Configuration and Beautification after Ubuntu Installation (2)
The previous article described a series of basic configurations after the installation of ubuntu, which are already available for daily use. This article describes the installation of IDE and some other configurations.
1. Install SSR
Download SSR Client
git clone https://github.com/ssrbackup/shadowsocksr
Create configuration file shadowsocks.json using vim
{
    "server": "0.0.0.0",
    "server_ipv6": "::",
    "server_port": 9427,
    "local_address": "127.0.0.1",
    "local_port": 1080,

    "password": "password",
    "method": "none",
    "protocol": "auth_chain_a",
    "protocol_param": "",
    "obfs": "plain",
    "obfs_param": "",
    "speed_limit_per_con": 0,
    "speed_limit_per_user": 0,

    "additional_ports" : {}, // only works under multi-user mode
    "additional_ports_only" : false, // only works under multi-user mode
    "timeout": 120,
    "udp_timeout": 60,
    "dns_ipv6": false,
    "connect_verbose_info": 0,
    "redirect": "",
    "fast_open": false
}
There are several main options to configure:
"server_port":9427,        //port
"password":"password",     //Password
 "protocol":"auth_chain_a",       //Protocol Plugin
 "obfs":"plain",      //Confusion Plugin
 "method":"none",    //Encryption method
Fill in the port, password, etc. of the SSR on your own server and save it.
Then execute
python local.py -c /etc/shadowsocks.json -d start
The SSR runs in the background.
Refer to the script author's github wiki .
2. Use with Proxy SwitchyOmega
This plugin can be downloaded directly from the official website or through the chrome extension store.
When the download is complete, click on the extension Proxy SwitchyOmega to enter the detailed settings page.

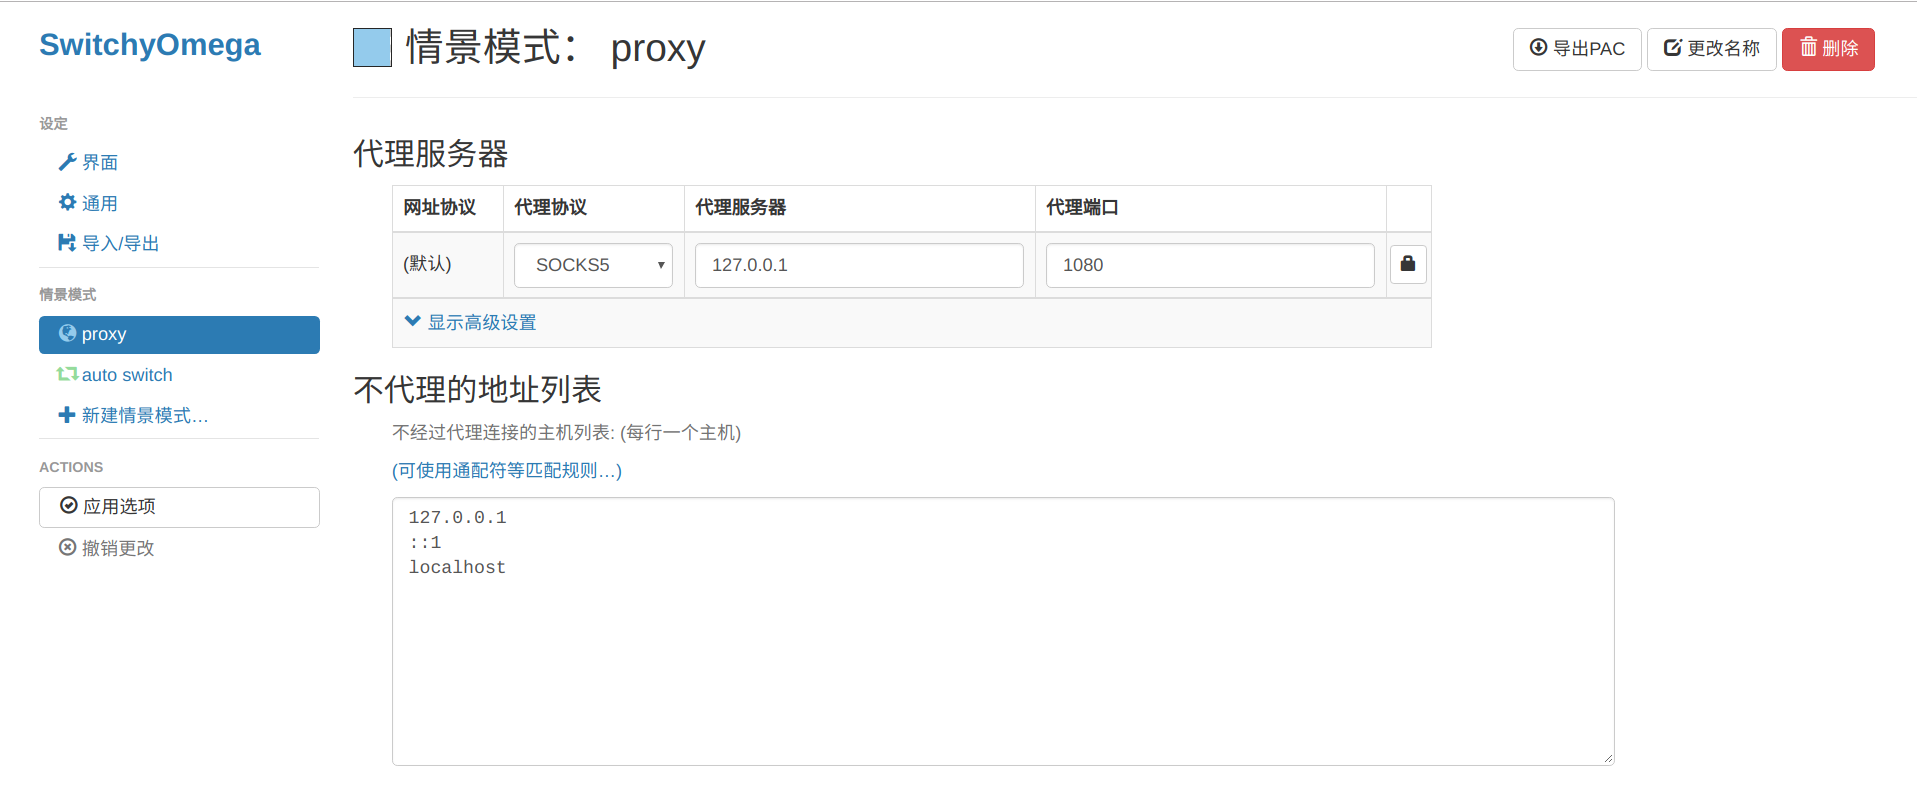
Create a new scenario mode with the following options:
- Proxy protocol: SOCKS5
- Proxy server: 127.0.0.1
- Proxy port: 1080
Then click Apply Options and we'll have fun going online ~
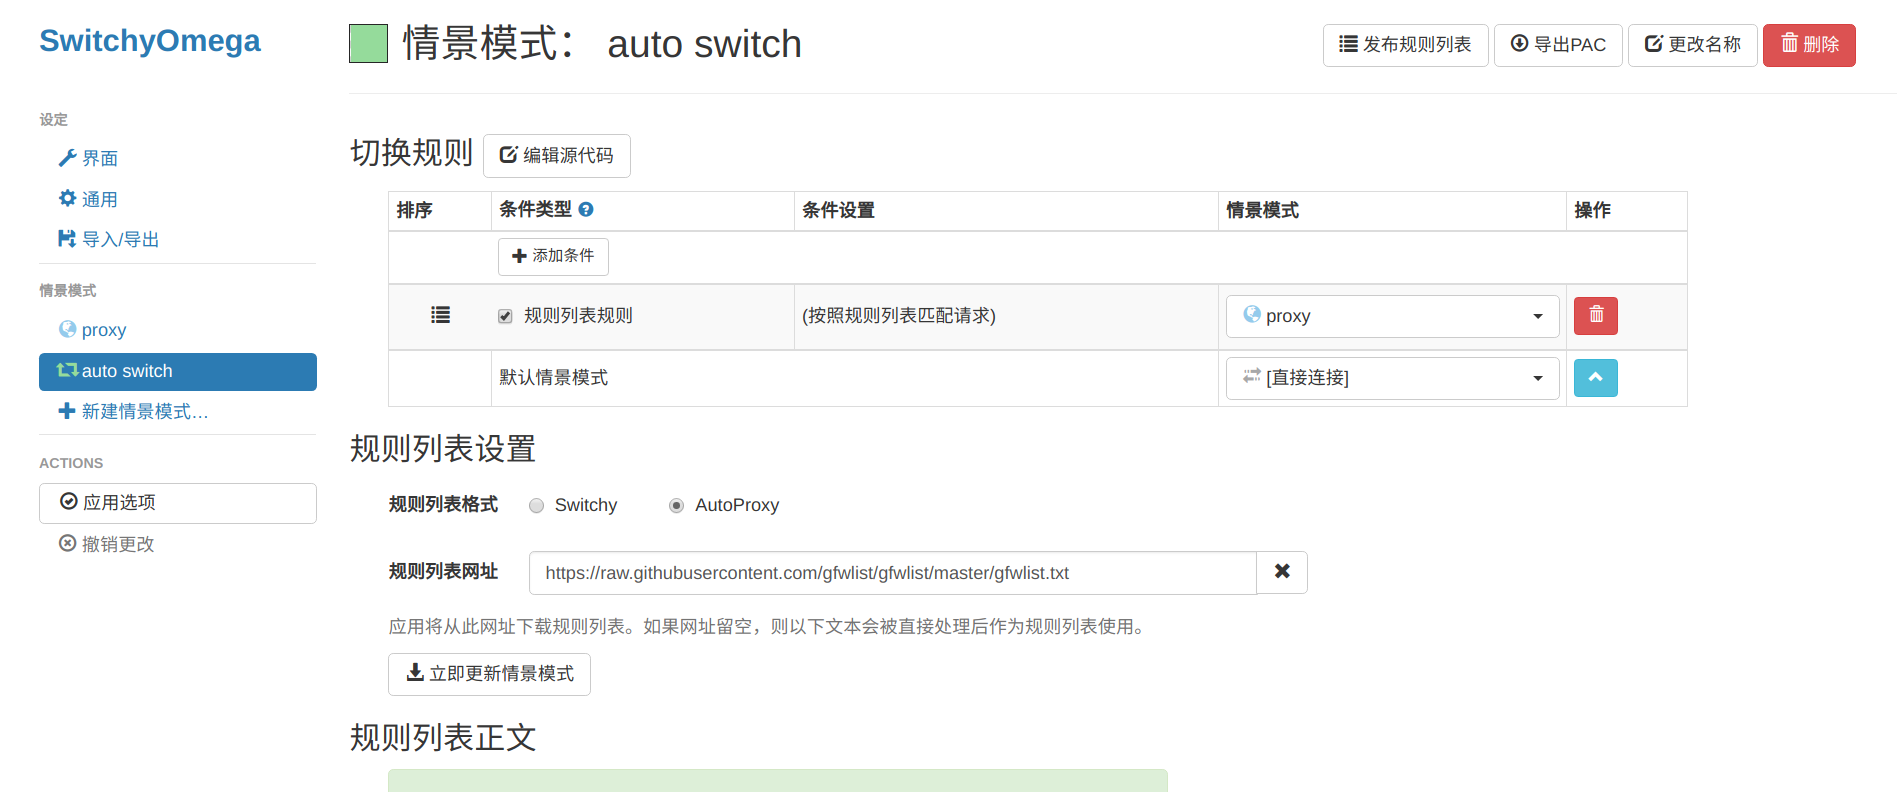
However, if this is set up, global mode access will be selected by default, which will become very slow when accessing domestic websites. We need to set the automatic switch mode and set it as follows

- Rule list format selection: AutoProxy
- Rule List URL: https://raw.githubusercontent.com/gfwlist/gfwlist/master/gfwlist.txt
After filling it out, click Update Scenario Mode immediately below the web address bar, and then click Apply Options, then we can switch agents at home and abroad automatically.
2. Install pycharm and idea
pycharm
For IDE, I have always been fond of the JetBrains development tools. Installation under linux is not difficult. After downloading and unzipping the compressed file on the official website, we found pycharm.sh in the bin directory and executed it on the terminal.
sh ./pycharm.sh
The installer will be executed.
After the program is installed, we also need to type the above command in the terminal to run pycharm in the future. Although it can run the program, I personally think it is a little troublesome or easy to open it directly if there is an icon.
So let's create the pycharm icon to execute at the terminal:
sudo vim /usr/share/applications/Pycharm.desktop
Create a pycharm icon and write:
[Desktop Entry]
Type=Application
Name=Pycharm
GenericName=Pycharm3
Comment=Pycharm3:The Python IDE
Exec=sh /home/weixuqin/Documents/pycharm-2018.3/bin/pycharm.sh
Icon=/home/weixuqin/Documents/pycharm-2018.3/bin/pycharm.png
Terminal=pycharm
Categories=Pycharm;
Fill in the path to the running file and icon in both lines
Exec=sh /home/weixuqin/Documents/pycharm-2018.3/bin/pycharm.sh
Icon=/home/weixuqin/Documents/pycharm-2018.3/bin/pycharm.png
Then we can find pycharm in the application and click it directly to open it.
IntelliJ idea
Installing idea works the same way as pycharm, running sh files, then creating a startup application icon with code
sudo vim /usr/share/applications/idea.desktop # Create an idea Icon
Write Configuration
[Desktop Entry]
Name=IdeaIU
Comment=IdeaIU
Exec=env JAVA_HOME=/usr/lib/jvm/java-8-openjdk-amd64 /home/weixuqin/Documents/idea-IU-183.4284.148/bin/idea.sh
Icon=/home/weixuqin/Documents/idea-IU-183.4284.148/bin/idea.png
Terminal=false
Type=Application
Categories=Application;Development;
Now we can start idea in the application.
3. Install mysql, python, git, vim
Simple, one-click installation:
mysql
sudo apt-get install mysql-server
python
ubuntu comes with python3, and friends who need to install python2 execute the following commands
sudo apt-get install python
git
sudo apt-get install git
vim
sudo apt-get install vim
4. Terminal Configuration
With linux, of course, we will use the most impressive terminal zsh, which has many more features than the default bash, and can also change the theme and so on. But the default Zsh configuration is cumbersome. There is an open source project called oh-my-zsh, and the developers have already done a series of configurations for us. We just need to download and install it.
Post the code:
The shell that comes with ubuntu does not have zsh. Let's install Zsh first
sudo apt-get install zsh
Install download tools
sudo apt-get install curl	# Install curl
sudo apt-get install wget	# Or install wget
Install oh-my-zsh
You can install it either curl or wget:
curl
sh -c "$(curl -fsSL https://raw.github.com/robbyrussell/oh-my-zsh/master/tools/install.sh)"
wget
sh -c "$(wget https://raw.githubusercontent.com/robbyrussell/oh-my-zsh/master/tools/install.sh -O -)"
The installation process will allow you to enter an administrator password, which will automatically switch to the zsh page.
Remember to restart at this point, or when you close the terminal and open it again, it will still be the original bash.
Change theme
Change the theme to ys.
Open hidden file.zshrc
vim .zshrc
Find the line ZSH_THEME and modify the default theme
ZSH_THEME="ys"
After you exit the save, apply the.zshrc file
source .zshrc
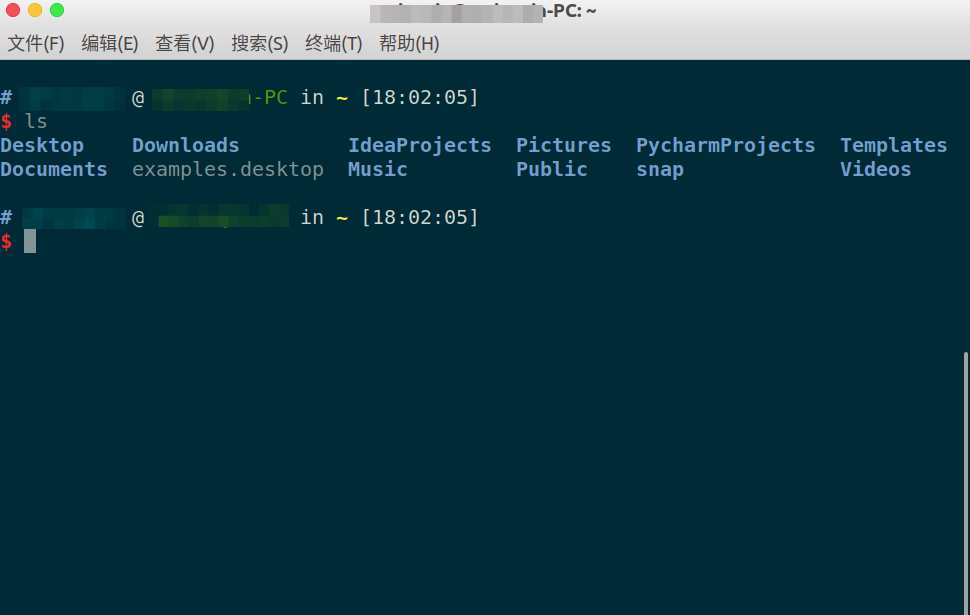
Successfully changed the theme to ys.
Then we'll change the font, page background, and I like the color scheme of solarized in Terminal Preferences.Your terminal looks good now.

Ending
emm.. That's all I've thought about for a while. With other updates and additions, it's still convenient to install programming-related operations under linux. Many times environment variables are automatically configured for you, and there are no problems under Windows. That's why I love Linux and MacOS, of course WindowsThere are also many advantages. Choosing the best one for you is the best one.
Finally, I want to spit out the Markdown rendering in the blog park. It's really ugly (black face)...