Compiling Linux 0.11 kernel
1, Experimental environment
As usual, the experiment is carried out on the Vmware virtual machine. The experimental environment is Ubuntu 16.04.

At the same time, this content is also based on the relevant contents of the course experiment of operating system of Harbin University of technology. hit-oslab
2, Download File
1. Can be directly in hit-oslab-github Download. If you can't access or the download speed is slow, here is the gitee download path: hit-oslab-gitee
be careful:
-
If VMware implements the file sharing function, you can directly drag the folder into the corresponding file path of Ubuntu after decompression.
-
You can also install git in Ubuntu with the following command: sudo apt install git. After Git is installed, you can directly use git command to obtain files. The command is as follows: git clone -b os https://gitee.com/fayoung/os.git .
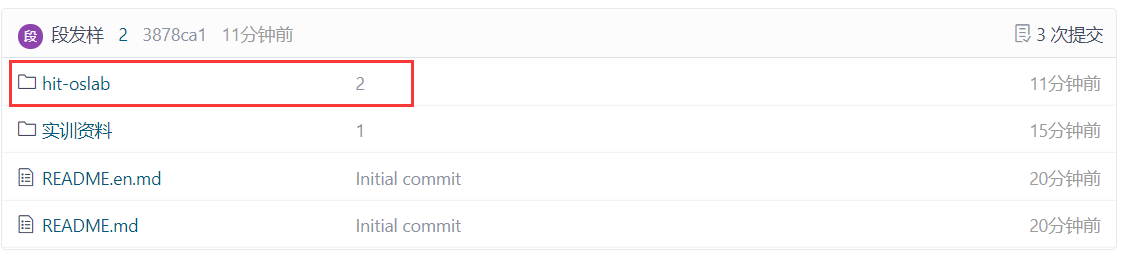
2. After downloading, you will get the following directory
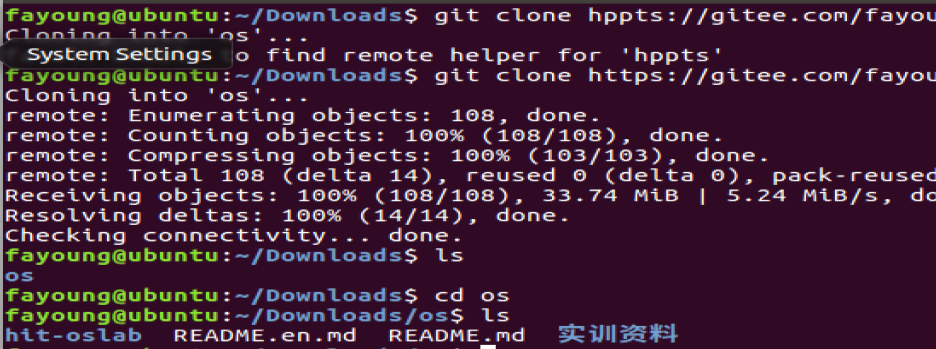
3. Hit oslab is the file we need this time. The contents are as follows:

3, Configuring the environment required for Linux 0.11
Since linux0.11 was compiled on a 32-bit machine at the beginning of the design, and the major Linux distributions (such as Ubuntu, redhat and CentOS) are 64 bit, there will be problems when compiling linux0.11 directly.
Now, to configure the environment required by Linux 0.11, you have written the relevant scripts in the files just downloaded, and you can run them directly.
Execute the setup.sh script:. / setup.sh:

At this time, you will be prompted that the permission is insufficient. You need to increase the permission of the file. The command is: Chmod 777. / setup.sh. After execution, you will find that the setup.sh file turns green and is an executable file.

Then, execute:. / setup.sh again
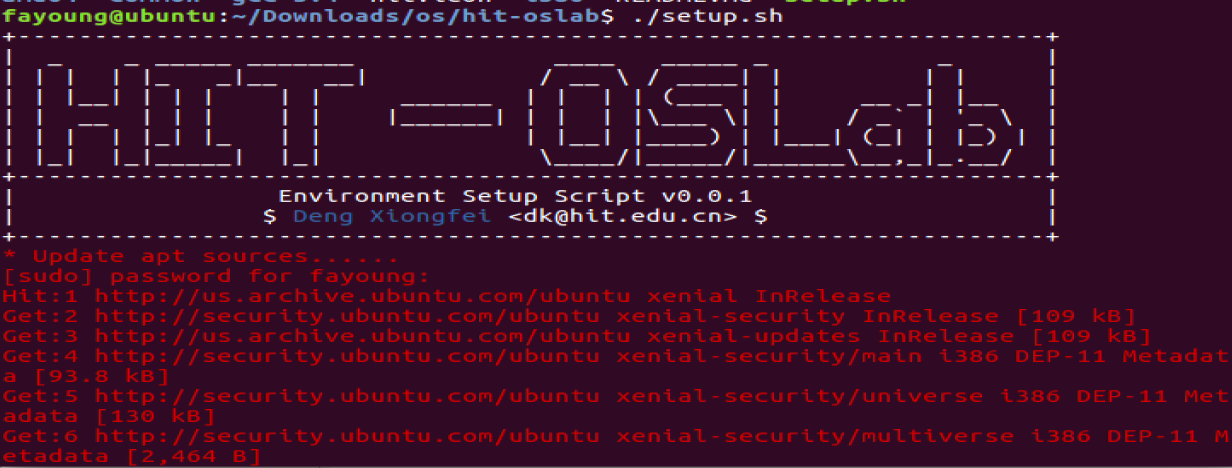
After completion, the following characters will be prompted:

The script then generates the oslab folder in the source directory

4, Compile kernel
Enter the oslab file directory

Enter the linux-0.11 folder directory

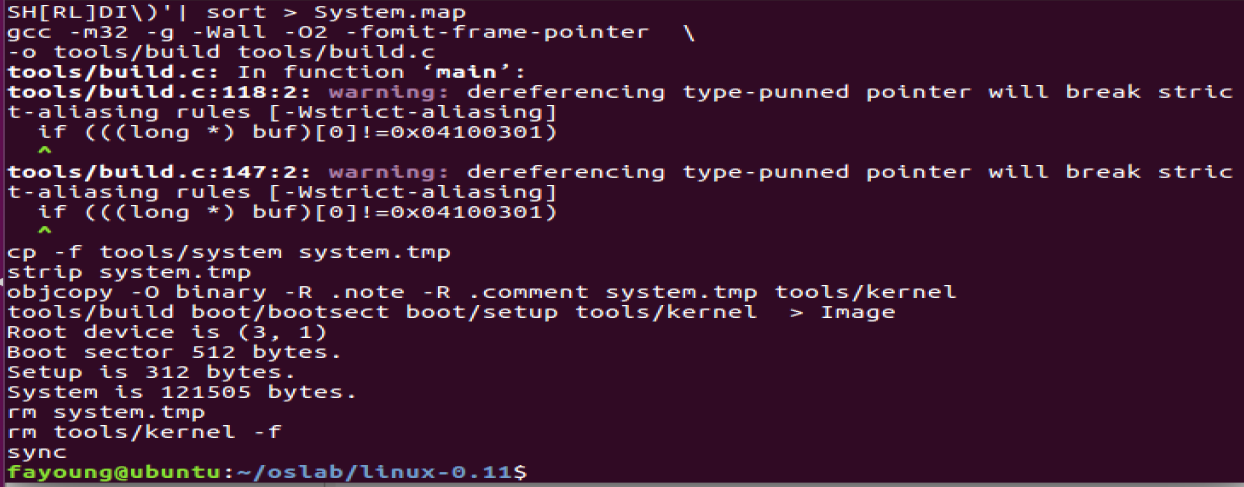
In the current directory, use the make command to compile
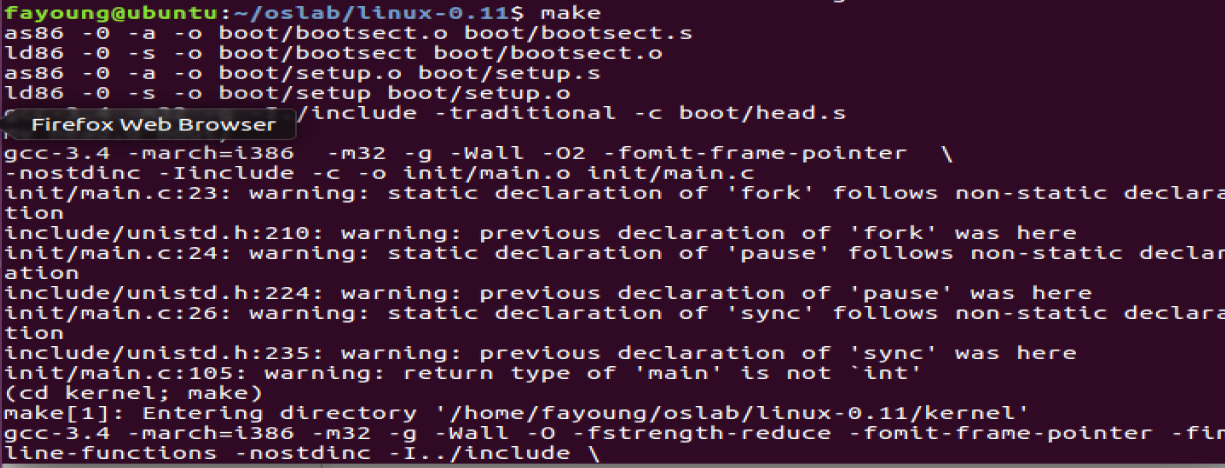
Wait for a period of time and the compilation is successful.
5, Run Linux 0.11
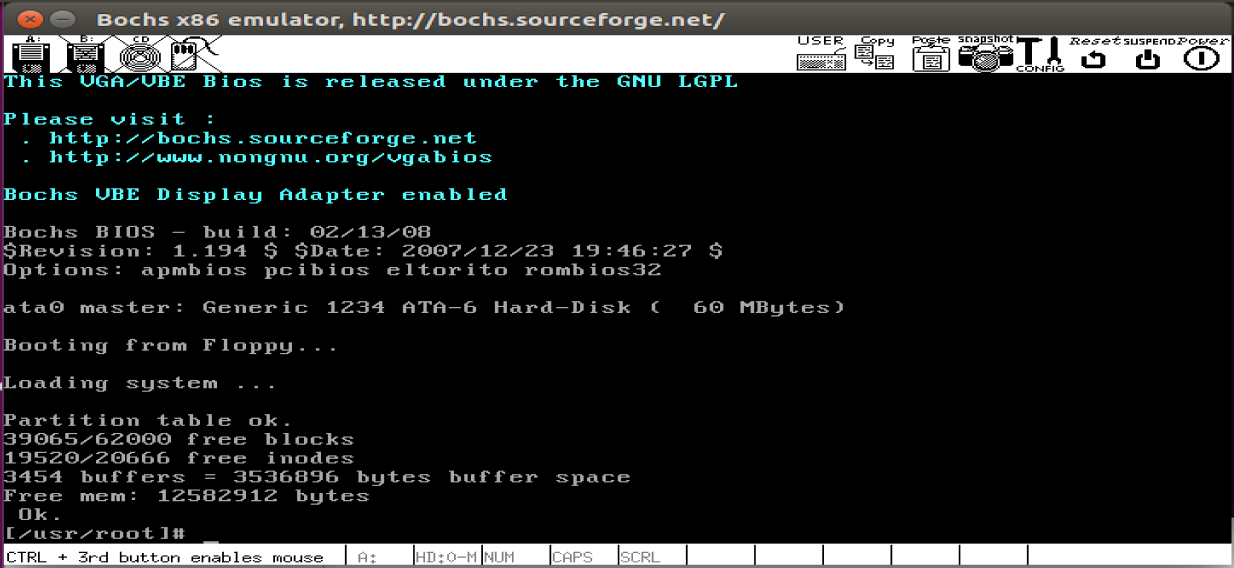
Go back to the previous directory and execute the run file.

Increase the permissions of the run file and run the run file

Discovery or error

According to the prompt, increase the permission of bochs GDB in bochs under the current directory

Next, execute the run file:. / run

The Bochs interface pops up
Enter the ls command
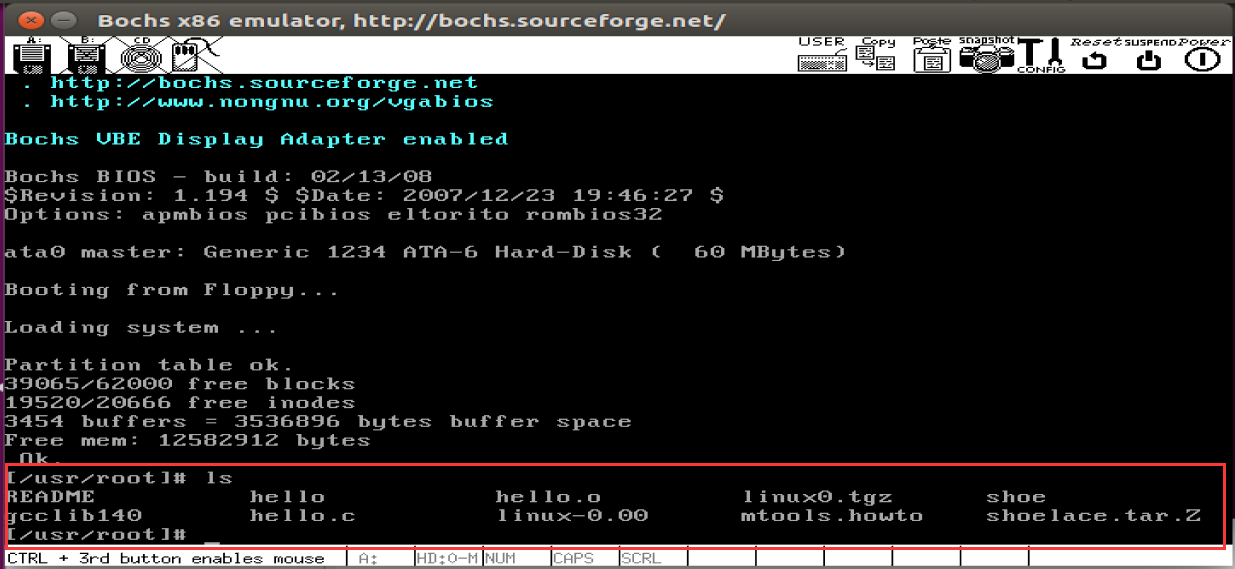
Description: compilation succeeded!
6, Explain
1. What is done in the setup.sh script?
The setup.sh code is as follows:
#!/bin/sh

# Harbin Insitute of Technology
# Operating System - Setup Script v0.0.1
#
# $Author$: Deng Xiongfei<dk@hit.edu.cn>
# $Date$: 2014-10-10
export OSLAB_INSTALL_PATH=$HOME/oslab
cat hit.icon
echo "|                 Environment Setup Script v0.0.1                   |"
echo "|                $ \033[34mDeng Xiongfei\033[0m <dk@hit.edu.cn> $                  |"
echo "+-------------------------------------------------------------------+"

install_gcc34_amd64() {
    echo -n  "* Install gcc-3.4 for x86_64(amd64) arch now......"
    if [ -z `which gcc-3.4` ]; then
        sudo dpkg -i gcc-3.4/amd64/gcc-3.4-base_3.4.6-8ubuntu2_amd64.deb > /dev/null
        sudo dpkg -i gcc-3.4/amd64/cpp-3.4_3.4.6-8ubuntu2_amd64.deb > /dev/null
        sudo dpkg -i gcc-3.4/amd64/gcc-3.4_3.4.6-8ubuntu2_amd64.deb > /dev/null
        echo "\033[34mDone\033[0m"
    else
        echo "\033[32mSipped\033[0m"
    fi
}

install_gcc34_i386() {
    echo -n  "* Install gcc-3.4 for x86(i386) arch now......"
    if [ -z `which gcc-3.4` ]; then
        sudo dpkg -i gcc-3.4/i386/gcc-3.4-base_3.4.6-8ubuntu2_i386.deb > /dev/null
        sudo dpkg -i gcc-3.4/i386/cpp-3.4_3.4.6-8ubuntu2_i386.deb > /dev/null
        sudo dpkg -i gcc-3.4/i386/gcc-3.4_3.4.6-8ubuntu2_i386.deb > /dev/null
        echo "\033[34mDone\033[0m"
    else
        echo "\033[33mSkipped\033[0m"
    fi
}

install_dep_i386() {
    echo  "* Install dependencies for x86(i386) arch now......"
    sudo apt-get install bin86
    sudo apt-get install build-essential
    echo  "* Install dependencies for x86(i386) arch now......\033[34mDone\033[0m"
}

install_dep_amd64() {
    echo  "* Install dependencies for x86_64(amd64) arch now......"
    sudo apt-get install bin86
    sudo apt-get install gcc-multilib
    sudo apt-get install build-essential
    sudo apt-get install bochs bochs-x bochs-sdl
    echo  "* Install dependencies for x86_64(amd64) arch now......\033[34mDone\033[0m"
}

configure_for_i386() {
    echo -n  "* Copy rest files to oslab......"
    cp -r i386/* $OSLAB_INSTALL_PATH
    echo  "\033[34mDone\033[0m"
}

configure_for_amd64() {
    # 64-bit version bochs has to show in sdl mode, bochs-sdl required
    echo -n "* Change bochs:display_library into sdl......"
    echo "display_library: sdl" >> $OSLAB_INSTALL_PATH/bochs/bochsrc.bxrc
    echo  "\033[34mDone\033[0m"

    echo -n "* Copy run script to oslab......"
    cp -r amd64/* $OSLAB_INSTALL_PATH
    echo "\033[34mDone\033[0m"
}

# Common Code
if [ "$1" ] && ([ "$1" = "-s" ] || [ "$1" = "--skip-update" ]); then
    echo -n "* Begin to setup......\033[33m3\033[0m sec to start"; sleep 1
    echo -n "\r* Begin to setup......\033[33m2\033[0m sec to start"; sleep 1
    echo -n "\r* Begin to setup......\033[33m1\033[0m sec to start"; sleep 1
    echo "\r* Begin to setup......                                 \033[0m"
else
    echo -n "* Update apt sources......\033[33m3\033[31m sec to start"; sleep 1
    echo -n "\r* Update apt sources......\033[33m2\033[31m sec to start"; sleep 1
    echo -n "\r* Update apt sources......\033[33m1\033[31m sec to start"; sleep 1
    echo "\r* Update apt sources......                                 "
    sudo apt-get update
fi

echo -n "* Create oslab main directory......"
[ -d $OSLAB_INSTALL_PATH ] || mkdir $OSLAB_INSTALL_PATH
echo "\033[34mDone\033[0m"

echo -n "* Create linux-0.11 directory......"
[ -d $OSLAB_INSTALL_PATH/linux-0.11 ] || mkdir $OSLAB_INSTALL_PATH/linux-0.11
echo "\033[34mDone\033[0m"

# Extract linux-0.11
echo -n "* Extract linux-0.11......"
tar zxf common/linux-0.11.tar.gz -C $OSLAB_INSTALL_PATH/linux-0.11
cp common/linux-0.11.tar.gz $OSLAB_INSTALL_PATH
echo "\033[34mDone\033[0m"

# Extract bochs and hdc image
echo -n "* Extract bochs configuration file and hdc image......"
tar zxf common/bochs-and-hdc.tar.gz -C $OSLAB_INSTALL_PATH/
echo "\033[34mDone\033[0m"

# Copy common files
echo -n "* Copy common files......"
cp -r common/files $OSLAB_INSTALL_PATH
echo "\033[034mDone\033[0m"

# `getconf LONG_BIT` works better than `uname -a`
if [ `getconf LONG_BIT` = "64" ]
then
    install_dep_amd64
    install_gcc34_amd64
    configure_for_amd64
else
    install_dep_i386
    install_gcc34_i386
    configure_for_i386
fi

echo "\033[34m* Installation finished. Ciao~\033[0m"
In general:
- Install gcc3.4 for your environment so that it can compile 32-bit code files
- Configure the dependencies required to compile Linux 0.11
- Download Linux 0.11 code
- Installing bochs and hdc image
- Finally, put the above files into the new oslab folder under the home path
2. What is the last pop-up window bochs?
Bochs is an open source simulator for x86 hardware platform. It can simulate various hardware configurations. Bochs simulates the entire PC platform, including I/O devices, memory and BIOS.
By changing the configuration, you can specify the CPU used (386, 486, or 586), memory size, etc. In a word, Bochs is the "PC" in the computer. Bochs can also simulate multiple PCs as needed. It also has its own power button.
A typical application of bochs is to provide a complete simulation of X86 PCs, including x86 processors, hardware devices, and memory. Run the operating system and software in the simulator on the workstation as if you had a machine in a machine.
Generally speaking, it is a simulator. Now, it is the virtual machine in the virtual machine.