The existence of components, like encapsulating a function or creating a package that can realize some functions, has the advantages of reuse, maintenance and avoiding variable pollution
For components, encapsulation is a complete set, including HTML, CSS and JS. It realizes a complete set of reuse. In order to facilitate modifying the content of components, but achieve different effects, there is communication between Vue components. First, let's talk about the most common communication methods. Get familiar with them and learn them first
1. Parent component - > child component Value transmission
First: decide what is the parent component and what is the child component?
Parent: vue files that use other components
Sub: introduced component (embedded)
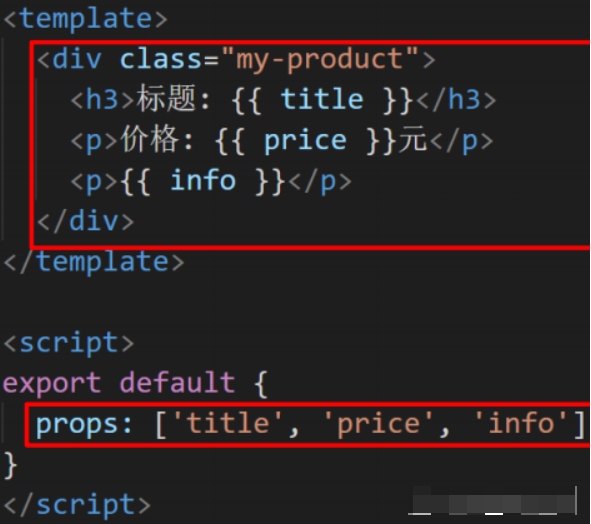
1.1. When transferring from parent to child, the props variable must be defined in the child component, ready to receive, and then use the variable
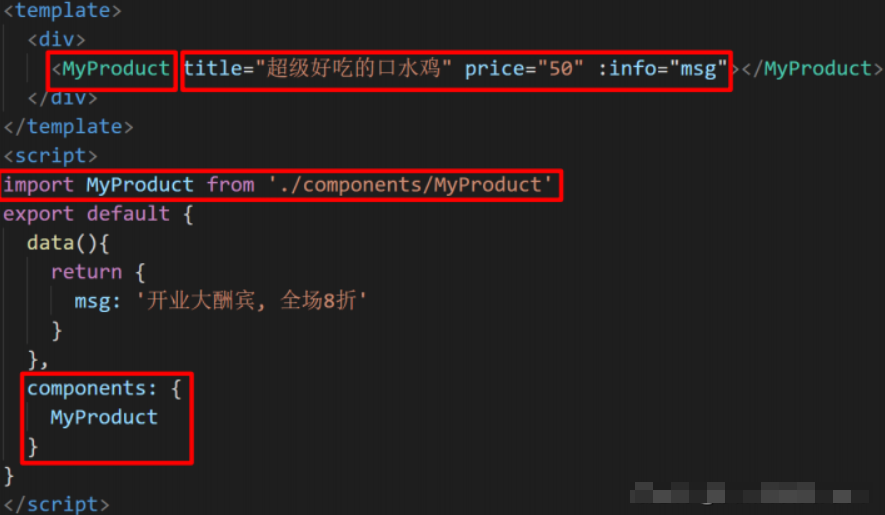
one point two Within the parent component, the encapsulated child components are displayed:
First, introduce sub components into the < script > tag, register local components through components, use sub components, and pass values to props variables in the tag in the form of attributes
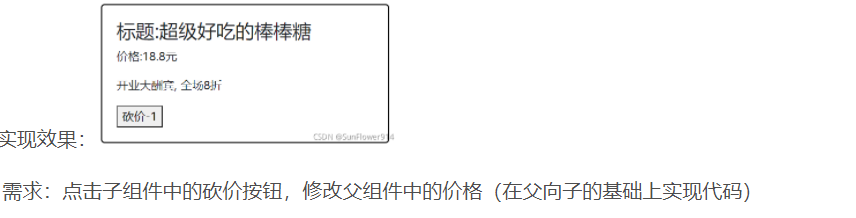
2. Child component -- > parent component _ Custom event (event binding)
Before understanding the communication between the child and the parent, we need to know the one-way data flow. The data flow from the parent to the child is called one-way data flow
Specified in Vue props Inside variable , itself yes read-only When the value is an array, the child component is directly modified without notifying the parent, resulting in data inconsistency. Therefore, in the communication between the child and the parent, we need to adopt Method implementation of child component triggering parent custom event
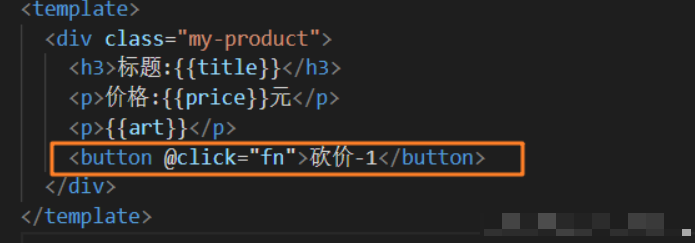
2.1 add a button button in the sub component and add a click event for the button
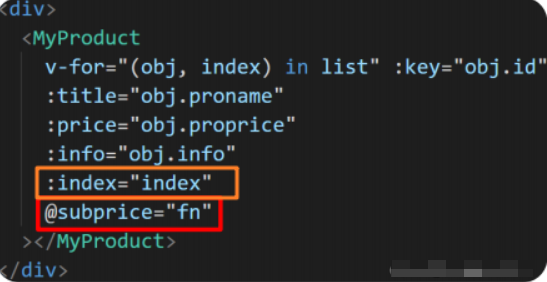
2.2 add the index attribute for props in the child component, and trigger the custom event bound by the parent component through this.$emit ("custom event name", argument), resulting in the event handling function in the parent methods being triggered for execution

3. Supplement index content in parent component, parent - > index - > child component (used to distinguish which child component), and then bind custom event and event handling function. Syntax: @ custom event name = "function name in parent methods"
Full code:
Parent: App.vue
<template>
  <div>
    <!--
      target: father(App.vue) -> son(MyProduct.vue) Enter by value transfer respectively
      demand: Each component displays different data information
      step(Pithy formula):
        1. Subcomponents - props - variable (Ready to receive)
        2. Parent component - Pass the value in
     -->

    <Product v-for="(obj,ind) in list" :key="ind" :title="obj.proname" :price="obj.proprice" :art="obj.info" :index="ind" @jianyi="fn"></Product>

  </div>
</template>

<script>
// 1. Create a component (. vue file)
// 2. Lead in components
import Product from './components/MyProductSon.vue'
export default {
  data(){
    return {
      str: "Full stack development, you must have",
      list: [
    { id: 1, proname: "Super delicious lollipop", proprice: 18.8, info: 'Grand reward for opening, 20% off' },
    { id: 2, proname: "Super delicious big chicken leg", proprice: 34.2, info: 'Delicious but not greasy, Come and buy it' },
    { id: 3, proname: "Super invincible ice cream", proprice: 14.2, info: 'hot summer , Have an ice cream' },
],
    }
  },
  // 3. Register components
  components: {
    // Product: Product // key and value variables have the same name - short form
    Product
  },
  methods: {
    // Each time a sub component clicks the button price, the corresponding price in the parent component will be reduced by one
    fn(index,num) {
    // If the unit price of the list clicked in the parent component is less than 1, it will not be reduced
    this.list[index].proprice>1&&(this.list[index].proprice=(this.list[index].proprice-num).toFixed(2))
    }
  },
}
</script>

<style>

</style>
Child: MyProductSon.vue
<template>
  <div class="my-product">
    <h3>title:{{title}}</h3>
    <p>Price:{{price}}element</p>
    <p>{{art}}</p>
    <button @click="fn">Bargain-1</button>
  </div>
</template>

<script>
export default {
  props:['title','price','art','index'],
  methods: {
    fn() {
      // this.index is the index value corresponding to the index attribute of the child component props in the parent component
      //kanjia is a custom event name, which should be consistent with the event name in the parent component
      this.$emit('kanjia',this.index,1)
    }
  },
}
</script>

<style scoped>
.my-product {
  width: 400px;
  padding: 20px;
  border: 2px solid #000;
  border-radius: 5px;
  margin: 10px;
}
</style>
3. Cross component communication EventBus (brother component communication)
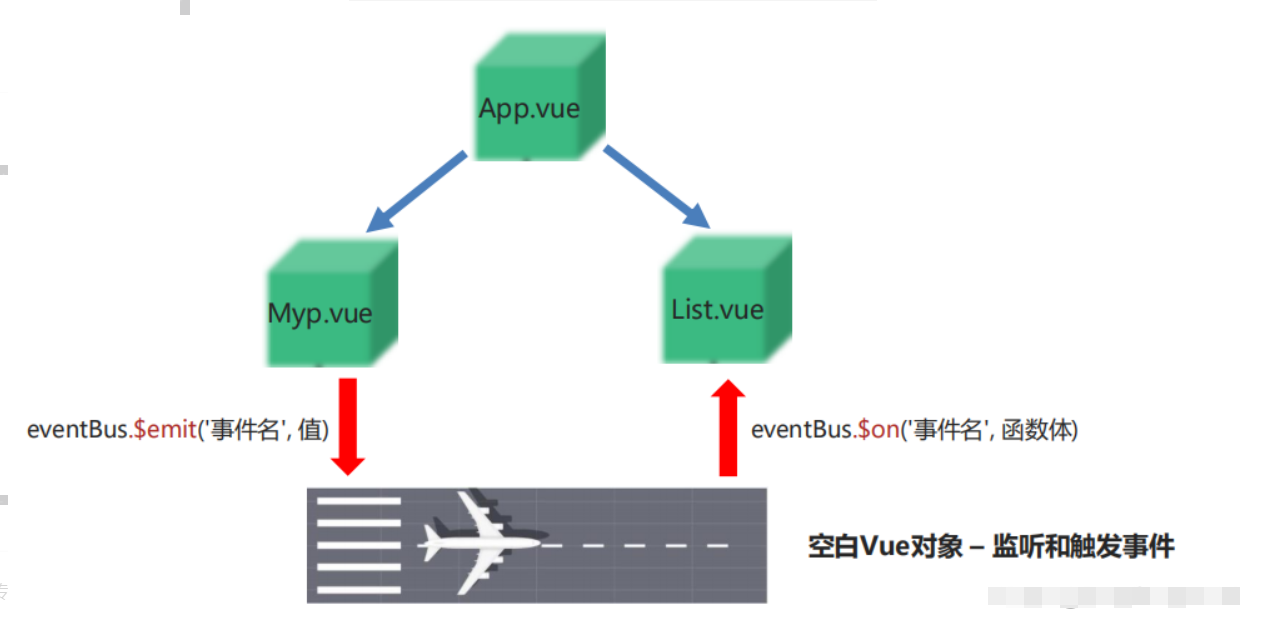
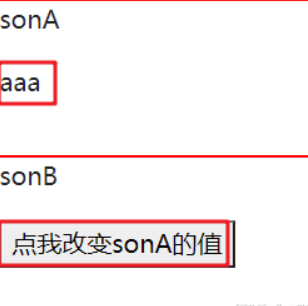
Requirement: click the sonB button to modify the value in sonA
Implementation steps:
1. At the src/EventBus/index.js path – create a blank Vue object and export it
// Create a blank vue object and export [as event bus]
import Vue from "vue";
export default new Vue();
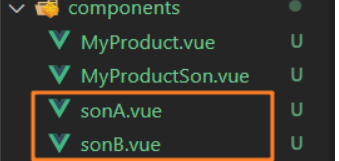
2. Create two sibling components to communicate across components in the components folder
3. After setting corresponding contents for sibling components, determine the components that transmit data and receive data
Pass data component: sonB.vue Receiving data component: sonA.vue
4. Introduce local components into the App.vue file, complete the creation and use
<template>
  <div>
    <!-- Step 3: in template Components used in -->
      <sonA></sonA>
      <sonB></sonB>
  </div>
</template>

<script>
// Step 1: introduce sonA and sonB components respectively
import sonA from './components/sonA.vue'
import sonB from './components/sonB.vue'
export default {
  // Step 2: create components through components
  components:{
    sonA,
    sonB
  }
}
</script>

<style scoped>

</style>
5. Introduce the event bus EventBus into the component (sonB.vue) to transfer the value, and customize the event through EventBus.$emit('default)
File name ', parameter to be passed) transfer the content to sonA.vue
<template>
  <div>
      <p>sonB</p>
      <button @click="fn">Point me to change sonA Value of</button>
  </div>
</template>

<script>
import EventBus from '../EventBus/index.js'
export default {
    name:'sonB',
    methods: {
    fn() {
    EventBus.$emit('bian','follow me')
    }
  },
}
</script>

<style scoped>
  div {
     width: 200px;
    height: 100px;
    border: 1px solid red;
  }
</style>
6. Introduce the event bus EventBus into the component (sonA.vue) to receive the value, and complete the content modification through EventBus.$on('event name ', function body) in created
<template>
  <div>
      <p>sonA</p>
      <p>{{msg}}</p>
  </div>
</template>

<script>
import EventBus from '../EventBus/index'
export default {
    name:'sonA',
    data() {
        return {
            msg:'aaa'
        }
    },
    created() {
        EventBus.$on('bian',(val)=>{
            this.msg=val
        })
    },
}
</script>

<style scoped>
  div {
    width: 200px;
    height: 100px;
    border: 1px solid red;
  }
</style>
4. Using vuex Realize cross component communication (including brother communication and communication between components without direct relationship)
See the next blog for details of this method