System: This is a tutorial for installation in the mirror environment of VMware virtual host CentOS7.
Connect xshell
Note: Because I am used to executing commands in xshell, I usually create SSH account to connect xshell before I collocate with environment.
Commands (to avoid permission issues, it's best to use root to execute):
| command | Explain | Example |
|---|---|---|
| Group add group name | Creating User Groups | groupadd nginx |
| Useradd-g User Group Name User Name | Creating Users under Groups | useradd -g nginx nginx |
| useradd user name | Creating Groupless Users | useradd nginx |
| passwd user name | Set or modify the name | passwd nginx |
| service ssh restart or/etc/init.d/sshd restart | Restart SSH service | |
| w | View logged-in users | |
| Document: /etc/passwd | All SSH user information |
Supplement: ssh configuration file / etc/ssh/sshd_config
Precondition preparation
Prerequisite: Before installing nginx, make sure that extensions such as gcc, zlib, make, pcre and openssl have been installed. The linux system usually has openssl installed by default.
- See if make is installed:
rpm -qa|grep make
- Install make
yum -y install gcc automake autoconf libtool make
- Check if gcc is installed
rpm -qa |grep gcc
- Install gcc
yum install gcc gcc-c++
- Looking at the PCR E library, Nginx requires a Perl Compatible Regular Expression, because both the Rewrite module of Nginx and the Http core module use the PCR E regular expression grammar. The download address is http://www.pcre.org/ We can also install it through yum.
rpm -qa | grep pcre
- Install pcre
yum install pcre pcre-devel
4. Look at the zlib library. The zlib library provides compression algorithms. The gzip algorithm is used in many places of Nginx. The download address is http://www.zlib.net/ It can also be installed through yum.
rpm -qa | grep zlib
- Install zlib
yum install zlib zlib-devel
5. Look at OpenSSL. If the server provides security pages in Nginx, it needs to use OpenSSL library. The download address is http://www.openssl.org/ It can also be installed through yum.
rpm -qa | grep openssl
- Install OpenSSL
yum -y install openssl openssl-devel
Install nginx
- Download nginx package
nginx's official website Download
or
Command Downloadwget http://nginx.org/download/nginx-1.12.2.tar.gz
- Plus: For ease of administration, the nginx package will be placed in / usr/local/src
cd /usr/local/src
- Decompression package
tar zxvf nginx-1.12.2.tar.gz
- Enter decompression package
cd nginx-1.12.2.tar.gz
- Execute. / configure, install the software into / usr/local directory, and use conf, etc, sbin, run, etc. to manage the classification.
./configure --prefix=/usr/local/nginx \
 --pid-path=/usr/local/nginx/run/nginx.pid \
 --with-http_ssl_module \
 --user=nginx \
 --group=nginx \
 --with-pcre \
 --without-mail_pop3_module \
 --without-mail_imap_module \
 --without-mail_smtp_module
-
In the last three of the above commands, to disable nginx as a mail proxy server, it is recommended that comrades who want to build a mail server read the instructions for nginx to build a mail server.
Check the. / configure results to see if there are any errors or missing modules. If everything is OK, go ahead and read it carefully with. / configure - help if you don't feel right. -
install
make && make install
Although the installation of nginx has been completed, nginx is still not started.
8. Start nginx, go to the directory where nginx is installed, and run nginx
cd /usr/local/nginx
./nginx
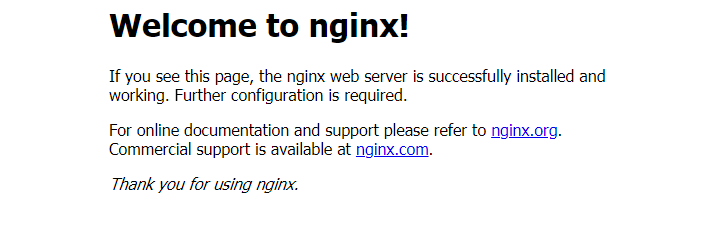
- Testing nginx is successful enough to access ip directly on the browser. If the following screen appears, it will be successful.
Plus: If the firewall is not closed, even if the nginx installation is successful, it will not be accessed successfully, so we need to close the firewall. - View firewall status
systemctl status firewalld
or
service firewalld status
- Temporary closure of firewalls
systemctl stop firewalld
- Permanently close the firewall
systemctl disable firewalld
Install mysql
- Download mysql source installation package
wget http://dev.mysql.com/get/mysql57-community-release-el7-8.noarch.rpm
- Install mysql source
yum localinstall mysql57-community-release-el7-8.noarch.rpm
- Check whether the mysql source was installed successfully
yum repolist enabled | grep "mysql.*-community.*"
4. Modify yum source [skip]
vim /etc/yum.repos.d/mysql-community.repo
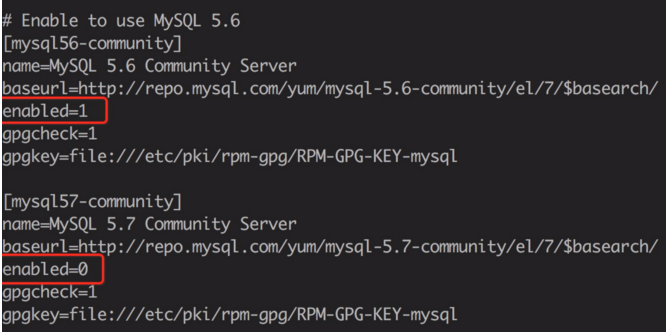
Change the default version of mysql installed. For example, to install version 5.6, change enabled=1 of the 5.7 source to enabled=0. Then change enabled=0 of 5.6 source to enabled=1.
-
Note: enabled=1 indicates the upcoming version of mysql, which can also be installed without modification by default.
- Install mysql
yum install mysql-community-server
- Start MySQL Service and Set Up Start
systemctl start mysqld
systemctl enable mysqld
systemctl daemon-reload
6. Port Opening
firewall-cmd --zone=public --add-port=3306/tcp --permanent
firewall-cmd --reload
7. View mysql password
grep 'temporary password' /var/log/mysqld.log

Install php
- Download the php7 source package
wget -O php7.tar.gz http://cn2.php.net/get/php-7.0.1.tar.gz/from/this/mirror
2. Decompression Source Packet
tar -xvf php7.tar.gz
3. Enter the catalogue
cd php-7.0.1
- Installing php dependency packages
yum install libxml2 libxml2-devel openssl openssl-devel bzip2 bzip2-devel libcurl libcurl-devel libjpeg libjpeg-devel libpng libpng-devel freetype freetype-devel gmp gmp-devel libmcrypt libmcrypt-devel readline readline-devel libxslt libxslt-devel
- Next, to configure before compilation, we need to provide php-fpm parameters
./configure --prefix=/usr/local/php --with-config-file-path=/etc --enable-fpm --with-fpm-user=nginx --with-fpm-group=nginx --enable-inline-optimization --disable-debug --disable-rpath --enable-shared --enable-soap --with-libxml-dir --with-xmlrpc --with-openssl --with-mcrypt --with-mhash --with-pcre-regex --with-sqlite3 --with-zlib --enable-bcmath --with-iconv --with-bz2 --enable-calendar --with-curl --with-cdb --enable-dom --enable-exif --enable-fileinfo --enable-filter --with-pcre-dir --enable-ftp --with-gd --with-openssl-dir --with-jpeg-dir --with-png-dir --with-zlib-dir --with-freetype-dir --enable-gd-native-ttf --enable-gd-jis-conv --with-gettext --with-gmp --with-mhash --enable-json --enable-mbstring --enable-mbregex --enable-mbregex-backtrack --with-libmbfl --with-onig --enable-pdo --with-mysqli=mysqlnd --with-pdo-mysql=mysqlnd --with-zlib-dir --with-pdo-sqlite --with-readline --enable-session --enable-shmop --enable-simplexml --enable-sockets --enable-sysvmsg --enable-sysvsem --enable-sysvshm --enable-wddx --with-libxml-dir --with-xsl --enable-zip --enable-mysqlnd-compression-support --with-pear --enable-opcache
Execute after configuration is correct:
- Execution and installation
make && make install
- Add PHP commands to environment variables:
vim /etc/profile
At the end, add:
PATH=$PATH:/usr/local/php/bin
export PATH
- To make the changes effective immediately:
source /etc/profile
- View environment variables:
echo $PATH

You can see that php's bin directory is already in the environment variable
7. View the php version:
php -v
- Configure php-fpm:
cp php.ini-production /etc/php.ini
cp /usr/local/php/etc/php-fpm.conf.default /usr/local/php/etc/php-fpm.conf
cp /usr/local/php/etc/php-fpm.d/www.conf.default /usr/local/php/etc/php-fpm.d/www.conf
cp sapi/fpm/init.d.php-fpm /etc/init.d/php-fpm
chmod +x /etc/init.d/php-fpm
- Because php-fpm is on port 9000, the external network can not be accessed. We need to add proxy rules in nginx configuration file, so that users can access port 80 and leave it to the FPM at the back end when they request php.
- Start php-fpm:
/etc/init.d/php-fpm start
- Configure the nginx virtual machine:
location ~ \.php$ {
            root          html;
            fastcgi_pass  127.0.0.1:9000;
            fastcgi_index  index.php;
            fastcgi_param  SCRIPT_FILENAME  /$document_root$fastcgi_script_name;
            include        fastcgi_params;
        }
- Change script to $document_root.
- Restart nginx:
service nginx reload
- Supplement:
CentOS 7 source code compilation and installation of PHP 5.6 and Nginx 1.7.9 and MySQL (build LNMP environment)
Ubuntu 14.04 LTS Installation LNMP NginxPHP5(PHP-FPM)MySQL
CentOS 6.8 Compile and Install LNMP
LNMP Development Environment for Source Configuration under Ubuntu 16.04
CentOS 7 source code compilation and installation of PHP 5.6 and Nginx 1.7.9 and MySQL (build LNMP environment)
CentOS 7 source installation latest version of LNMP environment
CentOS 6.8 Install LNMP Environment (Linux+Nginx+MySQL+PHP)
Construction of LNMP Environment in Ubuntu System
Compiling Nginx+php-fpm of LNMP
A Brief Description of LNMP Environment Configuration under Ubuntu 16.04 LTS