Building environment
-
stay Official website Download the latest version of cocos2dx.
-
according to Official website Download the development software of each platform.
-
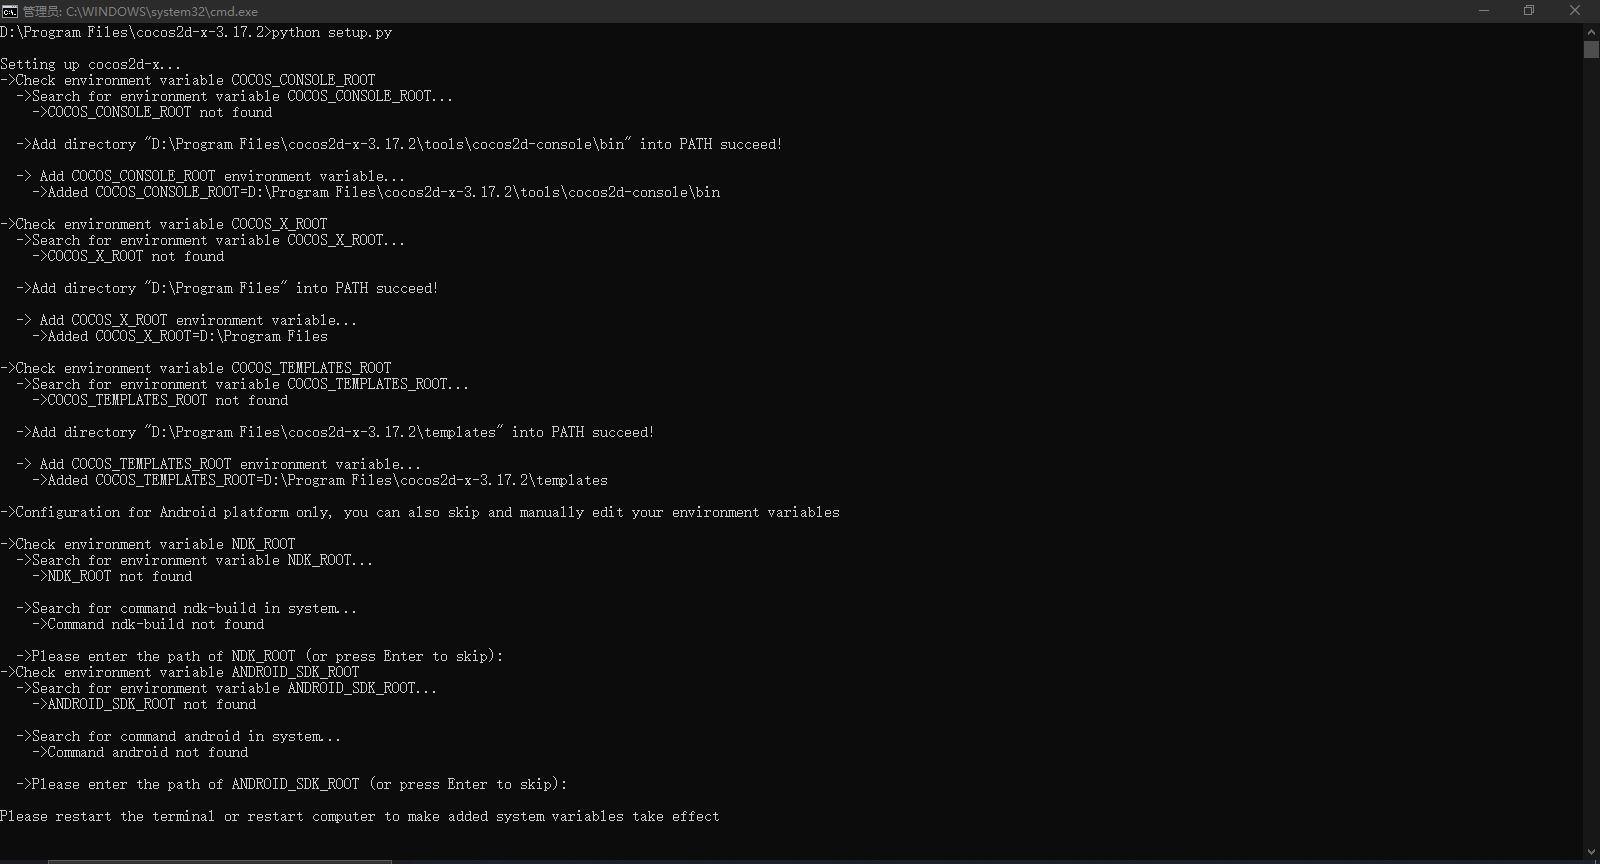
Download Python 2.7 and add environment variables to your computer.
-
Run python setup.py in the downloaded cocos2dx folder, as follows
- Done.
experience
Create a HelloWorld project
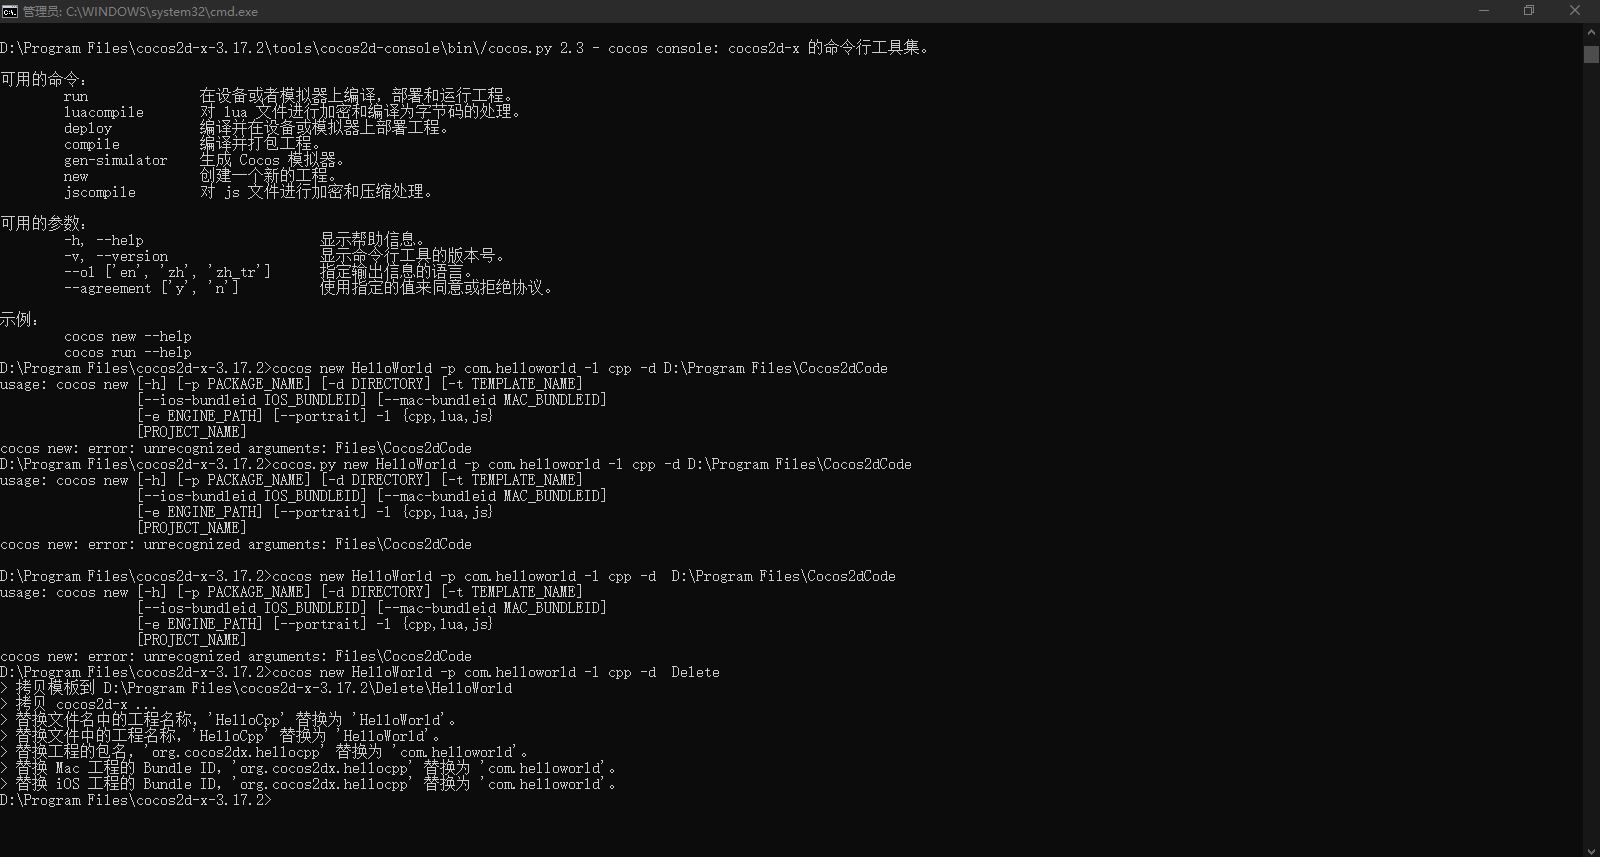
- Enter cocos new HelloWorld - P com.helloworld - L CPP - D delete in cmd
-
HelloWorld is the name of the project, - p followed by the package name of the project, - l followed by the language version (cpp stands for c + +), and - d followed by the path where the project is created
-
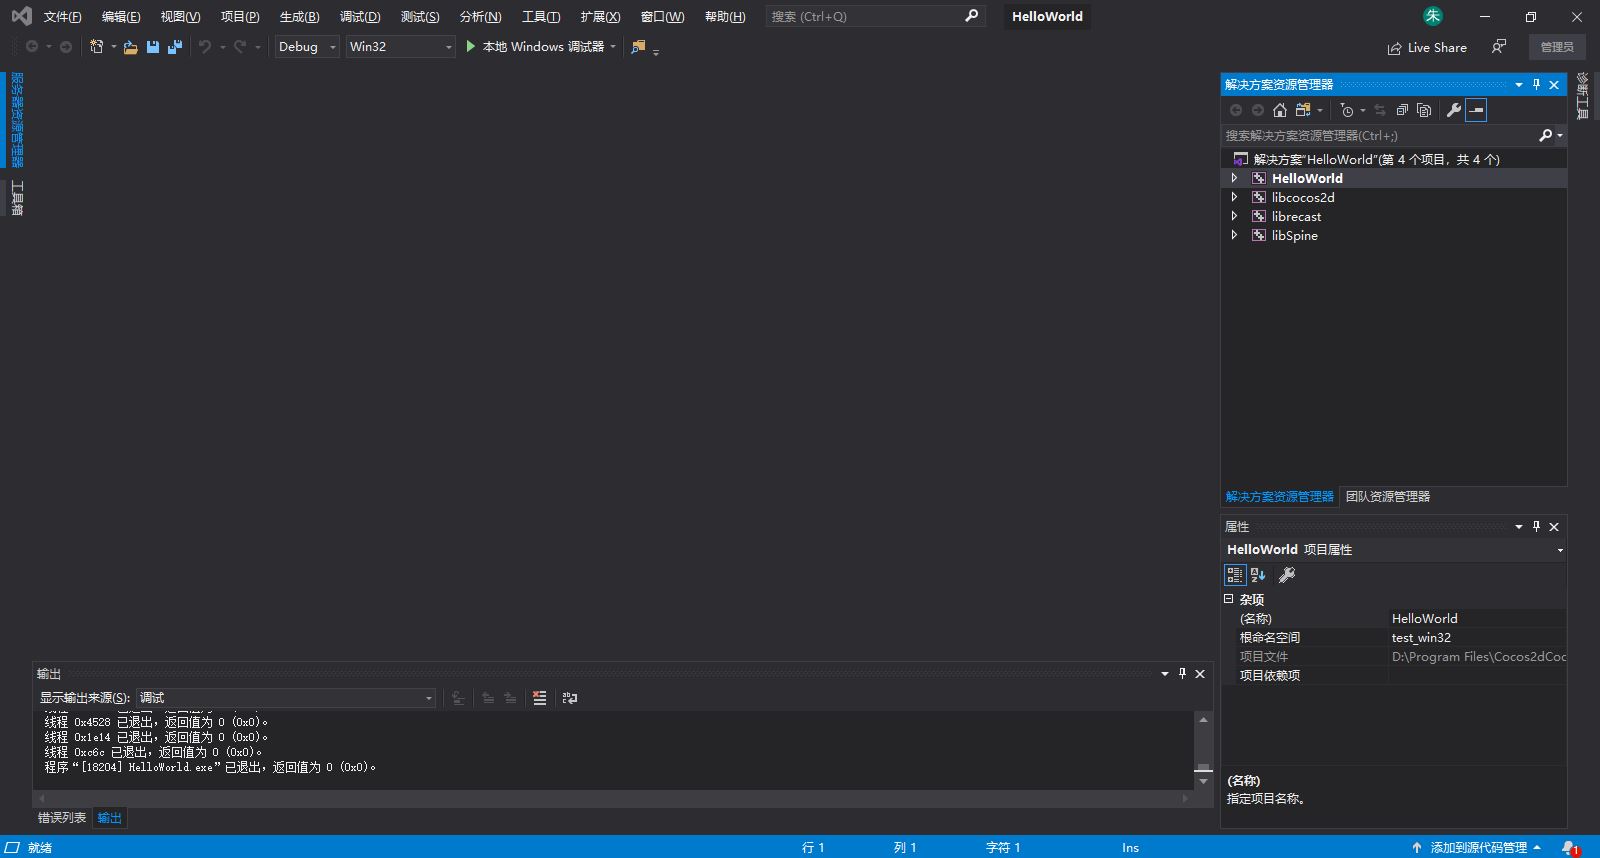
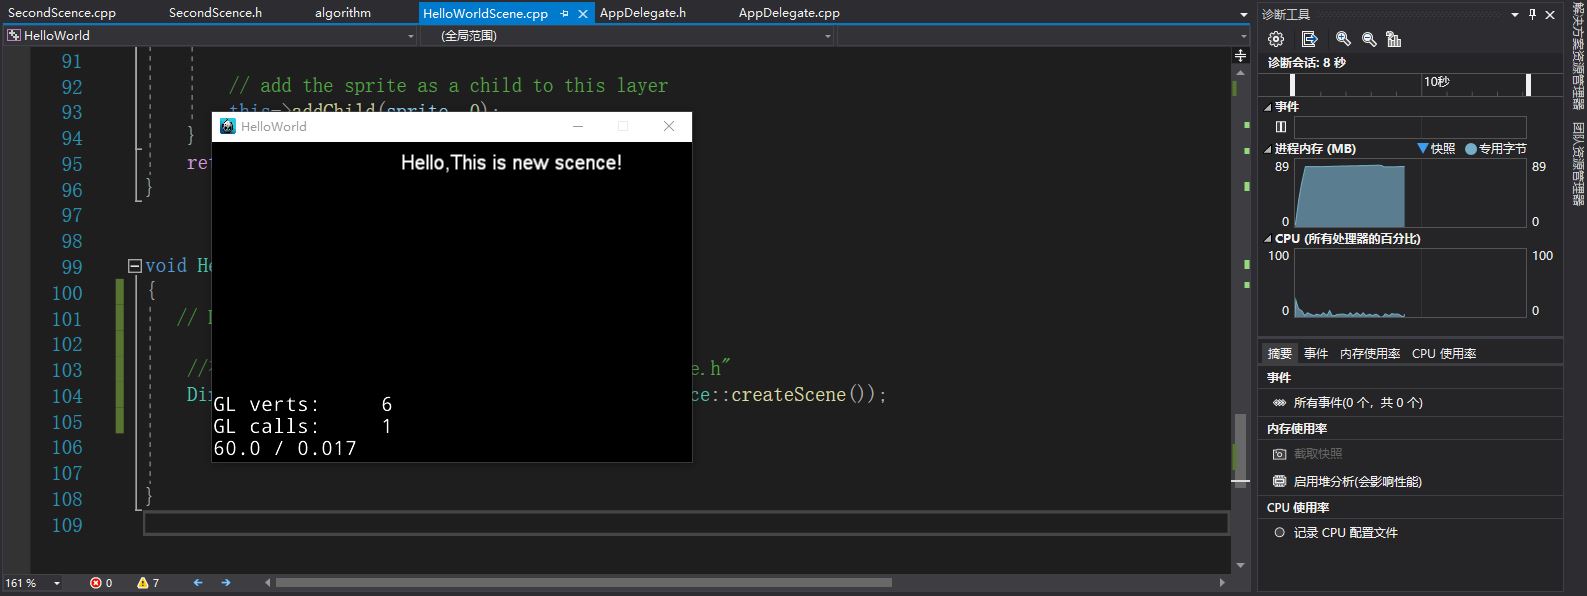
Open the HelloWorld.sln file in the proj.win32 directory under the path folder where the project is created.
-
The opening details are as follows
-
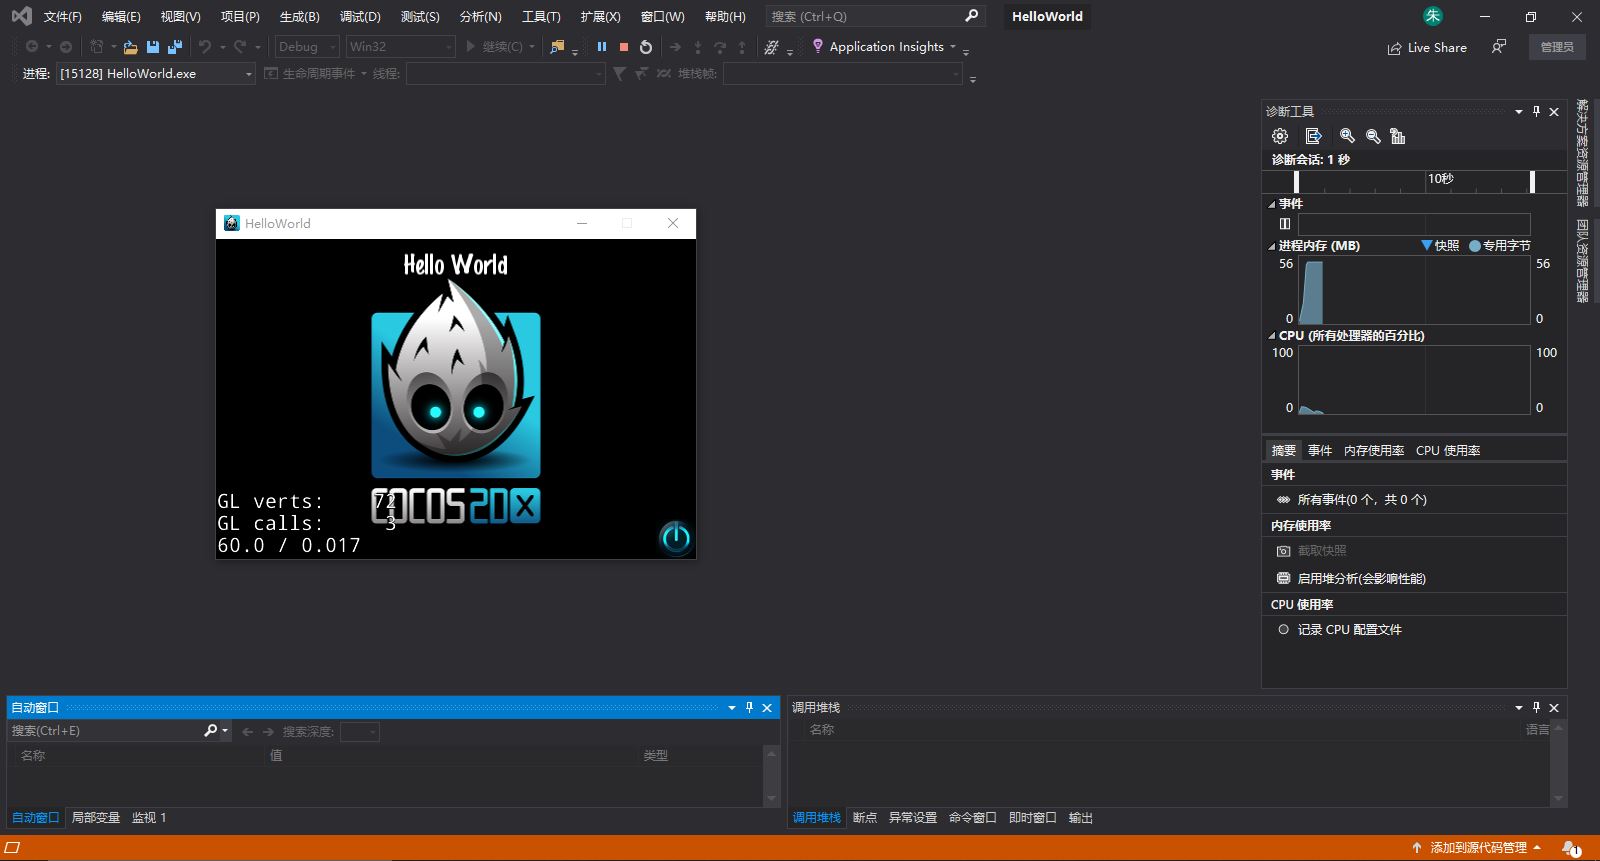
Compile run.
Create a new scene and switch
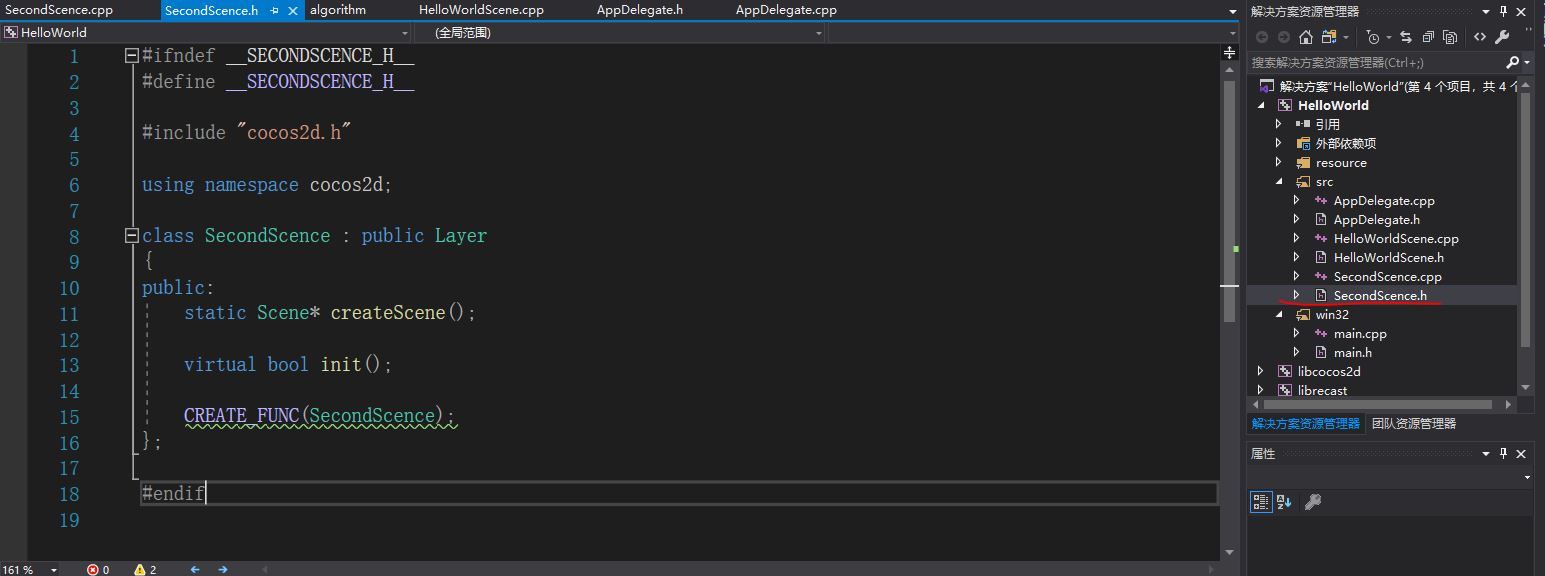
- Create a second scene's secondscience. H header file with any name.
- Create the secondscience.cpp file.
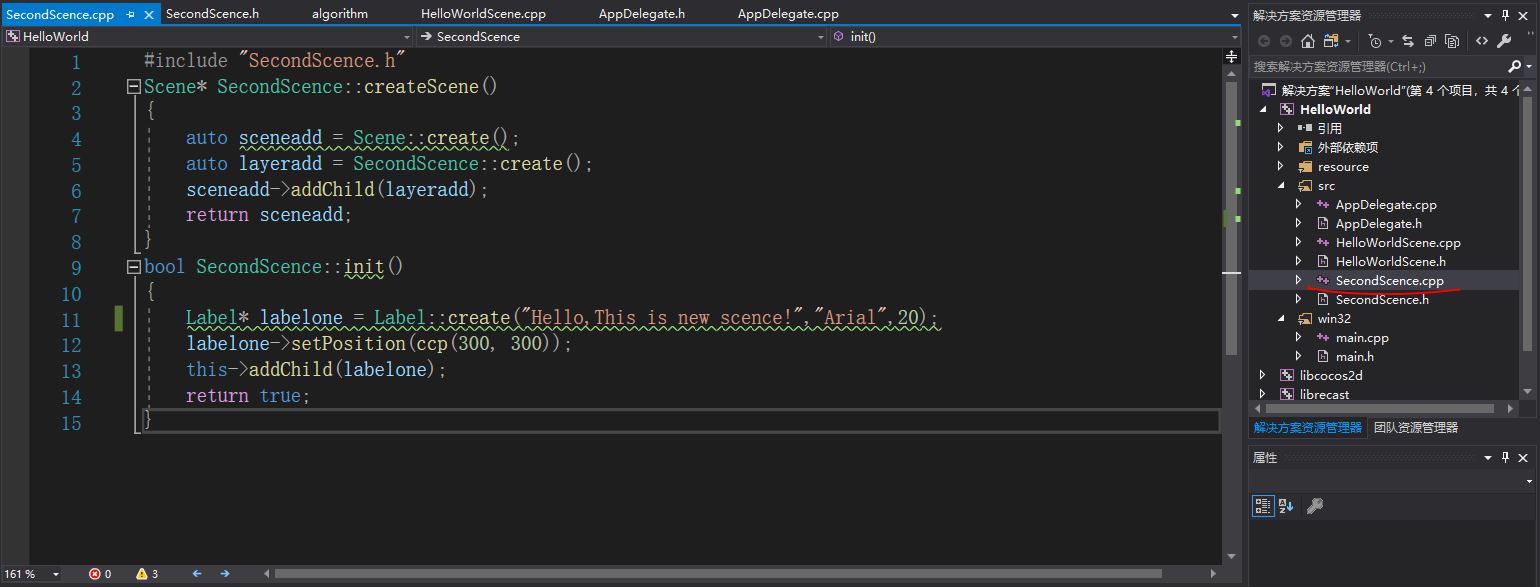
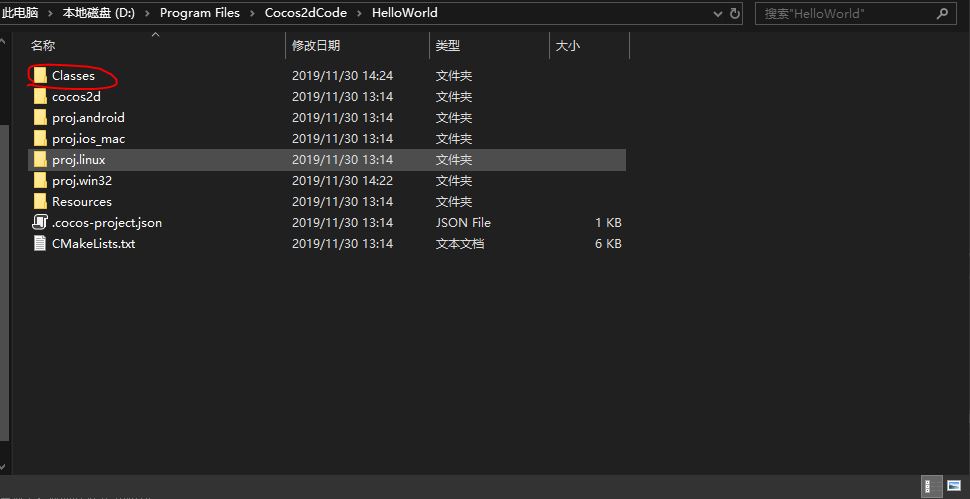
- Note that the header file and. cpp file of the second scenario created should be placed in the Classes folder to realize the call between the header files.
- In the first scenario (initial scenario), the function implemented by the close button is changed to the switching scenario.
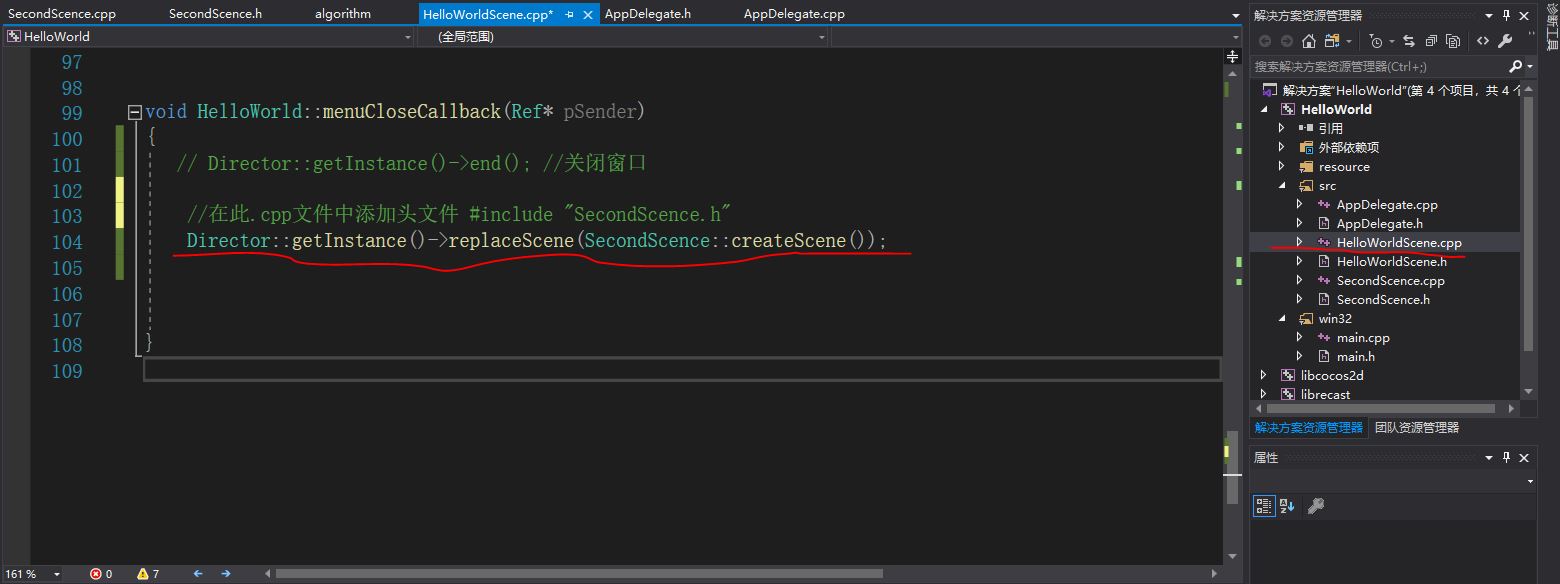
- Done.
Scene switching effect
-
Modify the code of switching scenario as follows
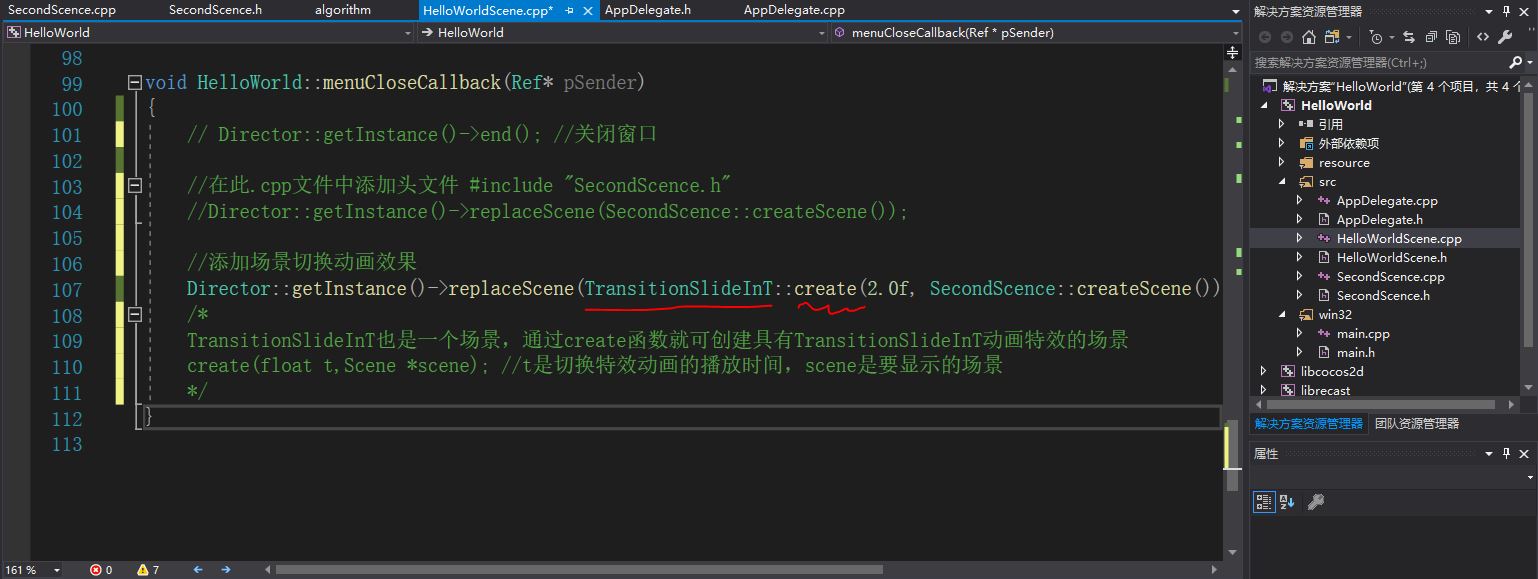
-
The old scene will exit downward and the new one will enter from top to bottom.
-
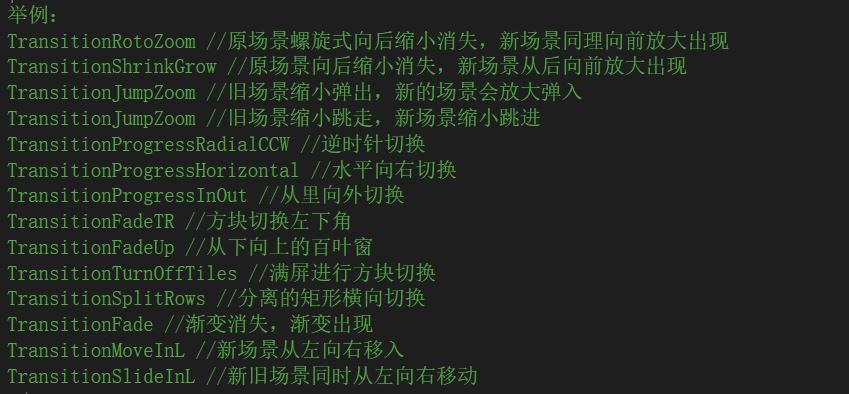
Other switching effects.
-
Using the replaceScene function for scene switching will release the old scene to save memory resources.
-
Done.
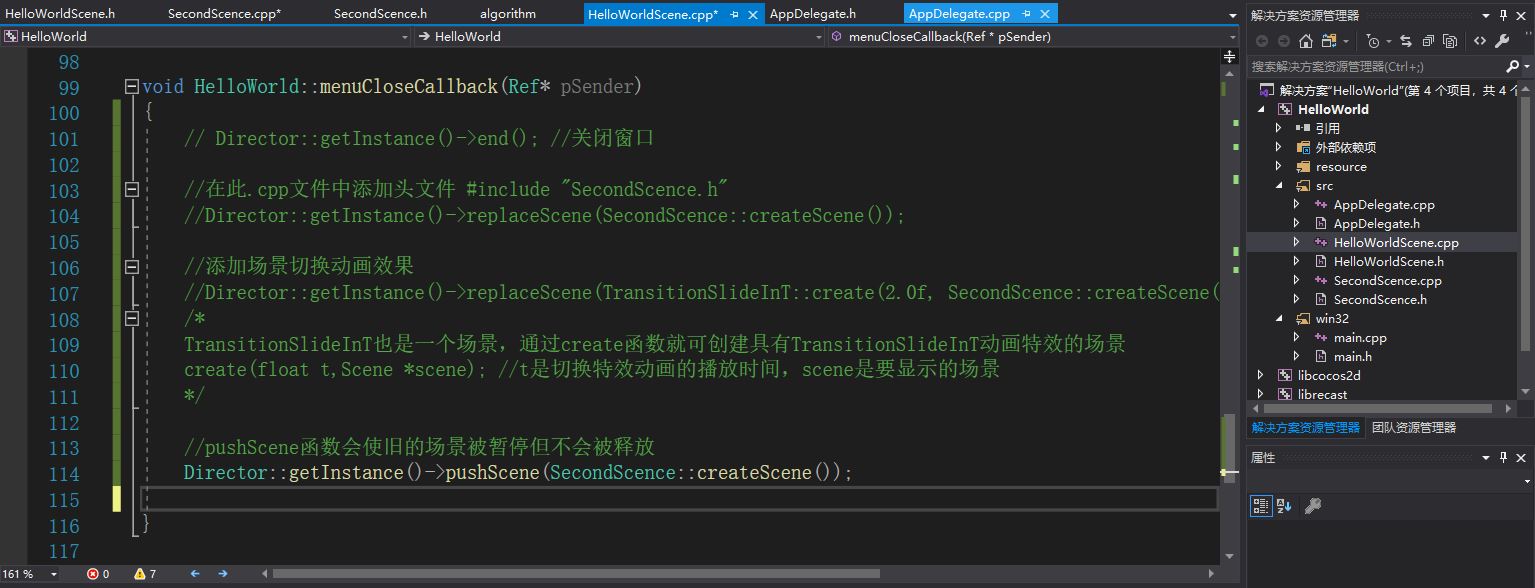
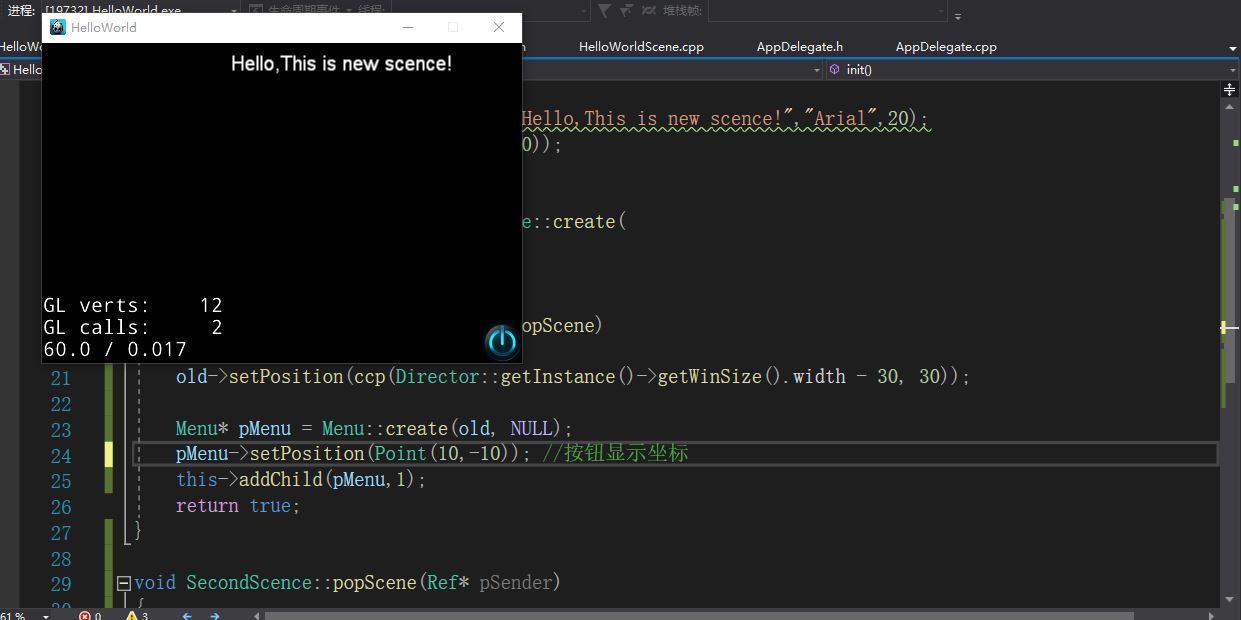
Push and pop up scenarios (Mario)
-
Two special effects that don't need to release old scenes.
-
Declare a popScene function in the. h header file of the second scene, add a button in the. cpp file and define the function popScene function, which is the callback function of the button.

-
The above describes the function of not releasing the old scene by realizing the scene switching back and forth.
-
Done.
Layer and object
-
There are many different layers in a scene, such as one layer with character sprites and the other layer with maps.
-
The code to create the layer is as follows.
Layer* layer=Layer::create();
-
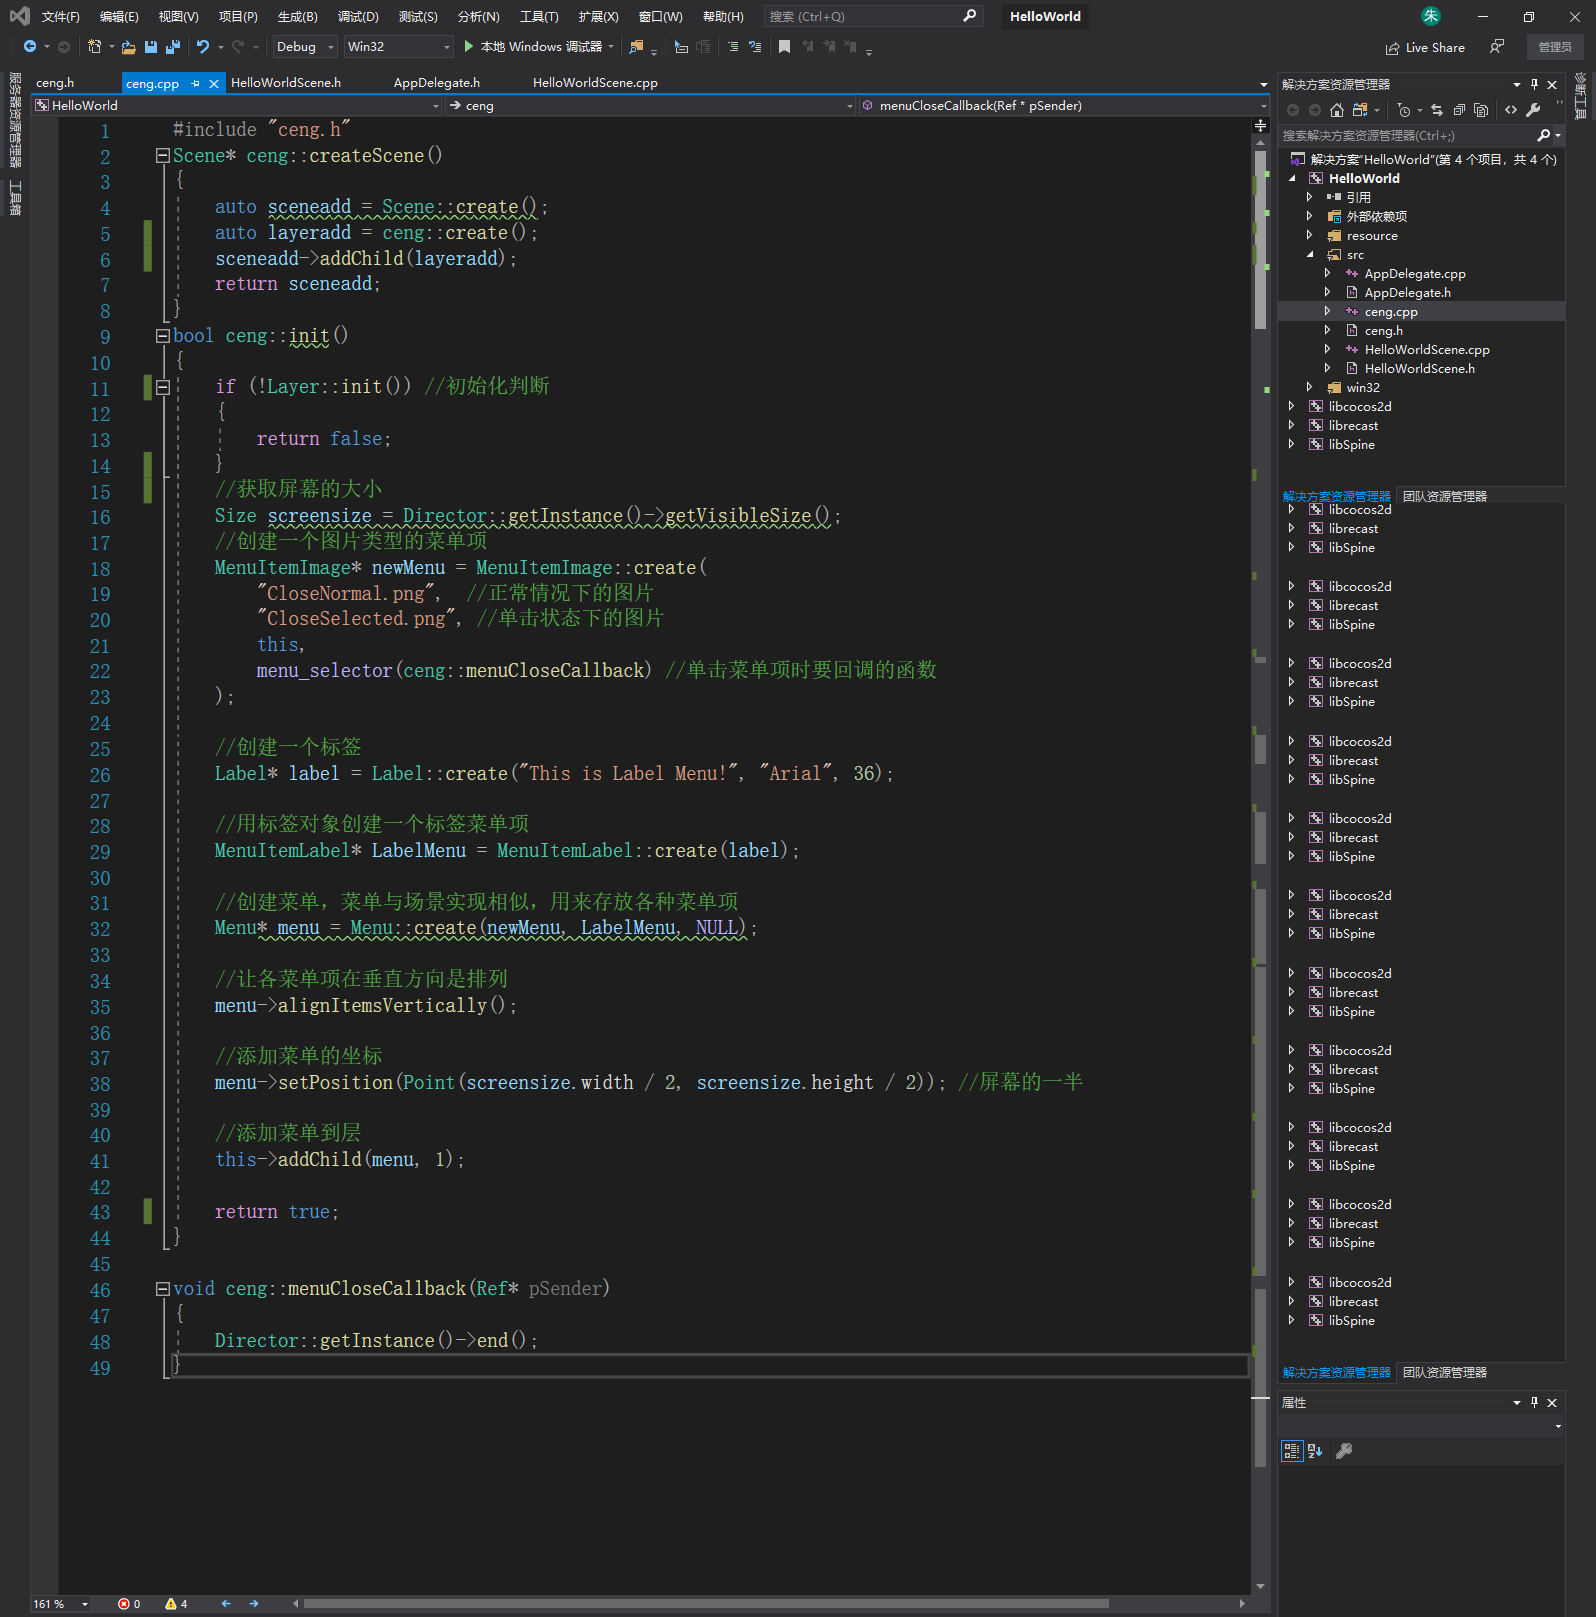
Create a header file and a. cpp file for aa.
//aa inherits Layer, and its init function overrides Layer, so you should first call the init function of the parent Layer to initialize. If the initialization fails, it will return false and not execute further
bool aa::init()
{
  if ( !Layer::init() )
    {
        return false;
    }
//Create an object with a picture
	Sprite* sprite = Sprite::create("CloseNormal.png");
//coordinate
	sprite->setPosition(Point(100, 200));
//Add sprites to layer
	this->addChild(sprite);
    return true;
}
-
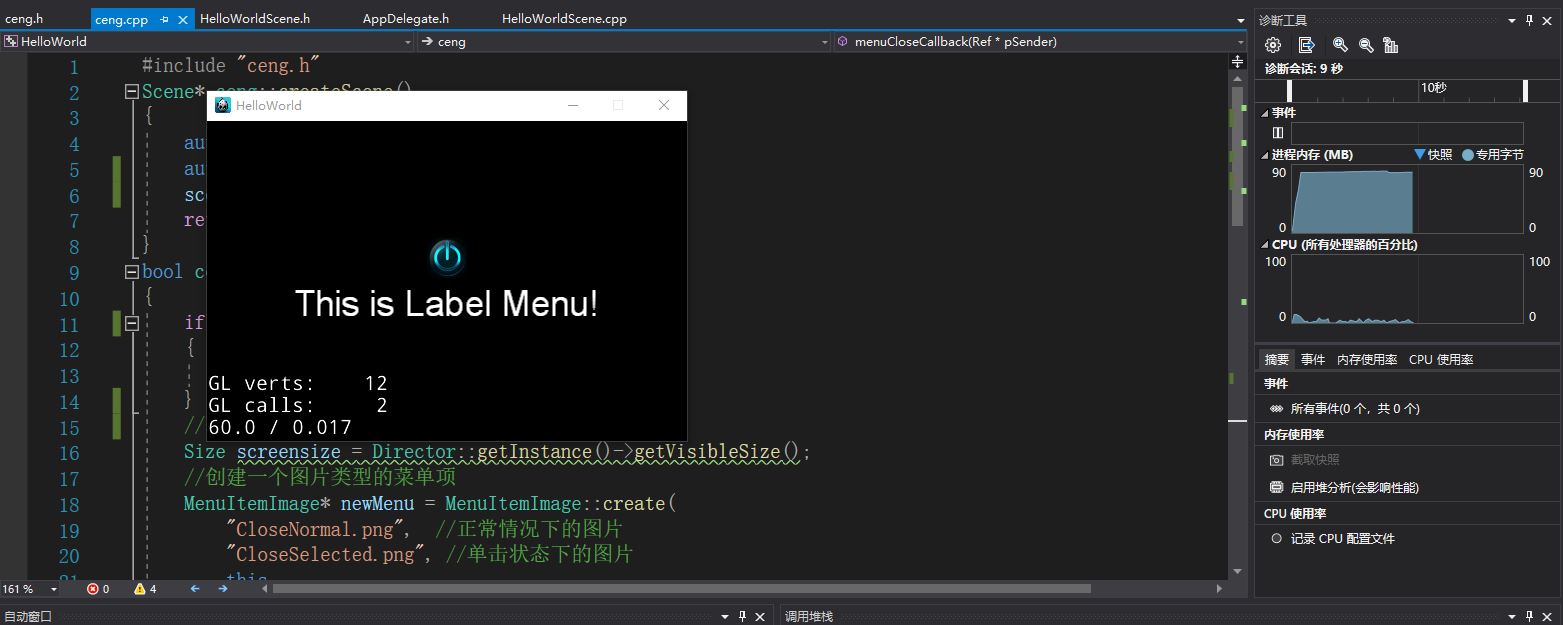
The third point is to create a ceng.h and a ceng.cpp, as follows

-
Done.
node
- Ref: the base class of the Cocos2d-x engine.
- Node: classes with simple functions, such as scaling, setting coordinates, size, visibility, stretching, etc., with update function and one function can be called for each frame of the specified program.
- Layer: a class that inherits from Node and has multiple functions.
- Cocos2d-x has a set of memory management methods. If you want to automatically handle the release of objects, let the class inherit Rrf and use the autorelease function.
Cocos2d-x 3.0 new Value, Vector, Map
-
Value has a large number of constructors, so it can represent a variety of values, such as integer, floating point, string, boolean type, etc., as follows
bool new::init()
{
    if(!Layer::init())
    {
        return false;
    }
    Value a=Value("This is very good?1/0");
    Value b=Value(1);
    log("%s%d",a.asString().c_str(),b.asInt());
    //Log is a print log function. Use the ac.. Function to get information. For example, asInt is to get integer value
    return true;
}
-
The function of vector is similar to that of queue. It encapsulates the vector container class of C + +. The first in, first out principle is as follows
bool new::init()
{
    if(!Layer::init())
    {
        return false;
    }
    Lavel* one=Label::create("Firstman","Arial",20);
    one->setPosition(Point(200,300));
    Lavel* two=Label::create("Secondman","Arial",20);
    two->setPosition(Point(200,400));
    //Create Vector object
    Vector<Label*> vec;  //< Label * > indicates that Vector is set to store only Label objects

    //Put two labels in the Vector
    vec.pushBack(one);
    vec.pushBack(two);

    //Traverse Vector, take out all labels and add them to the scene
    for(auto lab:vec)
    {
        this->addChild(lab);
    }

    return true;
}
/*
Vector Common functions:
eraseObject(object) //Remove object object from Vector
pushBack(object) //Add an object object from Vector's best
erase(index) //Remove the object at index from Vector
at(index) //Returns an object of Vector with index as the subscript value
front() //Returns the first object of Vector, which is the object of the most advanced Vector
size() //Returns the number of objects stored by Vector
back() //Returns the last object of Vector
clear() //Empty Vector
*/
-
Map's function is to distinguish and access a large amount of information, as follows
bool new::init()
{
    if(!Layer::init())
    {
        return false;
    }
 //Create Map object
    Map<int,Label*> newmap; //Define this Map with int as key and Label * as value
 //Create 50 objects (Heroes) and store them in the Map
    for(int a=1;a<=50;a++)
    {
  //Hero name
    std::string name="No."+Value(a).asString(); //Value(a).asString() is the usage of value, which can be converted between integer, floating point and string. For example, Value("123").asInt() output value is 123
  //Create a Label object to represent the hero
    Label* yx=Label::create(name.c_str(),"Arial",20);

  //Keep the hero in the Map, with a as the key and yx as the value
    newmap.insert(a,yx);
    }
  //Show hero No.33 today
    Label* label=newmap.at(33);
    label->setPosition(Point(200,300));
    this->addChild(label);

    return true;
}
End
The foundation has been understood, do not forget to organize.
~
- Create a second scene's secondscience. H header file with any name.

