Cobbler automatic unattended installation (actual combat!)
Keywords:
Linux
CentOS
vim
yum
DNS
Introduction to Cobbler
- Cobbler is a Linux server installation service. It can quickly install and reinstall physical servers and virtual machines through PXE, and manage DHCP, DNS, etc.
- Cobbler can use command-line management, also provides a Web-based interface management tool (cobbler Web), also provides an API interface, which is convenient for secondary development and use.
- Cobbler is an upgrade of earlier kickstart, which has the advantages of easy configuration and easy management with its own web interface.
- Cobbler has a built-in lightweight configuration management system, but it also supports integration with other configuration management systems, such as Puppet, which does not support SaltStack temporarily.
1. Install cobbler and necessary components
[root@localhost ~]# yum install epel-release -y    ##Install epel source
[root@localhost ~]# yum install  -y \
> cobbler \      ##Install cobbler\
> cobbler-web \    ##Web form management
> dhcp \                ##Address assignment service
> tftp-server \       ##Put compression and boot files
> pykickstart \      ##kickstart developed by Python
> httpd \               ##network service
> rsync \              ##Remote synchronization management
> xinetd               ##Management platform
2. Modify the cobbler's configuration file
[root@localhost ~]# cd /etc/cobbler/
[root@localhost cobbler]# vim settings  ##Modify profile

next_server: 192.168.13.140     ##Modify service address to local
server: 192.168.13.140
manage_dhcp: 1    ##dhcp open

[root@localhost cobbler]# systemctl start httpd.service      ##Open http service
[root@localhost cobbler]# systemctl start cobblerd.service ##Enable cobbler service
[root@localhost cobbler]# systemctl stop firewalld.service  ##Turn off firewall
[root@localhost cobbler]# setenforce 0     ##Turn off enhancements
3. Optimize cobbler
[root@localhost cobbler]# cobbler check   ##cobbler detection needs optimization
##What needs to be optimized will be listed below, which can be optimized according to the optimization input
[root@localhost cobbler]# vim /etc/xinetd.d/tftp  ##tftp optimization

service tftp
{
                socket_type             = dgram
                protocol                = udp
                wait                    = yes
                user                    = root
                server                  = /usr/sbin/in.tftpd
                server_args             = -s /var/lib/tftpboot
                disable                 = no     ##Here yes is changed to no
                per_source              = 11
                cps                     = 100 2
                flags                   = IPv4
}

[root@localhost cobbler]# systemctl enable rsyncd.service  ##Optimize and open remote synchronous management service
[root@localhost cobbler]# openssl passwd -1 -salt 'abc123' 'abc123'  ##Optimize administrator password

$1$abc123$9v8z2./E/PZihXrVcy3II0   ##Copy this segment is the ciphertext after salt value encryption

[root@localhost cobbler]# vim /etc/cobbler/settings  ##Modify profile
##Find default and copy the encrypted ciphertext here
default_password_crypted: "$1$abc123$9v8z2./E/PZihXrVcy3II0"
[root@localhost cobbler]# systemctl start rsyncd.service   ##Startup service
[root@localhost cobbler]# systemctl restart xinetd.service
4. Configure dhcp service
[root@localhost cobbler]# vim /etc/cobbler/dhcp.template  ##Modify profile

subnet 192.168.13.0 netmask 255.255.255.0 {     ##Modify network segment
         option routers             192.168.13.1;                 ##gateway
         option domain-name-servers 192.168.13.2;     ##dns address
         option subnet-mask         255.255.255.0;
         range dynamic-bootp        192.168.13.100 192.168.13.200;  ##Address pool

[root@localhost cobbler]# cobbler sync  ##Synchronous generation of DHCP configuration file (/ etc / DHCP / DHCP. CONF)
[root@localhost cobbler]# systemctl restart dhcpd.service   ##Start dhcp service
[root@localhost cobbler]# systemctl start cobblerd.service  ##Start the cobbler service
[root@localhost cobbler]# systemctl start xinetd.service      ##Start management platform service
5. Import ISO image file
First connect the image file and mount it to the / mnt directory
[root@localhost cobbler]# mount /dev/cdrom /mnt   ##Mount the image to the / mnt directory
mount: /dev/sr0 Write protected, will be mounted read-only
[root@localhost cobbler]# cd /mnt/
[root@localhost mnt]# ls    ##View image file
CentOS_BuildTag  GPL       LiveOS    RPM-GPG-KEY-CentOS-7
EFI              images    Packages  RPM-GPG-KEY-CentOS-Testing-7
EULA             isolinux  repodata  TRANS.TBL
Import image file
[root@localhost mnt]# cobbler import --path=/mnt/ --name=Centos-7-x86_64 --arch=x86_64
##Import image file to indicate path and generate name
[root@localhost mnt]# cd /var/www/cobbler/ks_mirror/   ##Switch to the cobbler directory
[root@localhost ks_mirror]# ls
Centos-7-x86_64  config
[root@localhost ks_mirror]# cobbler list    ##View file information
distros:
     Centos-7-x86_64

profiles:
     Centos-7-x86_64

systems:

repos:

images:

mgmtclasses:

packages:

files:
View compressed kernel and boot files
[root@localhost ks_mirror]# yum install tree -y   ##Installing the tree tool
[root@localhost ks_mirror]# tree /var/lib/tftpboot/images    ##View compressed kernel and boot files
/var/lib/tftpboot/images
└── Centos-7-x86_64
        ├── initrd.img    ##boot file
        └── vmlinuz      ##Compressed kernel
Restart all services
[root@localhost ks_mirror]# systemctl restart cobblerd.service
[root@localhost ks_mirror]# systemctl restart dhcpd.service
[root@localhost ks_mirror]# systemctl restart xinetd.service
[root@localhost ks_mirror]# systemctl restart httpd.service
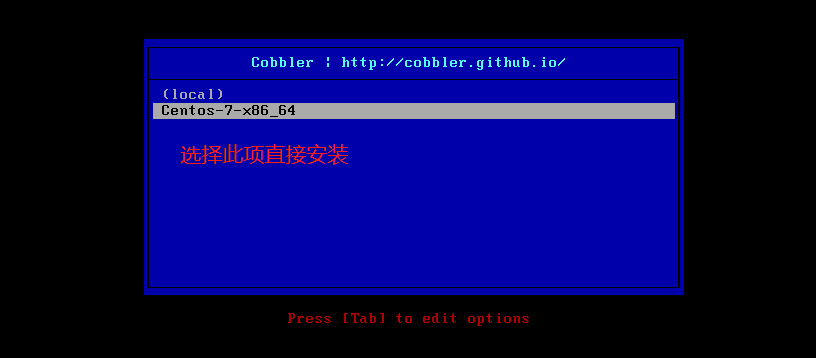
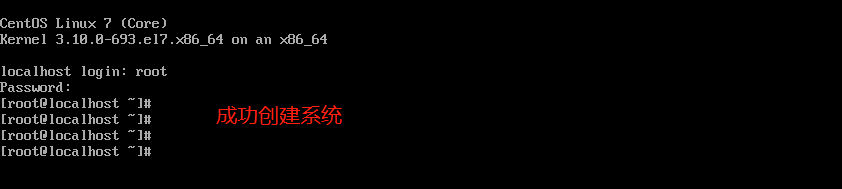
6. Create a virtual machine without a system and turn on the automatic installation system (character interface)
Install graphical interface
Code: [root @ localhost ~] (Yum groupinstall "GNOME desktop"
Code: [root @ localhost ~] (Yum groupinstall 'KDE plasma workspaces "- y
 Code: [root @ localhost ~] (Yum groupinstall "X window system" or "Graphical Administration Tools"
7. Using cobbler's web Management
[root@localhost ks_mirror]# vim /etc/cobbler/modules.conf ##Configure module profile

module = authn_configfile  ##Default opening

[root@localhost ks_mirror]# htdigest -c /etc/cobbler/users.digest Cobbler adadmin ##Create user password
Adding password for adadmin in realm Cobbler.
New password:     ##Input password
Re-type new password:
[root@localhost ks_mirror]# systemctl restart cobblerd.service   ##Restart cobbler service
[root@localhost ks_mirror]# systemctl restart httpd.service         ##Restart httpd service
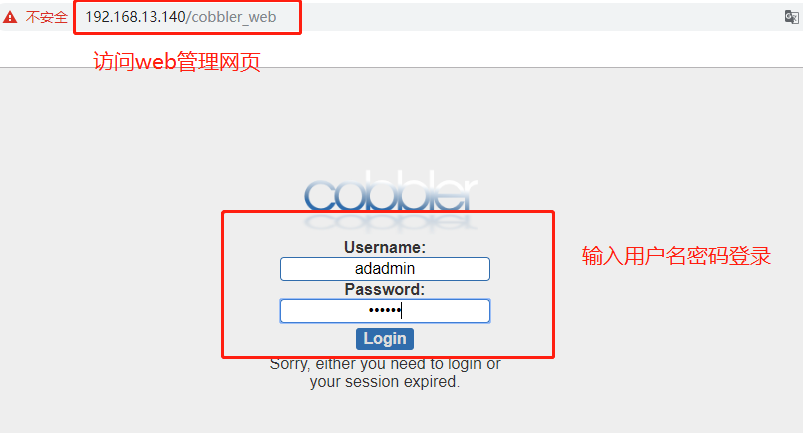
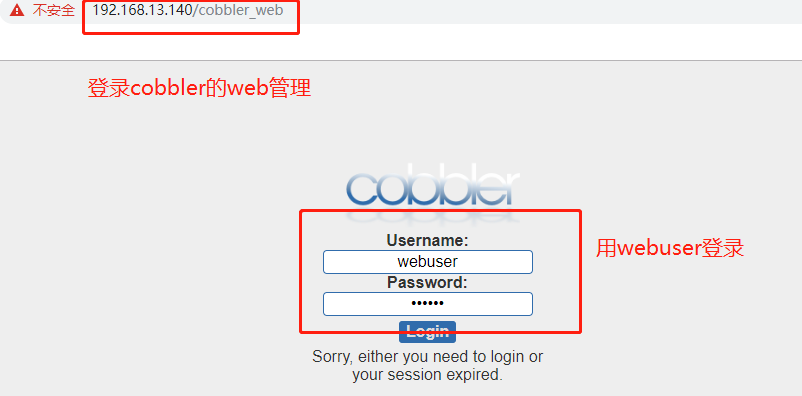
8. Web management of web access cobbler
9. Enable pam authentication and login
[root@localhost ks_mirror]# vim /etc/cobbler/modules.conf   ##Modify module profile

[authentication]
module = authn_pam    ##Modified to pam authentication module

[authorization]
module = authz_ownership ##Specify access rights

[root@localhost ks_mirror]# useradd webuser  ##Create system user
[root@localhost ks_mirror]# passwd webuser   ##Set password
//Change the password of the user webuser.
//New password:
//Invalid password: password is less than 8 characters
//Reenter new password:
passwd: All authentication tokens have been successfully updated.

[root@localhost ks_mirror]# vim /etc/cobbler/users.conf   ##Modify the users.conf file under cobbler

[admins]
admin = ""
cobbler = ""
webuser = ""    ##Add user

[root@localhost ks_mirror]# systemctl restart httpd.service   ##Restart service
[root@localhost ks_mirror]# systemctl restart cobblerd.service
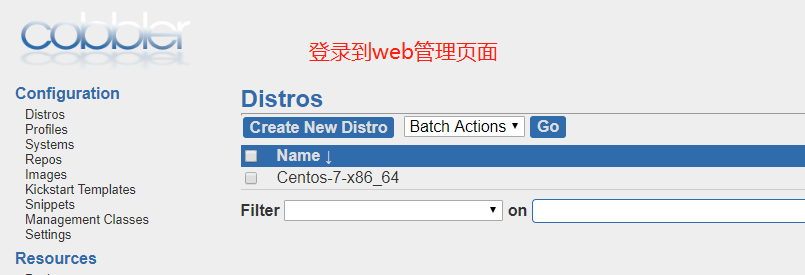
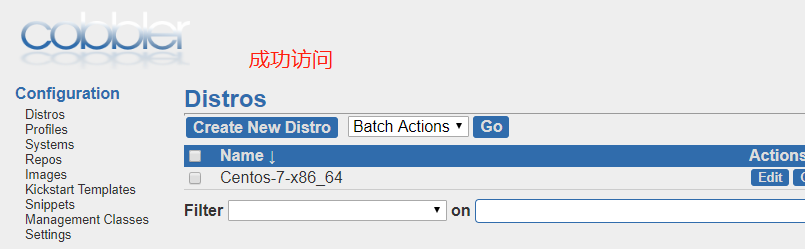
10. Log in to the web management page
Thank you for reading!
Posted by Greaser9780 on Wed, 06 Nov 2019 09:45:16 -0800