This series:
Chapter 1: Nine analysis takes you easy to finish the installation of helm3
The second chapter: Nine analysis takes you to the public warehouse of helm3
The third chapter: Nine analysis takes you through the explosion of helm3 private warehouse easily
The fourth chapter: Nine analysis takes you easy
The fifth chapter: Nine analysis takes you easy to finish helm3 release
The sixth chapter: Nine analysis takes you through helm3 gitlab easily
The seventh chapter: Nine analysis takes you through helm3 nginx ingress
The eighth chapter: Nine analysis takes you through helm3 gitlab nfs easily
The ninth chapter: Nine analysis takes you through helm3 nexus
The tenth chapter: Nine analysis takes you through helm3 heapster
Chapter 11: Nine analysis takes you through helm3 kubernetes dashboard
Chapter 12: Nine analysis takes you through helm3 harbor
Chapter 13: Nine analysis takes you through helm3 prometheus easily
Chapter 14: Nine analysis takes you through helm3 grafana
Chapter 15: Nine analysis takes you easy to finish
Chapter 16: Nine analysis takes you through helm3 efk - elastic search
Catalog
1 Preface
2 download elastic search
3 create elasticsearch namespace
4. Install elastic search
4.1 modify configuration
4.2 install elasticsearch
5 install nfs storage server
6 create pv
7 create secret
7.1 create a self signed certificate
7.2 generate secret based on certificate
8 verify elastic search
1 Preface
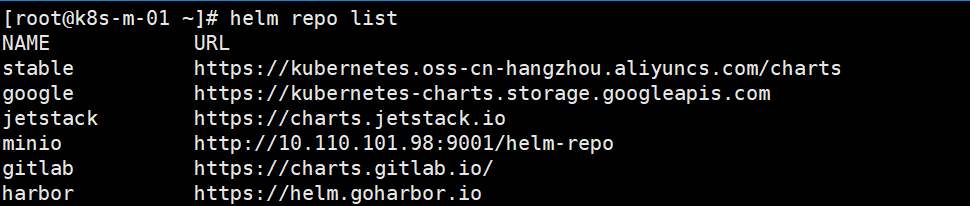
In this paper, helm3 v3.0.0; k8s v1.16.3 are used. The configuration of helm warehouse is as follows:

2 download elasticsearch
helm search elasticsearch:
helm search repo elasticsearch
helm downloads and decompresses elastic search:
helm fetch google/elasticsearch
tar -zxvf elasticsearch-1.32.1.tgz
3 create elasticsearch namespace
kubectl create ns elasticsearch
4. Install elastic search
4.1 modify configuration
Edit the values.yaml file and modify the related configuration of ingress. The screenshot is as follows:
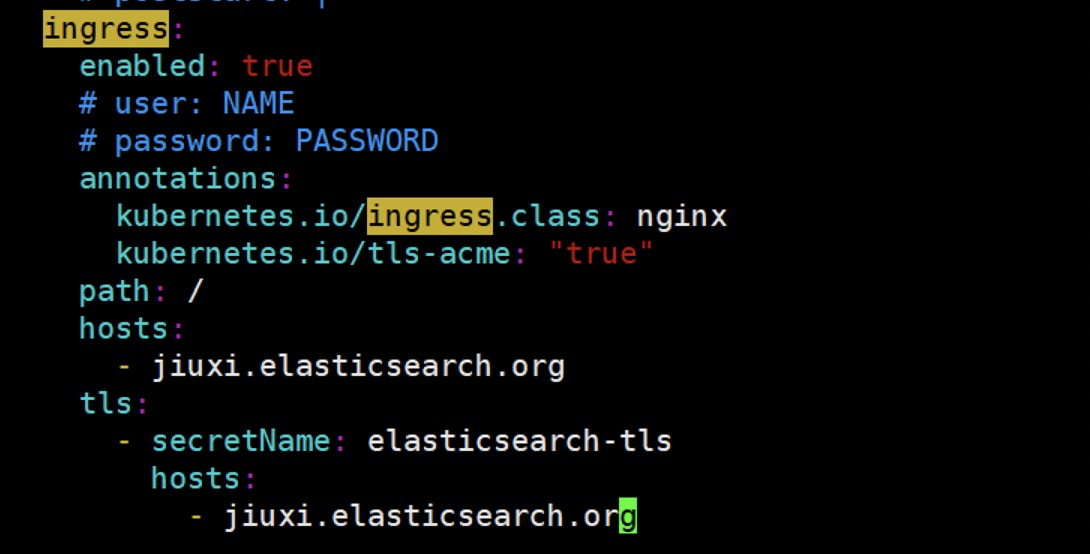
Because you have enabled ingress, you need to install nginx ingress. Please refer to my< helm3 installing nginx ingress >, don't worry, the installation process is easy to make you scream.
In addition, the data pvc size changed from 30Gi to 15Gi: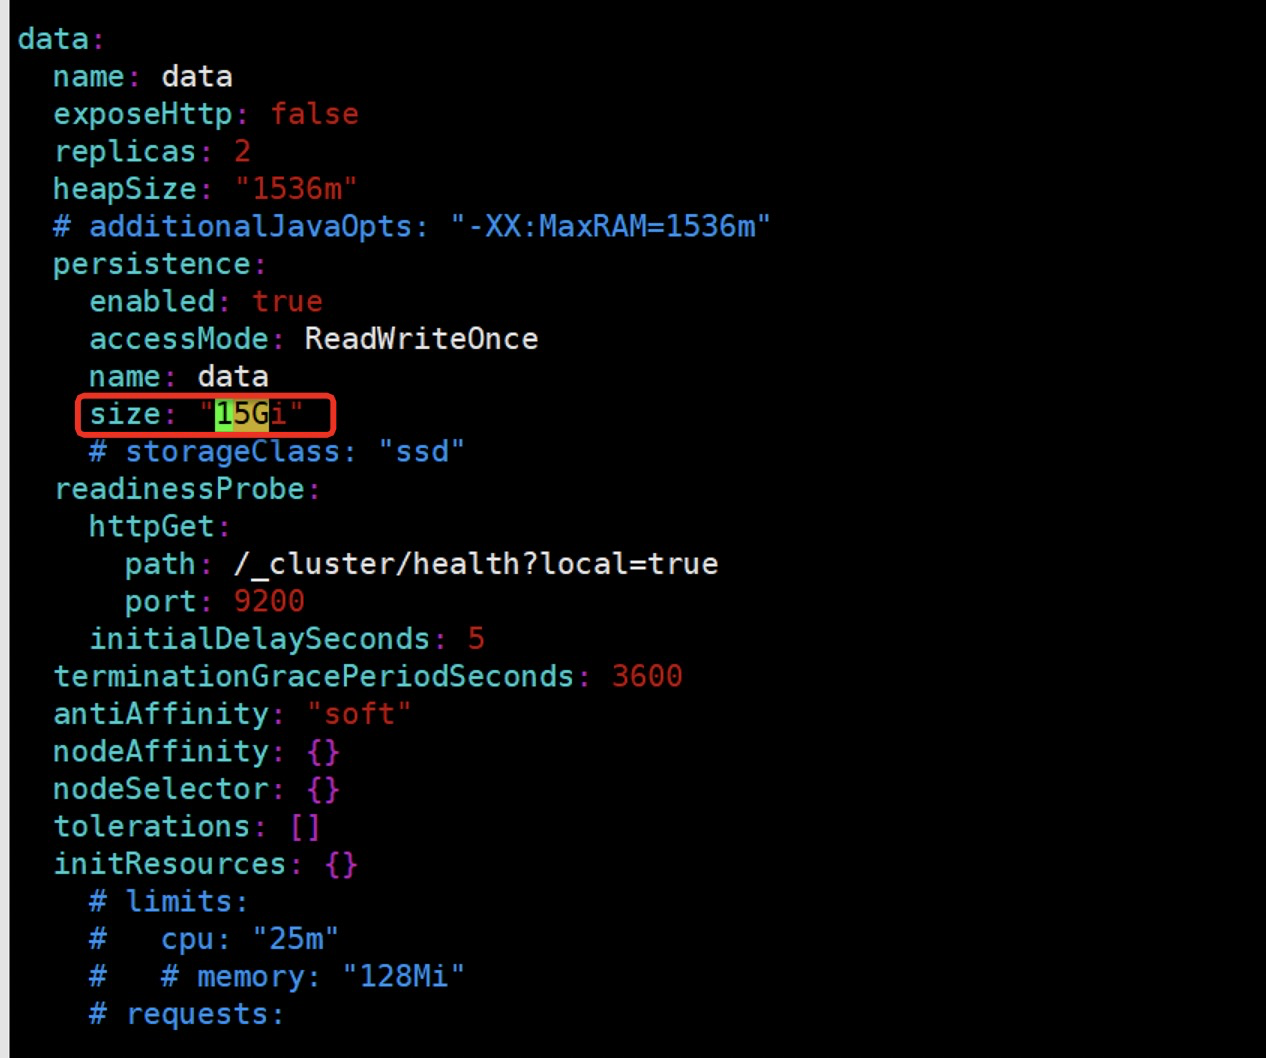
4.2 install elasticsearch
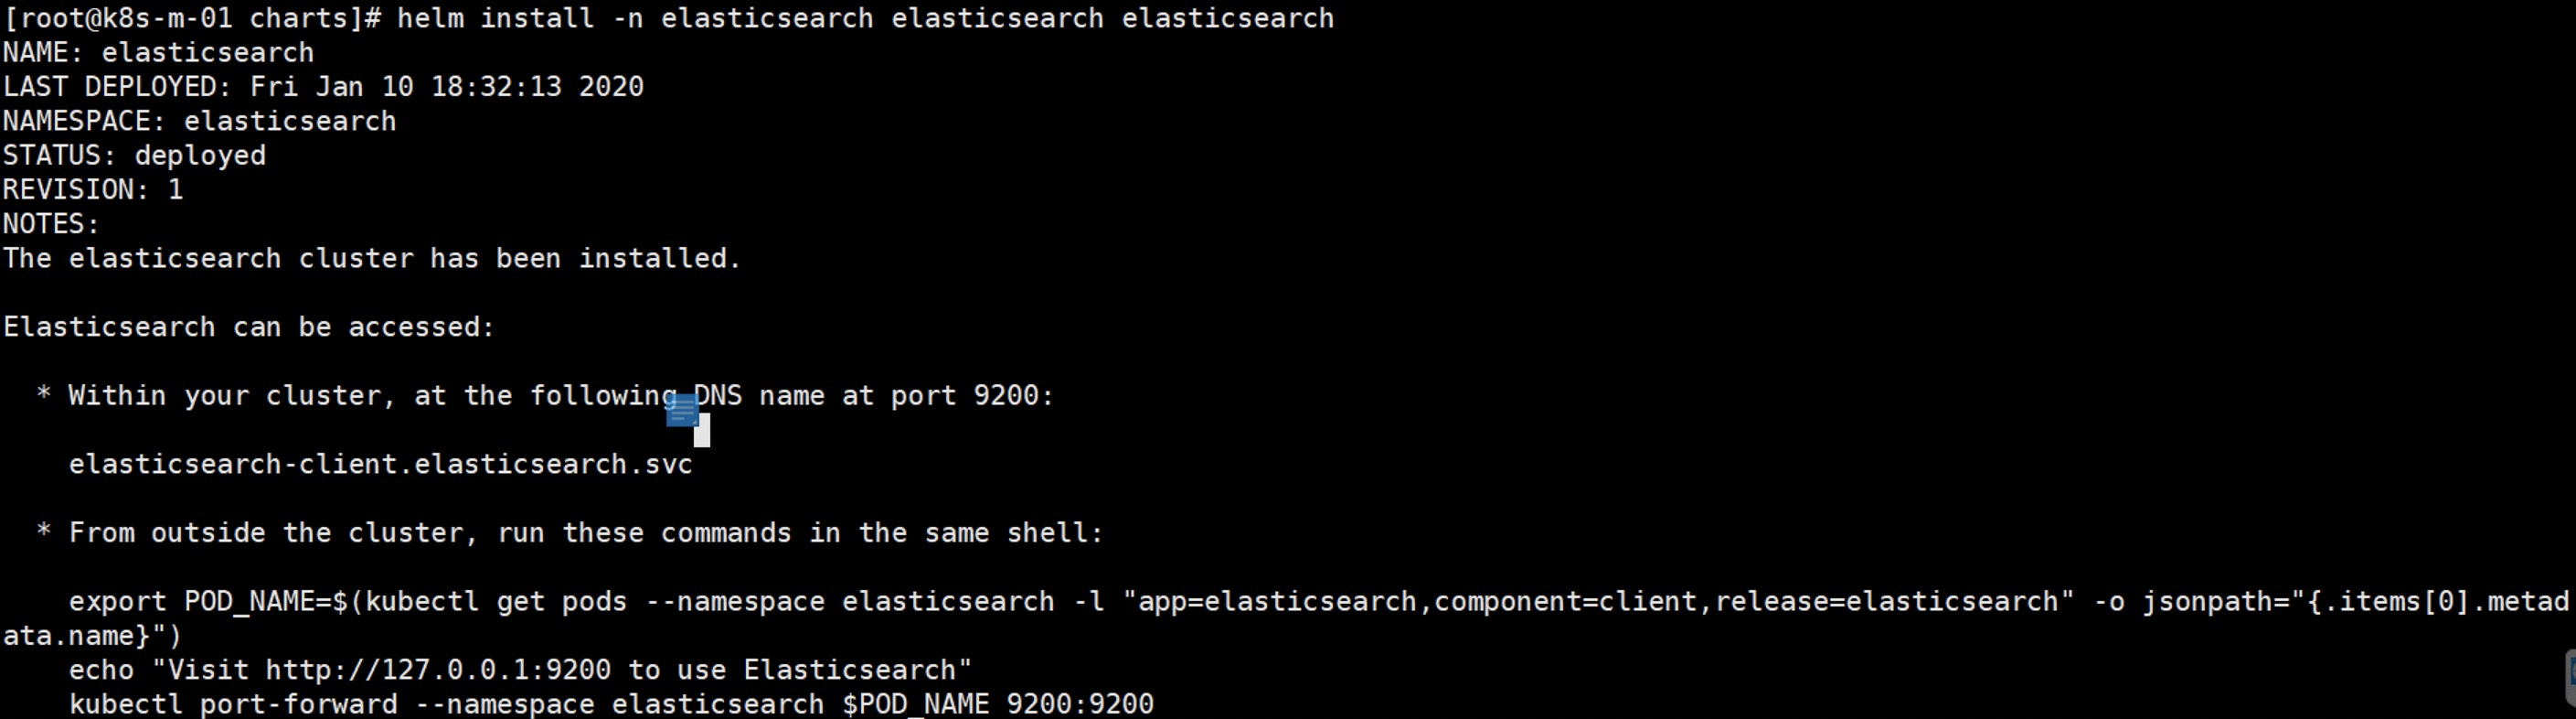
The first elasticsearch is the namespace, the second is helm release, and the third is the elasticsearch installation directory:
helm install -n efk elasticsearch elasticsearch
Use helm to view:
helm list -n efk

Since then, elasticsearch chart has been installed successfully. But don't be complacent. Successful installation doesn't mean successful operation. No, you can check pvc and pod:
kubectl get pod -n efk
kubectl get pvc -n efk

5 install nfs storage server
How to install the nfs server, please refer to me< Easy completion of nfs installation >Don't worry. It's easy to explode. It's easy for you to finish blasting in minutes.
mkdir -p /data/nfs/elasticsearch/data/15g/{0,1}
mkdir -p /data/nfs/elasticsearch/master/4g/{0,1,2}
chmod 777 -R /data/nfs/elasticsearch
echo '/data/nfs/elasticsearch 10.110.0.0/16(rw,sync,no_root_squash)' >> /etc/exports
systemctl restart nfs
6 create pv
After installing the storage server, start creating pv. Note that the following server is the IP address of the nfs server:
Create the pv-elasticsearch-master-4g.yaml file:
apiVersion: v1
kind: PersistentVolume
metadata:
name: pv-elasticsearch-master-4g-0
spec:
capacity:
storage: 4Gi
volumeMode: Filesystem
accessModes:
- ReadWriteOnce
persistentVolumeReclaimPolicy: Retain
nfs:
server: 10.110.101.106
path: /data/nfs/elasticsearch/master/4g/0
---
apiVersion: v1
kind: PersistentVolume
metadata:
name: pv-elasticsearch-master-4g-1
spec:
capacity:
storage: 4Gi
volumeMode: Filesystem
accessModes:
- ReadWriteOnce
persistentVolumeReclaimPolicy: Retain
nfs:
server: 10.110.101.106
path: /data/nfs/elasticsearch/master/4g/1
---
apiVersion: v1
kind: PersistentVolume
metadata:
name: pv-elasticsearch-master-4g-2
spec:
capacity:
storage: 4Gi
volumeMode: Filesystem
accessModes:
- ReadWriteOnce
persistentVolumeReclaimPolicy: Retain
nfs:
server: 10.110.101.106
path: /data/nfs/elasticsearch/master/4g/2
Create the pv-elasticsearch-data-15g.yaml file:
apiVersion: v1
kind: PersistentVolume
metadata:
name: pv-elasticsearch-data-15g-0
spec:
capacity:
storage: 15Gi
volumeMode: Filesystem
accessModes:
- ReadWriteOnce
persistentVolumeReclaimPolicy: Retain
nfs:
server: 10.110.101.106
path: /data/nfs/elasticsearch/data/15g/0
---
apiVersion: v1
kind: PersistentVolume
metadata:
name: pv-elasticsearch-data-15g-1
spec:
capacity:
storage: 15Gi
volumeMode: Filesystem
accessModes:
- ReadWriteOnce
persistentVolumeReclaimPolicy: Retain
nfs:
server: 10.110.101.106
path: /data/nfs/elasticsearch/data/15g/1
Create pv statement as follows:
kubectl apply -f pv-elasticsearch-master-4g.yaml
kubectl apply -f pv-elasticsearch-data-15g.yaml

7 create secret
7.1 create a self signed certificate
openssl req -x509 -nodes -days 365 -newkey rsa:2048 -keyout ./tls.key -out ./tls.crt -subj "/CN=jiuxi.elasticsearch.org"
7.2 generate secret based on certificate
kubectl -n efk create secret tls elasticsearch-tls --key ./tls.key --cert ./tls.crt
8 verify elastic search
Open the browser and visit https://jiuxi.elasticsearch.org (you need to modify the / etc/hosts file and add the domain name resolution record. Note that IP is the host IP of nginx ingress pod, remember).

Since then, it is easy to install elastic search in helm3.