Cereal mall project (learning note 1)
Cereal mall project (learning note 2)
Chapter II: initialization project
catalogue
Chapter II: initialization project
2, Introduction of Renren open source
1. Download Ren fast and Ren fast Vue
2. Introduce Ren fast in the backend
3. Introduce the front-end Ren fast Vue
4, Write public micro service gulimall common
1. Generate public micro services
2. Introduce public micro services for other categories
3. Add dependent packages in gulimall common as required
1. Dependencies required for introducing CRUD
6, Reverse generate code for other services as well
1, Initialize database
Note: do not run sql files directly.
Copy to the console for execution, otherwise the Chinese in the table will be garbled.
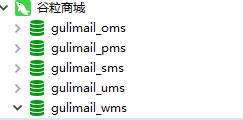
gulimall_oms  #Order database
gulimall_pms  #Commodity database
gulimall_sms  #Coupon database
gulimall_ums  #User database
gulimall_wms  #Warehouse database
2, Introduction of Renren open source
1. Download Ren fast and Ren fast Vue
Download Ren fast and Ren fast Vue on the code cloud.

2. Introduce Ren fast in the backend
Deploy Ren fast to idea.
Modify the mysql address in application-dev.yml to your own address.
Create a new gulimall admin in mysql and copy the code in db.
Note: add the following code after the address, otherwise an error may occur.
useSSL=false
If maven is red, please read this article: parent.relativePath‘ of POM io.renren:renren-generator:1.0.0_duanxj109's blog - CSDN blog
That is, add < relativepath > < / relativepath >
	<parent>
		<groupId>org.springframework.boot</groupId>
		<artifactId>spring-boot-starter-parent</artifactId>
		<version>2.2.4.RELEASE</version>
		<relativePath ></relativePath>
	</parent>
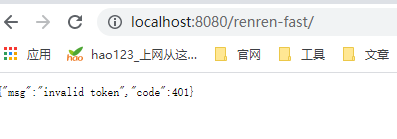
Start the service and access: http://localhost:8080/renren-fast/
3. Introduce the front-end Ren fast Vue
Verify that node.js is installed. Enter in cmd to view the version
node -v
VScode opens the project and installs the npm package in the terminal
npm install
Question 1: python environment
resolvent:
Install Python 2.7
Method 1: console installation
npm install --global --production windows-build-tools
Method 2: local installation
Download from the official website and configure environment variables
reference resources: Win 10 python installation and environment variable configuration_ LYJ_viviani's blog - CSDN blog_ python installation tutorial win10
If an error is reported, execute the following code in vscode
npm config set python D:/python/python.exe(Local Python Environment)
Question 2: msbuild error: msb3428 error
reference resources: Resolve msbuild error: msb3428 error_ yan072201 column - CSDN blog
 npm uninstall node-sass

 npm install node-sass(or npm install)
Run after successful installation
npm run dev
4. Test
Start front-end and back-end projects
Access: start the foreground website and enter the default user name and password, both admin.
Note: the verification code is available only after the backend is started http://localhost:8001/ http://localhost:8001/
3, Reverse generation
1. Introduce Ren generator
Download Renren generator, Renren's open source code generator
Introduced into idea project
2. Modify parameters
Modify the database address in the yaml file to gulimall in the server_ pms
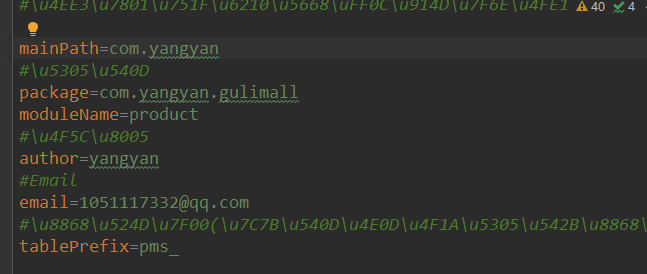
Modify the parameters in generator.properties to the parameters that need to generate code.
Reference is as follows:
Modify the template of the Controller and comment out @ RequiresPermissions and its reference
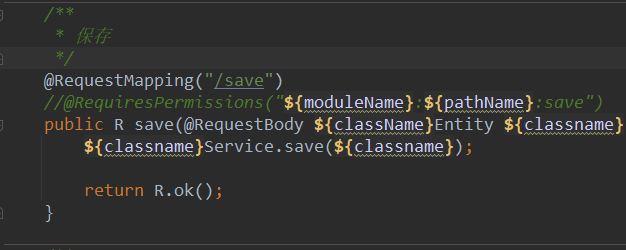
3. Generate code
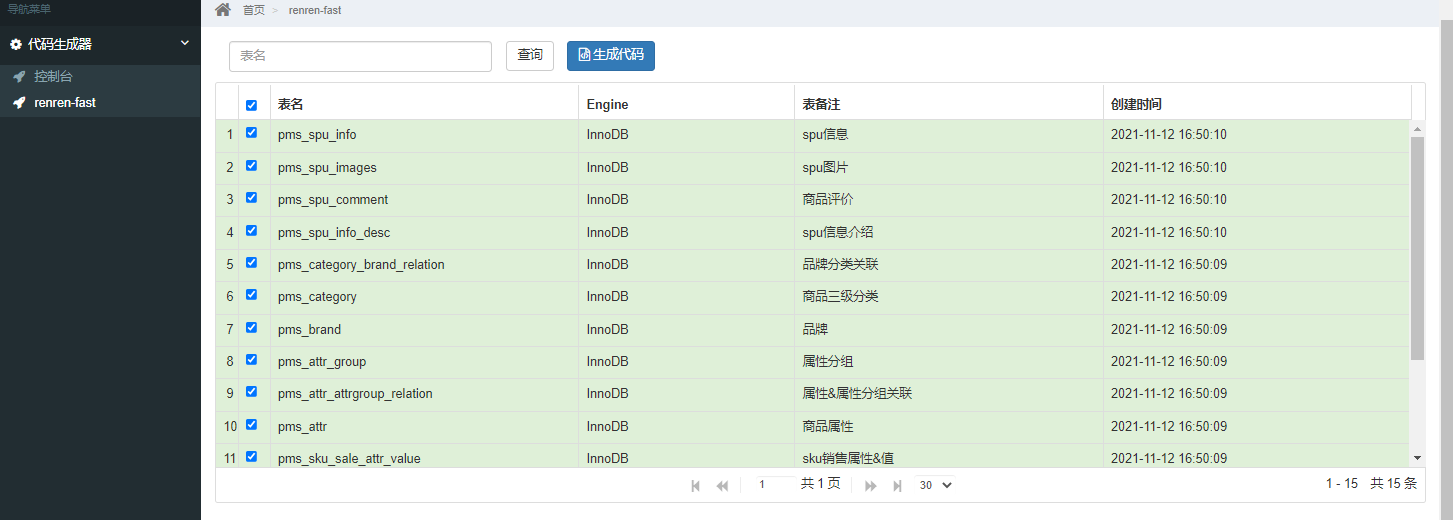
Put the obtained mian file into the specified service.
4, Write public micro service gulimall common
1. Generate public micro services
2. Introduce public micro services for other categories
        <!--Introducing public classes-->
        <dependency>
            <groupId>com.yangyan.gulimall</groupId>
            <artifactId>gulimall-common</artifactId>
            <version>0.0.1-SNAPSHOT</version>
        </dependency>
3. Add dependent packages in gulimall common as required
        <!--introduce MyBaits-plus perfect dao class-->
        <dependency>
            <groupId>com.baomidou</groupId>
            <artifactId>mybatis-plus-boot-starter</artifactId>
            <version>3.4.3.4</version>
        </dependency>
<!--introduce lombok perfect entity-->
<dependency>
<groupId>org.projectlombok</groupId>
<artifactId>lombok</artifactId>
</dependency>Import dependent tool classes according to the needs of service and controller classes.
Tool classes are available in common of Ren fast and can be introduced as needed
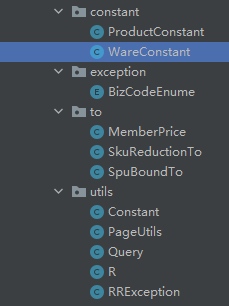
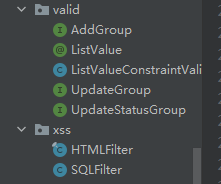
        <!--introduce httpcore Package adjustment tool class-->
        <dependency>
            <groupId>org.apache.httpcomponents</groupId>
            <artifactId>httpcore</artifactId>
        </dependency>
Import commons-lang. renren-fast There are
<dependency>
<groupId>commons-lang</groupId>
<artifactId>commons-lang</artifactId>
<version>2.6</version>
</dependency>
5, Configure and test CRUD
1. Dependencies required for introducing CRUD
        <!--introduce servlet-api-->
        <dependency>
            <groupId>javax.servlet</groupId>
            <artifactId>servlet-api</artifactId>
            <version>2.5</version>
            <scope>provided</scope>
        </dependency>

        <!--introduce MySQL-->
        <dependency>
            <groupId>mysql</groupId>
            <artifactId>mysql-connector-java</artifactId>
            <version>8.0.26</version>
        </dependency>
2. Configuration
1. Configure data source (in gulimall common)
Import driver (mysql, etc.) - > configure yaml
spring:
  datasource:
    username: root
    password: 123456
    url: jdbc:mysql://192.168.200.140:3306/gulimall_admin?useUnicode=true&characterEncoding=UTF-8&serverTimezone=Asia/Shanghai&useSSL=false
    driver-class-name: com.mysql.cj.jdbc.Driver
2. Configure mybatis plus
1) Set @ MapperScan("com.yangyan.gulimall.product.dao") on the startup class (for each microservice)
2) Configure the scan mapper path and global primary key auto increment in the yaml file of gulimall common
mybatis-plus:
  mapper-locations: classpath*:/mapper/**/*.xml
  global-config:
    db-config:
      id-type: auto
3. Test CRUD
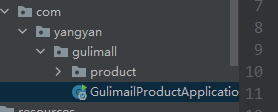
Note: the main startup class must be at the outermost layer, and the test class of test class must be consistent with the path of startup class
@RunWith(SpringRunner.class)
@SpringBootTest
class GulimailProductApplicationTests {


    @Autowired
    BrandService brandService;

    @Test
    void insterTest() {
        BrandEntity brandEntity = new BrandEntity();

        brandEntity.setName("Huawei");

        brandService.save(brandEntity);

        System.out.println("Saved successfully...");

    }
    @Test
    void updateTest() {
        BrandEntity brandEntity = new BrandEntity();
        brandEntity.setBrandId(2L);
        brandEntity.setDescript("Huawei");

        brandService.updateById(brandEntity);

        System.out.println("Update succeeded...");

    }
    @Test
    void deleterTest() {
        BrandEntity brandEntity = new BrandEntity();

        brandEntity.setBrandId(2L);

        brandService.removeById(brandEntity);

        System.out.println("Deleted successfully...");

    }
    @Test
    void queryTest() {
        List<BrandEntity> list = brandService.list(new QueryWrapper<BrandEntity>()
                .eq("name", "Huawei"));

        for (BrandEntity brand : list) {
            System.out.println(brand);
        }
    }
}
6, Reverse generate code for other services as well
Pay attention to modifying the parameters of Ren generator
Note that longblob reports an error in UndoLogEntity.java of ware
The database is longlob, and byte is used to receive data in java
go over.
You can reverse engineer with mybatis plus
BilBil video address: Shangsi Valley e-commerce course "grain mall" benchmarked Ali P6/P7, with an annual salary of 400000-600000_ Beep beep beep_ bilibili
