1. Dynamic and Static Separation of LAMP
When an efficient web architecture needs to be built, static-dynamic separation is undoubtedly the best option. This post will write down how LAMP is deployed.
So-called LAMP?LAMP architecture is one of the most mature application modes for enterprise websites. It refers to a set of systems and related software that work together to provide dynamic web site services and their application development environment.Along with it are LNMP, LTMP, and so on. LAMP simply means installing Apache website services on Linux operating system, building php/perl/Python running environment to connect mysql database, four components together called "LAMP".LNMP just built this httpd service with Nginx.
PHP operates in three modes in a LAMP environment: CGI mode, Apache module, and FastCGI (FCGI) mode.PHP is not very good when running in CGI mode.The difference between FastCGI and Apache module is that PHP in FastCGI is a separate process, and all PHP sub-processes are managed by a PHP component called php-fpm, while Apache runs PHP in a modular way and Apache calls PHP to complete its work.PHP's FastCGI approach performs much better than apache's modular approach.
This will compile and install the LAMP schema as FastCGI.
How FastCGI works:
Clients make requests, which are divided into two types: static requests, which can be returned directly by Apache in response; dynamic requests, such as the scripting interpretive language php or Perl included in them, which are executed by the Apache server through the fastcgi protocol by calling the php server and returning to Apache the results of the execution interpreted by Apache if this has been doneThe procedure involves operations on the data, in which case the php server will also call the mysql server through the mysql protocol.
As follows: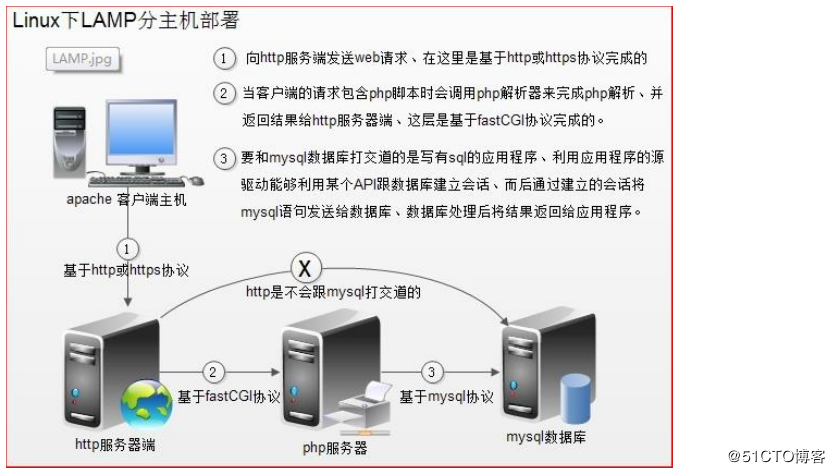
2. Installation and Configuration of LAMP
Environment Deployment:
Here I already have Apache and MySQL:
Apache installation is available for reference: https://blog.51cto.com/14227204/2459749
MySQL installation is available for reference: https://blog.51cto.com/14227204/2425596
1. Deploy PHP server:
Download the PHP installation package I provided and upload it to the PHP server: https://pan.baidu.com/s/1d2ETH7xgobxh23G7FYYvKw
Extraction Code: xs8u
#First you need to install dependent packages for PHP
[root@php php]# yum -y install libxml2-devel openssl-devel bzip2-devel
[root@php php]# tar zxf libmcrypt-2.5.7
[root@php php]# cd libmcrypt-2.5.7/
[root@php libmcrypt-2.5.7]# ./configure --prefix=/usr/local/libmcrypt && make && make install
[root@php libmcrypt-2.5.7]# cd ..
[root@php php]# tar zxf php-5.6.27.tar.gz
[root@php php]# cd php-5.6.27/
[root@php php-5.6.27]# ./configure --prefix=/usr/local/php5.6 --with-mysql=mysqlnd --with-pdo-mysql=mysqlnd --with-mysqli=mysqlnd --with-openssl --enable-fpm --enable-sockets --enable-sysvshm --enable-mbstring --with-freetype-dir --with-jpeg-dir --with-png-dir --with-zlib --with-libxml-dir=/usr --enable-xml --with-mhash --with-mcrypt=/usr/local/libmcrypt --with-config-file-path=/etc --with-config-file-scan-dir=/etc/php.d --with-bz2 --enable-maintainer-zts && make && make install
- --prefix=/usr/local/php5.6 #Installation location
- --with-mysql=mysqlnd #mysql support
- --with-pdo-mysql=mysqlnd #Support pdo module
- --with-mysqli=mysqlnd #Support mysqli Modular
#The above three options do not work on the same server as php. Specify this method to install the database connection driver.- --with-openssl #Support openssl module
- --enable-fpm #Supports fpm mode
- --enable-sockets #Enable socket support
- --enable-sysvshm #Enable system shared memory support
- --enable-mbstring #Multi-byte strings, like our Chinese, are multi-byte strings
- --with-freetype-dir #Support for freetype, install freetype-devel, font-related, font parsing tools
- --with-jpeg-dir
- --with-png-dir
#What the above two options do: process jpeg, png pictures, php can generate JPEG pictures dynamically- --with-zlib #Is a compression library used to compress transmission over the Internet
- --with-libxml-dir=/usr #This libxml is used to parse xml under specified/usr
- --enable-xml #xml-enabled
- --with-mhash #Support mhash
- --with-mcrypt=/usr/local/libmcrypt #libmcrypt-devel This package specifies
- --with-config-file-path=/etc #Specifies the path to store the configuration file
- --with-config-file-scan-dir=/etc/php.d #Profile Scan Path
- --with-bz2 #Support for BZip2
To support apache's worker or event MPM s, the--enable-maintainer-zts option was used at compile time.
#The following are adjustments to the PHP profile and controls the start and stop of the service
[root@php php-5.6.27]# cp php.ini-production /etc/php.ini    #Copy the PHP configuration file provided in the source code
[root@php php-5.6.27]# cp sapi/fpm/init.d.php-fpm /etc/init.d/php-fpm
#Copy its service control script file
[root@php php-5.6.27]# chmod +x /etc/init.d/php-fpm    #Give Execution Permission
[root@php php-5.6.27]# chkconfig --add php-fpm    #Add as a system service to support systemctl management
[root@php php-5.6.27]# chkconfig php-fpm on   #open
#Copy the default configuration file provided by php-fpm and edit it
[root@php php-5.6.27]# cp /usr/local/php5.6/etc/php-fpm.conf.default /usr/local/php5.6/etc/php-fpm.conf
[root@php php-5.6.27]# vim /usr/local/php5.6/etc/php-fpm.conf
listen = 192.168.171.133:9000    #Listening address is local IP9000 port
pm.max_children = 50         #Maximum number of processes started
pm.start_servers = 5          #Number of initial startup processes
pm.min_spare_servers = 5     #Minimum idle process
pm.max_spare_servers = 35     #Maximum idle process
#When the modification is complete, save and exit
[root@php /]# service php-fpm restart              # Restart PHP for configuration to take effect
Gracefully shutting down php-fpm . done
Starting php-fpm  done
[root@php /]# netstat -anput | grep 9000                  # Check to see if it runs
tcp        0      0 192.168.171.133:9000    0.0.0.0:*               LISTEN      3054/php-fpm: maste
[root@php /]# firewall-cmd --permanent --add-port=9000/tcp             # Configure Firewall Release Traffic
success
[root@php /]# firewall-cmd --reload                  # Overload firewall to take effect
2. Configure the Apache server:
[root@apache /]# vim /usr/local/http-2.4.23/conf/httpd.conf              # Edit Main Profile
#Remove the following two lines#Number
LoadModule proxy_module modules/mod_proxy.so
LoadModule proxy_fcgi_module modules/mod_proxy_fcgi.so
                        ....................................
#Locate the two lines at the beginning of the Add Type, and note that they are not commented out
    AddType application/x-compress .Z
    AddType application/x-gzip .gz .tgz
#Add the following two lines of apache to identify php
    AddType application/x-httpd-php .php
    AddType application/x-httpd-php-source .php
                         ...........................................
<IfModule dir_module>
    DirectoryIndex index.php index.html                      # Locate here and add index.php before index.html
</IfModule>
                                  ..........................................
Include conf/extra/httpd-vhosts.conf           # Locate here and place the#Remove, turn on virtual hosts
#Now you can save wq and exit
[root@apache /]# vim /usr/local/http-2.4.23/conf/extra/httpd-vhosts.conf              # Edit Virtual Host Profile
#The virtual host configuration is as follows
<VirtualHost *:80>
    ServerAdmin 848369866@qq.com
    DocumentRoot "/var/www/html"
    ServerName www.test.com
    ErrorLog "logs/test-error_log"
    CustomLog "logs/test-access_log" common
    ProxyRequests Off
ProxyPassMatch ^/(.*\.php(/.*)?)$ fcgi://192.168.171.133:9000/var/www/html/$1
<Directory "/var/www/html">
Options FollowSymLinks
AllowOverride None
Require all granted
</Directory>
</VirtualHost>
[root@apache /]# mkdir -p /var/www/html                        # Create Site Root Directory
[root@apache /]# echo test.com > /var/www/html/index.html               # Write Test Page
[root@apache /]# apachectl restart                           # Restart apache for configuration to take effect
The configuration file for the virtual host is explained as follows:
- ProxyRequests off #Close Forward Proxy
- ProxyPassMatch #Sends file requests ending in.Php to the php-fpm process, php-fpm needs to know at least the directory and URI to run, so these two parameters are specified directly after fcgi://192.168.20.5:9000. Other parameters are encapsulated by mod_proxy_fcgi.so and do not need to be specified manually.
- It is important to note that /var/www/html/needs to be consistent with the path after DocumentRoot in <VirtualHost >
- ProxyPassMatch #Only content that meets a specific regular pattern matches and enforces this rule, where the pattern is ^/(..php(/.)?)$, starting from the root directory of the Web site (virtual host <VirtualHost >), matching any path ending in.php, or following one/more other content after.php.
- ^ (caret) and $(dollar) mark the beginning and end of the path to match
- () The contents in parentheses can be expressed as $1 to facilitate later reference.
- fcgi://192.168.20.5:9000 Proxy forwarded via mod_proxy_fcgi, using the fastCGI protocol, to the port on which PHP-FPM listens.
- /var/www/html #is very important!The path of the virtual host must match, and must be the absolute path of the corresponding php file in the operating system, or the file will not be found.
3. Testing LAMP:
#Edit these two test files in the PHP server
[root@php /]# cat /var/www/html/index.php
<?php
phpinfo();
?>
[root@php /]# cat /var/www/html/test.php
<?php
$link=mysqli_connect('192.168.171.135','zyz','pwd@123');
if($link) echo "Congratulations, database connection is successful!!!"; else echo "connect shibai";
mysqli_close($link);
?>
4. Create users on MySQL servers and grant remote login rights:
[root@mysql /]# mysql -u root -p                # Sign in
Enter password:                      # Enter database password
mysql> create database bbs;                   # Create a dedicated database
Query OK, 1 row affected (0.00 sec)
mysql> grant all on bbs.* to zyz@192.168.171.133 identified by 'pwd@123';               # Authorized user zyz
Query OK, 0 rows affected, 1 warning (0.00 sec)
Client access to www.test.com:
Client access to the web server at www.test.com/test.php for testing:
Seeing the two test pages above shows that apache, php, mysql can work together
3. web Pressure Test
Site performance stress testing is an indispensable part of the performance tuning process for server sites.Only when the server is under high pressure can it truly reflect the problems exposed by improper software, hardware and other settings.
The most common performance testing tools are ab, http_load, webbench, siege.I am more used to the AB tool that comes with apahce.
ab is very useful for not only testing apache servers for site access stress, but also for other types of servers.Such as nginx, tomcat, IIS, etc.
1. The principle of ab:
The ab command creates multiple concurrent access threads that simulate multiple visitors accessing a URL address at the same time.Its testing goal is URL-based, so it can be used to test the load pressure of apache as well as other Web servers such as nginx, lighthttp, tomcat, IIS, etc.
The ab command requires very little on the computer from which the load is issued, and it does not occupy a very high CPU or a large amount of memory.However, it can cause a huge load on the target server, which works like a CC gong hit.Also be aware of testing your own use, otherwise there will be too much load at one time.This may cause the target server to run out of resources, or even crash in severe cases.
2. Installation of ab:
The installation of ab is very simple, even easier if apache is installed from the source code.After apache installation, the ab command is stored in the bin directory of the apache installation directory.The following:
/usr/local/http2.4.23/bin/ab.
If apache is installed via the RPM package of yum, the ab command is stored in the / usr/bin directory by default.The following:
which ab
Note: If you do not want to install apache but want to use the ab command, you can install the apache toolkit httpd-tools directly.The following:
yum -y install httpd-tools
To see if AB was installed successfully, you can switch to the directory above and use the ab-V command to detect it.
[root@apache /]# ab -V             # Amount.... Wrong Report
ab: error while loading shared libraries: libssl.so.1.0.0: cannot open shared object file: No such file or directory
[root@apache /]# export    LD_LIBRARY_PATH="/usr/local/openssl/lib/"            # Execute this command to set environment variables
[root@apache /]# ab -V
This is ApacheBench, Version 2.3 <$Revision: 1748469 $>
Copyright 1996 Adam Twiss, Zeus Technology Ltd, http://www.zeustech.net/
Licensed to The Apache Software Foundation, http://www.apache.org/
3. ab pressure test:
[root@apache /]# ab -c 500 -n 1000 127.0.0.1/index.html
#-c: Number of requests executed in the test session (that is, the total number of requests)
#-n: Number of requests generated at one time (i.e. number of concurrent users)
This is ApacheBench, Version 2.3 <$Revision: 1748469 $>
Copyright 1996 Adam Twiss, Zeus Technology Ltd, http://www.zeustech.net/
Licensed to The Apache Software Foundation, http://www.apache.org/

Benchmarking 127.0.0.1 (be patient)
Completed 100 requests
Completed 200 requests
Completed 300 requests
Completed 400 requests
Completed 500 requests
Completed 600 requests
Completed 700 requests
Completed 800 requests
Completed 900 requests
Completed 1000 requests
Finished 1000 requests

Server Software:        Apache/2.4.23
Server Hostname:        127.0.0.1
Server Port:            80

Document Path:          /index.html                  # Requested Resource Page
Document Length:        9 bytes                      # Body length of HTTP response data

Concurrency Level:      500             # Number of concurrencies
Time taken for tests:   0.807 seconds        # The time taken to complete all these request processing
Complete requests:      1000            # Number of Completed Requests
Failed requests:        0              # Number of failed requests
Total transferred:      251000 bytes
#Represents the sum of response data lengths for all requests, including header information and length of body data for each HTTP response data
HTML transferred:       9000 bytes     # Size of Web Page File (Remove Response Header Size)
Requests per second:    1238.40 [#/sec] (mean)
#Throughput, calculated as: Number of requests/User wait time (Complete requests/Time taken for tests)
Time per request:       403.748 [ms] (mean)
#Average time a user waits for a page, calculated as user wait time/number of times a request has been completed (Complete requests/Concurrency Level)
Time per request:       0.807 [ms] (mean, across all concurrent requests)
#The time taken by the server to process a request, calculated as user wait time/number of requests completed (Time taken for tests/Complete requests)
Transfer rate:          303.55 [Kbytes/sec] received
#Size of data requested by the user, calculated as: Total trnasferred/ Time taken for tests
#This statistic is a good indication of the amount of broadband demand a server needs to export when its processing power reaches its limit.(that is, traffic on the network on average per second)

Connection Times (ms)
              min  mean[+/-sd] median   max
Connect:        0    2   1.6      1       5
Processing:     1   78 138.1      9     802
Waiting:        1   77 138.3      8     802
Total:          2   79 139.2     11     805

Percentage of the requests served within a certain time (ms)
  50%     11
  66%     16
  75%    206
  80%    208
  90%    209
  95%    405
  98%    406
  99%    805
 100%    805 (longest request)
//The data in the above section describes the distribution of processing time for each request. For example, in the above tests, 80% of requests do not take more than 834ms to process. This refers to the previous Time per request, which is the average processing Time per request for a single user.
4. ab performance indicators:
Several indicators are important in performance testing:
Throughput (Requests per second)
A quantitative description of the concurrent processing capabilities of the server, in reqs/s, refers to the number of requests processed per unit time under a number of concurrent users.The maximum number of requests that can be processed per unit time under a number of concurrent users is called maximum throughput.
Note: Throughput is based on the number of concurrent users.This sentence represents two meanings:
- Throughput is related to the number of concurrent users;
- Throughput is generally different for different number of concurrent users.
Calculating formula: Total number of requests / The time it takes to process the number of requests to complete, i.e.
Request per second=Complete requests/Time taken for tests
It must be noted that this number represents the overall performance of the current machine, the higher the value, the better.
Number of concurrent connections
The number of concurrent connections refers to the number of requests that the server accepts at a given time, simply a session.
Concurrency Level
Be aware of the difference between this concept and the number of concurrent connections. A user may have multiple sessions, or connections, at the same time.
Average Request Waiting Time for Users
Calculating formula: The time it takes to process the number of requests to complete /(total requests/concurrent users), that is:
Time per request=Time taken for tests/(Complete requests/Concurrency Level)
Average server request wait time (Time per request:across all concurrent requests)
Calculating formula: The time/total number of requests taken to complete all requests, that is:
Time taken for/testsComplete requests
As you can see, it is the reciprocal of throughput.
It is also equal to the average request waiting time/number of concurrent users, i.e.
Time per request/Concurrency Level
4. Deploy PHP Acceleration Software Xcache
Xcache is a tool for caching PHP pages.Of course, in the real work environment, PHP dynamic pages will not be cached, which is of little significance (dynamic pages, data updates are fast) and takes up memory space.This is just to show that PHP dynamic pages can also be cached.
1. Install xcache:
Previously downloaded packages contained source packages for xcache
[root@php php]# tar zxf xcache-3.2.0.tar.gz
[root@php php]# cd xcache-3.2.0/
[root@php xcache-3.2.0]# /usr/local/php5.6/bin/phpize                   # Generate configure file using phpize in PHP
Configuring for:
PHP Api Version:         20131106
Zend Module Api No:      20131226
Zend Extension Api No:   220131226
[root@php xcache-3.2.0]# ./configure  --enable-xcache  --enable-xcache-coverager --enable-xcache-optimizer --with-php-config=/usr/local/php5.6/bin/php-config && make && make install
#Remember the last tip of the road after installation, you will use:
/usr/local/php5.6/lib/php/extensions/no-debug-non-zts-20131226/
2. Create xcache cache cache file:
[root@php /]# touch /tmp/xcache
[root@php /]# chmod 777 /tmp/xcache          # Write permissions are required
3. Copy the xcache daemon to the root directory of the website:
[root@php /]# cd /php/xcache-3.2.0/
[root@php xcache-3.2.0]# cp -r htdocs/ /var/www/html/xcache
4. Configure PHP support xcache:
[root@php /]# vim /etc/php.ini
#Add the following at the end of the profile
[xcache-common]
extension = /usr/local/php5.6/lib/php/extensions/no-debug-non-zts-20131226/xcache.so
# This is the directory that will be returned when xcache is installed
[xcache.admin]
xcache.admin.enable_auth = Off
[xcache]
xcache.shm_scheme ="mmap"
xcache.size=60M
xcache.count =1
xcache.slots =8K
xcache.ttl=0
xcache.gc_interval =0
xcache.var_size=64M
xcache.var_count =1
xcache.var_slots =8K
xcache.var_ttl=0
xcache.var_maxttl=0
xcache.var_gc_interval =300
xcache.test =Off
xcache.readonly_protection = Off
xcache.mmap_path ="/tmp/xcache"
xcache.coredump_directory =""
xcache.cacher =On
xcache.stat=On
xcache.optimizer =Off
[xcache.coverager]
xcache.coverager =On
xcache.coveragedump_directory =""
#Save Exit After Writing
[root@php /]# service php-fpm restart
Gracefully shutting down php-fpm . done
Starting php-fpm  done
5. Configure NFS and go back to the Apache server to mount the NFS shared directory in order to synchronize files in the root directory of the web page:
[root@php /]# vim /etc/exports
/var/www/html/       192.168.171.0/24(rw,sec=sys,sync,no_root_squash)
[root@php /]# systemctl restart nfs               # Restart nfs for effect
#Back to Apache Server
[root@apache /]# showmount -e 192.168.171.133            # Confirm that you can view the directory shared by PHP
Export list for 192.168.171.133:
/var/www/html 192.168.171.0/24
[root@apache /]# mount -t nfs 192.168.171.133:/var/www/html/ /var/www/html/            # Mount to local site root directory
[root@apache /]# df -hT
192.168.171.133:/var/www/html nfs4       50G  4.8G   46G  10% /var/www/html
6. Testing:
Visit www.test.com/xcache to see the following pages: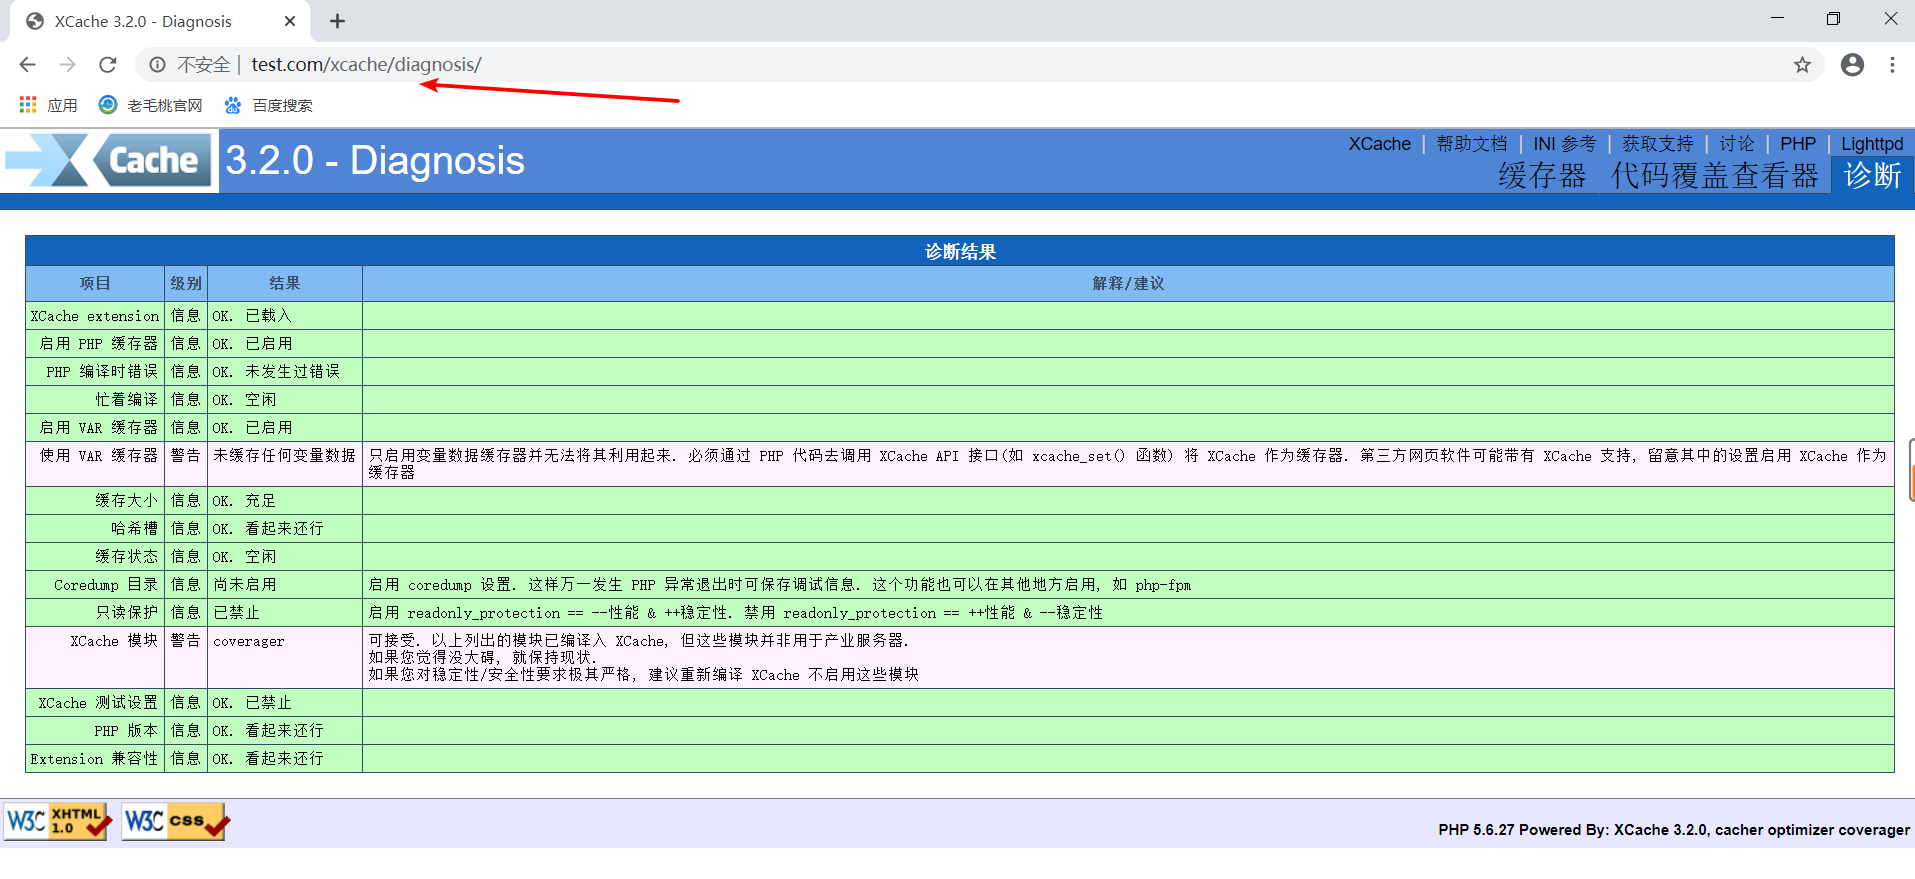
At this point, the php acceleration software xcache is installed
7. Testing Apache dynamic pages:
[root@apache /]# ab -c 100 -n 1000   http://192.168.171.134/index.php #First Test
.............................    //
Time taken for tests:   0.787 seconds
.............................     //
Requests per second:    1270.78 [#/sec] (mean)
.............................    //
[root@apache /]# ab -c 100 -n 1000  http://192.168.171.134/index.php #Second test
.............................       //
Time taken for tests:   0.755 seconds
.............................      //
Requests per second:    1325.23 [#/sec] (mean)
.............................     //
View the hit ratio of Xcache: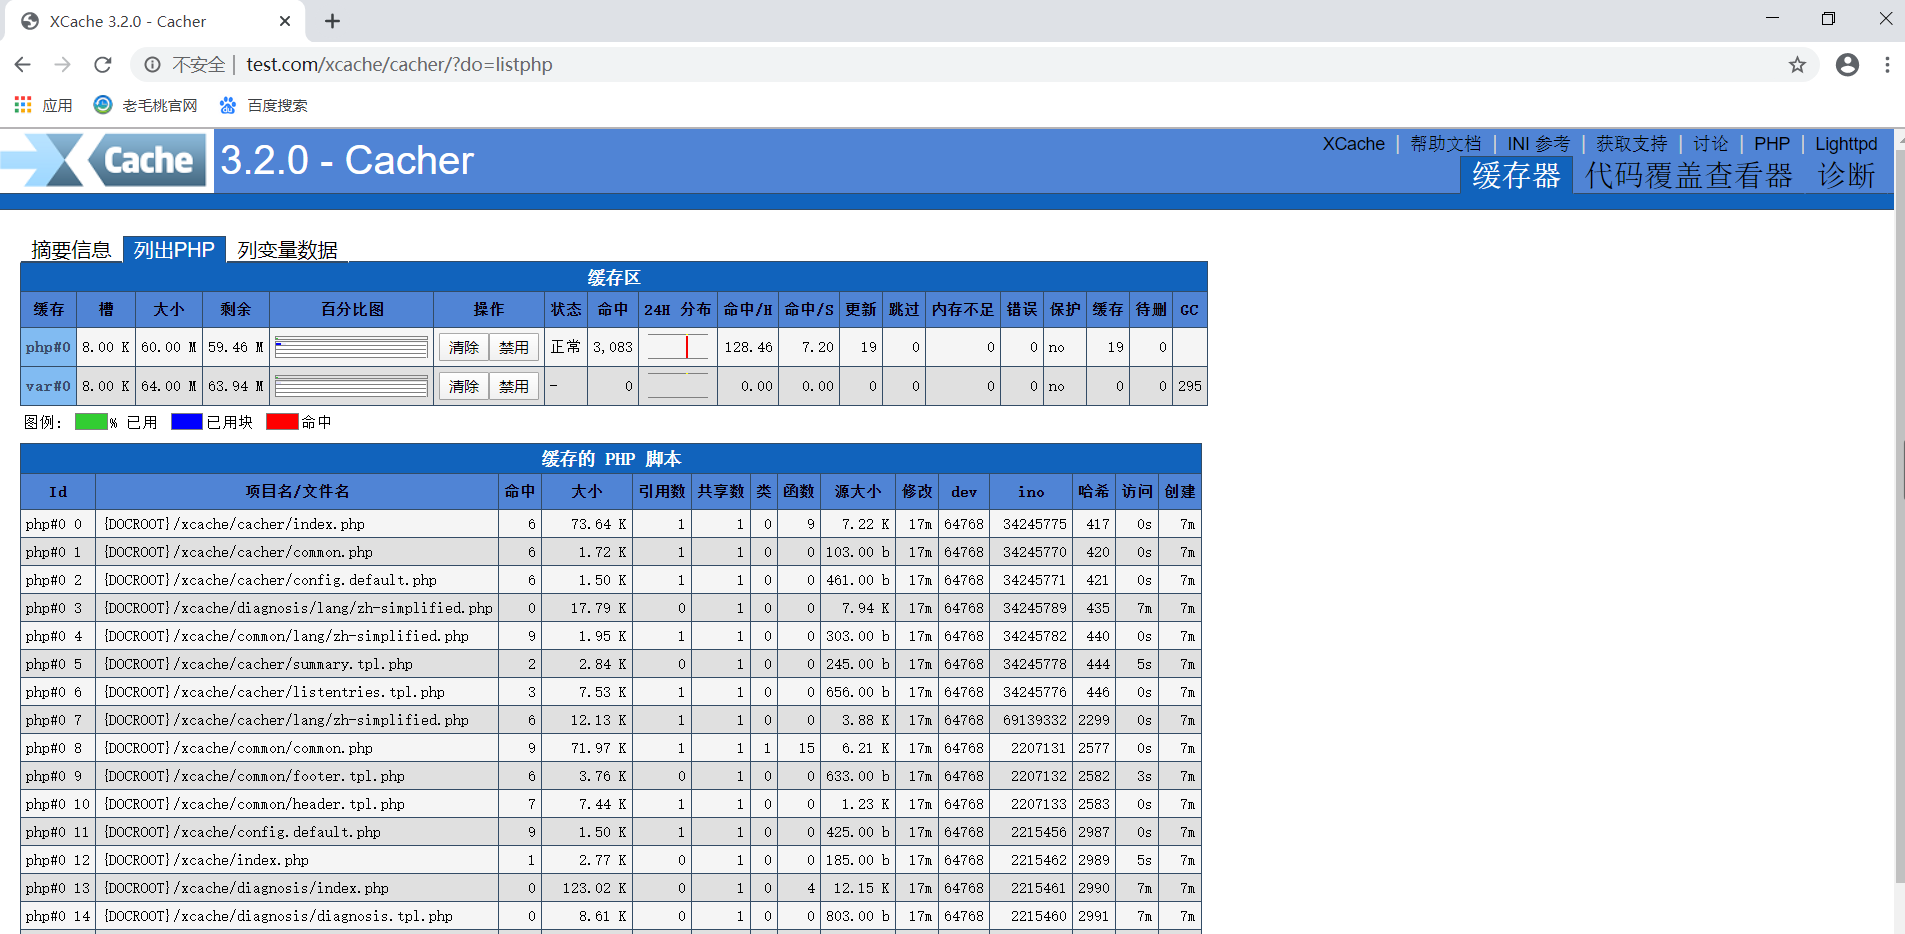
5. Deployment of bbs Forums
Operations on the PHP server:
Previously downloaded packages had source packages for bbs forums, pull them over and use them
[root@php php]# unzip Discuz_7.0.0_FULL_SC_UTF8.zip
[root@php php]# cd Discuz_7.0.0_FULL_SC_UTF8/
[root@php Discuz_7.0.0_FULL_SC_UTF8]# cp -r upload/ /var/www/html/bbs
[root@php Discuz_7.0.0_FULL_SC_UTF8]# chmod -R 777 /var/www/html/bbs
[root@php /]# vim /etc/php.ini
......................     // Omit some content
short_open_tag = On            # Modify Off to On by navigating to this line

[root@php /]# service php-fpm restart
Gracefully shutting down php-fpm . done
Starting php-fpm  done
Configure bbs (use the same user you used to test the linked database for bbs forums)
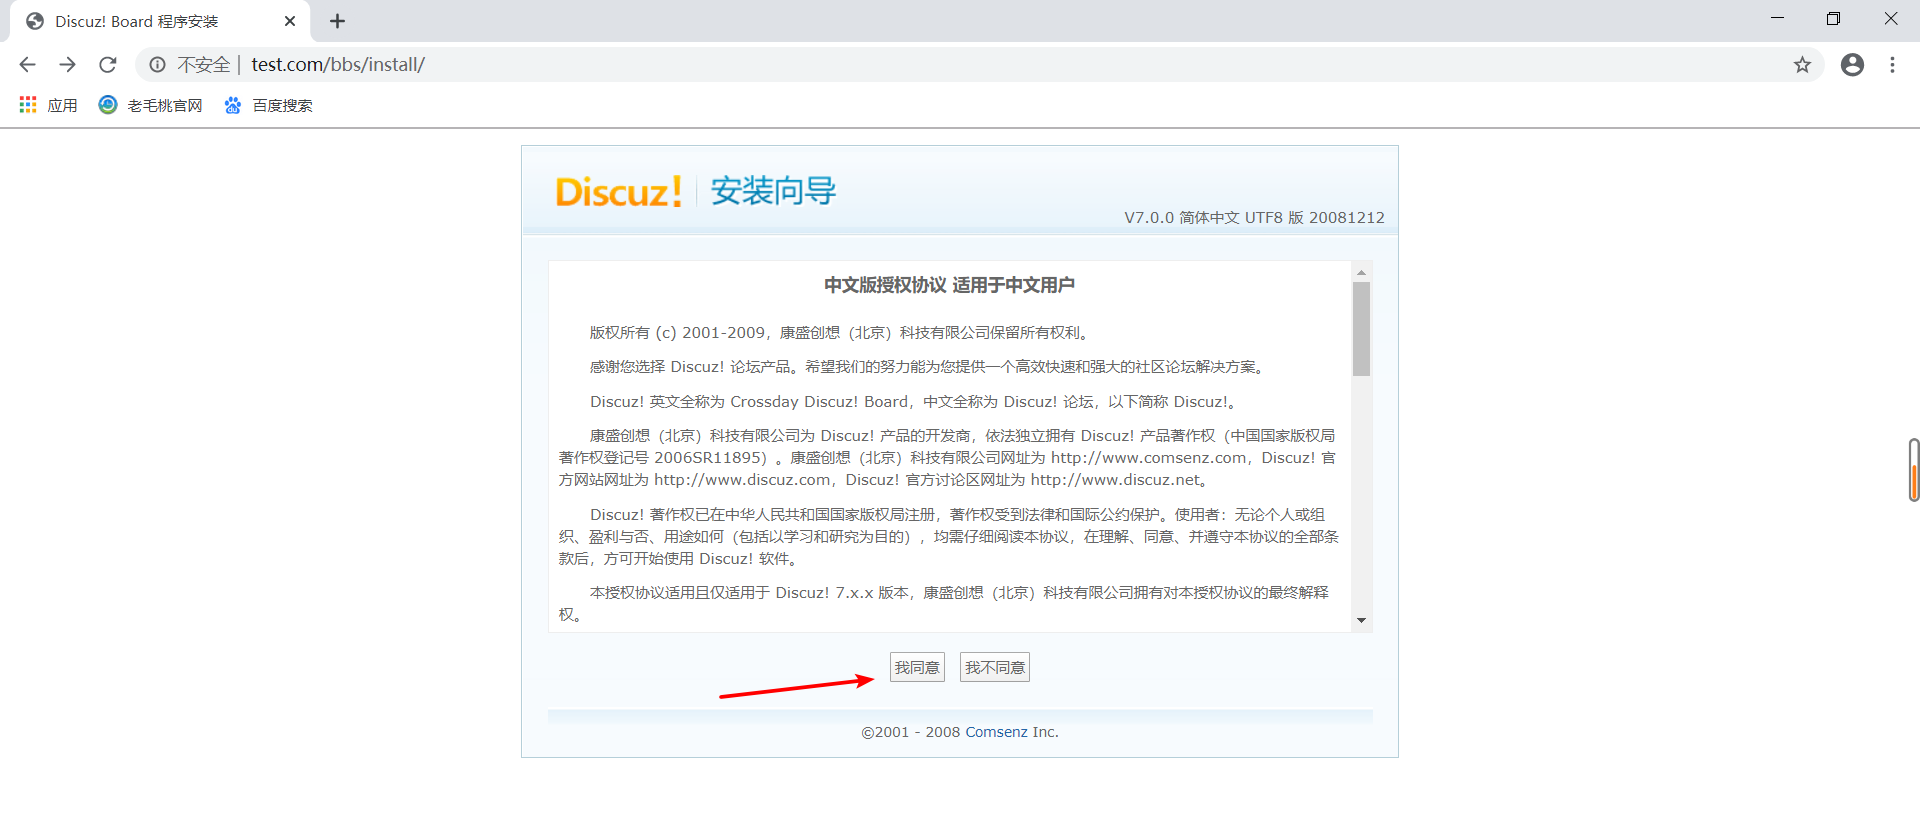
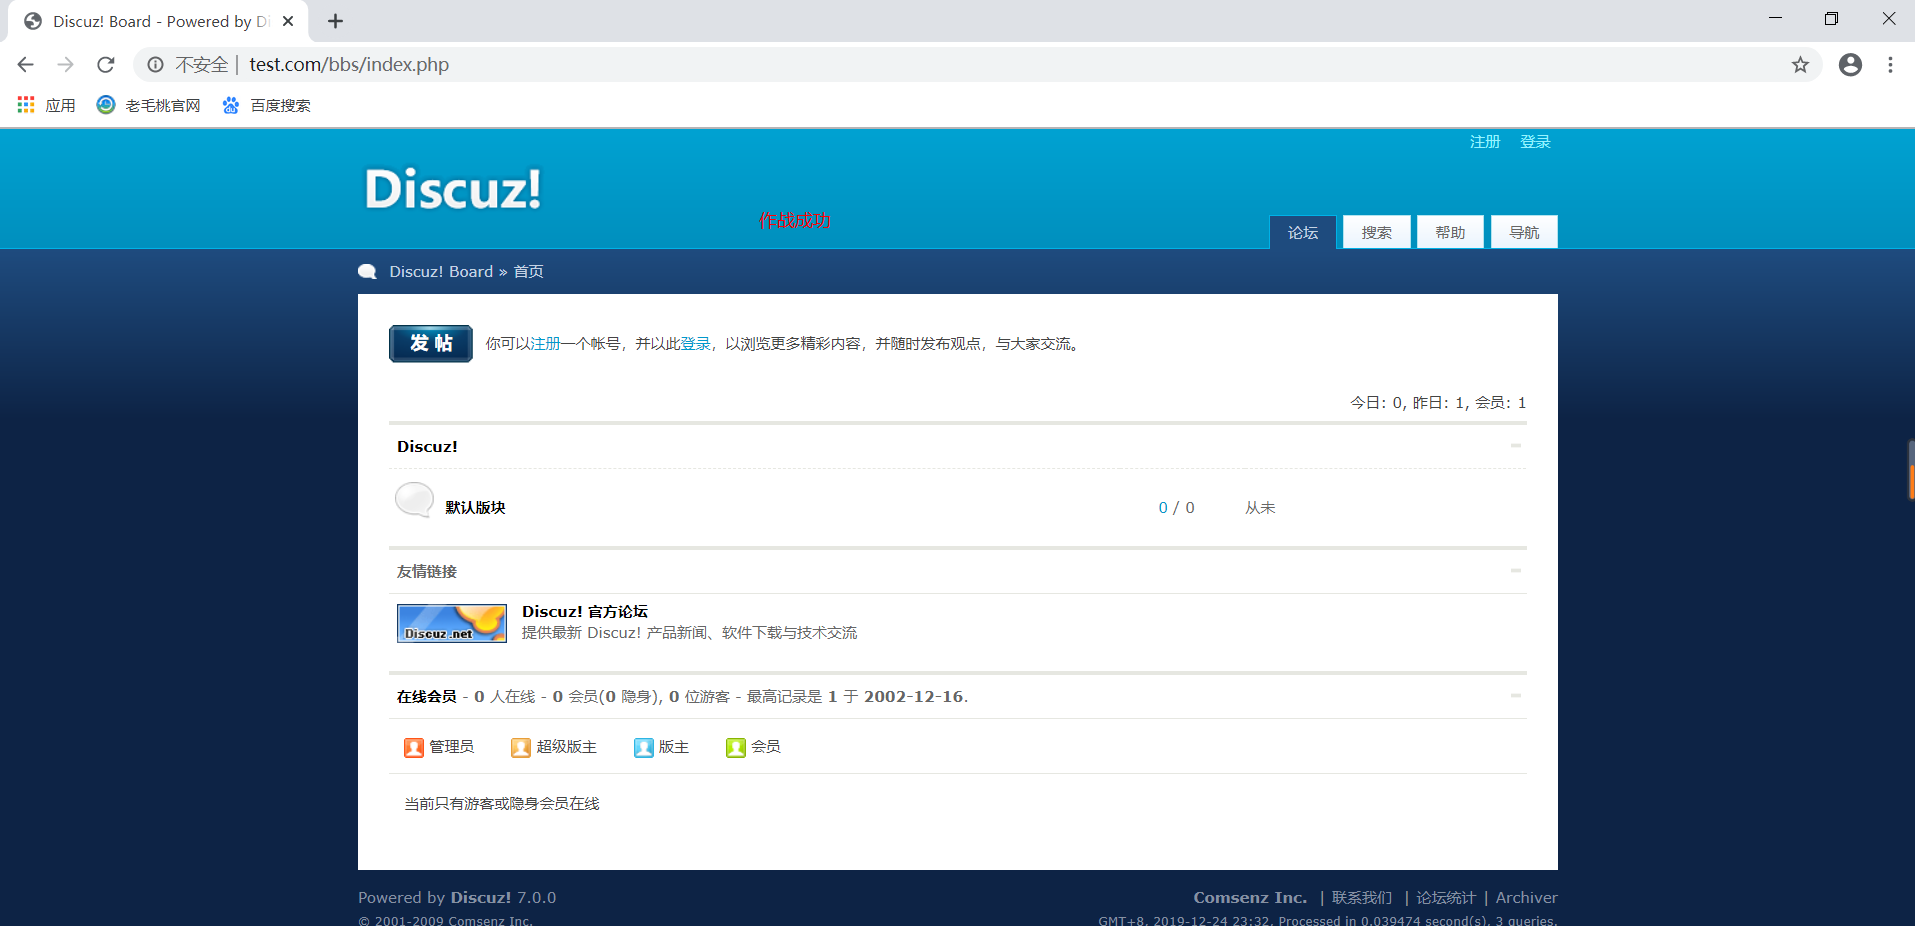
Visit www.test.com/bbs/install