
**WordPress is a commonly used software for building personal blog websites, which is developed in PHP language.
-
Build nginx
By default, CentOS 7.6 does not have the source of nginx. You need to configure the official website of nginx to provide the source address of Gentos.
-
Configure nginx source
[root@hl-web lnmp-wordpress]# rpm -Uvh http://nginx.org/packages/centos/7/noarch/RPMS/nginx-release-centos-7-0.el7.ngx.noarch.rpm

[root@hl-web ~]# yum search nginx
-
Installing nginx
[root@hl-web ~]#  yum install -y pcre-devel openssl-devel #Install nginx dependency package
[root@hl-web ~]# yum install -y nginx
-
Realize PHP linkage
-
Configure the / etc/nginx/conf.d/default.conf file of nginx,
server { listen 80; server_name 192.168.0.116; #access_log /var/log/nginx/host.access.log main; location / { root /usr/share/nginx/html/wordpress; index index.html index.htm index.php; } error_page 500 502 503 504 /50x.html; location = /50x.html { root /usr/share/nginx/html; } location ~ \.php$ { root /usr/share/nginx/html/wordpress; fastcgi_pass 127.0.0.1:9000; fastcgi_index index.php; fastcgi_param SCRIPT_FILENAME $document_root$fastcgi_script_name; include fastcgi_params; } } -
Or there are / etc/nginx/nginx.conf files for configuring nginx
http {
    log_format  main  '$remote_addr - $remote_user [$time_local] "$request" '
                      '$status $body_bytes_sent "$http_referer" '
                      '"$http_user_agent" "$http_x_forwarded_for"';

    access_log  /var/log/nginx/access.log  main;

    sendfile            on;
    tcp_nopush          on;
    tcp_nodelay         on;
    keepalive_timeout   65;
    types_hash_max_size 4096;

    include             /etc/nginx/mime.types;
    default_type        application/octet-stream;

    # Load modular configuration files from the /etc/nginx/conf.d directory.
    # See http://nginx.org/en/docs/ngx_core_module.html#include
    # for more information.

    # Load modular configuration files from the /etc/nginx/conf.d directory.
    # See http://nginx.org/en/docs/ngx_core_module.html#include
    # for more information.
    include /etc/nginx/conf.d/*.conf;

    server {
        listen       80;
        listen       [::]:80;
        server_name  121.41.90.219;
        root         /usr/share/nginx/html/wordpress;
        index        index.php index.html;

        # Load configuration files for the default server block.
        include /etc/nginx/default.d/*.conf;

        error_page 404 /404.html;
        location = /404.html {
        }

        error_page 500 502 503 504 /50x.html;
        location = /50x.html {
        }

        location ~ \.php$ {
         root           /usr/share/nginx/html/wordpress;
         fastcgi_pass   127.0.0.1:9000;
         fastcgi_index  index.php;
         fastcgi_param  SCRIPT_FILENAME  $document_root$fastcgi_script_name;
         include        fastcgi_params;
       }

    }
-
-
Add domain name * * (add localhost to the accessible web address)**
You need to modify the configuration file and write localhost to the file[root@hl-web ~]# vim /etc/hosts
The revised content is as follows:
127.0.0.1 localhost
-
Start nginx and set the startup auto start
[root@hl-web ~]# systemctl start nginx       #Start nginx service
[root@hl-web ~]# systemctl enable nginx      #Set linux boot to automatically start nginx
-
Task: two domain names are hung on nginx and can be accessed through the domain name
-
Idea * *: a domain name has been added above: localhost. The code written in adding two domain names is similar to the above. This time, we put the two domain names in different folders to make you better understand the code through comparison**
-
First modify / etc/nginx/conf.d/default.conf
[root@hl-web ~]# vim /etc/nginx/conf.d/default.conf
The revised content is:
-
server {
    listen       80;
    server_name  192.168.0.116;

    #access_log  /var/log/nginx/host.access.log  main;

    location / {
        root   /usr/share/nginx/html/wordpress;
        index index.html index.htm index.php;
    }

    #error_page  404              /404.html;

    # redirect server error pages to the static page /50x.html
    #
    error_page   500 502 503 504  /50x.html;
    location = /50x.html {
        root   /usr/share/nginx/html;
    }

    # proxy the PHP scripts to Apache listening on 127.0.0.1:80
    #
    #location ~ \.php$ {
    #    proxy_pass   http://127.0.0.1;
    #}

    # pass the PHP scripts to FastCGI server listening on 127.0.0.1:9000
    #
    location ~ \.php$ {
         root           /usr/share/nginx/html/wordpress;
         fastcgi_pass   127.0.0.1:9000;
         fastcgi_index  index.php;
         fastcgi_param  SCRIPT_FILENAME  $document_root$fastcgi_script_name;
         include        fastcgi_params;
       }

    # deny access to .htaccess files, if Apache's document root
    # concurs with nginx's one
    #
    #location ~ /\.ht {
    #    deny  all;
    #}
}


#www.hl02.com
server {
    listen       80;
    root   /usr/share/nginx/html/hl02;
    server_name  www.hl02.com;
    #charset koi8-r;
    #access_log  /var/log/nginx/log/host.access.log  main;

    location / {
            index hl02.html;
    }
}

#www.hl01.com
server {
    listen       80;
    root   /usr/share/nginx/html/hl01;
    server_name  www.hl01.com;
    #charset koi8-r;
    #access_log  /var/log/nginx/log/host.access.log  main;

    location / {
            index hl01.html;
    }
}
-
-
-
Next, add the newly added domain name to / ect/hosts
[root@hl-web ~]# vim /etc/hosts
The revised content is:
127.0.0.1 localhost www.hl01.com www.hl02.com
-
The last step is to create the site directory and file corresponding to the domain name, that is, to write a new html file of the display page
[root@hl-web ~]# cd /usr/share/nginx/html/
[root@hl-web html]# mkdir hl01
[root@hl-web hl01]# echo "I'm www.hl01. Com" > > hl01.html
[root@hl-web html]# mkdir hl02
[root@hl-web html]# cd hl02
[root@hl-web hl02]# echo "I'm www.hl02. Com" > > hl02.html
-
Restart nginx service
[root@hl-web hl01]# systemctl restart nginx
-
Verify whether the domain name is added successfully
Enter the newly added domain name in the browser address bar to see if it is the corresponding html page -
Build PHP
- Configure PHP source
[root@hl-web ~]# rpm -Uvh https://mirrors.cloud.tencent.com/epel/epel-release-latest-7.noarch.rpm
[root@hl-web ~]# rpm -Uvh https://mirror.webtatic.com/yum/el7/webtatic-release.rpm
- Install the package required for PHP FPM
[root@hl-web ~]# yum -y install mod_php72w.x86_64 php72w-cli.x86_64 php72w-common.x86_64 php72w-mysqlnd php72w-fpm.x86_64 php72w-gd
- Start PHP FPM and set boot auto start
[root@hl-web ~]# systemctl start php-fpm.service
[root@hl-web ~]# systemctl enable php-fpm.service
- Configure PHP source
-
Install Mysql
-
1 download and install the official Yum Repository of MySQL
[root@localhost ~]# wget -i -c http://dev.mysql.com/get/mysql57-community-release-el7-10.noarch.rpm
**Use the above command to directly download the Yum Repository for installation, which is about 25KB, and then you can install it directly using yum**
[root@localhost ~]# yum -y install mysql57-community-release-el7-10.noarch.rpm
**Then start installing the MySQL server**
[root@localhost ~]# yum -y install mysql-community-server
**This step may take some time, and the previous mariadb will be overwritten after the installation is completed**
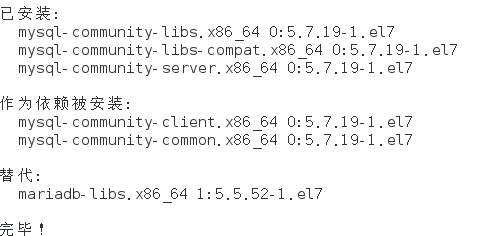
At this point, MySQL installation is complete, and then some settings for MySQL.
2 MySQL database settings
**Start MySQL first**
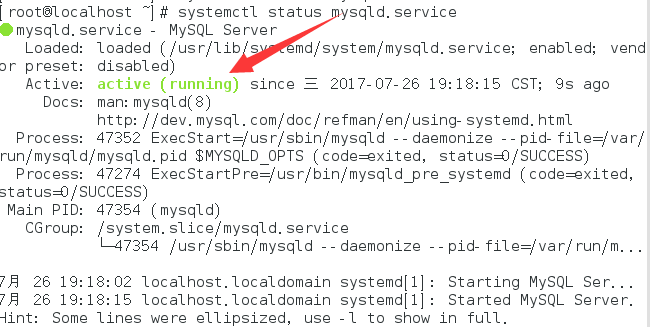
[root@localhost ~]# systemctl start mysqld.service
**View the running status of MySQL, as shown in the figure below:**
[root@localhost ~]# systemctl status mysqld.service
**At this time, MySQL is running normally. However, to enter mysql, you must first find the password of the root user. You can find the password in the log file through the following command:**
[root@localhost ~]# grep "password" /var/log/mysqld.log

**Enter the database with the following command:**
[root@localhost ~]# mysql -uroot -p
Passwords have security restrictions. You can modify it with the following command:
mysql> set global validate_password_policy=0;
mysql> set global validate_password_length=1;
Then you can change the password
set password='new password'
After setting, there are the values I found above. At this time, the password can be set very simply, such as 1234. The password setting for this database is complete.
**However, there is another problem at this time. Because Yum Repository is installed, it will be updated automatically every time yum operation is performed in the future. You need to uninstall this:**
[root@localhost ~]# yum -y remove mysql57-community-release-el7-10.noarch
**It's really finished at this time**
-
-
Install wordpress
- Download the Chinese version of WorldPress-5.0.4 from the official WordPress website
[root@pert ~]# wget https://cn.wordpress.org/latest-zh_CN.tar.gz
[root@pert ~]# tar zxvf latest-zh_CN.tar.gz
-
The extracted wordpress should be in the directory of / usr/share/nginx/html
-
Configuration database
- Create WordPress database
[root@hl-web html]# mysql -u root -p
MariaDB [(none)]> create database wordpress;
Query OK, 1 row affected (0.001 sec)
- Create wordpress user and set password
MariaDB [(none)]> CREATE USER 'root'@'%' IDENTIFIED BY 'password';
explain:
username: the user name you will create
Host: specify the host on which the user can log in. If it is a local user, localhost can be used. If you want the user to * * log in from any remote host *****************************************************
Password: the login password of the user. The password can be blank. If it is blank, the user can log in to the server without a password
- Authorize users
GRANT ALL ON *.* TO 'username'@'host';
- Refresh permissions
flush privileges;
-
Write database information
- Enter the WordPress installation directory, copy the wp-config-sample.php file to the wp-config.php file, and keep the original sample configuration file as a backup
[root@hl-web html]# cd wordpress/
[root@hl-web wordpress]# cp wp-config-sample.php wp-config.php
- Open wp-config.php and write the configured database related information to the
[root@hl-web wordpress]# vim wp-config.php /** WordPress Name of the database */ define('DB_NAME', 'wordpress'); /** MySQL Database user name */ define('DB_USER', 'root'); /** MySQL Database password */ define('DB_PASSWORD', 'password'); /** MySQL host */ define('DB_HOST', 'localhost'); /** Default text encoding when creating a data table */ define('DB_CHARSET', 'utf8'); /** Database collation type. Do not change if unsure */ define('DB_COLLATE', ''); - Verify wordpress, browser input http://192.168.0.116
- Enter the WordPress installation directory, copy the wp-config-sample.php file to the wp-config.php file, and keep the original sample configuration file as a backup