I. KVM overview
KVM is the abbreviation of Kernel Virtual Machine. At present, Linux distribution must run KVM in 64 bit system environment, and the hardware needs to support VT technology.
1. Case pre knowledge points
KVM has been directly integrated into Linux kernel since Linux version 2.6.20. It relies on CPU virtualization instruction set (such as Intel-VT, AMD-V) to achieve high-performance virtualization support. Because it is highly integrated with Linux kernel, it has good performance in performance, security, compatibility and stability.
The figure below is a simple KVM virtualization architecture. Each virtualization operating system running in the KVM environment will represent a single independent system process. Therefore, it can easily integrate with the security module of Linux system (SELinux), and can flexibly manage and allocate resources.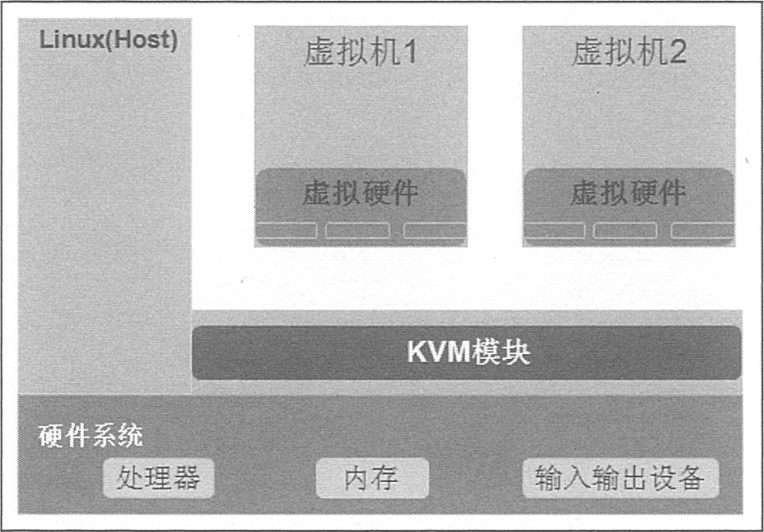
II. Implementation cases
1. Environmental requirements:
- Three Centos operating systems;
- 1 Windiws 7 operating system;
Please visit: https://pan.baidu.com/s/1fPhMgWJAjnmgJI5w267QCA
Extraction code: 7x2p
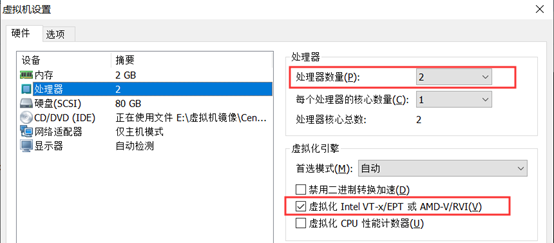
2. Edit virtual machine to support virtualization
1) change the number of processors to 2 and check virtualization engine
2) check whether the CPU supports virtualization
[root@centos01 ~]# cat /proc/cpuinfo | grep vmx
flags       : fpu vme de pse tsc msr pae mce cx8 apic sep mtrr pge mca cmov pat pse36 clflush dts mmx fxsr sse sse2 ss syscall nx pdpe1gb rdtscp lm constant_tsc arch_perfmon pebs bts nopl xtopology tsc_reliable nonstop_tsc aperfmperf eagerfpu pni pclmulqdq vmx ssse3 fma cx16 pcid sse4_1 sse4_2 x2apic movbe popcnt tsc_deadline_timer aes xsave avx f16c rdrand hypervisor lahf_lm abm 3dnowprefetch epb tpr_shadow vnmi ept vpid fsgsbase tsc_adjust bmi1 avx2 smep bmi2 invpcid rdseed adx smap xsaveopt dtherm ida arat pln pts hwp hwp_notify hwp_act_window hwp_epp
flags       : fpu vme de pse tsc msr pae mce cx8 apic sep mtrr pge mca cmov pat pse36 clflush dts mmx fxsr sse sse2 ss syscall nx pdpe1gb rdtscp lm constant_tsc arch_perfmon pebs bts nopl xtopology tsc_reliable nonstop_tsc aperfmperf eagerfpu pni pclmulqdq vmx ssse3 fma cx16 pcid sse4_1 sse4_2 x2apic movbe popcnt tsc_deadline_timer aes xsave avx f16c rdrand hypervisor lahf_lm abm 3dnowprefetch epb tpr_shadow vnmi ept vpid fsgsbase tsc_adjust bmi1 avx2 smep bmi2 invpcid rdseed adx smap xsaveopt dtherm ida arat pln pts hwp hwp_notify hwp_act_window hwp_epp
3. Install the software required by KVM
[root@centos01 ~]# ln -sf /lib/systemd/system/graphical.target
/etc/systemd/system/default.target
<!--Change the command line to graphical operation, and restart the virtual machine to take effect-->
[root@centos01 ~]# rm -rf /etc/yum.repos.d/CentOS-*
                                  <!--Delete system auto yum source-->
[root@centos01 ~]# Mount / dev / CDROM / MNT / <! -- mount operating system CD -- >
mount: /dev/sr0 Write protected, will be mounted read-only
[root@centos01 ~]# RPM - QA | grep QEMU kvm <! -- check whether the kvm module is installed -- >
qemu-kvm-1.5.3-141.el7.x86_64
qemu-kvm-common-1.5.3-141.el7.x86_64
[root@centos01 ~]# RPM - QA | grep QEMU kvm tools <! -- check whether the kvm debugging tool is installed -- >
[root@centos01 ~]# Yum - y install QEMU KVM tools <! -- install debugging tools -- >
[root@centos01 ~]# RPM - QA | grep QEMU kvm tools <! -- check whether the kvm debugging tool is installed successfully -- >
qemu-kvm-tools-1.5.3-141.el7.x86_64
[root@centos01 ~]# rpm -qa | grep virt-install
                        <!--Check if the create virtual machine tool is installed-->
[root@centos01 ~]# Yum - y install virt install <! -- install create virtual machine tool -- >
[root@centos01 ~]# RPM - QA | grep virt install <! -- check whether the virtual machine creation tool is installed successfully -- >
virt-install-1.4.1-7.el7.noarch
[root@centos01 ~]# RPM - QA | grep QEMU img <! -- check whether the disk management tool is installed -- >
qemu-img-1.5.3-141.el7.x86_64
[root@centos01 ~]# RPM - QA | grep bridge utils <! -- check if network tools are installed -- >
bridge-utils-1.5-9.el7.x86_64
[root@centos01 ~]# RPM - QA | grep libvirt <! -- check whether the virtual machine management tool is installed -- >
libvirt-daemon-driver-qemu-3.2.0-14.el7.x86_64
libvirt-client-3.2.0-14.el7.x86_64
libvirt-daemon-driver-interface-3.2.0-14.el7.x86_64
libvirt-daemon-driver-storage-disk-3.2.0-14.el7.x86_64
libvirt-daemon-driver-storage-3.2.0-14.el7.x86_64
libvirt-daemon-driver-storage-core-3.2.0-14.el7.x86_64
libvirt-daemon-driver-storage-mpath-3.2.0-14.el7.x86_64
libvirt-daemon-driver-storage-iscsi-3.2.0-14.el7.x86_64
libvirt-daemon-kvm-3.2.0-14.el7.x86_64
libvirt-daemon-driver-nodedev-3.2.0-14.el7.x86_64
libvirt-gconfig-1.0.0-1.el7.x86_64
libvirt-daemon-driver-storage-rbd-3.2.0-14.el7.x86_64
libvirt-daemon-driver-storage-scsi-3.2.0-14.el7.x86_64
libvirt-libs-3.2.0-14.el7.x86_64
libvirt-daemon-driver-network-3.2.0-14.el7.x86_64
libvirt-daemon-driver-nwfilter-3.2.0-14.el7.x86_64
libvirt-glib-1.0.0-1.el7.x86_64
libvirt-daemon-driver-storage-gluster-3.2.0-14.el7.x86_64
libvirt-daemon-3.2.0-14.el7.x86_64
libvirt-daemon-config-network-3.2.0-14.el7.x86_64
libvirt-gobject-1.0.0-1.el7.x86_64
libvirt-daemon-driver-storage-logical-3.2.0-14.el7.x86_64
libvirt-python-3.2.0-3.el7.x86_64
libvirt-daemon-driver-secret-3.2.0-14.el7.x86_64
[root@centos01 ~]# RPM - QA | grep virt manager <! -- check if the graphics management virtual machine tool is installed -- >
virt-manager-common-1.4.1-7.el7.noarch
[root@centos01 ~]# Yum - y install virt manager <! -- install graphics management virtual machine tool -- >
[root@centos01 ~]# rpm -qa | grep virt-manager
                          <!--Check if the graphics management virtual machine tool is installed successfully-->
virt-manager-1.4.1-7.el7.noarch
virt-manager-common-1.4.1-7.el7.noarch
[root@centos01 ~]# Lsmod | grep KVM <! -- check whether virtualization module is on -- >
kvm_intel             170086  0
kvm                   566340  1 kvm_intel
irqbypass              13503  1 kvm
[root@centos01 ~]# Systemctl start libvirtd <! -- start virtualization Service -- >
[root@centos01 ~]# Systemctl enable libvirtd <! - set auto start when power on -- >
4. Use WinSCP tool to import image
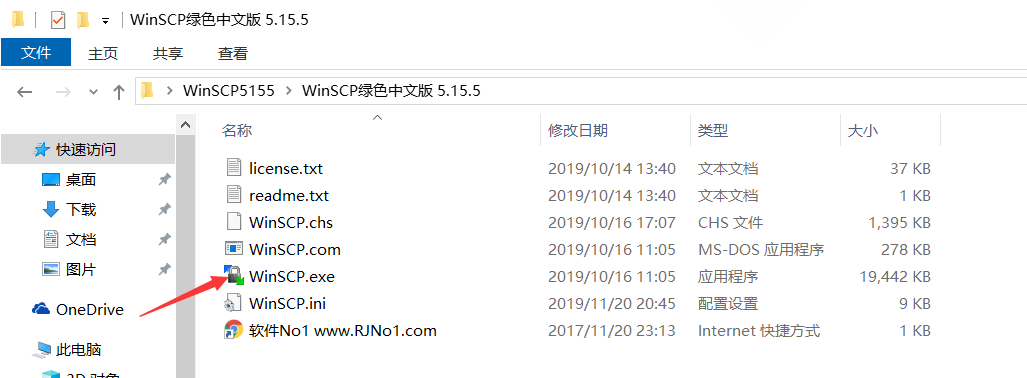
1) use winSCP to import the operating system CD into the virtualization Manager (for tools, please visit the network disk to extract by yourself)
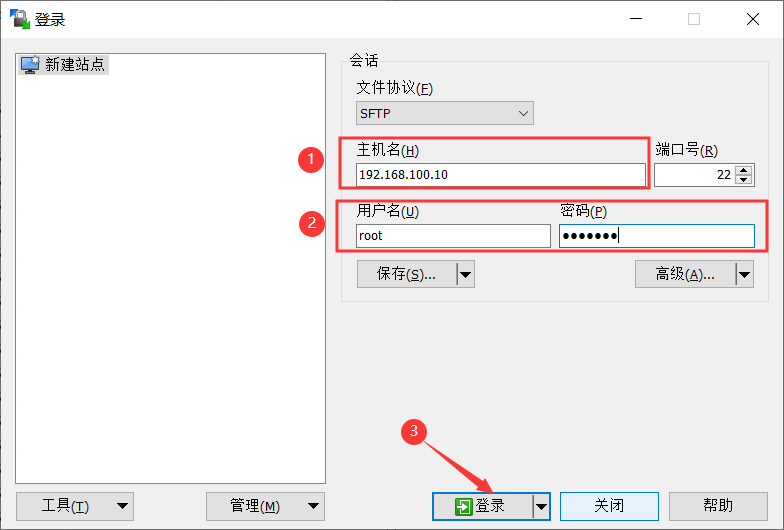
2) enter the IP address and user name password, and then log in
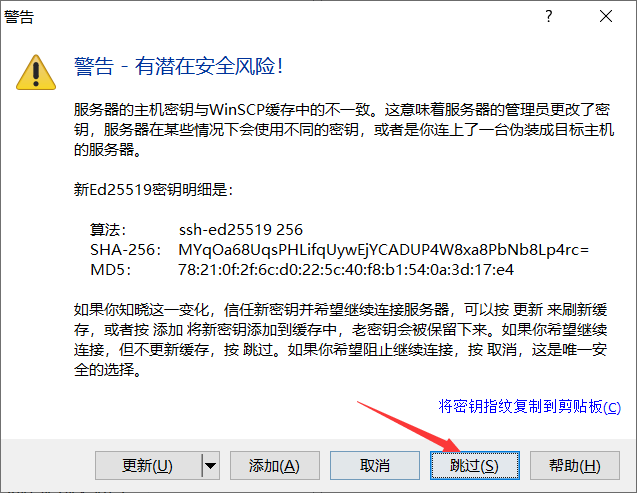
3) skip the warning
4) import the operating system
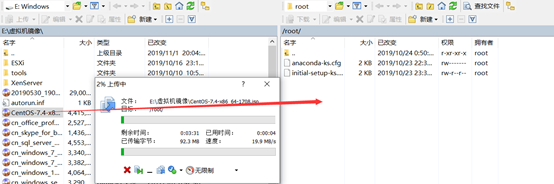
5) verify whether the upload is successful
[root@centos01 ~]# PWD <! -- view current location -- >
/root
[root@centos01 ~]# Ls <! -- verify whether the upload is successful -- >
anaconda-ks.cfg  CentOS-7.4-x86_64-1708.iso  initial-setup-ks.cfg
5. Virtualization manager creates virtual machine
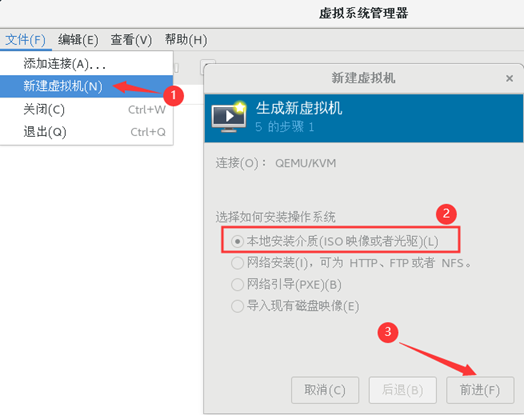
1) open virtualization Manager
[root@centos01 ~]# virt-manager
2) create a new virtual machine
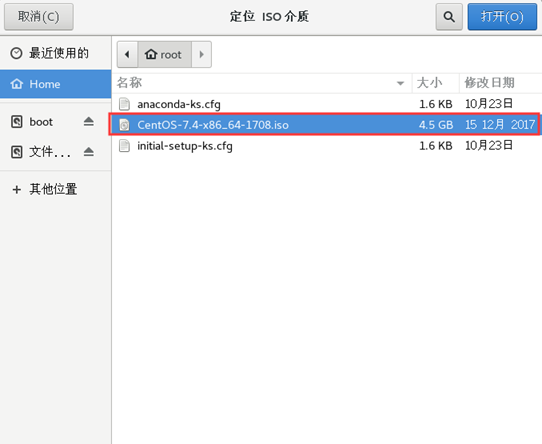
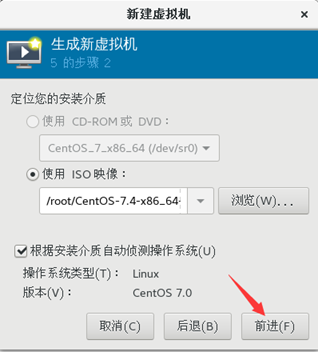
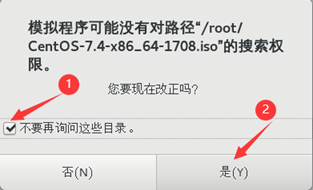
3) browse operating system CD

4) select disc
5) keep the default and click forward
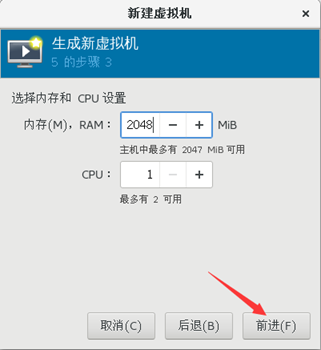
6) custom memory size
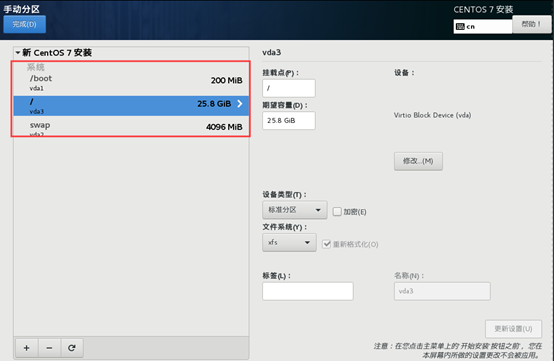
7) custom disk size

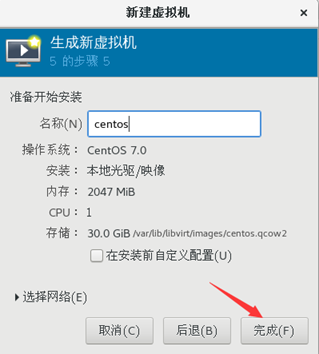
8) customize the virtual machine name, and click finish
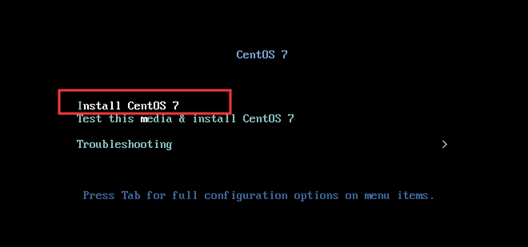
9) select the first line and press enter to start the installation
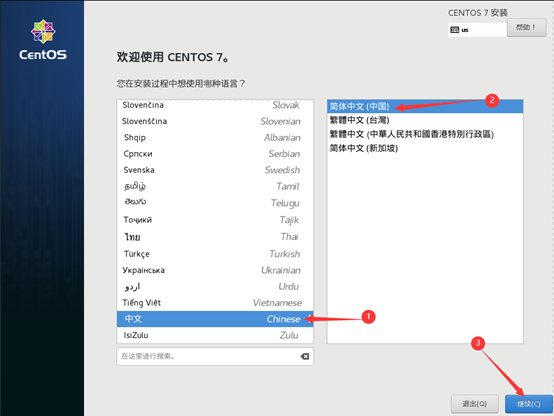
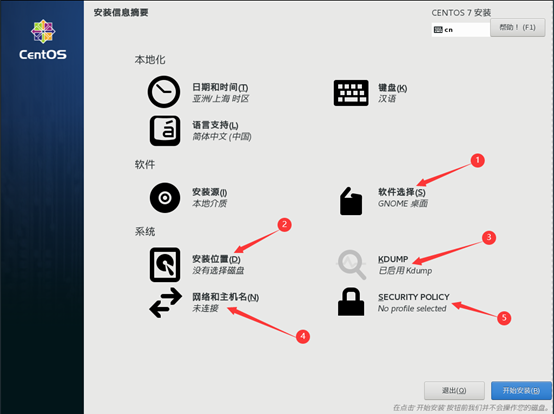
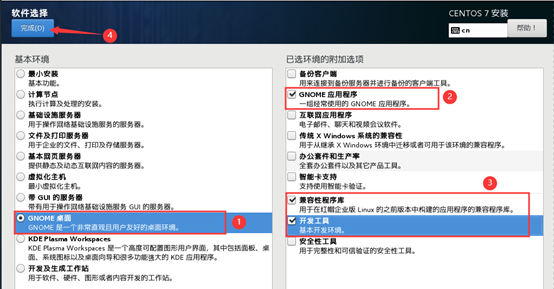
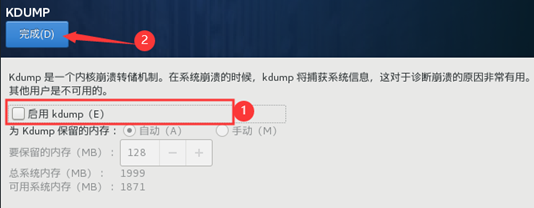
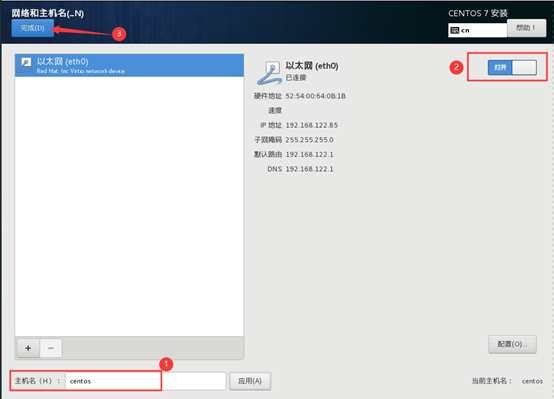
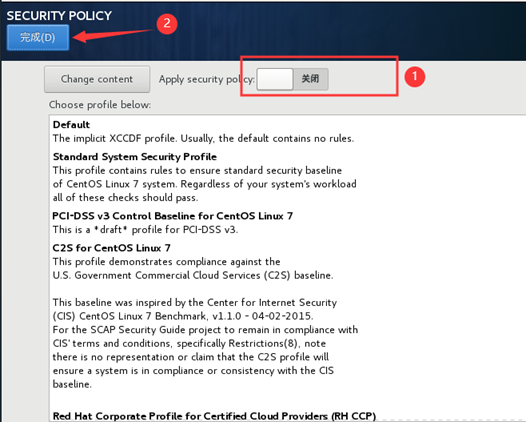
10) start initialization configuration

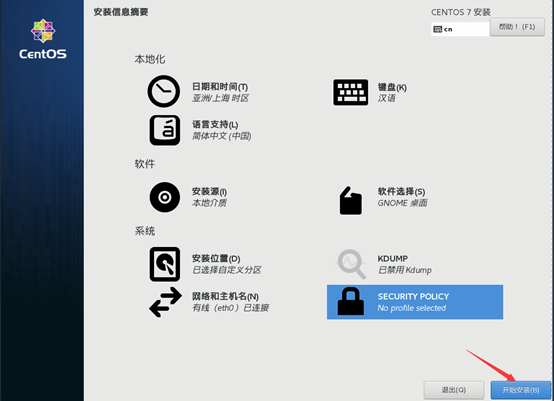
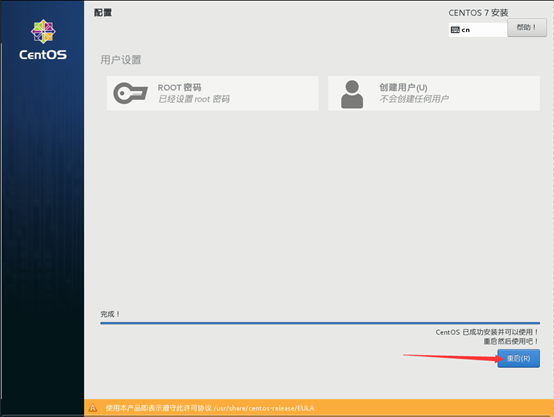
11) after the installation, restart the virtual machine
12) acceptance of license agreement
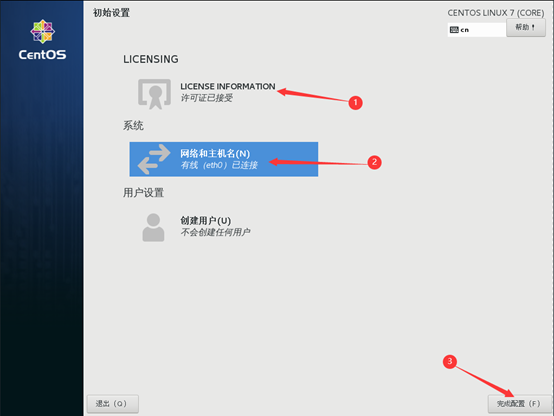
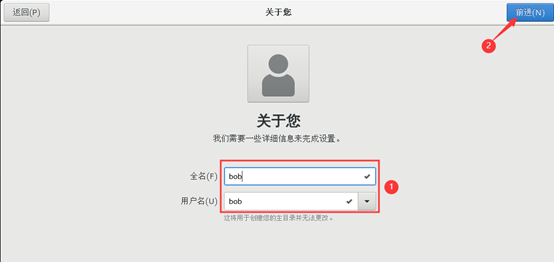
13) create account
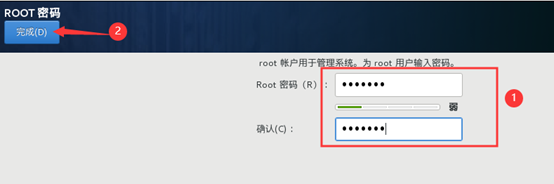
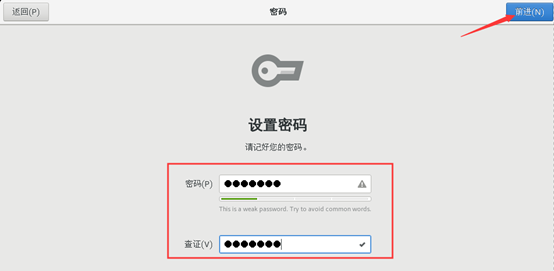
14) account setting password
III. basic management and use of virtualization
1) view the running status of virtual machine
[root@centos01 ~]# virsh list --all
 Id    Name                         state
----------------------------------------------------
 2     centos                         running
2) shut down the virtual machine
[root@centos01 ~]# virsh shutdown centos
 Domain centos is turned off
3) start virtual machine
[root@centos01 ~]# virsh start centos
 Domain centos started
4) set the virtual machine to start automatically
[root@centos01 ~]# virsh autostart centos
 Domain centos is marked as auto start
5) force virtual machine shutdown
[root@centos01 ~]# virsh destroy centos
 Domain centos deleted
1. Suspend and restore virtual machine
1) suspend virtual machine
[root@centos01 ~]# virsh suspend centos
 Domain centos is suspended
2) recover the suspended virtual machine
[root@centos01 ~]# virsh resume centos
 Domain centos is restored
2. Backup and restore virtual machine
1) backup virtual machine
[root@centos01 ~]# virsh dumpxml centos > /etc/libvirt/qemu/centos01.xml
2) delete virtual machine
[root@centos01 ~]# virsh undefine centos
 Domain centos has been undefined
3) view the backup virtual machine
[root@centos01 ~]# cd /etc/libvirt/qemu/
[root@centos01 qemu]# ls
autostart  centos01.xml  networks
4) restore virtual machine
[root@centos01 qemu]# virsh define centos01.xml
//Define domain CentOS (from centos01.xml)
5) view the operation status of the recovery virtual machine
[root@centos01 ~]# virsh list --all
 Id    Name                         state
----------------------------------------------------
 4     centos                         running
6) two methods of modifying virtual machine configuration file
[root@centos01 ~]# vim /etc/libvirt/qemu/centos.xml
[root@centos01 ~]# virsh edit centos
3. Clone and snapshot
1) clone virtual machine
[root@centos01 ~]# virsh shutdown centos
//Domain centos is turned off
[root@centos01 ~]# virt-clone -o centos -n centos02 -f /var/lib/libvirt/images/centos02.qcow2
//Allocating 'centos02. Qcow2' | 30 GB 00:11

//Successfully cloned 'centos02'.
2) create a snapshot
[root@centos01 ~]# virsh snapshot-create centos
 Domain snapshot 15744274181 generated
3) restore snapshot
[root@centos01 ~]# virsh snapshot-revert centos 1574274181
4) view snapshot
[root@centos01 ~]# virsh snapshot-list centos
 Name generation time status
------------------------------------------------------------
 1574274181           2019-11-21 02:23:01 +0800 shutoff
5) delete snapshot
[root@centos01 ~]# virsh snapshot-delete centos 1574274181
 Deleted domain snapshot 15744274181

[root@centos01 ~]# virsh snapshot-list centos
 Name generation time status
------------------------------------------------------------
——————Thank you for reading——————