Gitlab is an open source application developed using Ruby on Rails that implements a Git project repository that can be accessed through a Web interface from public or private projects Gitlab has similar capabilities as Github to browse source code, manage bugs and comments.Can manage team access to the repository, he is very easy to browse submitted versions and provides a file history library.He also provides a code snippet collection function that makes code reuse easy to find when needed in the future.
Recommended reference for more information about gitlab gitlab website Learn more!
Blog Outline:
1. Preparing the environment
2. Install Gitlab
3. Sinicized Gitlab
4. Basic gitlab operations
5. Basic operations of remote repositories
6. Reset gitlab administrator password
1. Preparing the environment
| operating system | Memory | CPU |
|---|---|---|
| centos 7 | 4G or more | Dual Core |
2. Install Gitlab
1) Dependencies required to install Gitlab
[root@gitlab ~]# yum -y install epel-release curl openssh-server openssh-clients postfix cronie policycoreutils-python
2) Get the RPM package for Gitlab
Method 1: Obtain the software package through the open source mirror station of Tsinghua University (recommended)
[root@gitlab ~]# wget https://mirrors.tuna.tsinghua.edu.cn/gitlab-ce/yum/el7/gitlab-ce-12.3.5-ce.0.el7.x86_64.rpm
Method 2: Get packages from Gitlab's website (used when the network is stable)
[root@gitlab ~]# wget --content-disposition https://packages.gitlab.com/gitlab/gitlab-ce/packages/el/7/gitlab-ce-12.3.5-ce.0.el7.x86_64.rpm/download.rpm
3) Install Gitlab
[root@gitlab ~]# rpm -ivh gitlab-ce-12.3.5-ce.0.el7.x86_64.rpm
#Long installation time, patience, gitlab logo will appear during installation
4) Modify gitlab url and execute reconfigure
[root@gitlab ~]# vim /etc/gitlab/gitlab.rb         #Modify gitlab configuration file
....................................                 #Omit some content
external_url 'http://192.168.1.8'#Change this to your local IP address for easy access
[root@gitlab ~]# gitlab-ctl reconfigure        #Reconfiguring gitlab requires reconfiguring gitlab after installation, even if the configuration file is not modified
5) web Page Access Test
Figure: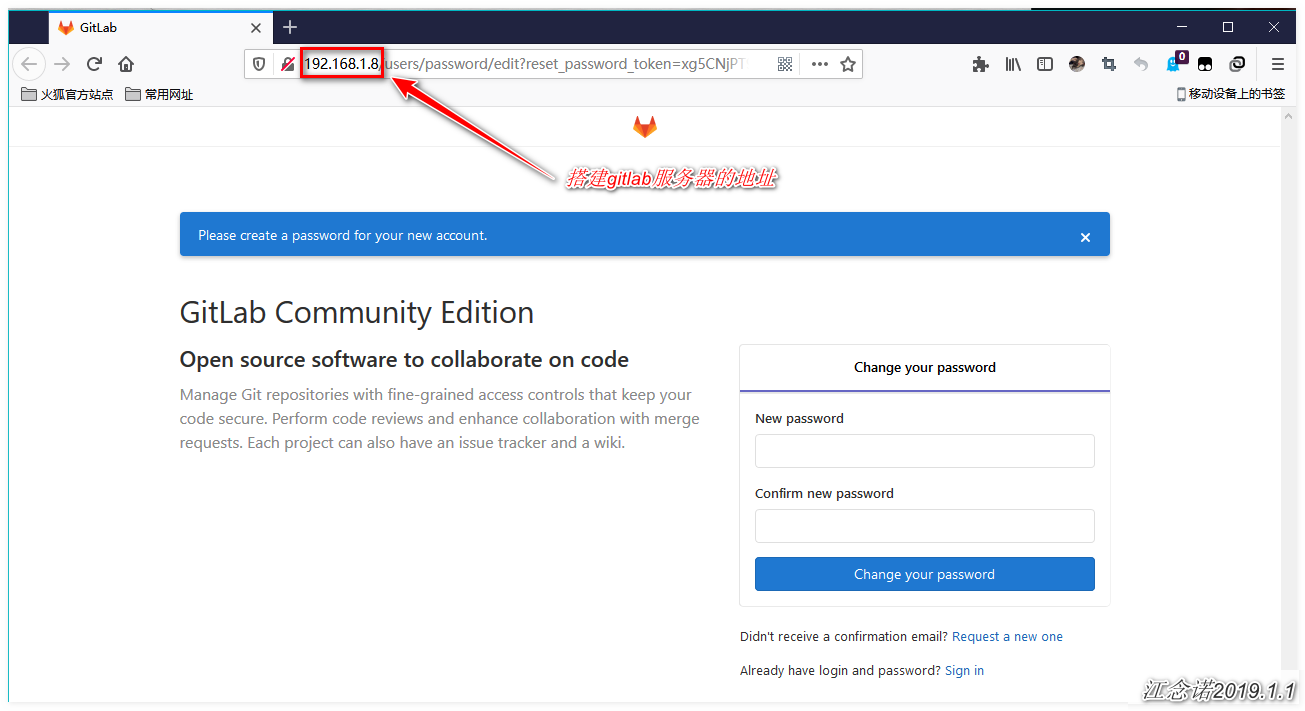
It is OK to access the expression, but they are all in English interface. It is a headache for me if my English is not good. Fortunately, there are some ways to make it Chinese, as follows!
3. Sinicized Gitlab
1) Get the gitlab sinicized patch pack (skip this step if Sinicization is not required)
[root@gitlab ~]# head -1 /opt/gitlab/version-manifest.txt           #View gitlab version
gitlab-ce 12.3.5
[root@gitlab ~]# git clone https://gitlab.com/xhang/gitlab.git -b v12.3.5-zh
#Get the Sinicized patch pack (note that it should be consistent with the gitlab version)
[root@gitlab ~]# cd gitlab/               #Enter the gitlab directory just below clone
[root@gitlab gitlab]# git diff v12.3.5 v12.3.5-zh > /root/v12.3.5-zh.diff
#Using diff to generate.Diff files by comparing the English version with the Chinese version
2) Import Chinese patches into gitlab
[root@gitlab gitlab]# gitlab-ctl stop              #Stop gitlab
[root@gitlab gitlab]# yum -y install patch
[root@gitlab gitlab]# patch -d /opt/gitlab/embedded/service/gitlab-rails -p1 <  ../v12.3.5-zh.diff
 #Import the just diff file into gitlab as a patch
#Skip all the way back during the command execution
[root@gitlab gitlab]# gitlab-ctl start                 #Start gitlab
[root@gitlab gitlab]# gitlab-ctl reconfigure      #Reconfigure gitlab
3) web Page Access Again
Figure: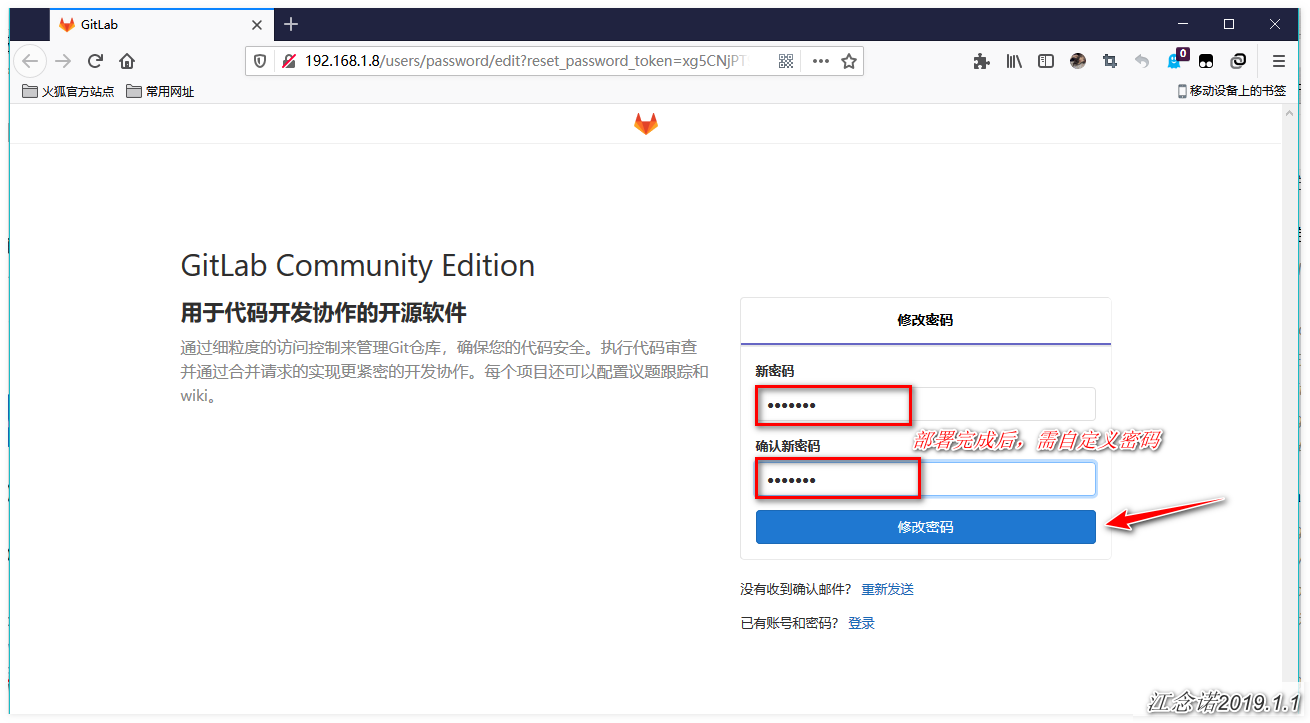
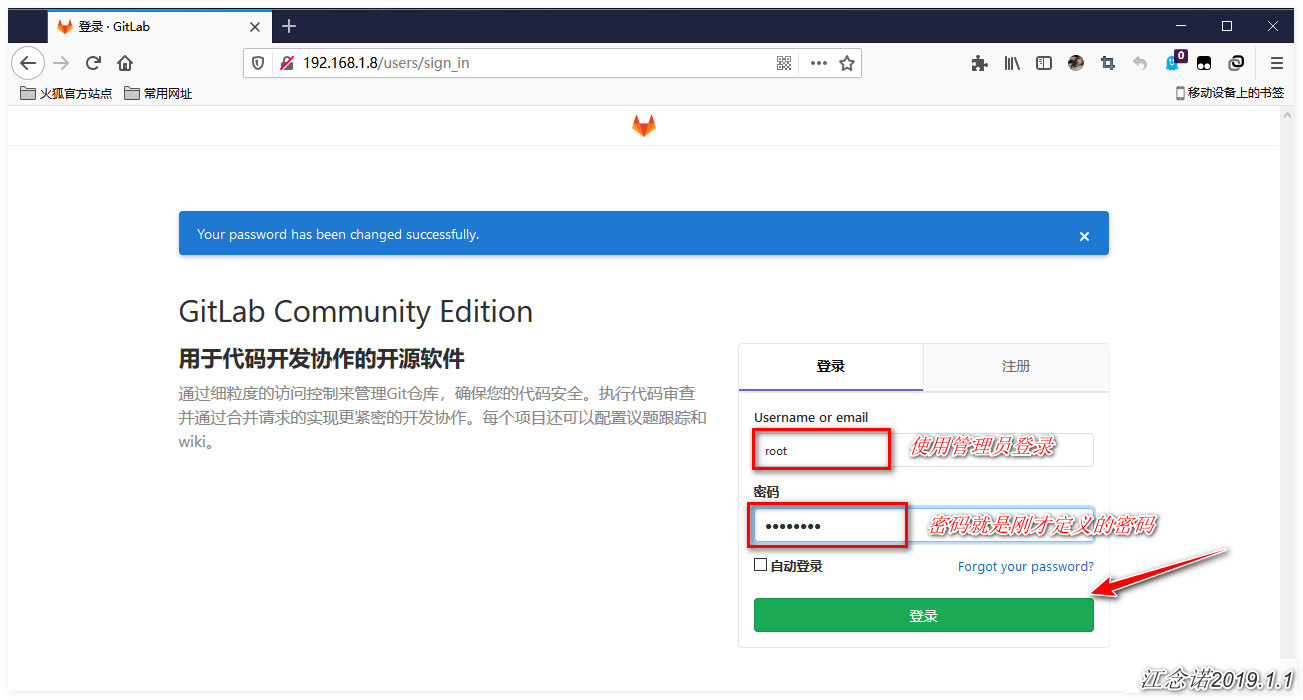
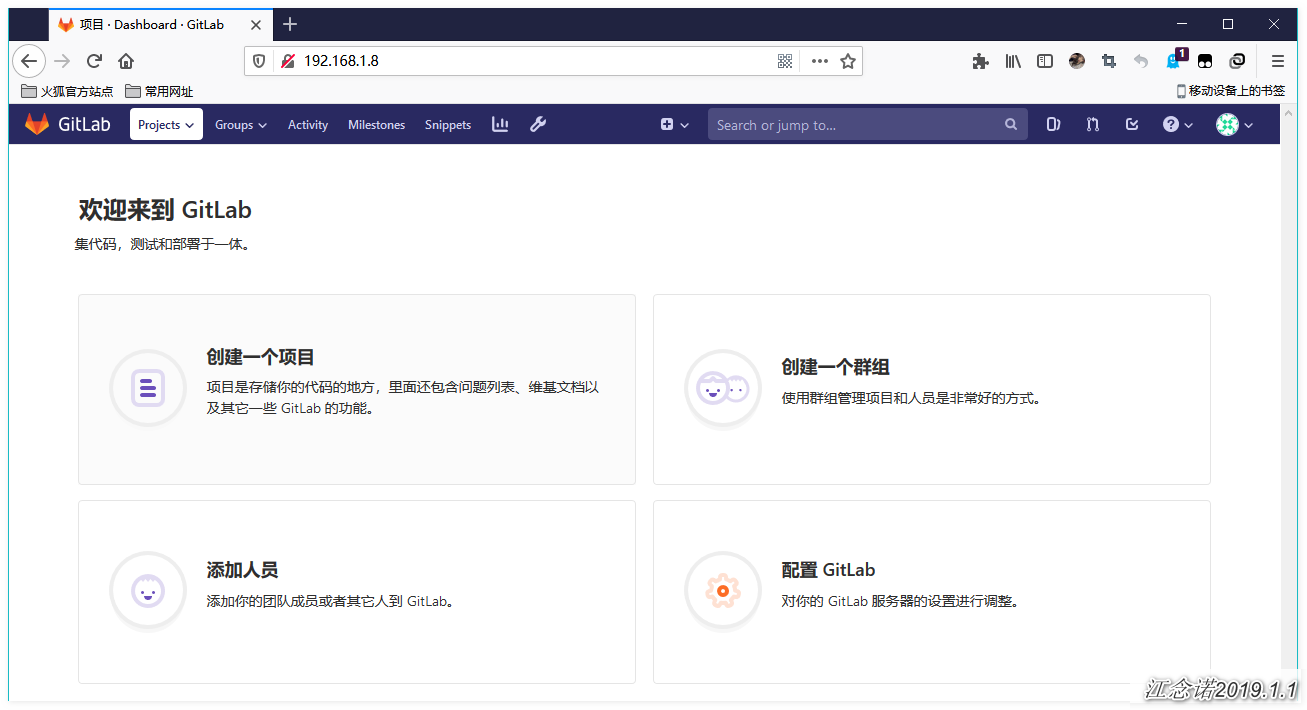
4. Basic gitlab operations
1) Configure SSH-based Secret Login
[root@gitlab ~]# ssh-keygen -t rsa -C "1454295320@qq.com"
#Generate a secret key pair and return all the way,'-C'followed by your own mailbox
[root@gitlab ~]# cat ~/.ssh/id_rsa.pub         #View generated public key and copy
ssh-rsa AAAAB3NzaC1yc2EAAAADAQABAAABAQCvNm+nXc59ugb0SGr9iMHDSFjvmdSJk0ORuX3hbjt822Y2ofXysUrIuBSQ1Jn0Rss/LPU54K32i4bIDsa/jD9gIpN/GqU+YP1MQ9bEw3YVUONAs+nYeWJWahQ1rMTeM0HC9aKvNTrNsOqrXIboJymBrs6Odt+1NnZsYHMwA/KlpYCFsi0HQgBzsLbrD5v++cIDTvM/V4rMq6fqFsfWoYYMHWc8JeNMl/aWJV1RhJpt7wm17FEv3XiH+wyoef5ZYI60IkH5qMJkjWhKcRXCWG5SH3nphUb1fmktB4DH92TW/EGw///VQEnE7tkpNjyJpOTXDuHnEk2tw43cctDN2sJH 1454295320@qq.com
Go back to the web page as follows: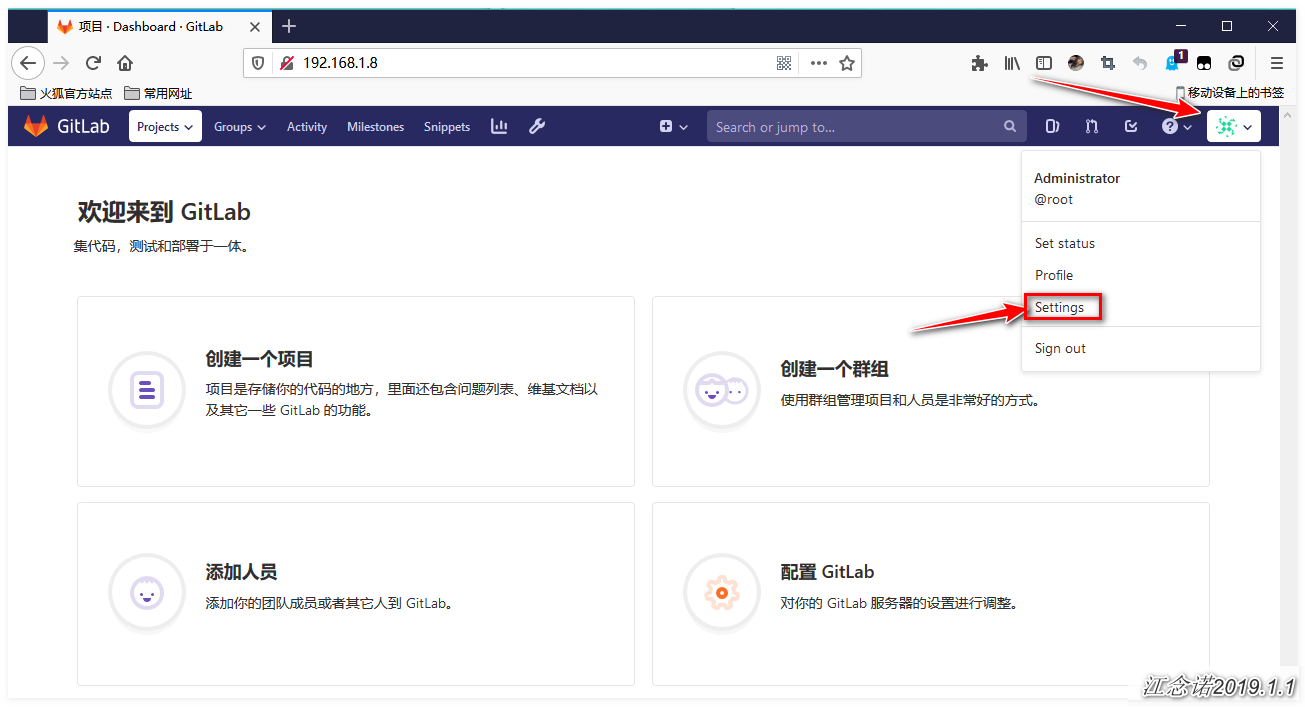
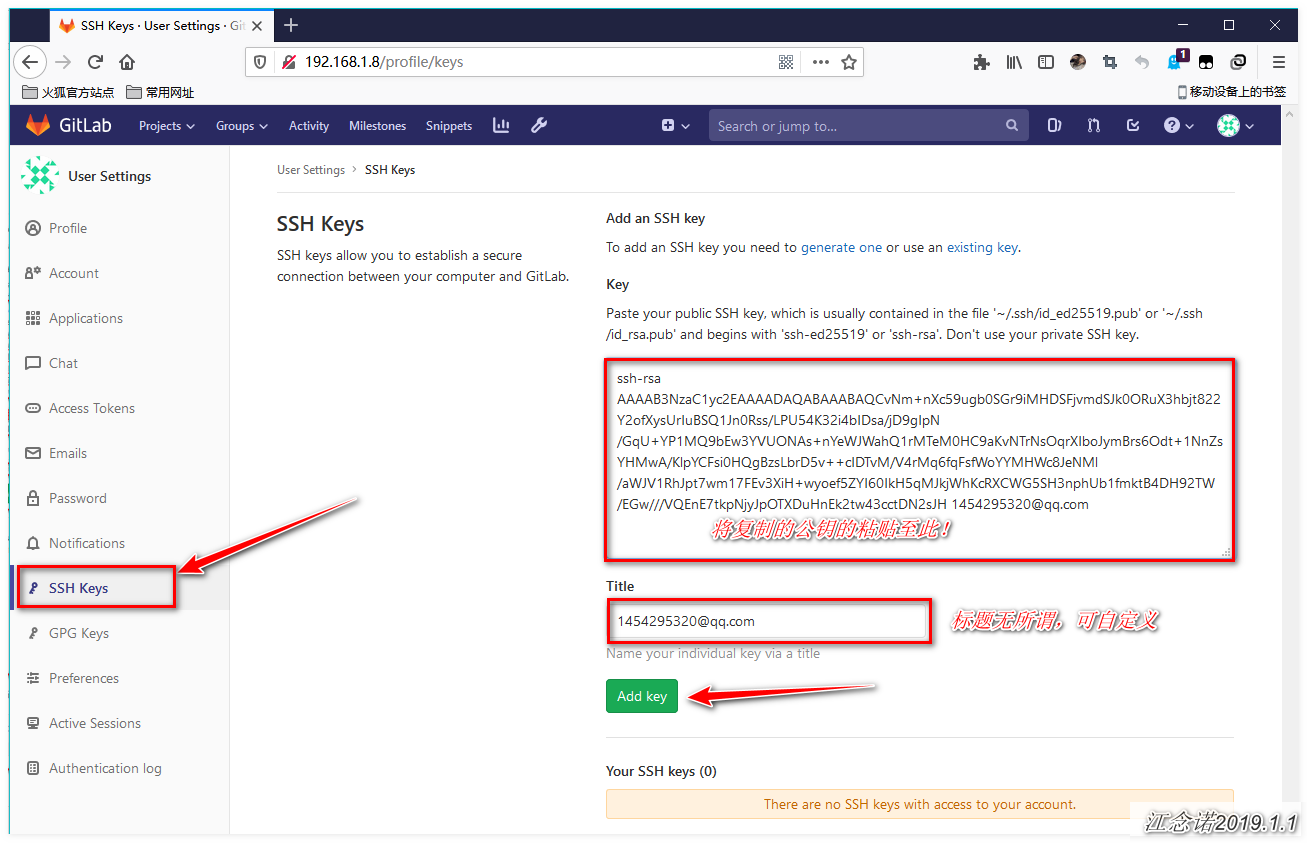
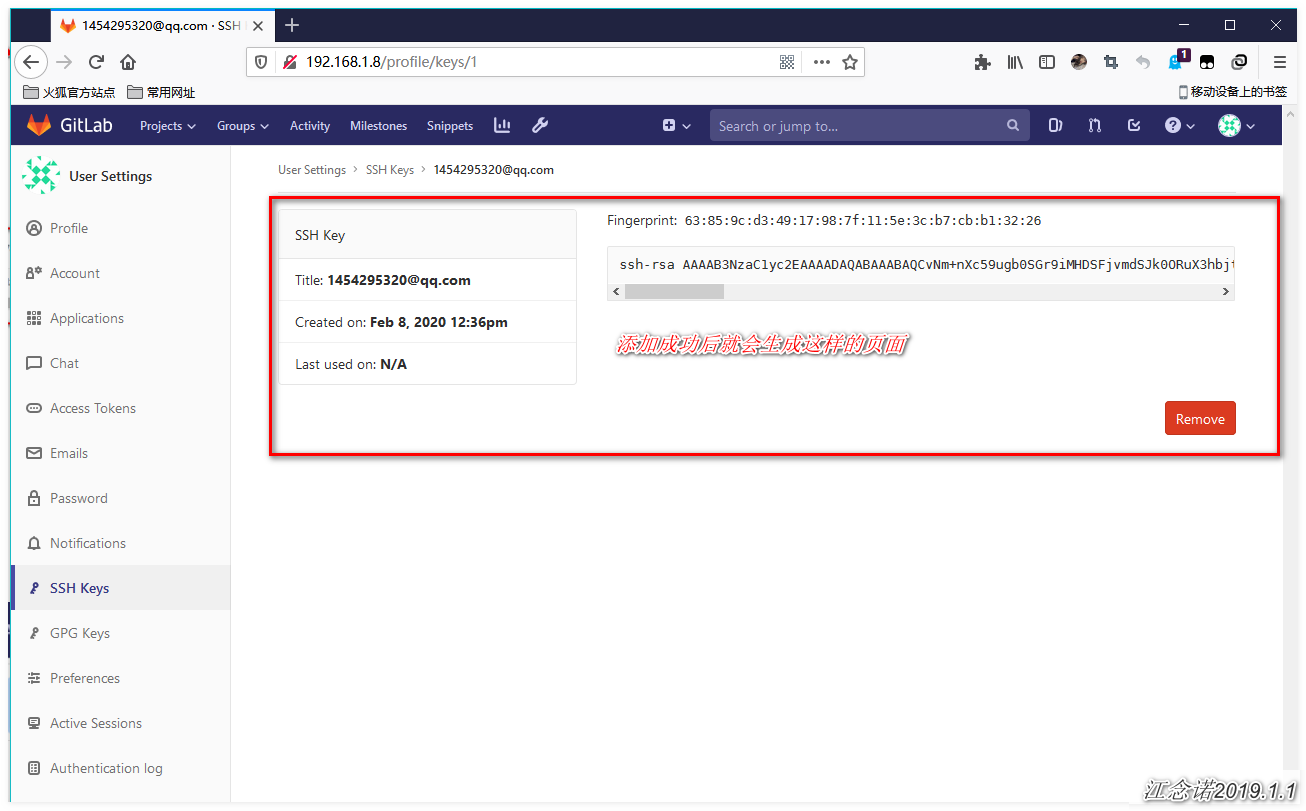
2) Create a base library
Figure: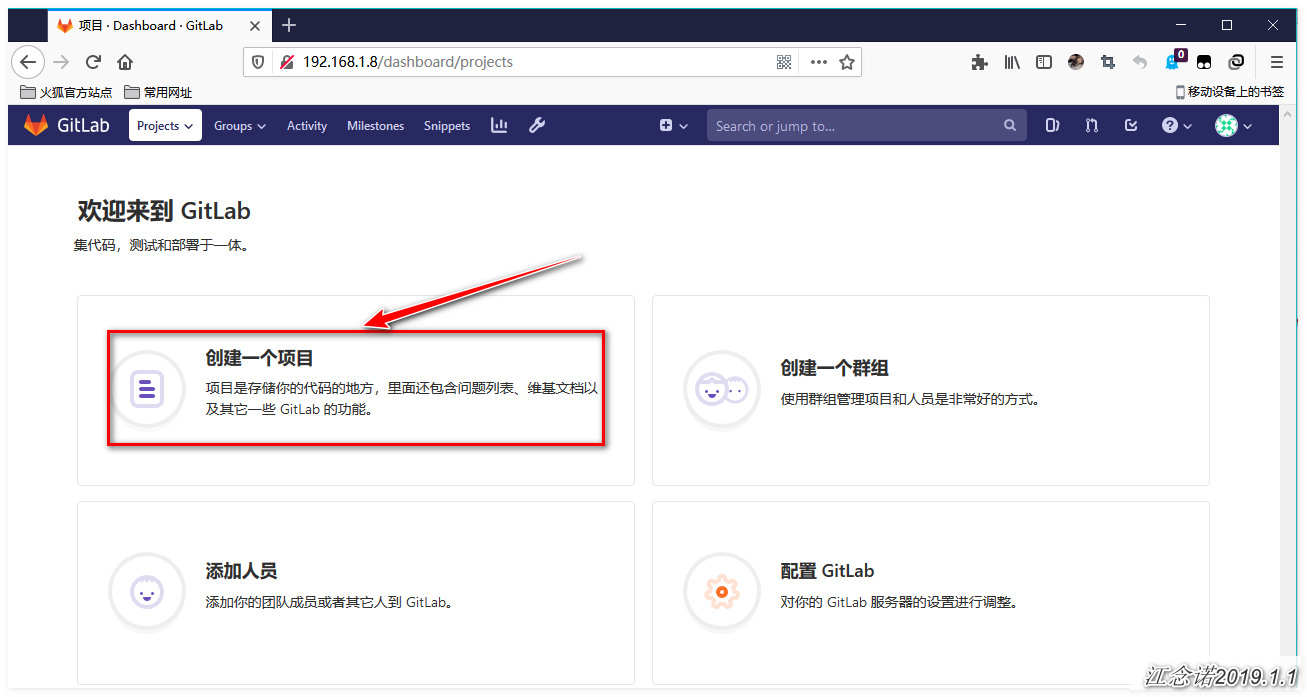
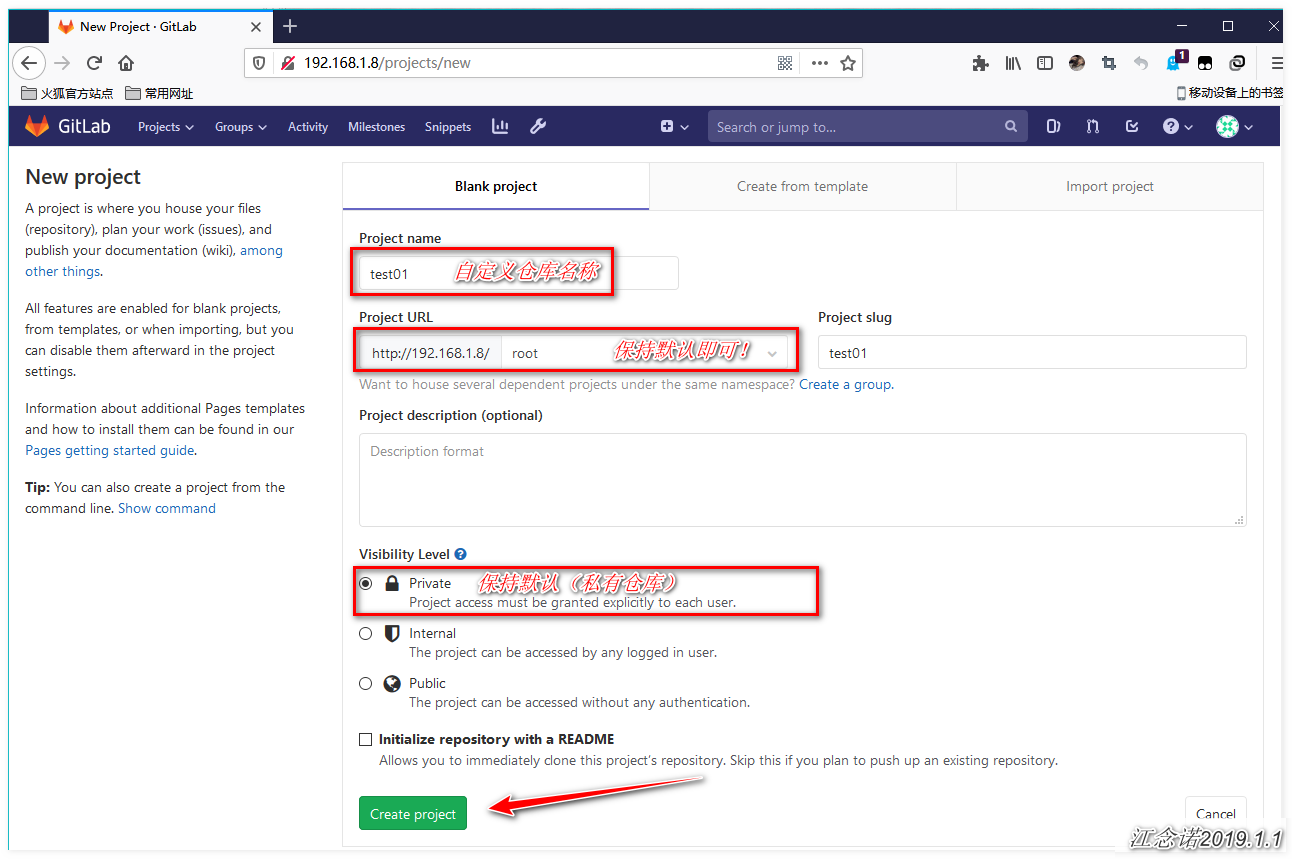
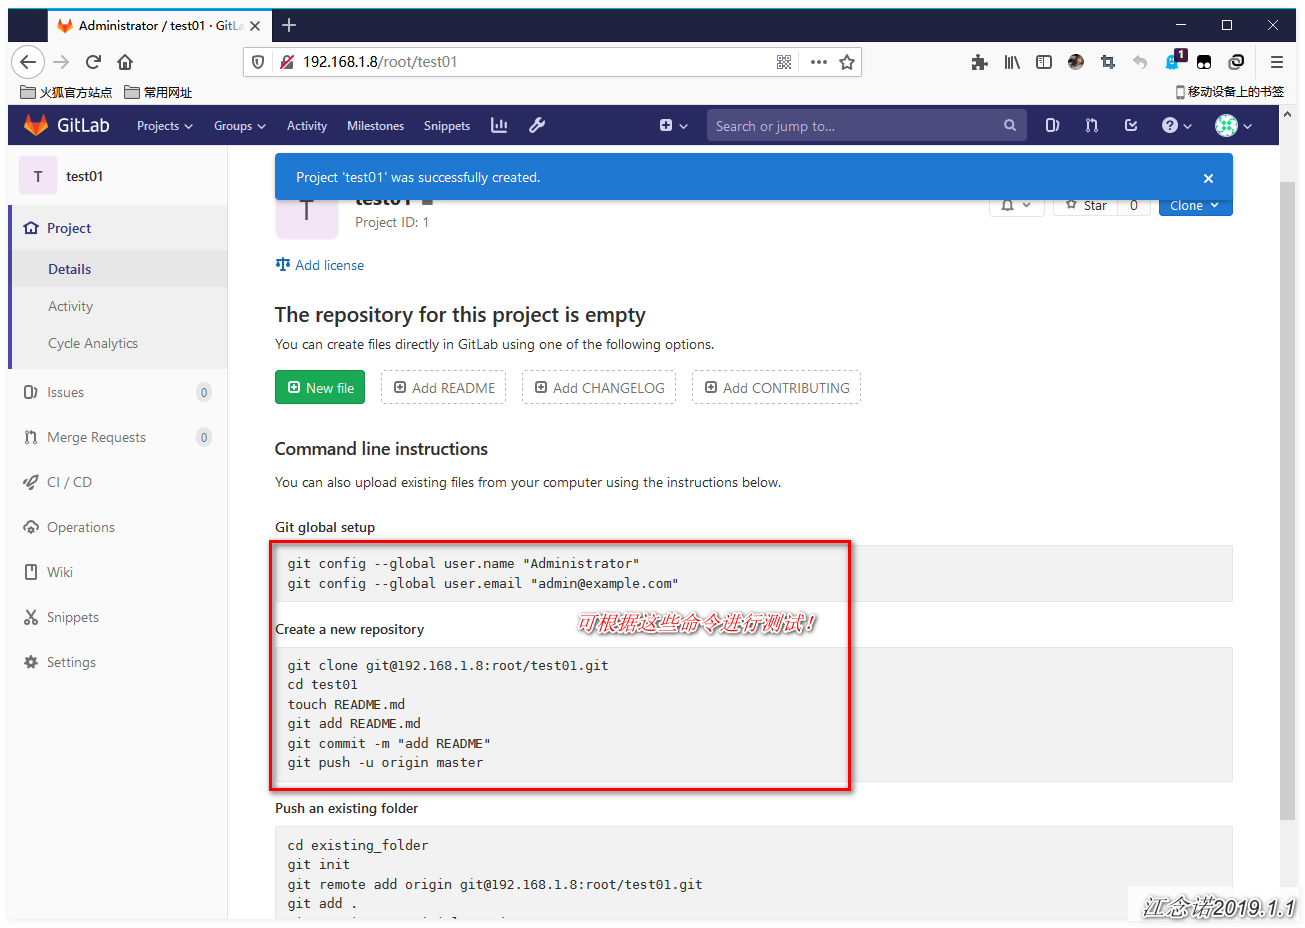
Return to the server and enter the command for the test as follows:
[root@gitlab ~]# git config --global user.name "Administrator"
[root@gitlab ~]# git config --global user.email "admin@example.com"
[root@gitlab ~]# git clone git@192.168.1.8:root/test01.git
#Clone to your local location and type "yes" as prompted!
[root@gitlab ~]# cd test01/
[root@gitlab test01]# touch README.md
[root@gitlab test01]# git add README.md
[root@gitlab test01]# git commit -m "add README"
[root@gitlab test01]# git push -u origin master
Refresh the web page, as shown in the following figure: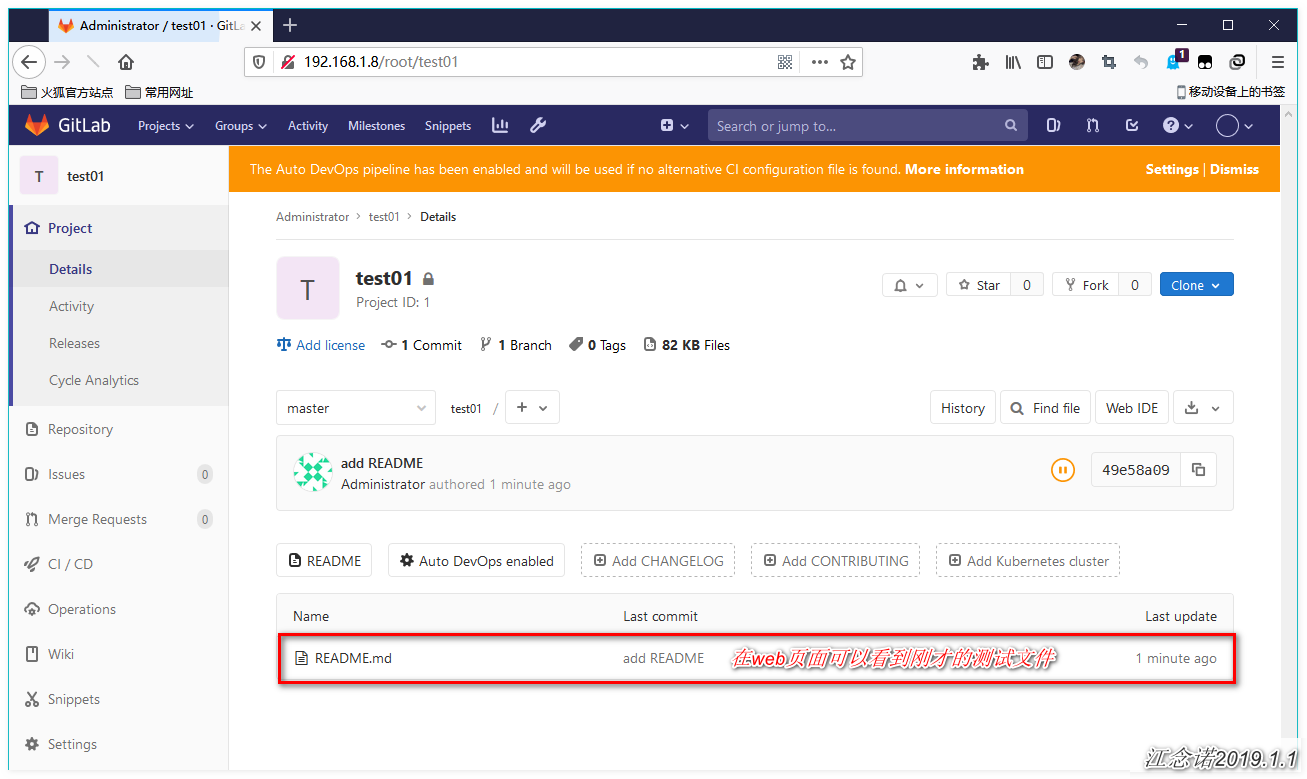
5. Basic operations of remote repositories
When you clone from a remote repository, git actually automatically maps the local master branch to the remote master branch, and the default name of the remote repository is origin.
1) View information about associated remote Libraries
[root@gitlab test01]# git remote        #Concise information
origin
[root@gitlab test01]# git remote -v         #detailed information
origin  git@192.168.1.8:root/test01.git (fetch)
origin  git@192.168.1.8:root/test01.git (push)
2) Push branch to remote warehouse
[root@gitlab test01]# git checkout -b dev             #Create and switch to dev branch
[root@gitlab test01]# git push origin dev              #Push local branch to remote warehouse
After refreshing the page, as shown in the figure: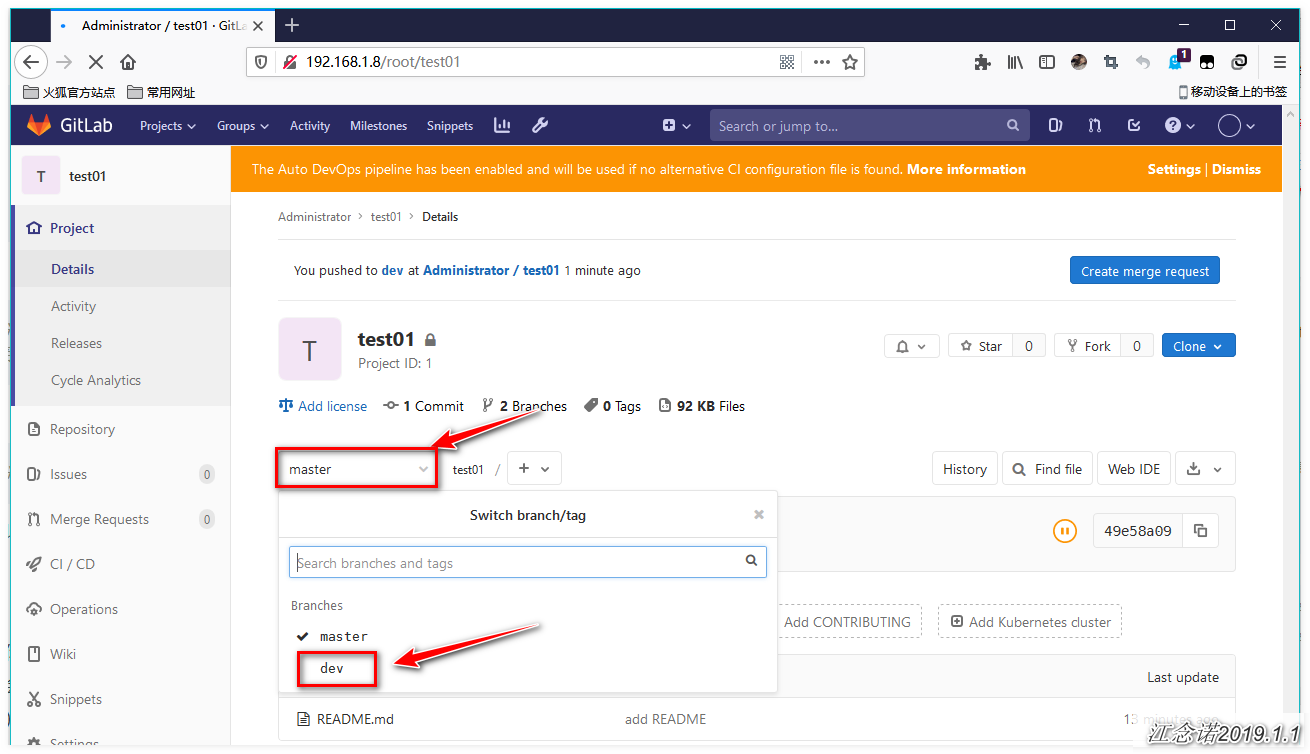
3) Solve problems caused by multi-person collaboration
When our entire team develops the same branch, if your colleague has modified the content of the branch and pushed it to a remote repository before you submitted it, and you happen to have made changes to the same file and tried to push it, the push will fail because your colleague's latest submitted data conflicts with the data you are trying to submit (your local content is farther away than your local content)End warehouse is old). The solution will be given in the return message that prompts you to fail the push. Here we will simulate this process.
#Enter another directory, clone the remote warehouse, and simulate multiple operations
[root@gitlab test01]# cd /tmp
[root@gitlab tmp]# git clone git@192.168.1.8:root/test01.git
[root@gitlab tmp]# cd test01/
[root@gitlab test01]# git checkout -b etc            #Re-create a branch and switch
[root@gitlab test01]# echo -e "touch /tmp/test01" > tmp.txt
[root@gitlab test01]# git add tmp.txt
[root@gitlab test01]# git commit -m "commmit from /tmp"
[root@gitlab test01]# git push origin etc                #Push newly modified content to remote
Return to the web interface and refresh to see the newly submitted branches: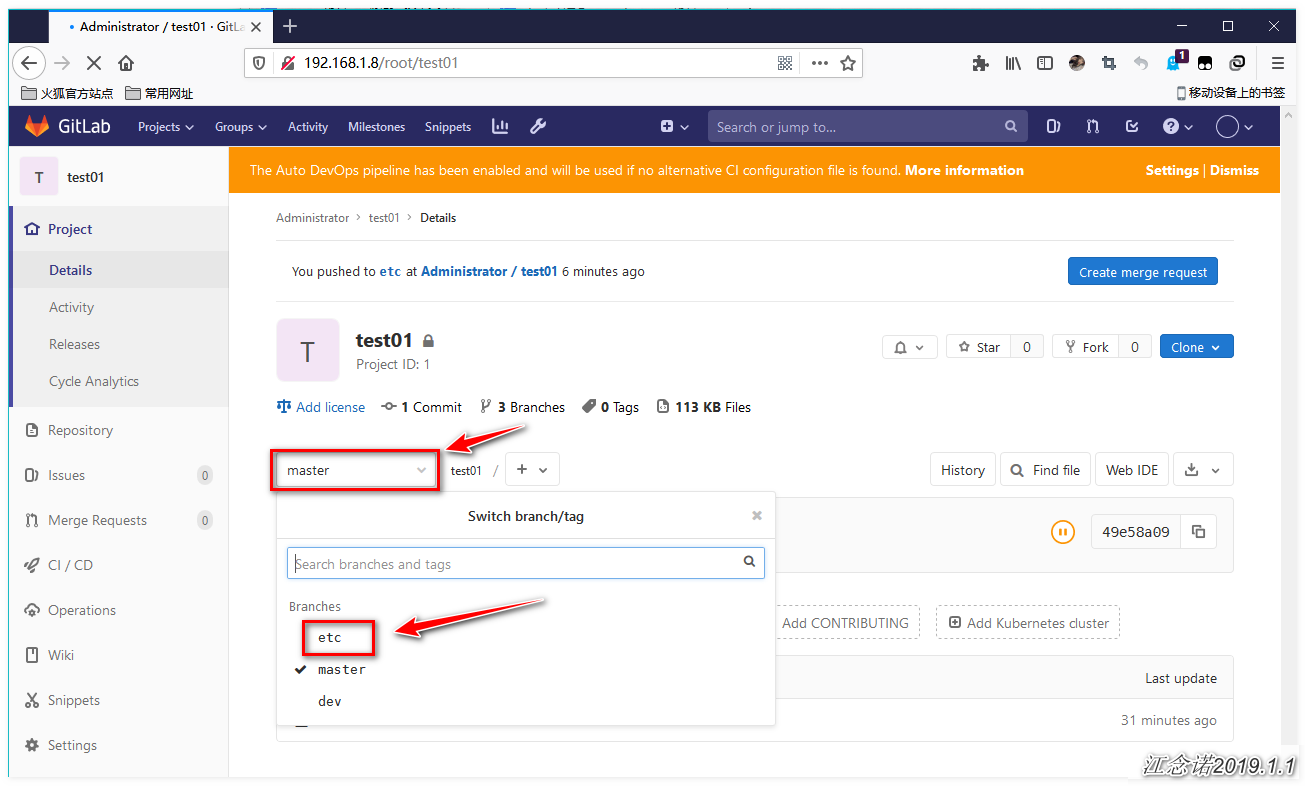
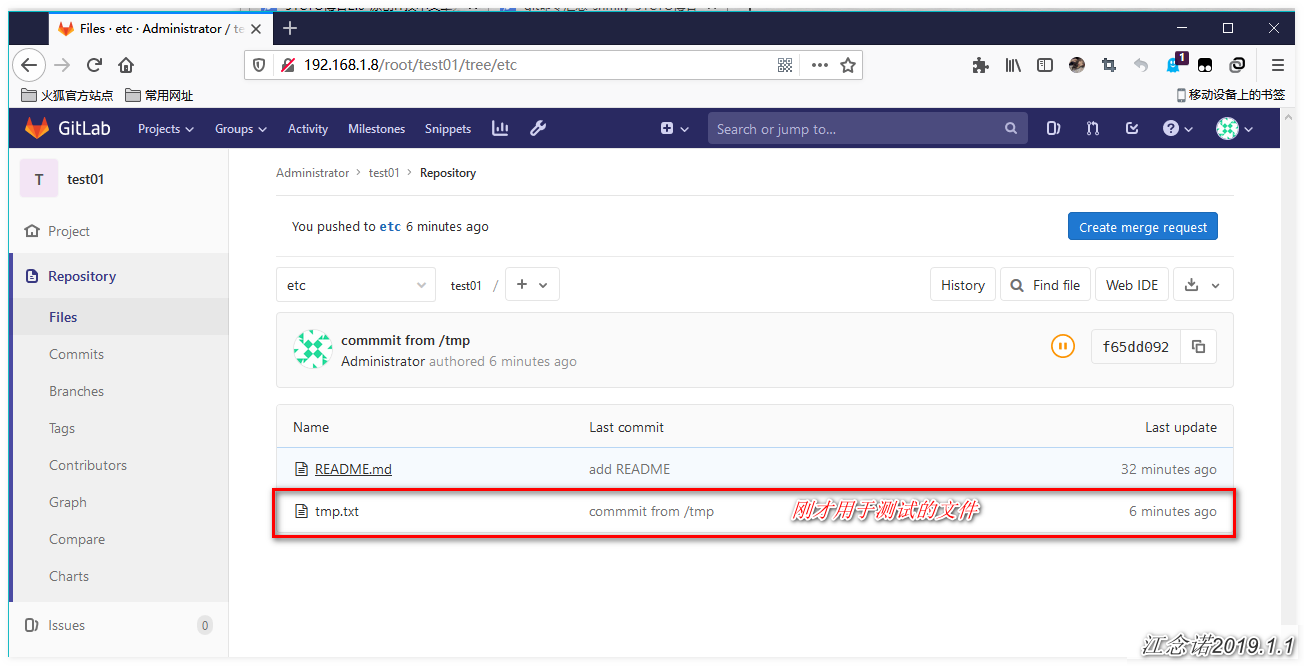
#The above operations are performed in the / tmp directory, and the next operations are performed in the / root directory:
[root@gitlab test01]# cd /root/test01/
[root@gitlab test01]# git checkout -b etc
[root@gitlab test01]# echo "touch /root/test01.txt" > root.txt
[root@gitlab test01]# git add root.txt
[root@gitlab test01]# git commit -m "commit from /root"
[root@gitlab test01]# git push origin  etc
#Push again and the following error will occur
To git@192.168.1.8:root/test01.git
 ! [rejected]        etc -> etc (fetch first)
error: Unable to push some references to 'git@192.168.1.8:root/test01.git'
//Tip: The update was rejected because the remote version library contains submissions that do not exist locally.This is usually due to the addition of
//Tip: A version library has already pushed the same reference.You may need to merge remote changes before pushing again
//Tip: (e.g.'git pull').
//Tip: See the'Note about fast-forwards'section in'git push--help' for details.
[root@gitlab test01]# git pull origin etc              #pull remote etc branch to local
[root@gitlab test01]# ls               #You can see that files submitted in the / tmp directory already exist
README.md  root.txt  tmp.txt
[root@gitlab test01]# git push origin etc                  #Then push the local dev branch to gitlab again to succeed
Refresh the web page again and you will have all the content we submit in the / tmp directory and / root directory under the ET branch, as shown in the following figure: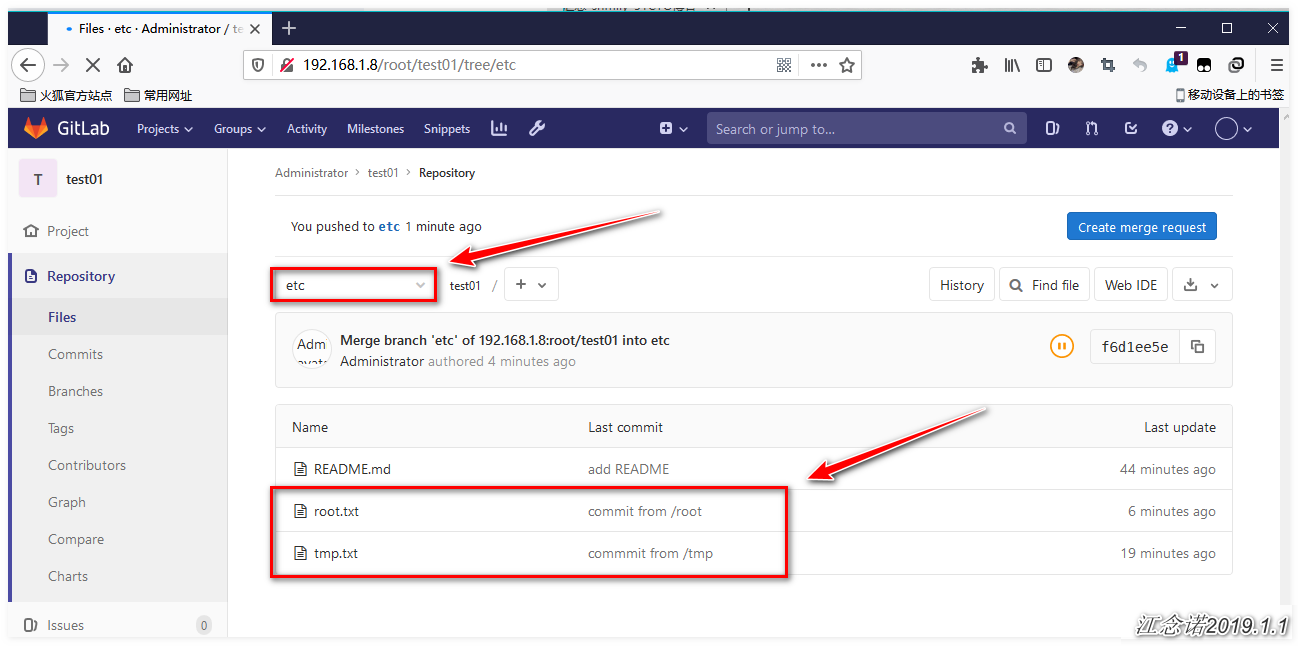
4) Merge remote branches
[root@gitlab test01]# git checkout master           #Switch to master branch
[root@gitlab test01]# git merge etc                    #Merge etc branches
[root@gitlab test01]# ls                   #View the contents under the merged branch
README.md  root.txt  tmp.txt
[root@gitlab test01]# git add .
[root@gitlab test01]# Git commit-m "submit"
[root@gitlab test01]# git push origin master             #Push to remote repository
Refresh the web page again, as shown in the following figure: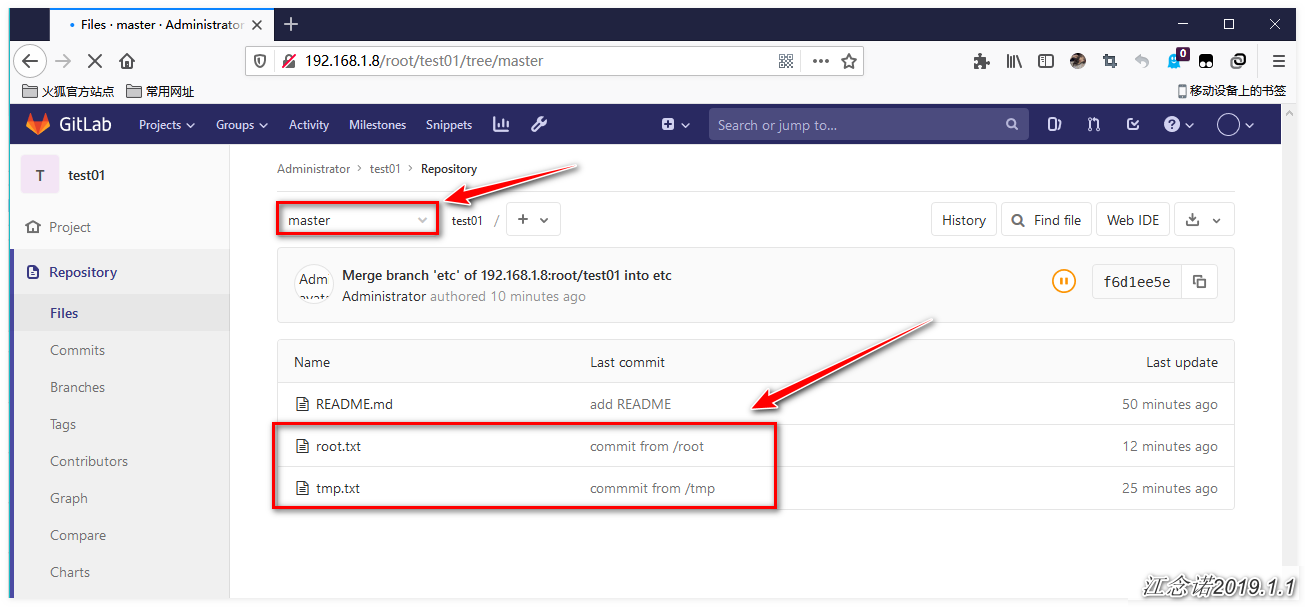
5) Delete remote branches
[root@gitlab test01]# git branch -d etc                 #Delete local dev branch
[root@gitlab test01]# git branch -r -d origin/etc     #Delete the specified remote branch
[root@gitlab test01]# git push origin :etc               #Submit deleted branches to a remote version Library
[root@gitlab test01]# git branch -d dev
[root@gitlab test01]# git branch -r -d origin/dev
[root@gitlab test01]# git push origin :dev                      #Ditto
Refresh the web page again, as follows: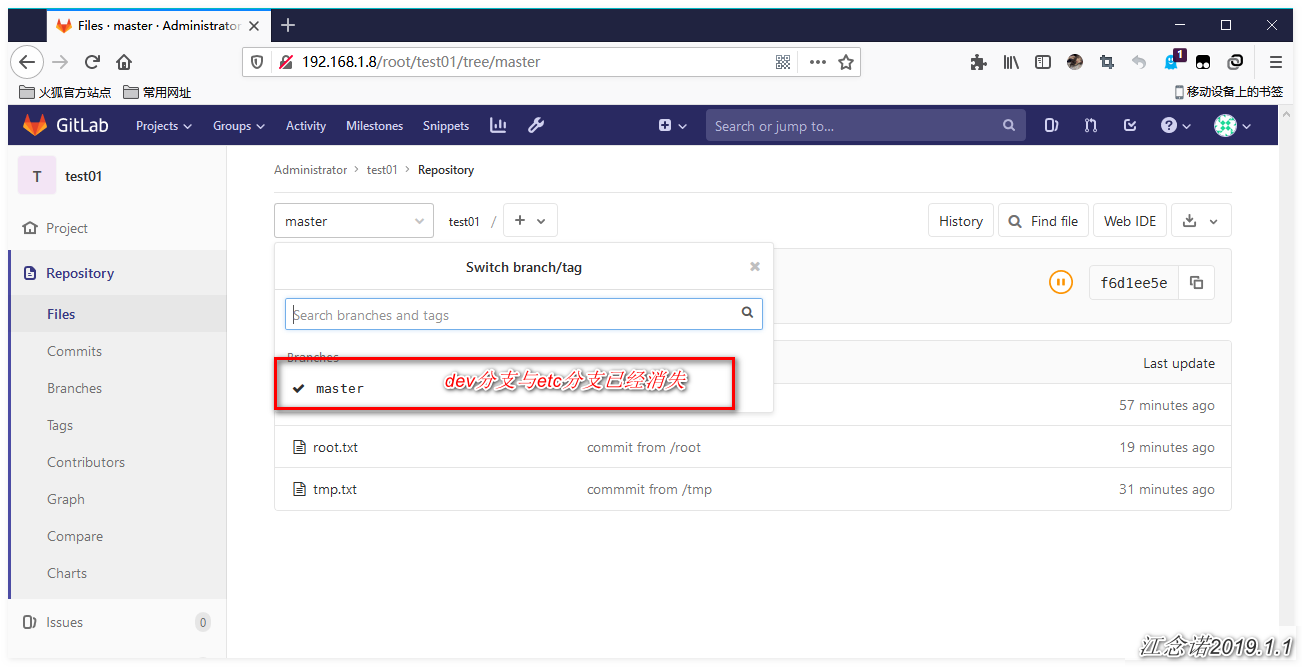
6. Reset gitlab administrator password
[root@gitlab ~]# gitlab-rails console production             #The root user must be logged on to the server to execute the command
irb(main):001:0> user = User.where(id: 1).first             #id 1 is a super administrator
irb(main):002:0> user.password = 'yourpassword'       #Password must be at least 8 characters
irb(main):003:0> user.save!                  #Save user modification information, return true if no problem
irb(main):004:0> exit                             #Sign out
At this point, to log in again, you need to log in with the new password yourpassword.