PV introduction
PV (Page View) is the number of clicks. Generally speaking, PV is the main indicator to measure a network news channel or website or even a network news. PV's explanation is as follows: a visitor looks at several pages of the website in 24 hours (0:00-23:00). It should be noted that the same person browsing the same page of the website does not repeat the calculation of PV quantity, and only one click of 100 pages.
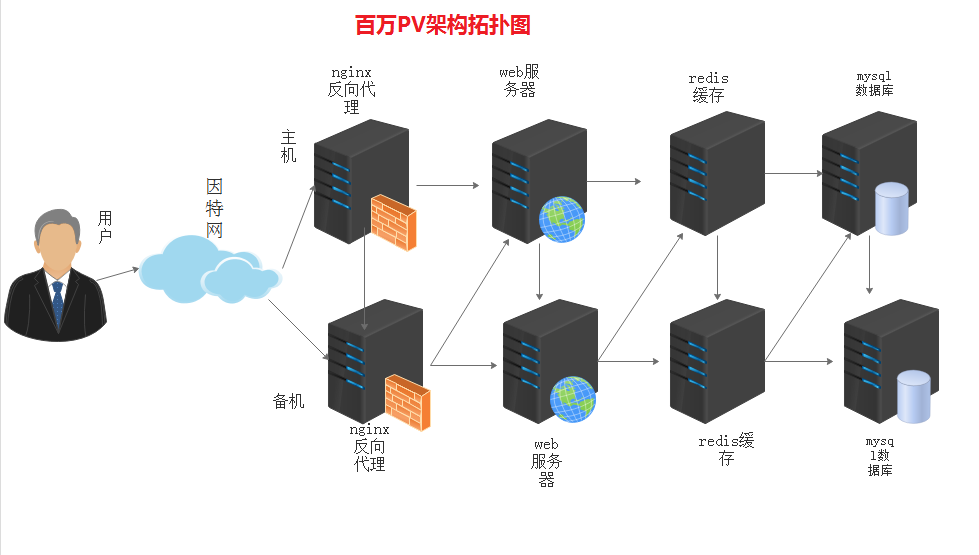
Million pv website architecture
This experiment design adopts four layer mode, mainly including front-end reverse proxy layer, web layer, database cache layer and database layer. The front-end reverse agent layer adopts the master-slave mode, the web layer adopts the cluster mode, the database cache layer adopts the master-slave mode, and the database layer adopts the master-slave mode.
Deployment environment
| host name | ip address | role |
|---|---|---|
| master | 192.168.0.106 | Nginx + maintained main database, redis main database and mysql data main database |
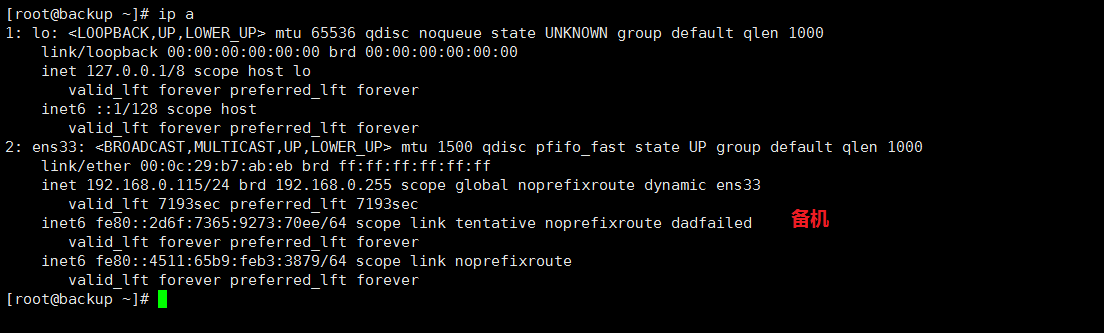
| backup | 192.168.0.115 | Nginx + maintained backup, redis backup, mysql data slave |
| web1 | 192.168.0.104 | Backend tomcat service |
| web2 | 192.168.0.105 | Backend tomcat service |
| VIP | 192.168.0.188 | Virtual IP address |
Installation service
Install on both master and backup servers
1, Install keepalived+nginx
1. Turn off firewall and enhance
systemctl stop firewalld.service
setenforce 0
2. Install the source with nginx rpm package
rpm -ivh http://nginx.org/packages/centos/7/noarch/RPMS/nginx-release-centos-7-0.el7.ngx.noarch.rpm
3. Install keepalived+nginx
yum install -y keepalived nginx
2, Install mysql
1. Check whether MySQL is installed in the system
rpm -qa | grep mysql
2. View the installed version of Mariadb database
rpm -qa|grep -i mariadb
3. Uninstall the installed Mariadb database.
rpm -qa|grep mariadb|xargs rpm -e --nodeps
4. Download the installation package file.
wget http://repo.mysql.com/mysql-community-release-el7-5.noarch.rpm
5. Install mysql-community-release-el7-5.noarch.rpm package
rpm -ivh mysql-community-release-el7-5.noarch.rpm
6. Install mysql.
yum install mysql-server -y
3, Install redis
yum install -y epel-release #To update epel source
yum install redis -y #Install redis
Install in node server (web1,web2)
4, Install tomcat
1. Install java environment
systemctl stop firewalld.service #Turn off firewall
setenforce 0
tar xf jdk-8u101-linux-x64.tar.gz -C /usr/local
cd /usr/local/
mv jdk1.8.0_101 java
2. Set environment variables
sed -i '$aJAVA_HOME=/usr/local/java\nCLASSPATH=$JAVA_HOME/lib\nPATH=$PATH:$JAVA_HOME/bin\nexport PATH JAVA_HOME CLASSPATH' /etc/profile
source /etc/profile
java -version
3. Install tomcat
tar xvf apache-tomcat-8.5.43.tar.gz -C /usr/local #decompression
cd /usr/local
mv apache-tomcat-8.5.43 tomcat #rename
chmod +x tomcat/bin/* #Authorize scripts
ln -s /usr/local/tomcat/bin/startup.sh /usr/bin/tomcatup #Establish a soft connection
ln -s /usr/local/tomcat/bin/shutdown.sh /usr/bin/tomcatdown
Change configuration and validation
1, Keep alive + nginx change configuration
1. Change the maintained configuration
vim /etc/keepalived/keepalived.conf #Modify three parameters
! Configuration File for keepalived

global_defs {
    route_id NGINX_HA   #The standby machine needs to be changed to nginx Gu HB
}

vrrp_script nginx {   #nginx monitoring script, which will be created later
    script "/opt/shell/nginx.sh"
    interval 2
}

vrrp_instance VI_1 {
    state MASTER    #BACKUP instead of standby
    interface ens33
    virtual_router_id 53   #Two must be the same
    priority 100   #Priority, the standby machine is smaller than this, such as 90
    advert_int 1
    authentication {
        auth_type PASS
        auth_pass 1111
}

track_script {
    nginx
}

virtual_ipaddress {
    192.168.0.188   #Virtual ip address
    }
}
2. Change nginx configuration
vim /etc/nginx/nginx.conf
 user  nginx;
worker_processes  1;

error_log  /var/log/nginx/error.log warn;
pid        /var/run/nginx.pid;

events {
    worker_connections  1024;
}

http {
    include       /etc/nginx/mime.types;
    default_type  application/octet-stream;

    log_format  main  '$remote_addr - $remote_user [$time_local] "$request" '
                      '$status $body_bytes_sent "$http_referer" '
                      '"$http_user_agent" "$http_x_forwarded_for"';

    access_log  /var/log/nginx/access.log  main;

    sendfile        on;
    #tcp_nopush     on;

    keepalive_timeout  65;

    #gzip  on;
upstream tomcatpool {
                                server 192.168.0.105:8080;  #ip address and port number of node server 1
                                server 192.168.0.104:8080; #ip address and port number of node server 2
                                ip_hash;   #Session stabilization function, otherwise you cannot log in through vip address
                }
                server {
                                listen 80;
                                server_name 192.168.0.188;  #Virtual ip address
                                location / {
                                                proxy_pass http://tomcatpool;
                                                proxy_set_header X-Real-IP $remote_addr;
                                }
    }
    include /etc/nginx/conf.d/*.conf;
}
3. Create nginx startup script
mkdir /opt/shell
vim /opt/shell/nginx.sh
#!/bin/bash
k=`ps -ef | grep keepalived | grep -v grep | wc -l`
if [ $k -gt 0 ];then
            /bin/systemctl start nginx.service
else
        /bin/systemctl stop nginx.service
 fi
chmod +x /opt/shell/nginx.sh #Script authorization
Remarks:2.platform nginx Service configuration, nginx Scripts are the same!
Verify the maintained + nginx function
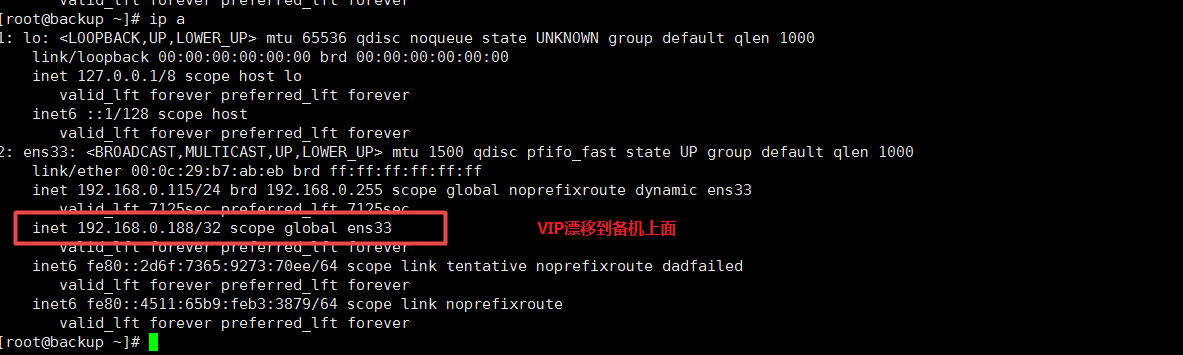
1. View the ip messages of the active and standby

2. Stop the host keeepalive

Drainage process
Pits 1:
No error is reported in the configuration, vip also drifts, but when you open the web page, you will be reporting an error. If you check the nginx log, you will not see any problems

Solution: look at the picture information carefully, give a prompt, some naming error

Modify the nginx configuration file, change the tomcat_pool to Tomcat pool, and remember that both of them need to be modified, and restart the nginx service
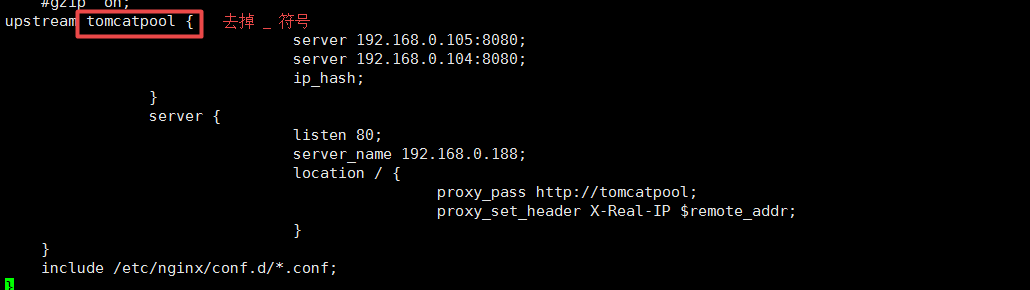
Error cause analysis: This is because the new version of Nginx does not support this symbol when naming. Try to avoid using
Pit two:
After the configuration is completed, no VIP (virtual ip) appears in both sets
Solution: check all configuration files carefully and make sure there is no problem. It should be a firewall problem. The firewalls of two servers must be closed or firewall policies must be made, otherwise VIP will not appear
Pit 3: after configuration, VIP (virtual ip) appears in both sets
Cause analysis:
1. The keepalived configuration file is incorrect. Two state s must be one active and one standby. They cannot all be master
2.2 virtual router IDS must be the same
3. The above two points need to be met
Solution: modify the configuration file against the reason

Pit four:
There is no error in the configuration, and we also see that vip drifts. Later, we use web services to connect to the database and vip address to connect. We can't log in to the website, but only see the webpage. However, the real ip address of the database can be used to log in to the web page.
Cause analysis: there is still a problem with the maintained configuration file
Solution: compare the above configuration file and modify it carefully to solve the problem. There must be something wrong with the details in the configuration file!
Database master slave synchronization
1. Change the configuration on the main database
vim /etc/my.cnf
Add under [mysqld]
binlog-ignore-db=mysql,information_schema
character_set_server=utf8
log_bin=mysql_bin
server_id=1
log_slave_updates=true
sync_binlog=1
2. Database authorization
systemctl start mysqld start service
MySQL < slsaledb-2014-4-10.sql import mall data
mysql
show databases; check whether the data is imported
Grant all on slsaledb. * to 'root' @ '%' identified by '123456'; (slsaledb database authorization)
grant replication slave on *.* to 'rep'@'192.168.0.%' identified by '123456'; ා authorize from library
flush privileges;
show master status;

3. Change the configuration from the database
vim /etc/my.cnf
Add under [mysqld]
server_id=2
relay-log=relay-log-bin
relay-log-index=slave-relay-bin.index
4. Synchronize settings from database
systemctl start mysqld start service
MySQL < slsaledb-2014-4-10.sql import mall data
mysql
show databases; check whether the data is imported
Grant all on slsaledb. * to 'root' @ '%' identified by '123456'; (slsaledb database authorization)
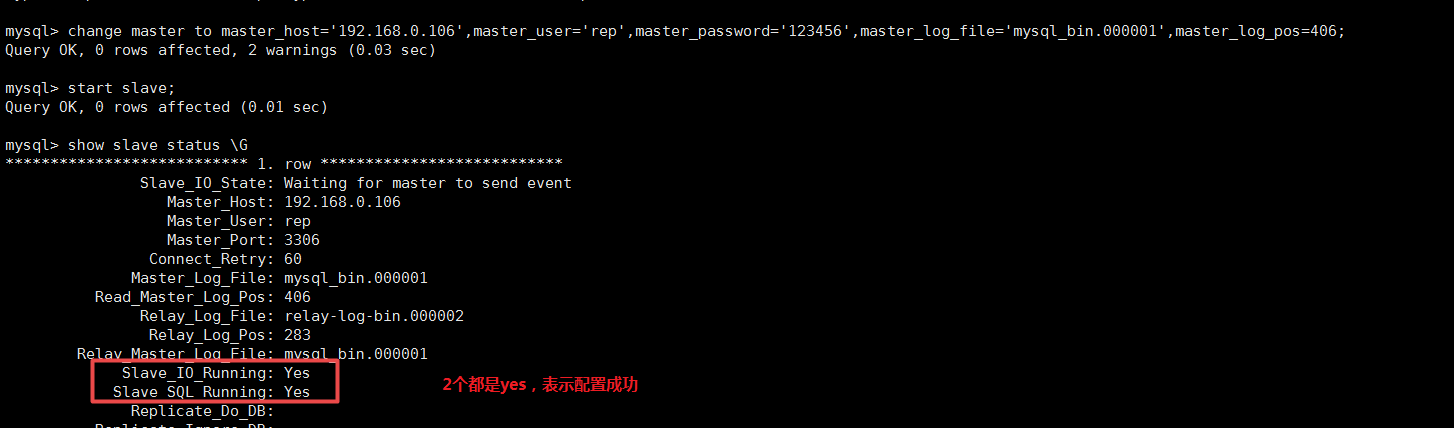
mysql
change master to master_host='192.168.0.106',master_user='rep',master_password='123456',master_log_file='mysql_bin.000001',master_log_pos=406;
start slave;
show slave status \G
Project deployment of shopping mall
1. Decompress the project package
tar xf SLSaleSystem.tar.gz -C /usr/local/tomcat/webapps/
2. Modify tomcat configuration
vim /usr/local/tomcat/conf/server.xml
Add line 149 under Host name
#The function is to allow users to access directly without using the project name
<Context path="" docBase="SLSaleSystem" reloadable="true" debug="0"></Context>
3. Modify data link
cd /usr/local/tomcat/webapps/SLSaleSystem/WEB-INF/classes
vim jdbc.properties
driverClassName=com.mysql.jdbc.Driver
#Fill in virtual ip address
url=jdbc\:mysql\://192.168.0.188\:3306/slsaledb?useUnicode\=true&characterEncoding\=UTF-8
#Fill in the user name and password when authorizing
uname=root
password=123456
minIdle=10
maxIdle=50
initialSize=5
maxActive=100
maxWait=100
removeAbandonedTimeout=180
removeAbandoned=true
4. Start tomcat service
tomcatup
netstat -ntap |grep 8080
Note: the operation of two node servers is the same
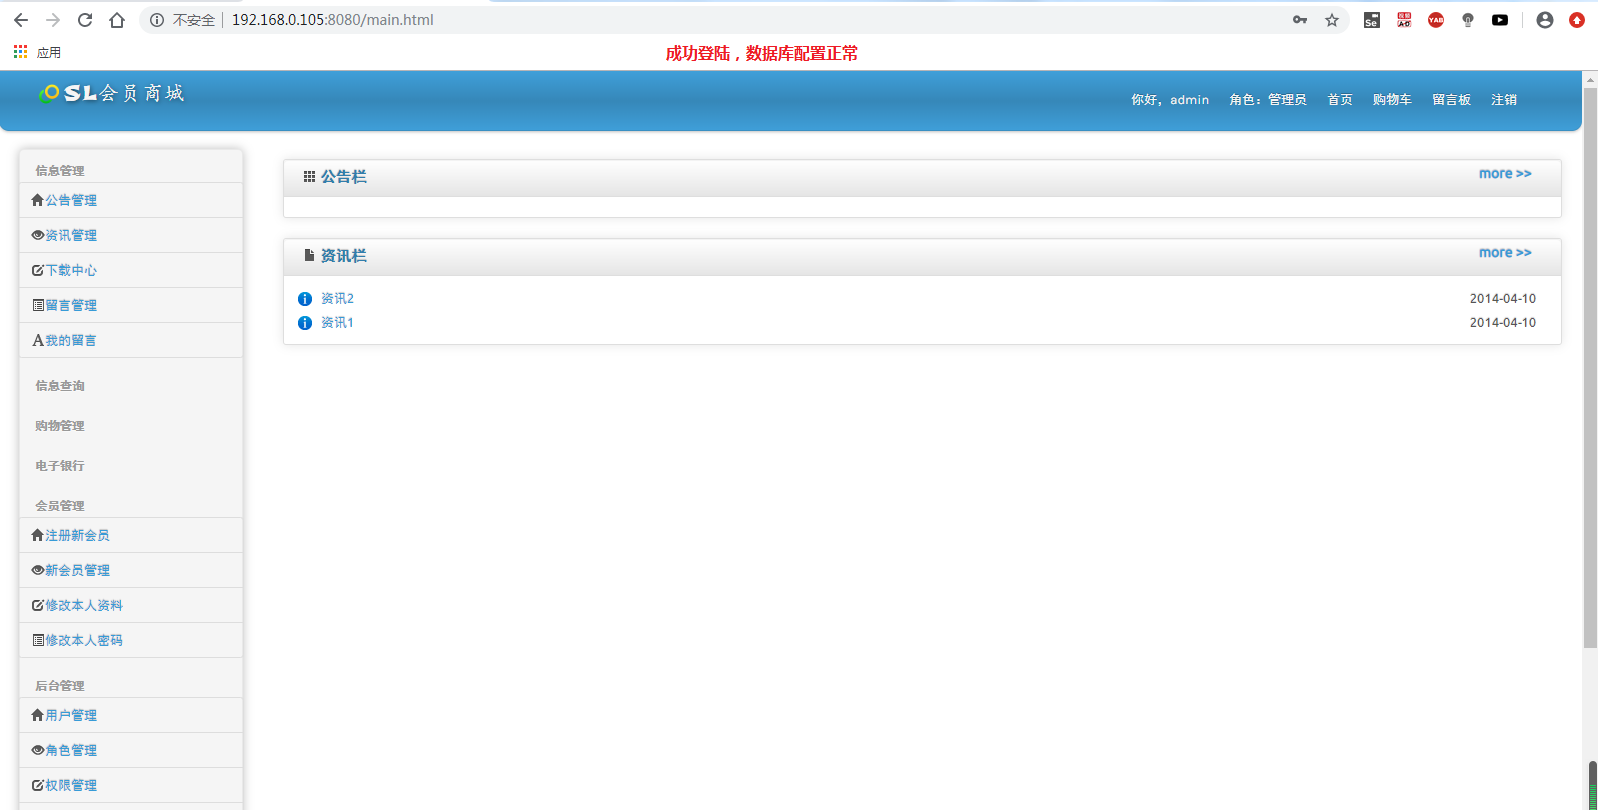
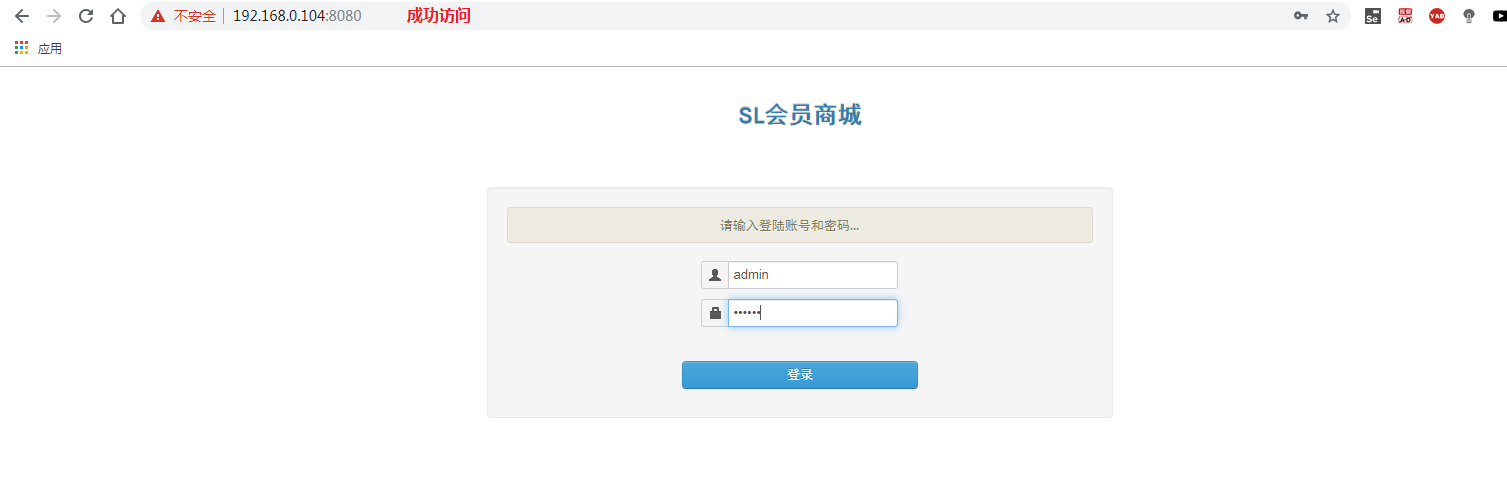
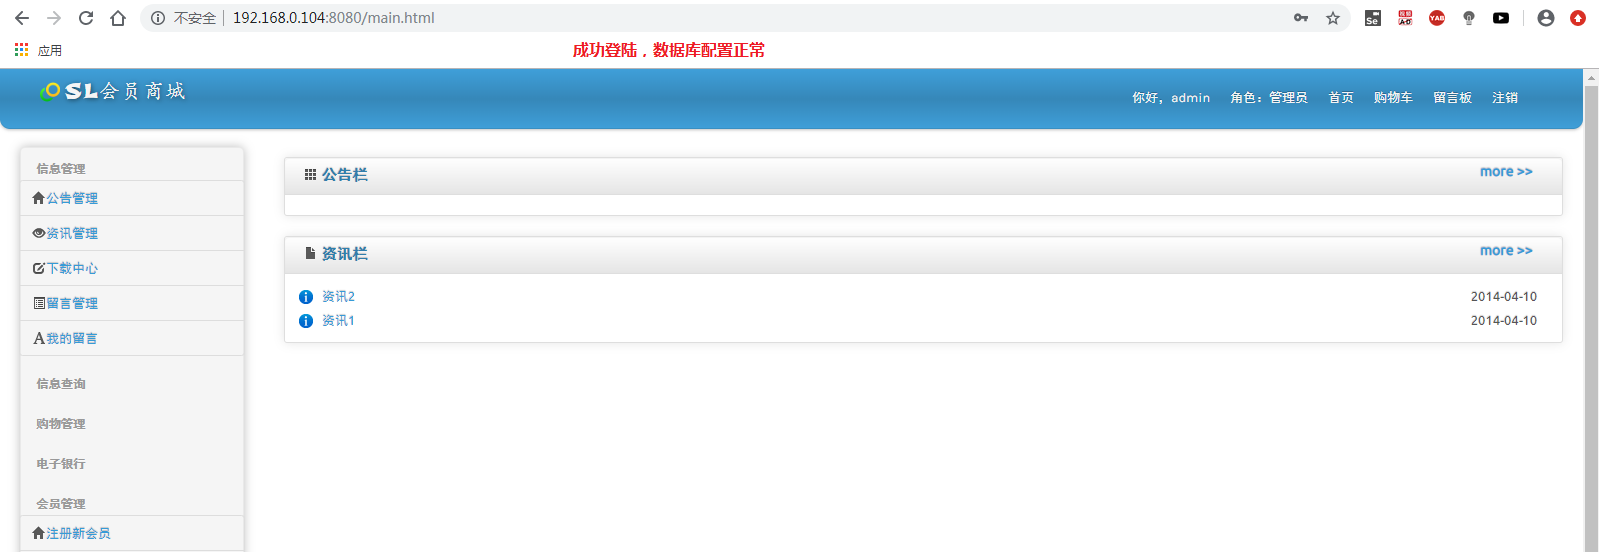
5. Website verification
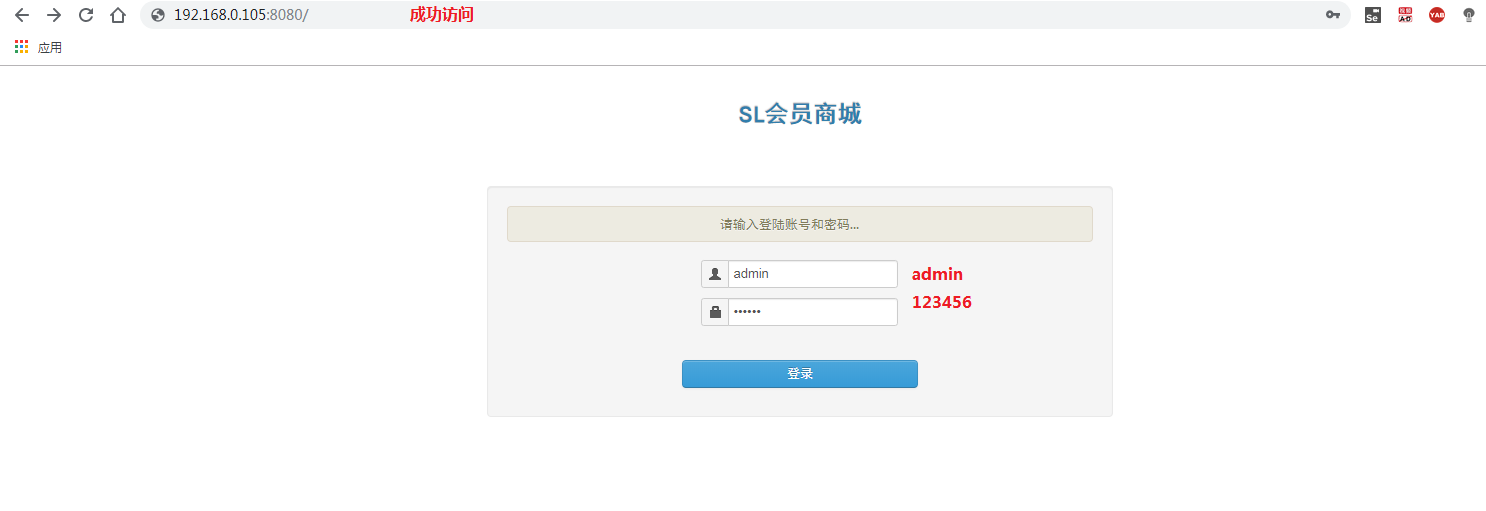
1. Visit the website of 2 node servers first
http://192.168.0.104:8080
http://192.168.0.105:8080
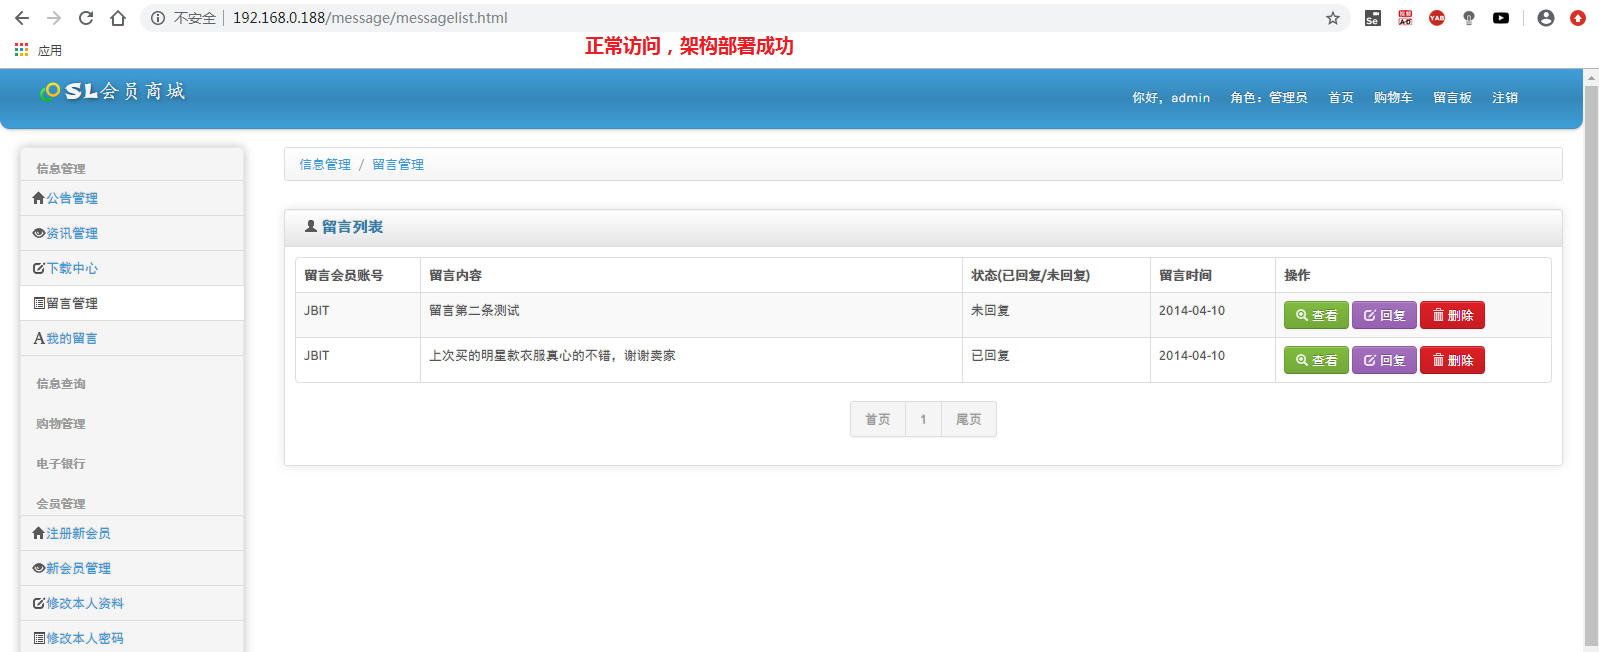
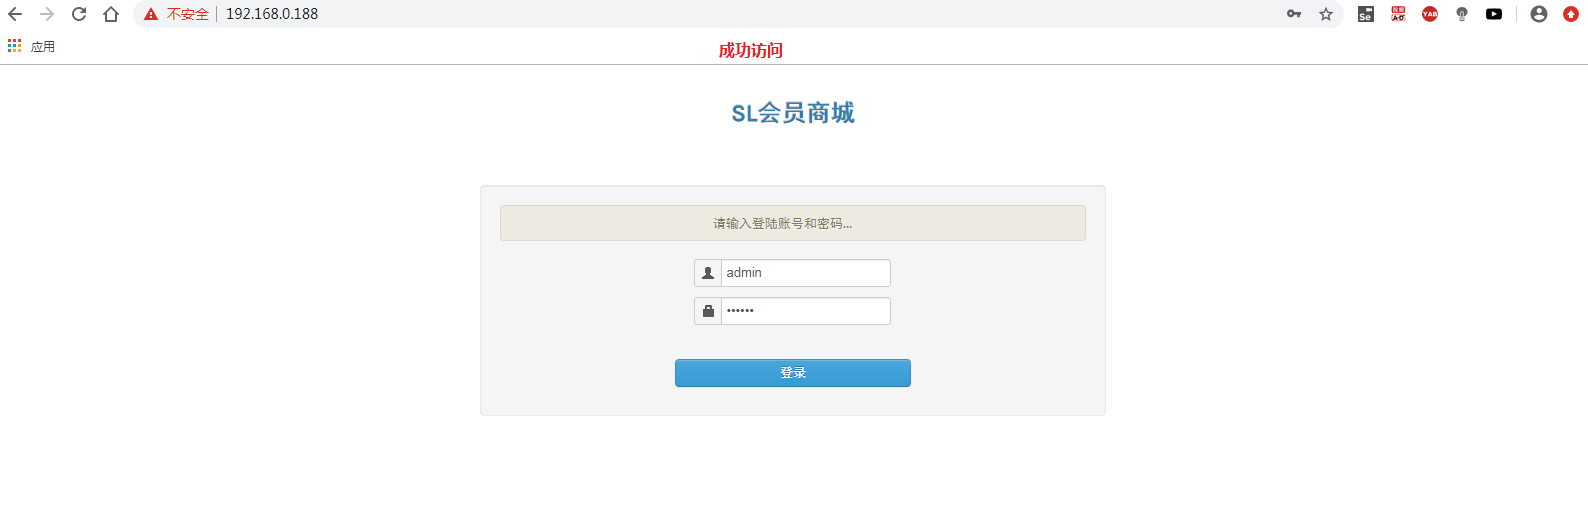
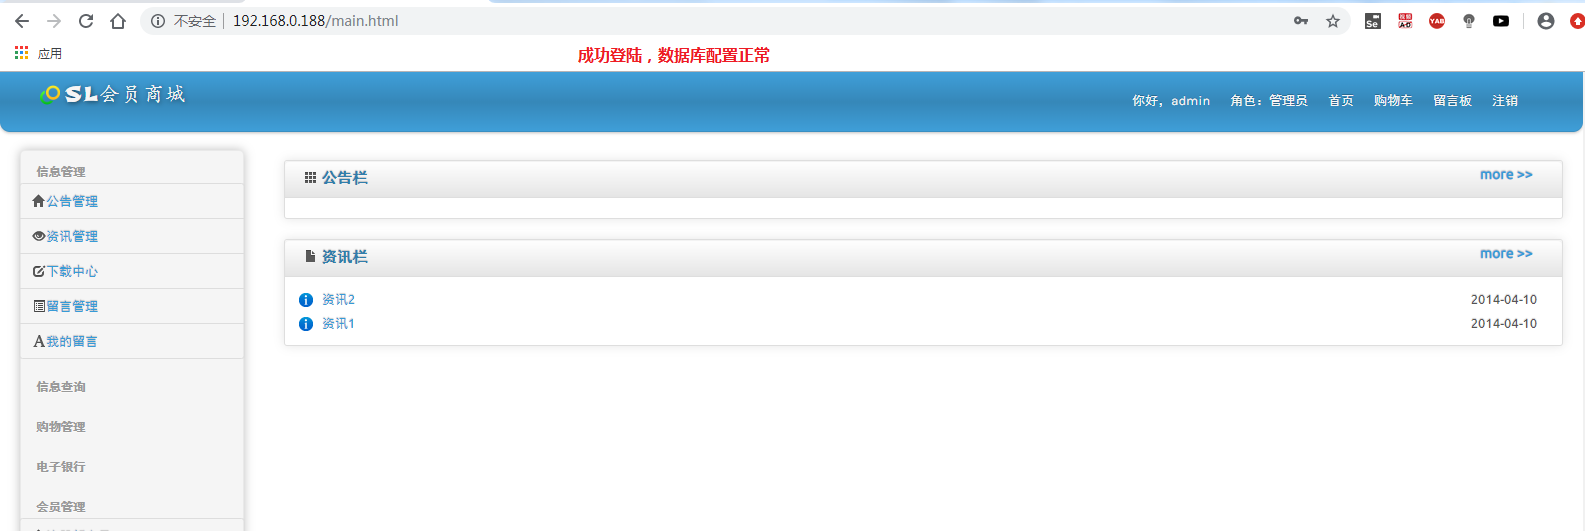
2. Access the virtual IP address
http://192.168.0.188
Redis master-slave and cluster configuration
On the host:
vim /etc/redis.conf
In line 61, change to
bind 0.0.0.0
systemctl start redis.service #Startup service
netstat -anpt | grep 6379
redis-cli -h 192.168.0.106 -p 6379 #Test connection
192.168.0.106:6379> set name test
OK
192.168.0.106:6379> get name
"test"
192.168.0.106:6379> exit
On the standby:
vi /etc/redis.conf
 bind 0.0.0.0  #61 elements
 slaveof 192.168.0.106  6379  #266 lines, IP of the primary server
systemctl start redis.service
Redis cli - H 192.168.0.115 - P 6379
192.168.0.115:6379> get name
"test"? Synchronization succeeded
192.168.0.115:6379> exit
redis is configured on the node server
Configure the parameters of connecting redis in the mall project
vi /usr/local/tomcat/webapps/SLSaleSystem/WEB-INF/classes/applicationContext-mybatis.xml
#Fill in the virtual IP address, line 47
<constructor-arg value="192.168.0.188"/>
 <constructor-arg value="6379"/>

tomcatdown
tomcatup
redis cache test
redis-cli -h 192.168.0.188 -p 6379
192.168.0.188:6379> info


Configure redis cluster and master-slave switch
Operation only on the primary server
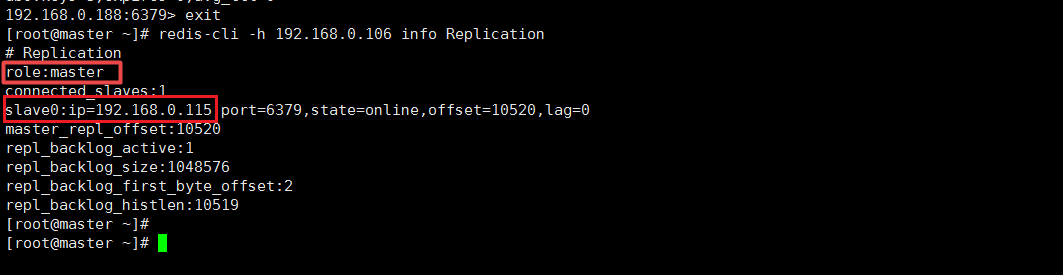
Redis cli - H 192.168.0.106 info replication get the role of the current server
vim /etc/redis-sentinel.conf
protected-mode no  #17 elements
sentinel monitor mymaster 192.168.200.128 6379 1 #69 lines, 1 for 1 standby machine
sentinel down-after-milliseconds mymaster 3000 #98 lines, failover time in milliseconds
Service redis sentinel start
netstat -anpt | grep 26379

redis-cli -h 192.168.0.106 -p 26379 info Sentinel #View cluster information

Verify master-slave switch
On the master server
systemctl stop redis.service
Redis cli - H 192.168.0.106 - P 26379 info Sentinel - view cluster information

Verify high availability architecture
Turn off all master servers and one tomcat service (we1)
To view a web page: http://192.168.0.188