Python xlwt module Excel table foundation 3: cell format, font format, alignment, border and fill, etc
preface:
The first two sections of the blog introduce some basic operations of xlwt on Excel tables. The last two sections are as follows:
1: Cell write, merge, insert bitmap, etc
2: Freezing windows, setting encryption protection, printing settings, etc
This blog mainly introduces cell format settings, including:
1. Cell data type;
2. Font setting;
3. Alignment;
4. Border setting;
5. Filling setting;
6. Cell protection.
1. Data type settings
Here we still use the method of the previous section. First, we create two sheet tables, write data, and then set a custom cell format for the Tset sheet table, and the T2 sheet table is written in the default cell format.
# Import module
import xlwt

work_book = xlwt.Workbook()
work_sheet = work_book.add_sheet('Test')
w2 = work_book.add_sheet('T2')
# Create data
z = [[r,c] for r in range(20) for c in range(20)]
[l.append(str(i)) for i,l in enumerate(z)]
Cell formatting method:
# Style
my_style_1 = xlwt.XFStyle()
# Create cell data type, numeric type, default: 'General'
my_style_1.num_format_str = '0'
# Write data, Test sheet object in custom format, T2 sheet object in default format
for info in z:
    # Write data and Format Cells
    work_sheet.write(info[0],info[1],info[2],my_style_1)
    w2.write(info[0],info[1],info[2])

# Save file
work_book.save('Test3.xls')
The data formats that can be set are:
# Cell data type  #######################################################
'''
            'general',
            '0',
            '0.00',
            '#,##0',
            '#,##0.00',
            '"$"#,##0_);("$"#,##0)',
            '"$"#,##0_);[Red]("$"#,##0)',
            '"$"#,##0.00_);("$"#,##0.00)',
            '"$"#,##0.00_);[Red]("$"#,##0.00)',
            '0%',
            '0.00%',
            '0.00E+00',
            '# ?/?',
            '# ??/??',
            'M/D/YY',
            'D-MMM-YY',
            'D-MMM',
            'MMM-YY',
            'h:mm AM/PM',
            'h:mm:ss AM/PM',
            'h:mm',
            'h:mm:ss',
            'M/D/YY h:mm',
            '_(#,##0_);(#,##0)',
            '_(#,##0_);[Red](#,##0)',
            '_(#,##0.00_);(#,##0.00)',
            '_(#,##0.00_);[Red](#,##0.00)',
            '_("$"* #,##0_);_("$"* (#,##0);_("$"* "-"_);_(@_)',
            '_(* #,##0_);_(* (#,##0);_(* "-"_);_(@_)',
            '_("$"* #,##0.00_);_("$"* (#,##0.00);_("$"* "-"??_);_(@_)',
            '_(* #,##0.00_);_(* (#,##0.00);_(* "-"??_);_(@_)',
            'mm:ss',
            '[h]:mm:ss',
            'mm:ss.0',
            '##0.0E+0',
            '@'
'''
2. Font settings
First create a font object:
# Create font
font = my_style_1.font
Then set the font name, font height, bold and other aspects:
Settable (default):
# self.height = 0x00C8  # 200: this is font with height 10 points
# self.italic = False
# self.struck_out = False
# self.outline = False
# self.shadow = False
# self.colour_index = 0x7FFF
# self.bold = False
# self._weight = 0x0190  # 0x02BC gives bold font
# self.escapement = self.ESCAPEMENT_NONE
# self.underline = self.UNDERLINE_NONE
# self.family = self.FAMILY_NONE
# self.charset = self.CHARSET_SYS_DEFAULT
# self.name = 'Arial'
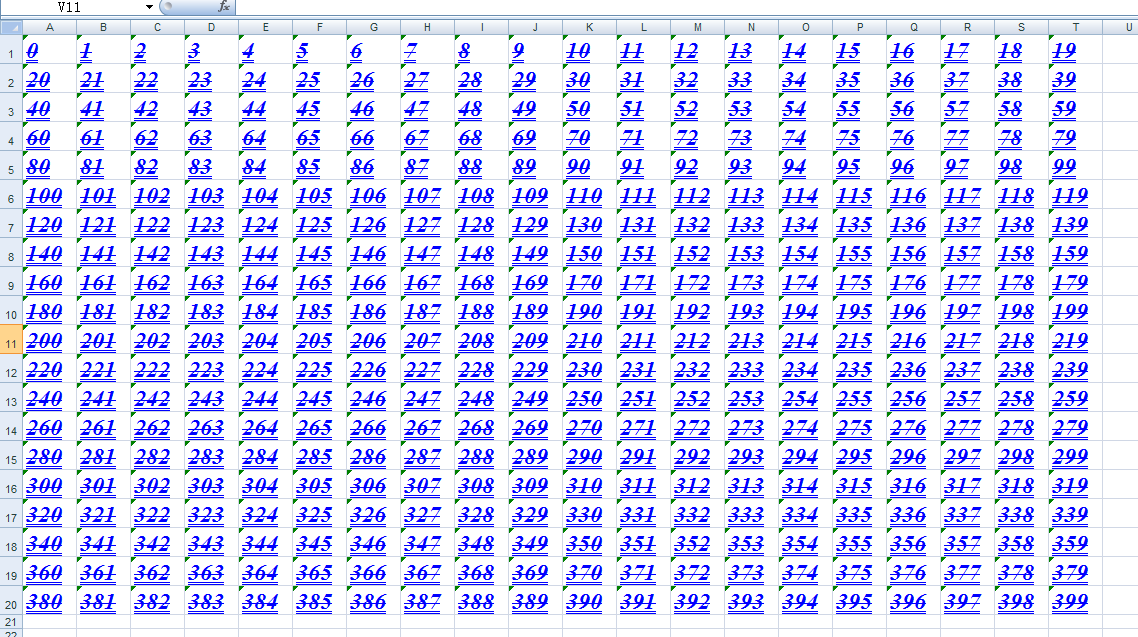
example:
# Set font name
font.name = 'Times New Roman '
# Set font height
font.height = 400
# Set italics
font.italic = True
# Set strikethrough
font.struck_out = True
# Set profile
font.outline = True
# Set shadow
font.shadow = True
# Set font color, blue
font.colour_index = 0x0C
# Set bold
font.bold = True
# Set font superscript and superscript
# font.escapement = 1
# Set underline, double underline
font.underline = 2
# Set character set, GBK
font.charset = 0x86
Set up renderings:

Get font format information:
font_info = font._search_key()
print(font_info)
# Print results:
# (400, True, True, True, True, 12, True, 400, 0, 2, 0, 134, 'Times New Roman ')
Setting Description:
The above settings set the font color to blue:
font.colour_index = 0x0C
Font color options:
# Color index  #######################################################
"""
aqua 0x31
black 0x08
blue 0x0C
blue_gray 0x36
bright_green 0x0B
brown 0x3C
coral 0x1D
cyan_ega 0x0F
dark_blue 0x12
dark_blue_ega 0x12
dark_green 0x3A
dark_green_ega 0x11
dark_purple 0x1C
dark_red 0x10
dark_red_ega 0x10
dark_teal 0x38
dark_yellow 0x13
gold 0x33
gray_ega 0x17
gray25 0x16
gray40 0x37
gray50 0x17
gray80 0x3F
green 0x11
ice_blue 0x1F
indigo 0x3E
ivory 0x1A
lavender 0x2E
light_blue 0x30
light_green 0x2A
light_orange 0x34
light_turquoise 0x29
light_yellow 0x2B
lime 0x32
magenta_ega 0x0E
ocean_blue 0x1E
olive_ega 0x13
olive_green 0x3B
orange 0x35
pale_blue 0x2C
periwinkle 0x18
pink 0x0E
plum 0x3D
purple_ega 0x14
red 0x0A
rose 0x2D
sea_green 0x39
silver_ega 0x16
sky_blue 0x28
tan 0x2F
teal 0x15
teal_ega 0x15
turquoise 0x0F
violet 0x14
white 0x09
yellow 0x0D
"""
Font superscript setting, underline setting, character set setting:
# Font superscript
font.escapement = 1
# Set underline, double underline
font.underline = 2
# Set character set, GBK
font.charset = 0x86
Resolution:
Here, the default font superscript and subscript settings of cells are:
self.escapement = self.ESCAPEMENT_NONE
Look up the following index: Escape element_ NONE = 0x00
If we want to set cell as superscript, superscript is: Escape element_ Superscript, corresponding value: 0x01 (16 digits)
And cell format:
font.escapement = 0x01
//Or:
font.escapement = 1
The other settings that appear below are similar in principle. If they appear again, they will not be explained.
Superscript, underscore, character set index:
ESCAPEMENT_NONE         = 0x00
# Superscript
ESCAPEMENT_SUPERSCRIPT  = 0x01
# subscript
ESCAPEMENT_SUBSCRIPT    = 0x02
# Underline optional
UNDERLINE_NONE          = 0x00
UNDERLINE_SINGLE        = 0x01
UNDERLINE_SINGLE_ACC    = 0x21
UNDERLINE_DOUBLE        = 0x02
UNDERLINE_DOUBLE_ACC    = 0x22
# Character set optional
CHARSET_ANSI_LATIN          = 0x00
CHARSET_SYS_DEFAULT         = 0x01
CHARSET_SYMBOL              = 0x02
CHARSET_APPLE_ROMAN         = 0x4D
CHARSET_ANSI_JAP_SHIFT_JIS  = 0x80
CHARSET_ANSI_KOR_HANGUL     = 0x81
CHARSET_ANSI_KOR_JOHAB      = 0x82
CHARSET_ANSI_CHINESE_GBK    = 0x86
CHARSET_ANSI_CHINESE_BIG5   = 0x88
CHARSET_ANSI_GREEK          = 0xA1
CHARSET_ANSI_TURKISH        = 0xA2
CHARSET_ANSI_VIETNAMESE     = 0xA3
CHARSET_ANSI_HEBREW         = 0xB1
CHARSET_ANSI_ARABIC         = 0xB2
CHARSET_ANSI_BALTIC         = 0xBA
CHARSET_ANSI_CYRILLIC       = 0xCC
CHARSET_ANSI_THAI           = 0xDE
CHARSET_ANSI_LATIN_II       = 0xEE
CHARSET_OEM_LATIN_I         = 0xFF
3. Cell alignment
Establish alignment objects and set alignment properties:
Settable (default):
# self.horz = self.HORZ_GENERAL
# self.vert = self.VERT_BOTTOM
# self.dire = self.DIRECTION_GENERAL
# self.orie = self.ORIENTATION_NOT_ROTATED
# self.rota = self.ROTATION_0_ANGLE
# self.wrap = self.NOT_WRAP_AT_RIGHT
# self.shri = self.NOT_SHRINK_TO_FIT
# self.inde = 0
# self.merg = 0
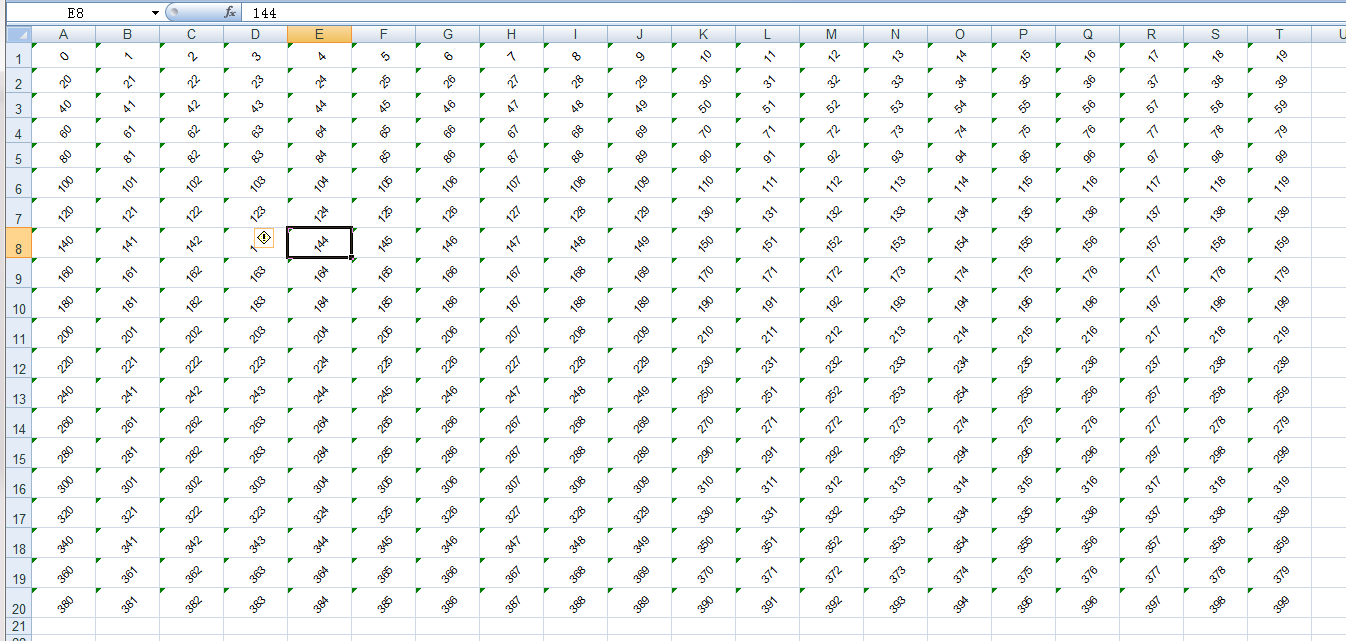
example:
# Establish a way to:
alignment = my_style_1.alignment
# Horizontal alignment, horizontal center
alignment.horz = 2
# Vertical alignment, vertical center
alignment.vert = 1
# Rotation direction, set rotation direction 45
alignment.rota = 45
# Auto indent settings
alignment.shri = 1
Set up renderings:

Get alignment information:
# Get current alignment
alignment_info = alignment._search_key()
print(alignment_info)
# Print results:
# (2, 1, 0, 0, 45, 0, 1, 0, 0)
Other alignment indexes:
# Horizontal alignment
HORZ_GENERAL                = 0x00
HORZ_LEFT                   = 0x01
HORZ_CENTER                 = 0x02
HORZ_RIGHT                  = 0x03
HORZ_FILLED                 = 0x04
HORZ_JUSTIFIED              = 0x05 # BIFF4-BIFF8X
HORZ_CENTER_ACROSS_SEL      = 0x06 # Centred across selection (BIFF4-BIFF8X)
HORZ_DISTRIBUTED            = 0x07 # Distributed (BIFF8X)
# Vertical alignment
VERT_TOP                    = 0x00
VERT_CENTER                 = 0x01
VERT_BOTTOM                 = 0x02
VERT_JUSTIFIED              = 0x03 # Justified (BIFF5-BIFF8X)
VERT_DISTRIBUTED            = 0x04 # Distributed (BIFF8X)
# Rotation angle
ROTATION_0_ANGLE            = 0x00
ROTATION_STACKED            = 0xFF
# Auto indent settings
SHRINK_TO_FIT               = 0x01
NOT_SHRINK_TO_FIT           = 0x00
4. Cell border settings
To create a cell border object, set the property value:
Settable (default):
# self.left = self.NO_LINE
# self.right = self.NO_LINE
# self.top = self.NO_LINE
# self.bottom = self.NO_LINE
# self.diag = self.NO_LINE

# self.left_colour = 0x40
# self.right_colour = 0x40
# self.top_colour = 0x40
# self.bottom_colour = 0x40
# self.diag_colour = 0x40

# self.need_diag1 = self.NO_NEED_DIAG1
# self.need_diag2 = self.NO_NEED_DIAG2
example:
borders = my_style_1.borders
# Left border thin line
borders.left = 1
# Center thin line of right border
borders.right = 2
# Dashed top border
borders.top = 3
# Bottom border dotted line
borders.bottom = 4
# Thick line of inner border
borders.diag = 5

# Left border color blue
borders.left_colour = 0x0C
# Right border color gold
borders.right_colour = 0x33
# Top border color green
borders.top_colour = 0x11
# Bottom border color red
borders.bottom_colour = 0x0A
# Yellow inner border
borders.diag_colour = 0x0D
Setting effect:

Get border setting information:
borders_info = borders._search_key()
print(borders_info)
# Print results
# (1, 2, 3, 4, 5, 12, 51, 17, 10, 13, 0, 0)
Border line index:
NO_LINE = 0x00
THIN    = 0x01
MEDIUM  = 0x02
DASHED  = 0x03
DOTTED  = 0x04
THICK   = 0x05
DOUBLE  = 0x06
HAIR    = 0x07
#The following for BIFF8
MEDIUM_DASHED               = 0x08
THIN_DASH_DOTTED            = 0x09
MEDIUM_DASH_DOTTED          = 0x0A
THIN_DASH_DOT_DOTTED        = 0x0B
MEDIUM_DASH_DOT_DOTTED      = 0x0C
SLANTED_MEDIUM_DASH_DOTTED  = 0x0D
Note: for border color setting, please refer to font color setting index.
5. Fill settings
To create a fill object, set properties:
Settable (default):
# self.pattern = self.NO_PATTERN
# self.pattern_fore_colour = 0x40
# self.pattern_back_colour = 0x41
example:
# Fill settings
pat = my_style_1.pattern
# Open fill
pat.pattern = 1
# Fill foreground, purple
pat.pattern_fore_colour = 0x14
# Fill background color, purple
pat.pattern_back_colour = 0x14
design sketch:

Note: it seems that the xlwt module only provides color fill setting method, while the hatch method is not provided. Color index see font color index.
6. Cell protection
Establish the protection object and set the properties:
Settable (default):
# self.cell_locked = 1
# self.formula_hidden = 0
example:
# Set cell lock
protection.cell_locked = 1
# Set hidden formula in cell
protection.formula_hidden = 1
# Only valid if sheet table is set to protected
work_sheet.set_protect(1)
Note: it is only valid when the sheet table is set as protected (for the effect, please refer to the table protection content in Section 2).
last:
Thank you for reading.
[Python and Office software] a series of articles will explain the use of common Office software processing modules in Python. Interested friends can pay attention to and collect them.