In the previous section, we used a variety of authentication methods of CAS to complete the login authentication in a variety of ways, that is, we mainly used a variety of authentication schemes encapsulated by CAS for us, which can basically meet our multiple needs of authentication. If you still don't know a lot about the multiple authentication methods of CAS, you can review the original—— CAS single sign on (3) - multiple authentication methods.
However, if the scheme provided by CAS framework still can not meet our needs, for example, we need not only user name and password, but also other information, such as mailbox, mobile number, but also mailbox, mobile information in another database, and the same IP input error number limit in a period of time. Here we need to customize the authentication policy and CAS web authentication process.
Custom authentication verification policy
We know that CAS provides us with a variety of authentication data sources. We can choose JDBC, File, JSON and other methods. However, if I want to choose different data sources according to the submitted information in my own authentication method, this method requires us to implement self-defined authentication.
The custom policy mainly changes CAS configuration through reality, designs and registers the custom authentication policy in CAS through AuthenticationHandler, intercepts the data source to achieve the goal.
It is mainly divided into the following three steps:
- Design your own certification data processing program
- Register authentication interceptor to CAS authentication engine
- Change authentication configuration to CAS
First, we need to add the required dependency Library:
        <!-- Custom Authentication -->
        <dependency>
            <groupId>org.apereo.cas</groupId>
            <artifactId>cas-server-core-authentication-api</artifactId>
            <version>${cas.version}</version>
        </dependency>

        <!-- Custom Configuration -->
        <dependency>
            <groupId>org.apereo.cas</groupId>
            <artifactId>cas-server-core-configuration-api</artifactId>
            <version>${cas.version}</version>
        </dependency>
If our authentication method is just the traditional user name and password, we can implement the abstract class AbstractUsernamePasswordAuthenticationHandler, which is also the official instance.
You can view the official reference: Configuring-Custom-Authentication . There is a pit in the official instance, which gives the example before 5.2.x. the jar package after 5.3.x has changed, and there is a pit in one place. It is OK before 5.2.x. the new 5.3.x is not OK.
Next, we define our own implementation class, CustomUsernamePasswordAuthentication, as follows:
/**
 * @author anumbrella
 */
public class CustomUsernamePasswordAuthentication extends AbstractUsernamePasswordAuthenticationHandler {

    public CustomUsernamePasswordAuthentication(String name, ServicesManager servicesManager, PrincipalFactory principalFactory, Integer order) {
        super(name, servicesManager, principalFactory, order);
    }

    @Override
    protected AuthenticationHandlerExecutionResult authenticateUsernamePasswordInternal(UsernamePasswordCredential usernamePasswordCredential, String s) throws GeneralSecurityException, PreventedException {

        String username = usernamePasswordCredential.getUsername();

        String password = usernamePasswordCredential.getPassword();

        System.out.println("username : " + username);
        System.out.println("password : " + password);

        // JDBC template depends on connection pool to get data connection, so connection pool must be constructed first
        DriverManagerDataSource dataSource = new DriverManagerDataSource();
        dataSource.setDriverClassName("com.mysql.jdbc.Driver");
        dataSource.setUrl("jdbc:mysql://localhost:3306/cas");
        dataSource.setUsername("root");
        dataSource.setPassword("123");

        // Create JDBC template
        JdbcTemplate jdbcTemplate = new JdbcTemplate();
        jdbcTemplate.setDataSource(dataSource);

        String sql = "SELECT * FROM user WHERE username = ?";

        User info = (User) jdbcTemplate.queryForObject(sql, new Object[]{username}, new BeanPropertyRowMapper(User.class));

        System.out.println("database username : "+ info.getUsername());
        System.out.println("database password : "+ info.getPassword());

        if (info == null) {
            throw new AccountException("Sorry, username not found!");
        }

        if (!info.getPassword().equals(password)) {
            throw new FailedLoginException("Sorry, password not correct!");
        } else {

            //Multiple attribute information returned to the client can be customized
            HashMap<String, Object> returnInfo = new HashMap<>();
            returnInfo.put("expired", info.getDisabled());

            final List<MessageDescriptor> list = new ArrayList<>();

            return createHandlerResult(usernamePasswordCredential,
                    this.principalFactory.createPrincipal(username, returnInfo), list);
        }
    }
}
This is different from the official instance in two places. First, the returned one is AuthenticationHandlerExecutionResult instead of HandlerResult. In fact, the source code is the same. It's just renamed in the new version. Second, the warnings passed in by createHandlerResult cannot be null, otherwise the submitted information cannot be authenticated successfully after the program runs!!!
The code obtains the user name and password by intercepting the incoming Credential, and then customizes the user information returned to the client. Here, you can customize multiple attribute information returned to the client through code.
Then we inject the configuration information and inherit the AuthenticationEventExecutionPlanConfigurer.
/**
 * @author anumbrella
 */
@Configuration("CustomAuthenticationConfiguration")
@EnableConfigurationProperties(CasConfigurationProperties.class)
public class CustomAuthenticationConfiguration implements AuthenticationEventExecutionPlanConfigurer {

    @Autowired
    private CasConfigurationProperties casProperties;

    @Autowired
    @Qualifier("servicesManager")
    private ServicesManager servicesManager;

    @Bean
    public AuthenticationHandler myAuthenticationHandler() {
        // Parameters: name, servicesManager, principalFactory, order
        // Defined as using it for authentication first
        return new CustomUsernamePasswordAuthentication(CustomUsernamePasswordAuthentication.class.getName(),
                servicesManager, new DefaultPrincipalFactory(), 1);
    }

    @Override
    public void configureAuthenticationExecutionPlan(final AuthenticationEventExecutionPlan plan) {
        plan.registerAuthenticationHandler(myAuthenticationHandler());
    }
}
Finally, we create a new META-INF directory in the src/main/resources directory, and a new spring.factories file below to specify the configuration as our own new information.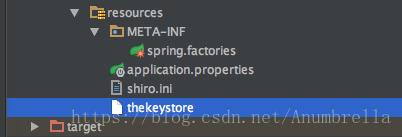
org.springframework.boot.autoconfigure.EnableAutoConfiguration=net.anumbrella.sso.config.CustomAuthenticationConfiguration
The database is still the original design, as follows: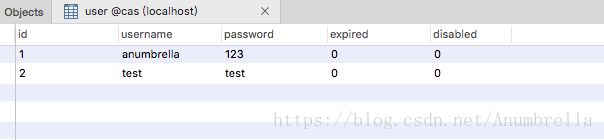
Start the application, input the user name and password, view the information we print on the console, you can find the data we submit from the landing page and the data we query from the database, match the information, and the login authentication is successful!!
So we can verify the user name and password, and we can choose different data sources.
There may also be questions from readers. The information I submit is not only user name and password. How to customize the authentication?
Here we need to inherit the excuse of AbstractPreAndPostProcessingAuthenticationHandler. In fact, the above AbstractUsernamePasswordAuthenticationHandler is the inherited class, which is only used for simple user name and password verification. We can view the source code as follows:
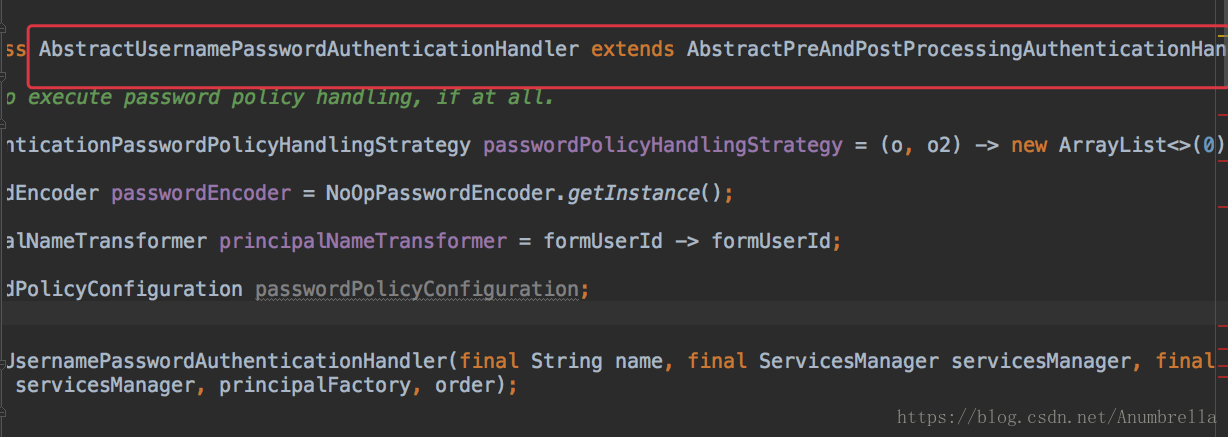
So we need to customize the implementation of AbstractPreAndPostProcessingAuthenticationHandler.
For example, here I create a new CustomerHandlerAuthentication class, as follows:
/**
 * @author anumbrella
 */
public class CustomerHandlerAuthentication extends AbstractPreAndPostProcessingAuthenticationHandler {

    public CustomerHandlerAuthentication(String name, ServicesManager servicesManager, PrincipalFactory principalFactory, Integer order) {
        super(name, servicesManager, principalFactory, order);
    }

    @Override
    public boolean supports(Credential credential) {
        //Determine whether the passed Credential is the type that you can handle
        return credential instanceof UsernamePasswordCredential;
    }

    @Override
    protected AuthenticationHandlerExecutionResult doAuthentication(Credential credential) throws GeneralSecurityException, PreventedException {

        UsernamePasswordCredential usernamePasswordCredentia = (UsernamePasswordCredential) credential;

        String username = usernamePasswordCredentia.getUsername();
        String password = usernamePasswordCredentia.getPassword();

        System.out.println("username : " + username);
        System.out.println("password : " + password);


        // JDBC template depends on connection pool to get data connection, so connection pool must be constructed first
        DriverManagerDataSource dataSource = new DriverManagerDataSource();
        dataSource.setDriverClassName("com.mysql.jdbc.Driver");
        dataSource.setUrl("jdbc:mysql://localhost:3306/cas");
        dataSource.setUsername("root");
        dataSource.setPassword("123");

        // Create JDBC template
        JdbcTemplate jdbcTemplate = new JdbcTemplate();
        jdbcTemplate.setDataSource(dataSource);

        String sql = "SELECT * FROM user WHERE username = ?";

        User info = (User) jdbcTemplate.queryForObject(sql, new Object[]{username}, new BeanPropertyRowMapper(User.class));

        System.out.println("database username : "+ info.getUsername());
        System.out.println("database password : "+ info.getPassword());


        if (info == null) {
            throw new AccountException("Sorry, username not found!");
        }

        if (!info.getPassword().equals(password)) {
            throw new FailedLoginException("Sorry, password not correct!");
        } else {

            final List<MessageDescriptor> list = new ArrayList<>();

            return createHandlerResult(usernamePasswordCredentia,
                    this.principalFactory.createPrincipal(username, Collections.emptyMap()), list);
        }
    }
}
Here I simply implement the information acquisition of user name and password. When more information is submitted, the submitted information can be obtained when converting the Credential. I'll explain later. It doesn't matter if I don't understand here.
Then we change the AuthenticationHandler to CustomerHandlerAuthentication in the CustomAuthenticationConfiguration.
    @Bean
    public AuthenticationHandler myAuthenticationHandler() {
        // Parameters: name, servicesManager, principalFactory, order
        // Defined as using it for authentication first
        return new CustomerHandlerAuthentication(CustomerHandlerAuthentication.class.getName(),
                servicesManager, new DefaultPrincipalFactory(), 1);
    }
When the application is started, it can be found that the same effect can be achieved as before.
Knowledge of extending user submitted custom form information will be explained in the next section.
Code instance: Chapter3