Double eleven is coming. Do you plan to buy a cloud server and build a website, such as a personal blog?
This paper starts from scratch. The software is WordPress, which is relatively mature, and the operating system is CentOS
1. Environmental preparation
Official website address: https://cn.wordpress.org
- PHP 7.4 or later
- MySQL 5.6 or later, or MariaDB 10.1 or later
- Nginx or with Mod_ Apache for Rewrite Module
- HTTPS support
2. Install PHP8
2.1 update it first
dnf upgrade
2.2 view the php version in the current dnf Library
dnf list mysql
What I see here is version 7.2, which is too low,
php.x86_64 7.2.24-1.module_el8.2.0+313+b04d0a66 appstream
A new one needs to be installed.
2.3 first install the Remi repository
dnf install -y https://rpms.remirepo.net/enterprise/remi-release-8.rpm
remi-release-8.rpm           0 kB/s |  26 kB     00:01
 Dependency resolution.
=====================================================================================
software package              framework               edition            Warehouse                 size
=====================================================================================
install:
 remi-release      noarch             8.4-1.el8.remi  @commandline         26 k
 Install dependencies:
 epel-release      noarch             8-11.el8        extras               24 k
EPEL release will be installed automatically, which does not need to be installed separately.
2.4 listing PHP module s
dnf module list php
The results are similar as follows:
CentOS Linux 8 - AppStream
Name        Stream        Profiles                       Summary
php         7.2 [d]       common [d], devel, minimal     PHP scripting language
php         7.3           common [d], devel, minimal     PHP scripting language
php         7.4           common [d], devel, minimal     PHP scripting language

Remi's Modular repository for Enterprise Linux 8 - x86_64
Name        Stream         Profiles                      Summary
php         remi-7.2       common [d], devel, minimal    PHP scripting language
php         remi-7.3       common [d], devel, minimal    PHP scripting language
php         remi-7.4       common [d], devel, minimal    PHP scripting language
php         remi-8.0       common [d], devel, minimal    PHP scripting language
php         remi-8.1       common [d], devel, minimal    PHP scripting language
You can see that there are versions 8.0 and 8.1. The official website is still RC version and is ready to install 8.0.
You will be asked to import various public keys and select "y".
2.5 installing php 8.0
dnf module enable php:remi-8.0
dnf install php
===================================================================================
 software package            framework     edition                 Warehouse                  size
===================================================================================
install:
 php              x86_64   8.0.12-1.el8.remi     remi-modular         1.6 M
 Install dependencies:
 apr              x86_64   1.6.3-11.el8          AppStream            125 k
 apr-util         x86_64   1.6.1-6.el8           AppStream            105 k
 centos-logos-httpd noarch 85.8-1.el8            base                  75 k
 httpd            x86_64   2.4.37-39.module_el8  AppStream            1.4 M
 httpd-filesystem noarch   2.4.37-39.module_el8  AppStream             39 k
 httpd-tools      x86_64   2.4.37-39.module_el8  AppStream            106 k
 libsodium        x86_64   1.0.18-2.el8          epel                 162 k
 libxslt          x86_64   1.1.32-6.el8          base                 250 k
 mailcap          noarch   2.1.48-3.el8          base                  39 k
 mod_http2        x86_64   1.15.7-3.module_el8   AppStream            154 k
 oniguruma5php    x86_64   6.9.7.1-1.el8.remi    remi-safe            210 k
 php-common       x86_64   8.0.12-1.el8.remi     remi-modular         1.2 M
 Install weak dependencies:
 apr-util-bdb     x86_64   1.6.1-6.el8           AppStream             25 k
 apr-util-openssl x86_64   1.6.1-6.el8           AppStream             27 k
 nginx-filesystem noarch   1:1.14.1-9.module_el8 AppStream             24 k
 php-cli          x86_64   8.0.12-1.el8.remi     remi-modular         4.7 M
 php-fpm          x86_64   8.0.12-1.el8.remi     remi-modular         1.6 M
 php-mbstring     x86_64   8.0.12-1.el8.remi     remi-modular         525 k
 php-opcache      x86_64   8.0.12-1.el8.remi     remi-modular         768 k
 php-pdo          x86_64   8.0.12-1.el8.remi     remi-modular         156 k
 php-sodium       x86_64   8.0.12-1.el8.remi     remi-modular          94 k
 php-xml          x86_64   8.0.12-1.el8.remi     remi-modular         238 k
 Enable module flow:
 httpd                     2.4
 nginx                     1.14

Transaction summary
================================================================================
Install 23 packages
Select y and wait for the installation to complete.
2.6 installing PHP MySQL extension
dnf install php-mysql
2.7 verifying installation
Enter the command to view the php version:
php -v
PHP 8.0.12 (cli) (built: Oct 19 2021 10:34:32) ( NTS gcc x86_64 )
Copyright (c) The PHP Group
Zend Engine v4.0.12, Copyright (c) Zend Technologies
    with Zend OPcache v8.0.12, Copyright (c), by Zend Technologies
3. Install mysql8.0
3.1 view mysql version in dnf Library
dnf list mysql
mysql.x86_64 8.0.26-1.module_el8.4.0+915+de215114 appstream
Version 8.0, direct installation.
3.2 installing Mysql8.0
Enter the installation command with "@":
dnf install @mysql
Dependency resolution.
========================================================================================
 software package         framework     edition              Warehouse                size
========================================================================================
Installation group/Module package:
 mysql-server  x86_64   8.0.26-1.module_el8.4.0+915+de215114   AppStream      25 M
 Install dependencies:
 ...ellipsis....
Install module configuration file:
 mysql/server
 Enable module flow:
 perl                   5.26
 perl-IO-Socket-SSL     2.066
 perl-libwww-perl       6.34

Transaction summary
========================================================================================
Install 54 software package
Select y to wait for the installation to complete.
3.3 configuration
mysql start
systemctl start mysqld
View running status
systemctl enable mysqld
Set to startup
systemctl enable mysqld
Run the configuration wizard
mysql_secure_installation
Follow the prompts:
[root@localhost mysql]# mysql_secure_installation
## By default, you are logged in with an empty password
Securing the MySQL server deployment.
Connecting to MySQL using a blank password.

##Whether to install the password strength verification module depends on your needs
VALIDATE PASSWORD COMPONENT can be used to test passwords
and improve security. It checks the strength of password
and allows the users to set only those passwords which are
secure enough. Would you like to setup VALIDATE PASSWORD component?
Press y|Y for Yes, any other key for No: no

## Set root password
Please set the password for root here.
New password:
Re-enter new password:

## Delete anonymous user? Yes
By default, a MySQL installation has an anonymous user,
allowing anyone to log into MySQL without having to have
a user account created for them. This is intended only for
testing, and to make the installation go a bit smoother.
You should remove them before moving into a production
environment.

Remove anonymous users? (Press y|Y for Yes, any other key for No) : y
Success.

## By default, only local access is allowed. Whether to enable remote access depends on your own needs
Normally, root should only be allowed to connect from
'localhost'. This ensures that someone cannot guess at
the root password from the network.

Disallow root login remotely? (Press y|Y for Yes, any other key for No) : y
Success.

## Delete the test database? It can be deleted
By default, MySQL comes with a database named 'test' that
anyone can access. This is also intended only for testing,
and should be removed before moving into a production
environment.

Remove test database and access to it? (Press y|Y for Yes, any other key for No) : y
 - Dropping test database...
Success.

 - Removing privileges on test database...
Success.

## Whether to reload the configuration immediately, select Yes
Reloading the privilege tables will ensure that all changes
made so far will take effect immediately.

Reload privilege tables now? (Press y|Y for Yes, any other key for No) : y
Success.
## Configuration complete
All done!
3.4 creating a database for WordPress
Login database
mysql -uroot -p
Prompt for the password. Enter the password of the root you just set.
Create a database with its own name, such as wordpress
create database wordpress;
View existing databases
show databases;
You can see the newly created database
+--------------------+
| Database           |
+--------------------+
| information_schema |
| mysql              |
| performance_schema |
| sys                |
| wordpress          |
+--------------------+
5 rows in set (0.00 sec)
Enter exit to exit.
4 install Nginx
4.1 view Nginx version in dnf Library
dnf list nginx
nginx.x86_64 1:1.14.1-9.module_el8.0.0+184+e34fea82 appstream
The version is a little low. Install the new version.
4.2 installation Nginx1.20.1
Enter installation command
dnf install http://nginx.org/packages/centos/8/x86_64/RPMS/nginx-1.20.1-1.el8.ngx.x86_64.rpm
==========================================================================================
software package            framework       edition                        Warehouse                  size
==========================================================================================
install:
 nginx           x86_64     1:1.20.1-1.el8.ngx          @commandline          819 k

Transaction summary
==========================================================================================
Install 1 package
Select y to wait for the installation to complete.
4.3 view firewall
Check whether port 80 has been opened and modify the firewall settings. A cloud needs to modify security group settings.
firewall-cmd --query-port=80/tcp
If no is returned, it is not open.
Open 80 port command:
firewall-cmd --zone=public --add-port=80/tcp --permanent
Make settings effective:
firewall-cmd --reload
4.4 visit the default website to verify the installation
start nginx
systemctl start nginx
View running status
systemctl status nginx
You will see a success prompt containing the words "Active: active (running)".
Set automatic startup
systemctl enable nginx
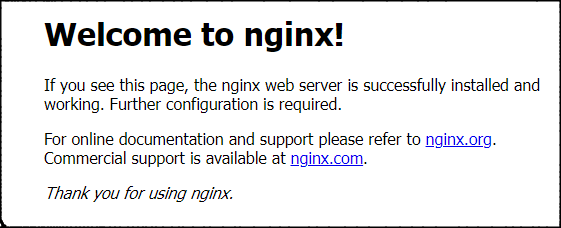
When accessing http: / / server ip, the normal page is as follows
4.5 enable php support
Modify nginx configuration file
cd /etc/nginx/conf.d
Backup default configuration files
cp default.conf default.conf.bak
Modify default.conf
vi default.conf
Press the "i" key to find the following code block. The default is the comment status. Remove the # number and modify it to the following configuration
    # pass the PHP scripts to FastCGI server listening on 127.0.0.1:9000
    #
    location ~ \.php$ {
        root           /usr/share/nginx/html/;
        fastcgi_pass   unix:/run/php-fpm/www.sock;
        fastcgi_index  index.php;
        fastcgi_param  SCRIPT_FILENAME  $document_root$fastcgi_script_name;
        include        fastcgi_params;
    }
fastcgi_pass corresponds to the listening configuration of PHP FPM. The configuration file is: / etc / PHP fpm.d/www.conf, which can be viewed and verified.
; The address on which to accept FastCGI requests.
; Valid syntaxes are:
;   'ip.add.re.ss:port'    - to listen on a TCP socket to a specific IPv4 address on
;                            a specific port;
;   '[ip:6:addr:ess]:port' - to listen on a TCP socket to a specific IPv6 address on
;                            a specific port;
;   'port'                 - to listen on a TCP socket to all addresses
;                            (IPv6 and IPv4-mapped) on a specific port;
;   '/path/to/unix/socket' - to listen on a unix socket.
; Note: This value is mandatory.
listen = /run/php-fpm/www.sock
Set the default file to index.php
    location / {
        root   /usr/share/nginx/html;
        index  index.php index.html index.htm;
    }
After modification, press ESC and enter: wq save and exit.
Restart nginx:
systemctl restart nginx
5. Install WordPress
5.1 visit the website directory
The default website directory of nginx is / usr/share/nginx/html /. Visit and verify it
cd /usr/share/nginx/html/
ll
You can see two html files, the default "Welcome to nginx!" page.
-rw-r--r--. 1 root root 494 5 September 25:41 50x.html
-rw-r--r--. 1 root root 612 5 September 25:41 index.html
You can delete the default index.html file
rm -r index.html
Ask whether to delete, and enter y.
5.2 download installation package
Install the download and decompression tools, and ignore them if they are already installed
yum install wget
yum install tar
Download wordpress
wget https://cn.wordpress.org/latest-zh_CN.tar.gz
After downloading, unzip
tar -zxvf latest-zh_CN.tar.gz
Copy to current directory
cp -R wordpress/* /usr/share/nginx/html/
5.3 start installation
Visit http: / / server IP / WP admin / install. PHP to see the following page:
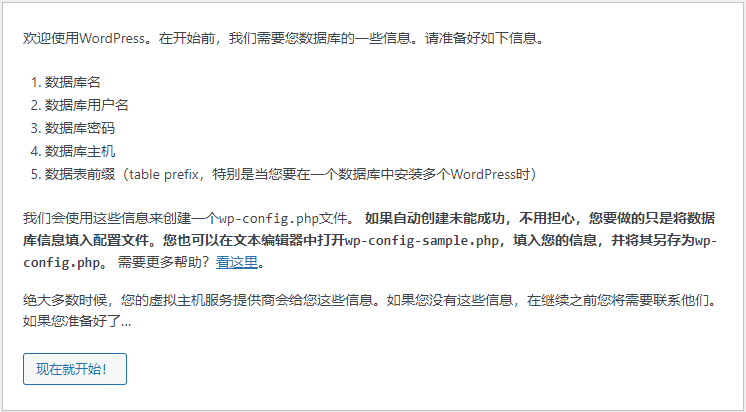
Click the button to start configuration:
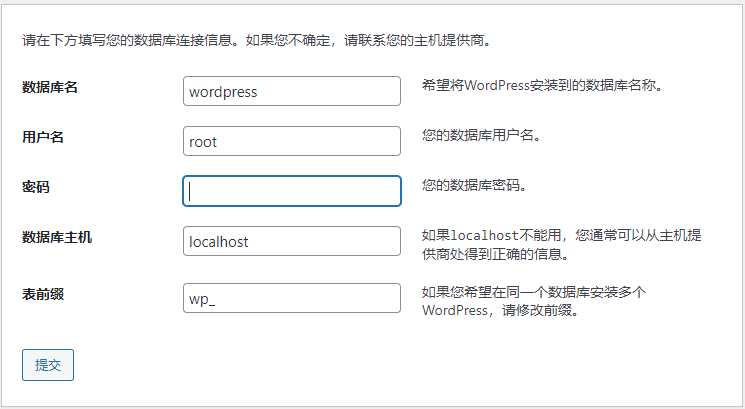
Enter information about the prepared database.
If the prompt cannot be written to wp-config.php, see the following figure
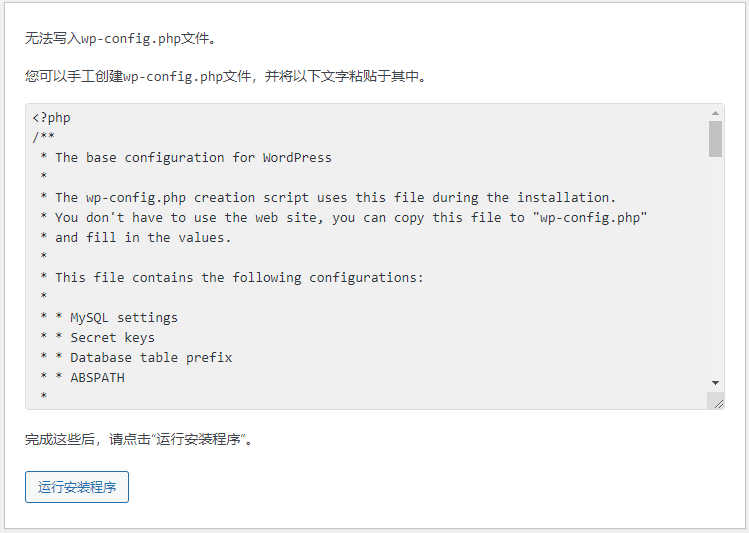
Manually create the wp-config.php file
cd /usr/share/nginx/html/
vi wp-config.php
Press i to paste the contents of the file given in the web page.
Press ESC and enter: wq enter to save.
Continue with the installation and set up information about the website on a new page
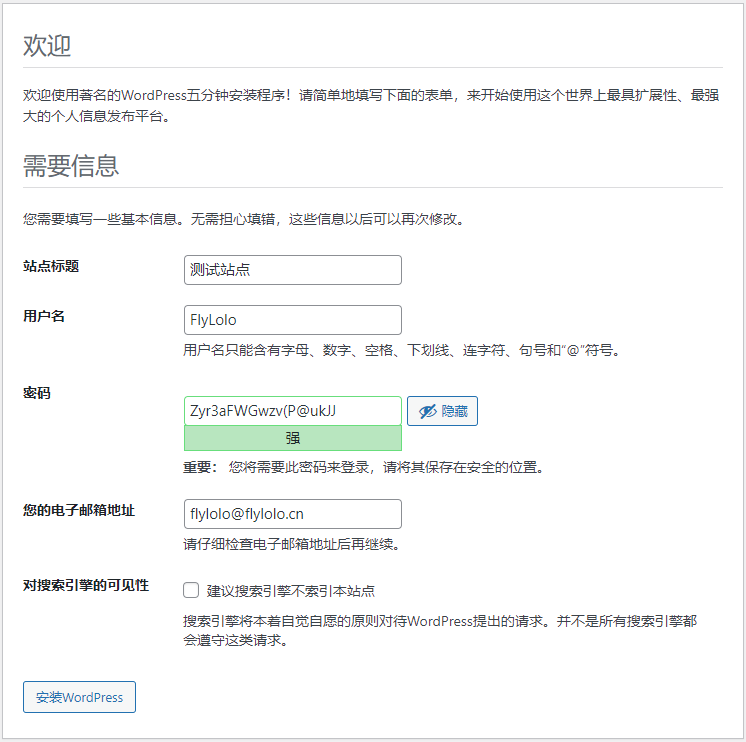
Click the button to start the installation.
After successful installation, you can access http: / / server ip.
Management background address: http: / / server IP / WP admin