01 Preface
At present, the latest version of PRISM is 8.1.97. This section explains it with 6.3.0.0. You can get the source code of PRISM on Github.
- Prism Github address: https://github.com/PrismLibrary/Prism
- Prism official documents: https://prismlibrary.com/docs/
- Prism needs to use IOC containers. Unity and MEF are the options. Here I use MEF and unity respectively. I don't understand MEF's suggestions. Take a look at Daniel's series of blog posts http://www.cnblogs.com/yunfeifei/p/3922668.html
02 installation Library
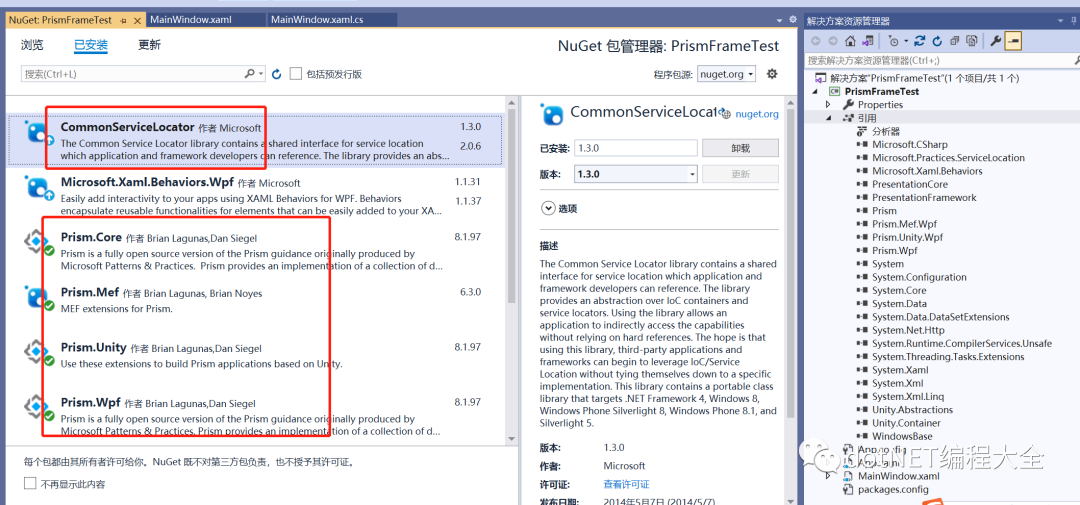
Install Prism related common libraries on nuget

03 project construction
step1: create a new solution: I name it PrismFrameTest here;
Step 2: delete MainWindow.xaml and start boot in App.xaml
StartupUri="MainWindow.xaml"
Then create a new program entry in App.xaml.cs
 protected override void OnStartup(StartupEventArgs e)
        {
            base.OnStartup(e);
            MyBootstrapper bootStrapper = new MyBootstrapper();
            bootStrapper.Run(true);
        }
To create a new boot class MyBootstrapper.cs, you need to inherit the base class MefBootstrapper under the base class Prism.Mef library
Mode 1: mef
public class MyBootstrapper : MefBootstrapper
    {
        protected override DependencyObject CreateShell()
        {
            return this.Container.GetExportedValue<MyShellView>();
        }
        protected override void InitializeShell()
        {
            base.InitializeShell();
            Application.Current.MainWindow = (MyShellView)this.Shell;
            Application.Current.MainWindow.Show();//Show the main window, but there is no content in the content. HelloWorldView will be displayed only after calling the Initialize() method in the Module.
        }
        protected override void ConfigureAggregateCatalog()
        {
            base.ConfigureAggregateCatalog();
            this.AggregateCatalog.Catalogs.Add(new AssemblyCatalog(typeof(MyBootstrapper).Assembly));
            this.AggregateCatalog.Catalogs.Add(new AssemblyCatalog(typeof(PrismModuleLeft.ModuleLeftViewModel).Assembly));//Registration module
            //this.AggregateCatalog.Catalogs.Add(new AssemblyCatalog(typeof(ModuleB.ModuleBViewModel).Assembly));
        }
        protected override IModuleCatalog CreateModuleCatalog()
        {
            // When using MEF, the existing Prism ModuleCatalog is still the place to configure modules via configuration files.
            return new ConfigurationModuleCatalog();
        }

    }
Mode 2 uses unity
 public class MyBootstrapper : UnityBootstrapper
    {
        protected override DependencyObject CreateShell()
        {
            return Container.Resolve<MyShellView>();
        }

        protected override void InitializeShell()
        {
            base.InitializeShell();

            Application.Current.MainWindow = (MyShellView)this.Shell;
            Application.Current.MainWindow.Show();//Show the main window, but there is no content in the content. HelloWorldView will be displayed only after calling the Initialize() method in the Module.
        }

        protected override void ConfigureModuleCatalog()
        {
            base.ConfigureModuleCatalog();

            ModuleCatalog moduleCatalog = (ModuleCatalog)this.ModuleCatalog;
            moduleCatalog.AddModule(typeof(PrismModuleLeft.ModuleLeftViewModel));//Registration module
        }

    }
step3:
Then create a new XAML form MyShellView.xaml, and divide the form into left and right parts
Here, cal:RegionManager.RegionName is a dependent property. We associate it with ItemsControl control, and MainRegion is a placeholder.
 <ItemsControl cal:RegionManager.RegionName="RegionLeft" HorizontalAlignment="Center" VerticalAlignment="Center"/>
 <ItemsControl cal:RegionManager.RegionName="RegionRight" HorizontalAlignment="Center" VerticalAlignment="Center" Grid.Column="1"/>
Mark the class as [Export] in the corresponding cs
step4: create a new class library PrismModuleLeft
Create a new ModuleLeftView.xaml in the class library
About event binding: (both methods are listed in the following code)
① Controls inherit from ButtonBase and MenuItem classes, such as Button, RadioButton, Hyperlink, MenuItem... In this case, since Prism has helped us implement the Command property of these controls, we can directly bind the Command property to bind the Click event to the ViewModel:
② ListView, ListBox, DropDownList and other controls without Click event. At this time, when we want to implement common events such as SelectedItemChanged and SelectionChanged, we use the system.windows.interaction.dll file attached to Expression Blend, which uses the interaction trigger and InvokeCommandAction behavior to help us directly bind the events of the control.
Reference required
xmlns:i="http://schemas.microsoft.com/expression/2010/interactivity"
 <Grid>
        <Grid.RowDefinitions>
            <RowDefinition/>
            <RowDefinition/>
        </Grid.RowDefinitions>
        <TextBlock  Foreground="Red" FontSize="20" Text="{Binding TxtLabel}" Background="Gray" Grid.Row="0"/>
        <Button Background="LightCyan" Name="CreateRecipe" Command="{Binding CreateRecipeCommand}" Content="BtnCtr" FontSize="20" Grid.Row="1">
            <i:Interaction.Triggers >
                <i:EventTrigger EventName="PreviewKeyDown">
                    <i:InvokeCommandAction Command="{Binding KeyUpEventCommand}" />
                </i:EventTrigger>
            </i:Interaction.Triggers>
        </Button>
        </Grid>
In the corresponding cs:
  [Export]
    public partial class ModuleLeftView : UserControl
    {
        private readonly IRegionViewRegistry regionViewRegistry;
        public ModuleLeftView()
        {
            InitializeComponent();
            this.DataContext = new ModuleLeftViewModel(regionViewRegistry);
        }
    }
step4: in ModuleLeftViewModel:
using Prism.Commands;
using Prism.Mef.Modularity;
using Prism.Modularity;
using Prism.Mvvm;
using Prism.Regions;
using PropertyChanged;
using System.ComponentModel.Composition;
using System.Windows;
using System.Windows.Input;

namespace PrismModuleLeft
{
    [AddINotifyPropertyChangedInterface]
    [ModuleExport("ModuleLeftViewModel", typeof(ModuleLeftViewModel), InitializationMode = InitializationMode.WhenAvailable)]
    public class ModuleLeftViewModel : BindableBase,IModule
    {
        private readonly IRegionViewRegistry regionViewRegistry;
        public ICommand CreateRecipeCommand { get; set; }
        public DelegateCommand<KeyEventArgs> KeyUpEventCommand { get; private set; }
        public string TxtLabel { get; set; } = "Hello! I am ModuleA";
        public void KeyUpEventHandler(KeyEventArgs args)
        {
            MessageBox.Show("PrismCTR");
        }
        public void Initialize()
        {
            regionViewRegistry.RegisterViewWithRegion("RegionLeft", typeof(ModuleLeftView));

        }
        [ImportingConstructor]
        public ModuleLeftViewModel(IRegionViewRegistry registry)
        {
            this.regionViewRegistry = registry;
            CreateRecipeCommand = new DelegateCommand(() => CreateRecipe());
        }
        public void CreateRecipe()
        {
            TxtLabel = "this is my first prism test example";
            MessageBox.Show(TxtLabel);
        }
    }
}
04 summary
At this time, let's make a brief summary of PRISM infrastructure:
Shell: the main window whose functions are realized through the Module;
Bootstrapper: the entry point of the application;
Region: content area, similar to a placeholder
Module: the thing that truly realizes business functions is the collection composed of View, data and model;
Prism is a very powerful wpf mvvm pattern framework. It uses dependency injection and control inversion containers to help us solve the loose coupling problem of teamwork.
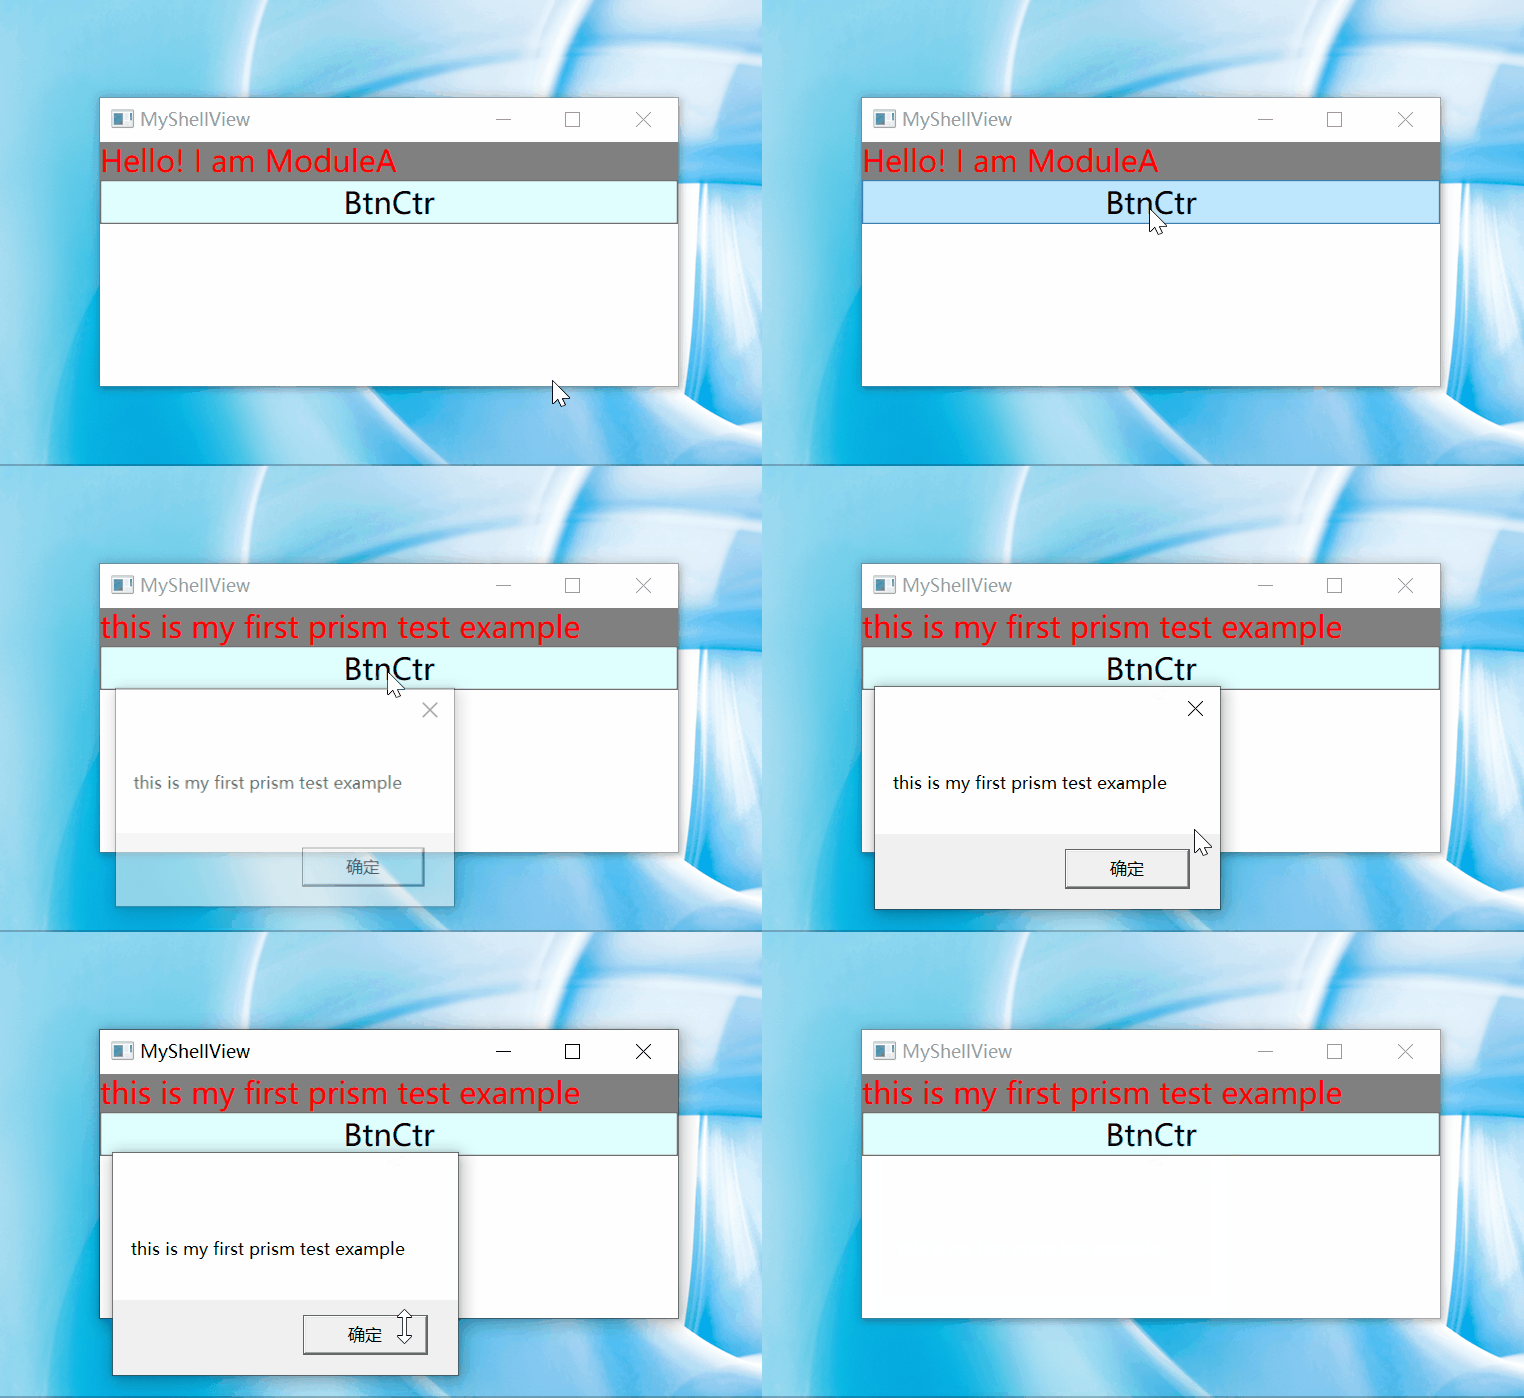
05 result demonstration
