Last article: Front-end automated testing
Another serial is coming! This time, we will introduce how to build a web pack development environment from 0, understand its internal mechanism and principle, so that we can master and use web pack more accurately. Let's begin with:
1. What is Webpack?
Web pack is a static module bundler for modern JavaScript applications. When web pack processes applications, it recursively builds a dependency graph that contains each module the application needs, and then packages all these modules into one or more bundles.

Use Webpack as a front-end build tool:
- Code conversion: TypeScript compiled into JavaScript, SCSS compiled into CSS, etc.
- File optimization: compress JavaScript, CSS, HTML code, compress and merge pictures, etc.
- Code segmentation: extract the common code of multiple pages, extract the code of the first screen without the execution part to load asynchronously;
- Module merging: There will be many modules and files in the project adopting modularization, which need to build functions to classify and merge modules into one file;
- Auto refresh: monitor the changes of local source code, rebuild and refresh the browser automatically;
- Code Verification: Before the code is submitted to the warehouse, it is necessary to verify whether the code conforms to the specifications and whether the unit tests pass.
- Automatic Publishing: After updating the code, the online publishing code is automatically constructed and transmitted to the publishing system.
There are two cores in Web pack applications:
- 1) Module converter, which is used to convert the original content of the module into new content according to the requirements, can load non-JS modules;
- 2) Extension plug-ins inject extension logic at a specific time in the Webpack build process to change the build results or do what you want.
2. Initialization project
├── src   # Source directory
│   ├── a-module.js
│   └── index.js
Write a-module.js
module.exports = 'hello';
Write index.js
let a = require('./a-module');
console.log(a);
Here we use CommonJS module to introduce, which is not run on browsers by default. We want to package it through webpack!
3. Quick start of webpack
3.1 installation
npm init -y
npm install webpack webpack-cli --save-dev
webpack supports 0 configuration by default, configuring scripts scripts
"scripts": {
  "build": "webpack"
}
When npm run build is executed, the webpack command under node_modules/.bin is invoked by default, and the webpack-cli parsing user parameters is invoked internally to package. The default entry file is src/index.js.
npx webpack can also be used here. npx is an executable file provided by npm after version 5.2.

We found that a dist directory has been generated, which is the result of the final packaging. main.js can be referenced directly in html, and we are also prompted to default mode to production.
3.2 webpack.config.js
We don't usually use 0 configuration when packing. By default, webpack will look for webpack.config.js or webpackfile.js files in the current directory.
Packaging through configuration files:
const path = require('path');
module.exports = {
    entry:'./src/index.js',
    output:{
        filename:'bundle.js',
        // Packed Outcome File
        path:path.resolve(__dirname,'dist')// Packed in dist directory
    }
}
3.3 Configure packaged mode
We need to provide the mode l attribute when packaging to distinguish the development environment from the production environment in order to split the configuration file.
├── build
│   ├── webpack.base.js
│   ├── webpack.dev.js
│   └── webpack.prod.js
We can package by specifying different files.
Configure scripts scripts:
"scripts": {
  "build": "webpack --config ./build/webpack.prod",
  "dev": "webpack --config ./build/webpack.dev"
}
You can specify which configuration file to use for packaging by config parameters.
Differentiation by env parameters
"scripts": {
    "build": "webpack --env.production --config ./build/webpack.base",
    "dev": "webpack --env.development --config ./build/webpack.base"
}
Modifying the default export function of webpack.base file will pass environment variables into the parameters of the function.
module.exports = (env)=>{
    console.log(env); // { development: true }
}
Merge configuration files
We can determine whether the current environment is a development environment to load different configurations. Here we need to merge the configurations.
Install webpack-merge:
npm install webpack-merge --save-dev
webpack.dev configuration
module.exports = {
    mode:'development'
}
webpack.prod configuration
module.exports = {
    mode:'production'
}
webpack.base configuration
const path = require('path');
const merge = require('webpack-merge');
// development environment
const dev = require('./webpack.dev');
// production environment
const prod = require('./webpack.prod');
const base = {
    // Basic configuration
    entry:'./src/index.js',
    output:{
        filename:'bundle.js',
        path:path.resolve(__dirname,'../dist')
    }
}
module.exports = (env) =>{
    if(env.development){
        return merge(base,dev);
    }else{
        return merge(base,prod);
    }
}
In the follow-up development, we will put the public logic into the base, and the configuration in the development and production will be stored separately.
4.webpack-dev-server
Configuring the development server allows you to package in memory and start the service automatically.
npm install webpack-dev-server --save-dev
"scripts": {
    "build": "webpack --env.production --config ./build/webpack.base",
    "dev": "webpack-dev-server --env.development --config ./build/webpack.base"
}
Start the development environment by executing npm run dev:
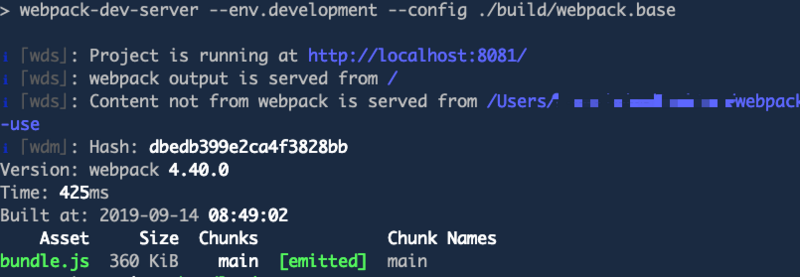
By default, the service will be started under the current root directory
Configuration of Configuration Development Services
const path = require('path')
module.exports = {
    mode:'development',
    devServer:{
        // Change static file directory location
        contentBase:path.resolve(__dirname,'../dist'),
        compress:true, // Open gzip
        port:3000, // Change port number
    }
}
5. Packaging Html plug-ins
5.1 Single-entry Packaging
Automatically generate html and introduce packaged files
Edit webpack.base file
const HtmlWebpackPlugin = require('html-webpack-plugin');
plugins:[
    new HtmlWebpackPlugin({
        filename:'index.html', // Packed file name
        template:path.resolve(__dirname,'../public/index.html'),
        hash:true, // Add hash stamp after reference resource
        minify:{
            removeAttributeQuotes:true // Delete double quotation marks for attributes
        }
    })
]
5.2 Multi-entry Packaging
Multiple js files are generated according to different entries and introduced into different html:
── src
    ├── entry-1.js
    └── entry-2.js
Multiple entries need to be configured
entry:{
    jquery:['jquery'], // Pack jquery
    entry1:path.resolve(__dirname,'../src/entry-1.js'),
    entry2:path.resolve(__dirname,'../src/entry-2.js')
},
output:{
    filename:'[name].js',
    path:path.resolve(__dirname,'../dist')
},
Generate multiple html files
new HtmlWebpackPlugin({
    filename:'index.html',
    template:path.resolve(__dirname,'../public/template.html'),
    hash:true,
    minify:{
        removeAttributeQuotes:true
    },
    chunks:['jquery','entry1'], // The introduced chunk has jquery,entry
}),
new HtmlWebpackPlugin({
    filename:'login.html',
    template:path.resolve(__dirname,'../public/template.html'),
    hash:true,
    minify:{
        removeAttributeQuotes:true
    },
    inject:false, // inject is false to denote not injecting js files
    chunksSortMode:'manual', // Manual configuration of code block order
    chunks:['entry2','jquery']
})
The above approach is not very elegant. Each time you need to manually add HtmlPlugin, you should dynamically generate html files, like this:
let htmlPlugins = [
  {
    entry: "entry1",
    html: "index.html"
  },
  {
    entry: "entry2",
    html: "login.html"
  }
].map(
  item =>
    new HtmlWebpackPlugin({
      filename: item.html,
      template: path.resolve(__dirname, "../public/template.html"),
      hash: true,
      minify: {
        removeAttributeQuotes: true
      },
      chunks: ["jquery", item.entry]
    })
);
plugins: [...htmlPlugins]
6. Empty packing results
clean-webpack-plugin can be used to manually clear the contents of a folder:
install
npm install --save-dev clean-webpack-plugin
const { CleanWebpackPlugin } = require('clean-webpack-plugin');
new CleanWebpackPlugin({
    // Clear the matching path
    cleanOnceBeforeBuildPatterns: [path.resolve('xxxx/*'),'**/*'],
})
So you can empty the specified directory, and you can see that the basic usage of the webpack plug-in is new Plugin and put it in the plugins.
7. summary
Are there any preliminary impressions or more ideas about the use of webpack? Are the big knives of the gods going to be irrepressible? Next issue will introduce the various configurations that webpack has to meet. Please look forward to it!
