Preface
Hello everyone, I am a different technology house. I make a little progress every day and experience a different life. What we bring today is to use frp to build our own intranet penetration, which is convenient for debugging in our daily development. At the same time, frp is open-source and free, only one cloud server is needed to build.
What is frp?
Frp is a fast reverse proxy that helps you expose a local server behind a NAT or firewall to the Internet. So far, it supports TCP and UDP as well as HTTP and HTTPS protocols, where requests can be forwarded to internal services via domain names.
frp also has P2P connection mode.
Install frp on the server
Download frp
Download with my own server Centos as an example frp_linux_amd64
wget https://github.com/fatedier/frp/releases/download/v0.31.1/frp_0.31.1_linux_amd64.tar.gz
decompression
tar -zxvf frp_0.31.1_linux_amd64.tar.gz
Extracted file
[root@VM_10_197_centos frp_0.31.1_linux_amd64]
-rwxrwxr-x 1 1000 1000 10608640 1 Month 616:02 frpc
-rw-rw-r-- 1 1000 1000     7447 1 Month 616:04 frpc_full.ini
-rw-rw-r-- 1 1000 1000      126 1 Month 616:04 frpc.ini
-rwxrwxr-x 1 1000 1000 11333632 1 Month 616:02 frps
-rw-rw-r-- 1 1000 1000     2514 1 Month 616:04 frps_full.ini
-rw-rw-r-- 1 1000 1000       26 1 Month 616:04 frps.ini
-rw-rw-r-- 1 1000 1000    11358 1 Month 616:04 LICENSE
drwxrwxr-x 2 1000 1000     4096 1 Month 616:04 systemd
Delete useless files
rm -f frpc
rm -f frpc.ini
rm -f frpc_full.ini

rm -f systemd/frpc.service
rm -f systemd/frpc@.service
Server configuration
modify the frps.ini file to set the http access port to 8080
# frps.ini
[common]
bind_port = 7000 #Service start occupation port
vhost_http_port = 8080 #Forward port
Start server
./frps -c ./frps.ini
Register system services
vim systemd/frps.service
Modify service file
[Unit]
Description=Frp Server Service
After=network.target

[Service]
Type=simple
User=nobody
Restart=on-failure
RestartSec=5s
# It needs to be changed according to the installation path of frps
ExecStart=/home/frp/frps -c /home/frp/frps.ini

[Install]
WantedBy=multi-user.target
Copy files to system
cp systemd/frps.service /etc/systemd/system/
note: the ECS security group and firewall need to open corresponding ports
Operation command
# Startup Test
systemctl start frps.service

# View startup status
systemctl status frps.service

# Stop it
systemctl stop frps.service

# Boot from boot
systemctl enable frps.service
Client install frp (mac)
download the client and unzip it frp_darwin_amd64 Please refer to the server installation process for the process.
curl -O --insecure https://github.com/fatedier/frp/releases/download/v0.31.1/frp_0.31.1_darwin_amd64.tar.gz
Delete useless files
rm -f frps
rm -f frps.ini
rm -f frps_full.ini

rm -f systemd/frps.service
rm -f systemd/frps@.service
Modify profile
vim frpc.ini
[common]
server_addr = xxx.xxx.xxx.xxx(Server public network ip)
server_port = 7000

[web]
type = http
# Local web service port
local_port = 9090
custom_domains = www.xxxxxx.com(Custom domain name)
note: the custom domain name needs to be resolved to the corresponding server ip, otherwise it cannot be used normally
Client start
./frpc -c ./frpc.ini
Start success message
2020/02/02 12:26:14 [I] [proxy_manager.go:144] [fd88aa5c4087afc9] proxy added: [web]
2020/02/02 12:26:14 [I] [control.go:164] [fd88aa5c4087afc9] [web] start proxy success
Access to local services
. We can access our local web services from anywhere by accessing http://www.xxxxxx.com:8080 Access is available http://localhost:9090 The purpose of.
Add security configuration
for the sake of security, we can set the token when connecting. When the client and the server token are consistent, the connection can be successfully established. The adding method only needs to add the token configuration under the server and the client [common]:
# Authentication token
token = 12345678
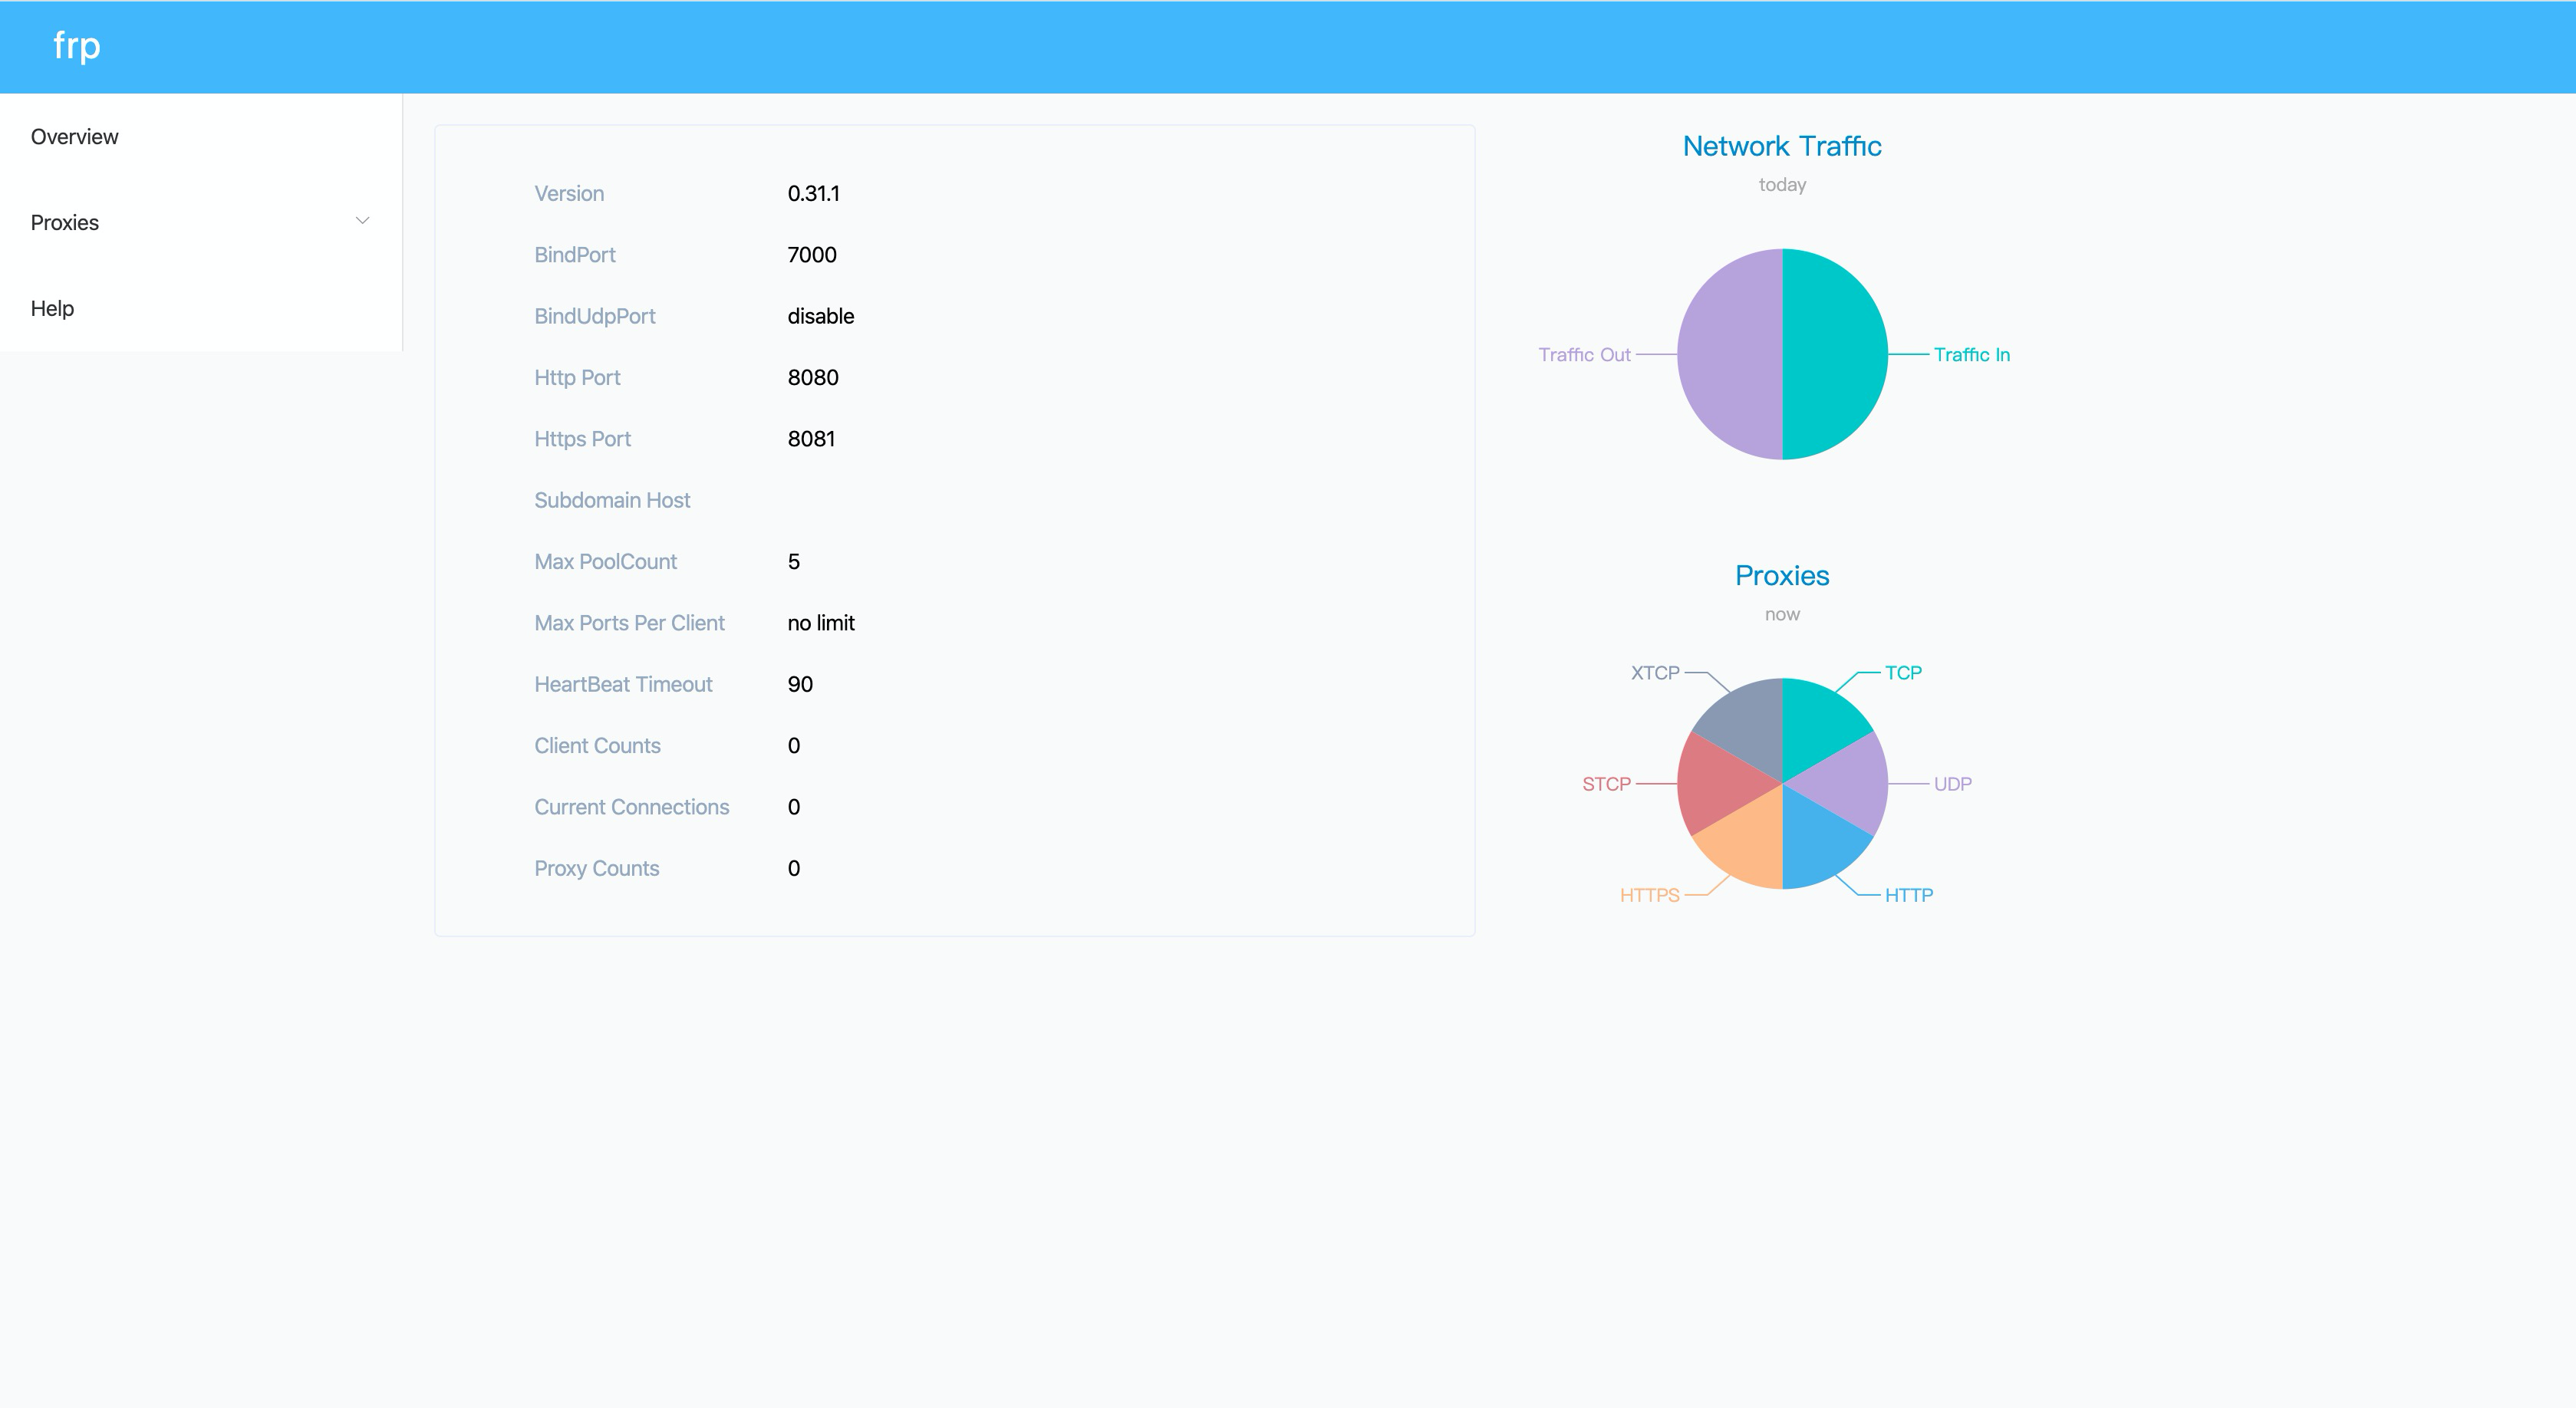
Open DashBorad
to open the dashboard, you only need to add the following configuration in the server [common], and don't forget to open the port to the security group.
dashboard_port = 7500
dashboard_user = admin
dashboard_pwd = admin
address: http://serverIp:7500
Ending
.