1, Construction project
In our daily projects, we usually have a multi-layer architecture. The domain layer (entity) is generally not placed together with the application layer (business: such as api and mvc). We only do this when doing exercises. Then I will directly share the most practical and layer according to the most basic project objectives.
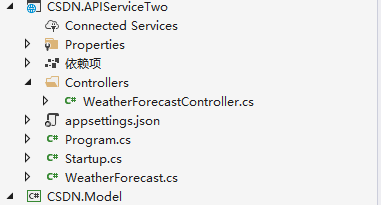
Build an ASP.NET Core API project and a. NET Core class library (note that it is the Core version, not the framework)
2, Install dependent packages
Select the Model class library, open the nuget package manager, and search for Microsoft.EntityFrameworkCore.SqlServer installation. When installing the latest version, please pay attention to whether your project is. net6 or. net5, I still use 3.1, and the following package is version 5.0.12.

Then select the api project and download the Microsoft.EntityFrameworkCore.Tools package, which is also version 5.0.12. The package is mainly used to execute the migration command: add migration; Update database, and reverse generation of entity code from the database

3, New entity, database context
Create two new classes under the root directory of the model class library, BaseModel and DbContext (database context). BaseModel is a common field, such as id, createtime and isdelete. Almost every entity class can be used and can be extracted
Virtual is used for id because some tables may need id of int type or long or string. Using virtual, subclasses can override this field
public class BaseModel
    {
        public virtual Guid Id { get; set; }
        /// <summary>
        ///Creation time
        /// </summary>
        public DateTime CreateTime { get; set; }
        /// <summary>
        ///Delete status
        /// </summary>
        public bool IsDelete { get; set; }
    }
The database context class needs to inherit DbContext and call the constructor of the parent class in the constructor, which comes from the using Microsoft.EntityFrameworkCore namespace, which is in the package we installed.
public class CSDNDbContext:DbContext
    {
        public CSDNDbContext(DbContextOptions<CSDNDbContext> options):base(options)
        {

        }
    }
Then we create a new folder Entity. Under the Entity folder, we create an EntityEnum folder to put some enumeration types. First, we create a student Entity class in the Entity folder.
using System;
using System.Collections.Generic;
using System.Text;
using CSDN.Model.Entity.EntityEnum;

namespace CSDN.Model.Entity
{
    public class Student:BaseModel
    {
        /// <summary>
        ///Name
        /// </summary>
        public string Name { get; set; }
        /// <summary>
        ///Date of birth
        /// </summary>
        public DateTime Birthday { get; set; }
        /// <summary>
        ///Gender
        /// </summary>
        public SexType Sex { get; set; }
        /// <summary>
        ///Mailbox
        /// </summary>
        public string Email { get; set; }
    }
}
SexType is built in the EntityEnum folder
namespace CSDN.Model.Entity.EntityEnum
{
    public enum SexType
    {
        /// <summary>
        ///Male
        /// </summary>
        Male,
        /// <summary>
        ///Female
        /// </summary>
        Female
    }
}
After the entity class is created, we add the entity class in the database context
public class CSDNDbContext:DbContext
    {
        public CSDNDbContext(DbContextOptions<CSDNDbContext> options):base(options)
        {

        }

        public DbSet<Student> Students { get; set; }
    }
4, Execute the migration command to generate the database
Add the database connection string in the app setting.json folder in the api project
{
  "Logging": {
    "LogLevel": {
      "Default": "Information",
      "Microsoft": "Warning",
      "Microsoft.Hosting.Lifetime": "Information"
    }
  },
  "AllowedHosts": "*",
  "ConnectionStrings": {
    "CSDNDB": "server=.;database=csdnDb;user id=sa;password=123456;"
  }
}
Register the database context in the ConfigureServices method in the startup class. One is services. Adddbcontext < > (), and the other is AddDbContextPool. We need to generate the database by reading the connection string in app setting.json. In the startup class, ASP.NET Core has provided us with a method to read the connection string, Configuration.GetConnectionString(); The parameter needs to be passed in the key we just added: "csdndb", which should be consistent.
Differences between AddDbContext() and AddDbContextPool0 methods:
When writing code, it will prompt to select services.AddbContext or services AddDbContextPool0
We selected services.AddDbContextPool in the code above. We can use the AddDbContext0 or AddDbContextPool0 methods to register the DbContext class in the program into the ASP.NET Core dependency injection container. The difference between the AddDbContext() and AddDbContextPool0 methods is that the AddDbContextPool0 method provides a database connection pool (DbContextPool).
If the database connection pool is available, instances in the database connection pool are provided instead of creating new instances
Example. The database connection pool is conceptually similar to the working mode of connection pool in ADO.NET. From a performance perspective
The reason for choosing AddDbContextPool is that the performance of AddDbContextPool method is better than that of AddDbContext method.
public void ConfigureServices(IServiceCollection services)
{
services.AddControllers();
//Or services. Adddbcontext < > (...)
services.AddDbContextPool<CSDNDbContext>(option => {
option.UseSqlServer(Configuration.GetConnectionString("CSDNDB"));
});
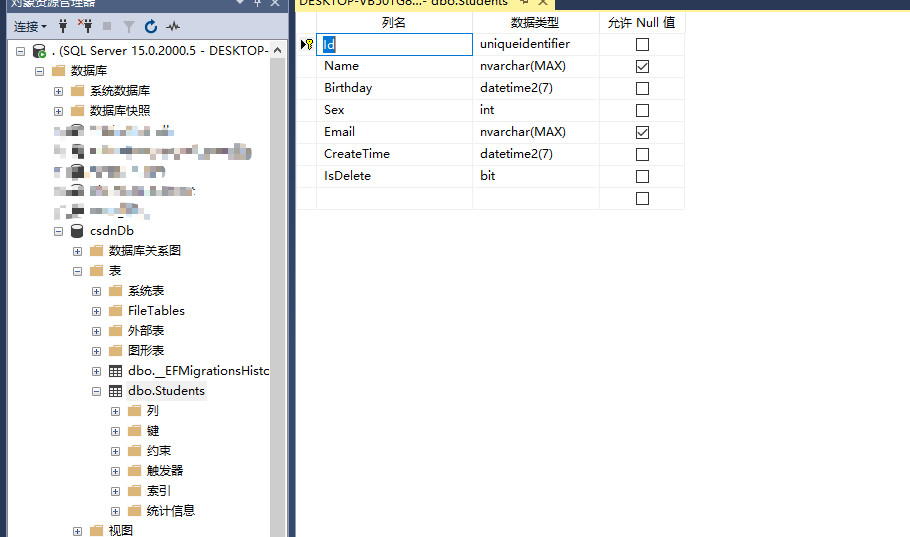
}Then we set the launcher as an api project, open the package manager console, select the model layer, and enter add migration initdatabase to generate the migration file.

It will generate a migration folder in the root directory of your model layer and add a migration class
Then we execute the update database command to generate the database, and then generate the database and table. You can see that each field in our student entity class is generated.
 5, Command knowledge
1. Add migration "migration name" the migration name is usually named for the purpose of your migration. For example, you added a student entity "add_student_table" and modified a field "update_xxx_Field". Try not to name it casually.
2. After the migration file is generated, you can delete the newly generated migration file by executing remove migration before executing update database. Only one migration file can be deleted at a time, and only the migration file you have not executed update database can be deleted
3. Execute udpate database. When generating the database, it does not regenerate all tables every time. There is a class of snapshot file in the migration folder. When generating the database, it will compare the snapshot file every time, so as to know what needs to be modified or added every time. If you get someone else's project and execute update database for the first time, ef will execute all the migration files in turn.
4. Update database can specify the execution of the migration file: if the generated database is found to have problems and wants to go back to the previous version, we can get the generated database by specifying the migration name update-databse init2