Rotation chart
- It is often located on the home page and used as a large picture for activity promotion. It can be played automatically by clicking the left and right switch button, or by clicking the small dot on the picture
Tab Toggle
- It is used to click different labels or titles to display different contents
Form Validation
- Often located on the registration and login pages, it is used to verify the input data in HTML forms before the data is sent to the server. If the input data is incorrect, an error will be prompted
What is JavaScript
- JavaScript (JS for short) is a lightweight, interpretive or just in time programming language with function priority
- It is often used to add various dynamic functions to web pages to provide users with more smooth and beautiful browsing effects
JavaScript features
- Is an interpretative scripting language
- It is mainly used to add interactive behavior to HTML (an application under standard General Markup Language) pages
- You can directly embed HTML pages, but writing a separate js file is conducive to the separation of structure and behavior
- Cross platform feature, which can run on multiple platforms
- It has its own basic data types, expressions and arithmetic operators, and the basic program framework of the program
- It can realize the human-computer interaction of web pages
Three main components
- ECMAScript (core)
- BOM (browser object model)
- DOM (document object model)
ECMAScript
- ECMAScript is a script programming language standardized by Ecma International (formerly European Computer Manufacturers Association) through ECMA-262. It is the core of JavaScript and describes the basic syntax, data type, language, keywords, reserved words, operators, objects, etc
BOM
- BOM (browser object model) accesses and operates the browser window. For example, pop up a new browser window, move, change and close the browser window, provide detailed navigator object, detailed location object, detailed screen object, support for cookies, etc
DOM
- DOM (document object model) is an application program interface (API) for HTML and XML. DOM will plan the entire page into a document composed of node levels. Each part of an HTML or XML page is a derivative of a node
<html>
  <head>
    <title>Sample Page</title>
  </head>
  <body>
    <p>hello world!</p>
  </body>
</html> 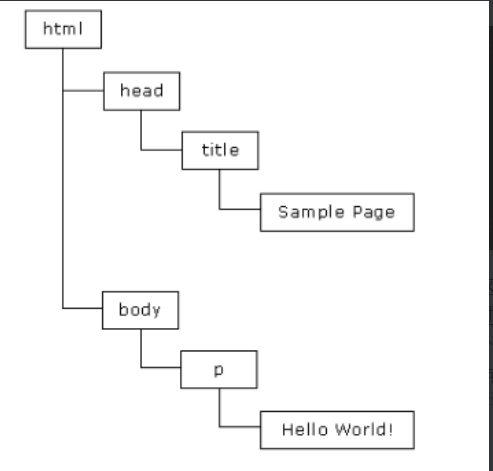
Basic structure
- JavaScript code in HTML must be between < script > and < / script > tags
<script>
    //Code block
</script >
use
- Write the first JavaScript program according to the above syntax
<!DOCTYPE html>
<html lang="en">
<head>
	<meta charset="UTF-8">
	<title>first JavaScript program</title>
</head>
<body>
	<script>
		alert("My first JavaScript");
	</script>
</body>
</html>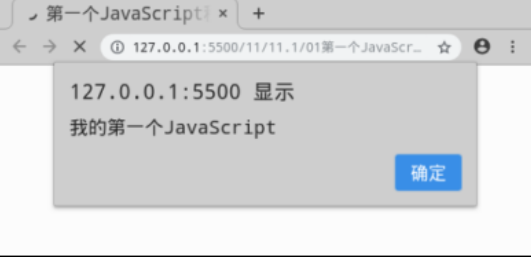
Use < script > tags
- JavaScript code can be inserted through the < script > and < / script > tags
-
<!DOCTYPE html> <html lang="en"> <head> <meta charset="UTF-8"> <title>use script label</title> </head> <body> <script> alert("use script Introduction of labels JavaScript code!") </script> </body> </html> - When the amount of JavaScript code is small, the < script > tag is recommended. This method is more efficient and easy to manage. However, when referenced in a website or among multiple pages, this method code will be redundant and inconvenient for maintenance and management. Therefore, it is not recommended to use it in multiple pages
External JS file
- Javascript code can also be stored in a separate file to enhance the repeatability of JavaScript scripts. JavaScript file is a text type file that can be opened or edited in any text editor. The extension of JavaScript file is ". js"
- Import the file named "index.js" and import it using the src attribute of the < script > tag
<!DOCTYPE html>
<html lang="en">
<head>
	<meta charset="UTF-8">
	<title>external JS file</title>
</head>
<body>
	<script src="js/index.js"></script>
</body>
</html>
be careful
- General websites use external JS files to write JavaScript code, which can help developers develop quickly and manage efficiently
In HTML tags
- Write JavaScript code directly into HTML tags
<!DOCTYPE html>
<html lang="en">
<head>
	<meta charset="UTF-8">
	<title>stay HTML In label</title>
</head>
<body>
	<input type="submit" value="Let me try" onclick="alert('You hit me!')">
</body>
</html>- The method of writing JavaScript code directly into HTML tags does not really separate structure and behavior, so it is not recommended
JS variable
concept
- In programming languages, variables are used to store data values. JavaScript uses keywords var To define variables and assign values to variables using the equal sign
use
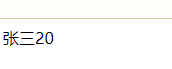
- You can declare variables first and then assign values to them; You can also declare and assign variables at the same time
<!DOCTYPE html>
<html lang="en">
<head>
	<meta charset="UTF-8">
	<title>variable</title>
</head>
<body>
	<script>
		// Declare variables before assigning values to them
		var name;
		name="Zhang San"
		document.write(name);

		// Declare and assign variables at the same time
		var age=20;
		document.write(age);
	</script>
</body>
</html>
JS notes
concept
- JavaScript comments can be used to improve the readability of the code, which will not be parsed by the browser
use
- Single line comments are marked with "/ /" Start with a multiline comment“ /*” Start with "* /" ending
<!DOCTYPE html>
<html lang="en">
<head>
	<meta charset="UTF-8">
	<title>notes</title>
</head>
<body>
	<script>
		//"Hello" pops up on the page
		alert("Hello");

		/*Use alert() to pop up in the page
		"Welcome to JavaScript "*/
		alert("Welcome to study JavaScript")
	</script>
</body>
</html> 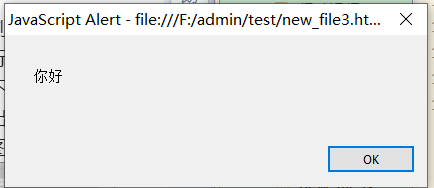
Implement basic algorithms using JavaScript operators
classification
- JavaScript operators can be used for assignment, value comparison, arithmetic execution, etc. the commonly used operators are as follows:
- Arithmetic operator
- Assignment Operators
- Comparison operator
- Logical operator
Arithmetic operator
concept
- Arithmetic operators perform arithmetic operations on numeric values (words or variables). The commonly used arithmetic operators are as follows
- +: addition
- -: subtraction
- *: multiplication
- /: Division
- %: remainder
- ++: self increasing
- --: self subtraction
- Declare several variables and evaluate the result using arithmetic operators
<!doctype html>
<html lang="en">
<head>
<meta charset="UTF-8">
<title>Arithmetic operator</title>
</head>
<body>
	<script>
		var x=50;
		document.write("x The value of is:"+x);
		//addition
		var y=x+10;
		document.write("<br/>y The value of is:"+y);
		//subtraction
		var z=x-8;
		document.write("<br/>z The value of is:"+z);
		//multiplication
		var m=x*5;
		document.write("<br/>m The value of is:"+m);
		//division
		var n=x/6;
		document.write("<br/>n The value of is:"+n);
		//remainder
		var k=x%6;
		document.write("<br/>k The value of is:"+k);
		//Self increasing
		var i=10;
		i++;
		document.write("<br/>i++The value of is:"+ i);
		//Self subtraction
		var j=10;
		j--;
		document.write("<br/>j--The value of is:"+ j);
	</script>
</body>
</html>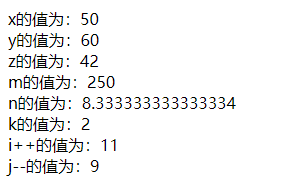
- Assignment operators are used to assign values to JavaScript variables. Common assignment operators are as follows
- =: assigning values to variables
- += Add value to variable
- -= Subtract a value from a variable
- *= Multiplicative variable
- /= Divide variables
- %= Assign the remainder to the variable
- Declare several variables and evaluate the result using the assignment operator
<!DOCTYPE html>
<html lang="en">
<head>
	<meta charset="UTF-8">
	<title>Assignment Operators </title>
</head>
<body>
	<script>
		//Assign values to variables
		var a = 7;
		document.write("a The value of is:"+a);
		//Add value to variable
		var b = 7;
		b += 8;
		document.write("<br/>b The value of is:"+b);
		//Subtract a value from a variable
		var c = 7;
		c -= 8;
		document.write("<br/>c The value of is:"+c);
		//Multiplicative variable
		var x = 7;
		x *= 8;
		document.write("<br/>x The value of is:"+x);
		//Divide variables
		var y = 7;
		y /= 8;
		document.write("<br/>y The value of is:"+y);
		//Assign the remainder to the variable
		var z = 7;
		z %= 8;
		document.write("<br/>z The value of is:"+z);
	</script>
</body>
</html>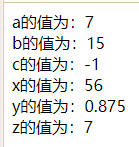
Comparison operator
concept
- The comparison operator is used to judge the logical statement, so as to determine whether the given two values or variables are equal, and the return value is true or false. Common comparison operators are as follows
- ==: equal to
- ===: equivalent type
- !=: Unequal
- >: greater than
- <: less than
- >=: greater than or equal to
- < =: less than or equal to
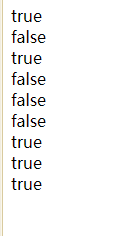
- Next, declare variables and compare values using comparison operators
<!DOCTYPE html>
<html lang="en">
<head>
	<meta charset="UTF-8">
	<title>Comparison operator</title>
</head>
<body>
	<script>
		//be equal to
		var x = 8;
		document.write( (x==8)+ "<br>");//Correct, return true
		document.write( (x==5)+ "<br>");//Error, return false
		//Equivalent isotype
		document.write( (x===8)+ "<br>");//Correct, return true
		document.write( (x==="8")+ "<br>");//Error, return false
		//Unequal
		document.write( (x!=8)+ "<br>");//Error, return false
		//greater than
		document.write( (x>10)+ "<br>");//Error, return false
		//less than
		document.write( (x<10)+ "<br>");//Correct, return true
		//Greater than or equal to
		document.write( (x>=8)+ "<br>");//Correct, return true
		//Less than or equal to
		document.write( (x<=8)+ "<br>");//Correct, return true
	</script>
</body>
</html>
Logical operator
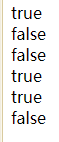
- Logical operators are used to determine the logic between variables or values. Common logical operators are as follows:
- &&(and): returns true if both expressions are true; otherwise, returns false
- ||(or): returns true if one or two expressions are true; otherwise, returns false
- ! (non): return true for false statements and false for true statements
<!DOCTYPE html>
<html lang="en">
<head>
	<meta charset="UTF-8">
	<title>Logical operator</title>
</head>
<body>
	<script>
		var x=6;
		var y=3;
		//and
		document.write( (x<10&&y>1)+ "<br>");//Both expressions are correct and return true
		document.write( (x<10&&y<1)+ "<br>");//Y < 1 error, return false
		//or
		document.write( (x==5||y==5)+ "<br>");//Both expressions are wrong and return false
		document.write( (x==6||y==5)+ "<br>");//x==6, correct, return true
		//wrong
		document.write( (!(x==y) )+ "<br>");//x==y error, preceded by non, so it returns true
		document.write( (!(x>y) )+ "<br>");//x> Y is correct, preceded by non, so it returns false
	</script>
</body>
</html>
Using if statement to realize conditional judgment
Conditional statement
classification
- When writing code, you often need to perform different actions based on different judgments. At this time, you need to use conditional statements. In JavaScript, you can use the following conditional statements to judge:
- if statement
- else statement
- else if statement
- switch sentence
- The if statement is used to specify the JavaScript code block to be executed if the condition is true
if (condition) {
    If the condition is true Code executed when
} - When encoding, If Use lowercase letters because uppercase letters (If or If) cause JavaScript errors
- Write a program according to the syntax, that is, if the time is less than 8 a.m., a "Good morning" greeting will pop up
<!DOCTYPE html>
<html lang="en">
<head>
	<meta charset="UTF-8">
	<title>if sentence</title>
</head>
<body>
	<script>
		var hour=7;
		if(hour<8){
			alert("Good morning");
		}
	</script>
</body>
</html>
else statement
- else statement is used to specify the code block if the condition is false
if (condition) {
    Condition is true Code block executed at
} else {
    Condition is false Code block executed at
}- Modify the program based on the previous example according to the syntax, that is, if the time is less than 8 a.m., the greeting of "Good morning" will pop up, otherwise, "it's not early, it's time to get up!"
<!DOCTYPE html>
<html lang="en">
<head>
	<meta charset="UTF-8">
	<title>else sentence</title>
</head>
<body>
	<script>
		var hour=9;
		if(hour<8){
			alert("Good morning");
		}else{
			alert("It's getting late. It's time to get up!");
		}
	</script>
</body>
</html> 
else if statement
- else if Statement is used to specify a new condition when the first condition is false
if (Condition 1) {
    Condition 1 is true Code block executed at
} else if (Condition 2) {
    Condition 1 is false And condition 2 is true Code block executed at
 } else {
    Condition 1 and condition 2 are both false Code block executed at
}- Continue to modify the program based on the previous example according to the syntax, that is, if the time is less than 8 a.m., a "Good morning" greeting will pop up; If not, but the time is less than 10 o'clock, the pop-up "start a new day's work!"; Otherwise, "I wish you a good mood today!"
<!DOCTYPE html>
<html lang="en">
<head>
	<meta charset="UTF-8">
	<title>else if sentence</title>
</head>
<body>
	<script>
		var hour=9;
		if(hour<8){
			alert("Good morning");
		}else if(hour<10){
			alert("Start a new day's work!");
		}else{
			alert("I wish you a good mood today!");
		}
	</script>
</body>
</html>
Using switch statement to realize condition judgment
- The switch statement is used to select one of multiple code blocks to be executed
switch(expression) {
     case n:
        Code block
        break;
     case n:
        Code block
        break;
     default:
        Default code block
} - Step 1: evaluate the switch expression
- Step 2: compare the value of the expression with the value of each case
- Step 3: if there is a match, execute the associated code
key word
- Break keyword: if JavaScript encounters a break Keyword, it will jump out of the switch code block
- default keyword: used to specify the code to run when there is no case match
- Write a program according to the syntax of the switch statement, that is, dress according to the weather tips
<!DOCTYPE html>
<html lang="en">
<head>
	<meta charset="UTF-8">
	<title>switch Use of statements</title>
</head>
<body>
	<script>
		var weather1="rain";
		var weather2="sun";
		var weather3="snow";
		var weather4="wind";
		switch(weather3){
        case "rain":
            alert("On rainy days, remember to wear your coat!");
            break;
        case "sun":
            alert("Sunny, you can wear a beautiful skirt!");
            break;
        case "snow":
            alert("There is heavy snow today. It is recommended to wear snow boots!");
            break;
        case "wind":
            alert("In windy weather, wear a wind jacket!");
            break;
    }
	</script>
</body>
</html>
default keyword
- Used to specify the code to run when there is no case match. If you declare another variable as weather5 for the previous example, but do not assign a weather condition
<!DOCTYPE html>
<html lang="en">
<head>
	<meta charset="UTF-8">
	<title>default Use of keywords</title>
</head>
<body>
	<script>
		var weather1="rain";
		var weather2="sun";
		var weather3="snow";
		var weather4="wind";
		var weather5;
		switch(weather5){
        case "rain":
            alert("On rainy days, remember to wear your coat!");
            break;
        case "sun":
            alert("Sunny, you can wear a beautiful skirt!");
            break;
        case "snow":
            alert("There is heavy snow today. It is recommended to wear snow boots!");
            break;
        case "wind":
            alert("In windy weather, wear a wind jacket!");
            break;
        default:
            alert("The weather condition is unknown, please check the weather forecast in advance!");
            break;
    }
	</script>
</body>
</html> 
Master the use of circular statements
- JavaScript supports different types of loops, as follows
- for: loop the code block a certain number of times
- for in: loop through the properties of the object
- while : Loop the specified code block when the specified condition is true
- do while: loop the specified code block when the specified condition is true
-
The for loop is one of the most commonly used loops when creating a loop. It is used to loop the code block a certain number of times
for (Statement 1; Statement 2; Statement 3)
{
   	Executed code block
}- Statement 1 : (code block) execute before starting
- Statement 2: Define the conditions for running a loop (code block)
- Statement 3 : Execute after the loop (code block) has been executed
- Print the "welcome learning cycle" in the page 5 times according to the for loop syntax
<!DOCTYPE html>
<html lang="en">
<head>
	<meta charset="UTF-8">
	<title>for loop</title>
</head>
<body>
	<script>
		for(var i=0;i<5;i++){
			document.write("Welcome to the learning cycle"+"<br>");
		}
	</script>
</body>
</html> 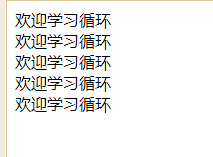
- Statement 1: set the variable before the beginning of the loop ("var i=0", which means starting from 0)
- Statement 2: define the conditions for loop operation (because "welcome learning loop" is printed 5 times, i must be less than 5)
- Statement 3: add a value (i + +) after each code block has been executed
- The for in statement in JavaScript is used to loop through the properties of an object
for (variable in object)
{
    Statement executed in a loop
}- First declare a kitten object, and then print the kitten's name, color and age in the page according to the syntax of the for in loop
<!DOCTYPE html>
<html>
<head lang="en">
    <meta charset="UTF-8">
    <title>for in loop</title>
</head>
<body>
<script>
    var cat={name:"Meow meow",color:"orange",age:2}
    for(var x in cat){
        document.write(cat[x]+"<br/>");
    }
</script>
</body>
</html>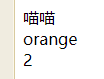
- The while loop executes the code block when the specified condition is true
while (condition)
{
	 Code to execute
}
be careful
- When encoding, if you forget to increase the value of the variable used in the condition, the loop will never end. This may cause the browser to crash, so be careful with the while loop
- First declare a variable, and then print 0-4 integers in the page according to the while loop syntax
<!DOCTYPE html>
<html lang="en">
<head>
	<meta charset="UTF-8">
	<title>while loop</title>
</head>
<body>
<script>
	var i=0;
	while (i<5){
		document.write(i+"<br>");
		i++;
	}
</script>
</body>
</html>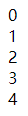
do while loop
- The do while loop is a variant of the while loop. The loop executes the code block once before checking whether the condition is true, and then repeats the loop if the condition is true
do
{
   Code to execute
}
while (condition);- Modify the previous example according to the do while loop syntax, and also print an integer of 0-4 in the page
<!DOCTYPE html>
<html lang="en">
<head>
	<meta charset="UTF-8">
	<title>do while loop</title>
</head>
<body>
	<script>
		var i=0;
		do{
			document.write(i+"<br>");
			i++;
		}
		while (i<5);
	</script>
</body>
</html>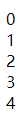
While and do while loops are used differently
- Through the previous examples, we can find that both the while loop and the do while loop can print integers of 0-4 in the page. If the condition in the do while loop is modified to false, how will the code be executed?
<!DOCTYPE html>
<html lang="en">
<head>
	<meta charset="UTF-8">
	<title>while and do while Cyclic distinction</title>
</head>
<body>
	<script>
		var i=0;
		do{
			document.write(i+"<br>");
			i++;
		}
		while (i>5);
	</script>
</body>
</html> 
- The while loop judges the condition first and then executes; The do while loop is executed once before judging the condition
Function overview and event driven
- A function is a reusable block of code that is event driven or executed when it is called. When used, a function is a code block wrapped in curly braces, preceded by the keyword function
function functionname(){
    // Execute code
}
be careful
- JavaScript is case sensitive. The keyword function must be lowercase and the function must be called in the same case as the function name
- According to the function syntax, when the user clicks the button, the function will be called, and "Hello, welcome to learn the function" will pop up
<!DOCTYPE html>
<html lang="en">
<head>
	<meta charset="UTF-8">
	<title>function</title>
</head>
<body>
	<input type="submit" value="Let me try" onclick="myFunction()">
	<script>
		function myFunction(){
			alert("Hello, welcome to learn function");
		}
	</script>
</body>
</html>
JS
JS
Two ways to define functions
- In JavaScript, use keywords function Define functions. In fact, a function can be defined by declaration or an expression. Therefore, there are two ways to define functions:
- Function declaration (learned earlier), i.e
function functionname(){
 	// Execute code
}
Function expression
JavaScript functions can be defined through an expression, and their basic syntax is as follows
var functionName=function(){
      //Execute code
}- This form looks like a regular variable assignment statement, that is, create a function and assign it to the variable functionName. The function created in this case is also called an anonymous function
- When using, it should be noted that the value must be assigned before calling the function
Function expression
- Define the function in the way of function expression, and print "welcome to learn JavaScript function" in the page
<!DOCTYPE html>
<html lang="en">
<head>
	<meta charset="UTF-8">
	<title>Function expression</title>
</head>
<body>
	<script>
		var myFunction=function(){
			document.write("Welcome to study JavaScript function");
		}
		myFunction();
	</script>
</body>
</html>
concept
- When you call a function, you can pass values to the function, which are called parameters. The number of parameters can be multiple, separated by commas
myFunction(argument1,argument2)
When a function is declared, parameters are declared as variables
function myFunction(var1,var2)
{
	//Execute code
}- According to the syntax of function with parameters, the function is defined by function declaration and parameters are passed to it. Finally, the passed variables are printed in the page
<!DOCTYPE html>
<html lang="en">
<head>
	<meta charset="UTF-8">
	<title>Parametric function</title>
</head>
<body>
	<script>
		function myFunction(name,color,age){
			document.write("The kitten's name is"+name+",The color is"+color+",this year"+age+"Years old");
		}
		myFunction("Meow meow","orange",2)
	</script>
</body>
</html>
- When coding, you often want the function to return the value to the place where it is called. At this time, you need to implement it through the return statement
function myFunction(){
 	var x=5;
   	return x;
}- When you use return, the entire JavaScript does not stop executing, only the function stops executing. JavaScript will continue to execute code from where the function is called. When the function is declared, the parameters are declared as variables
use
- According to the syntax of the return value function, calculate the product of two numbers and return the result
<!DOCTYPE html>
<html lang="en">
<head>
	<meta charset="UTF-8">
	<title>Return value function</title>
</head>
<body>
	<input type="submit" value="Calculate the product of two numbers" onclick="alert(myFunction(3,6))">
	<script>
		function myFunction(x,y){
			return x*y;
		}
	</script>
</body>
</html>
Variable and scope
concept
- The scope of a variable refers to the valid range of the variable in the program, that is, the variable can be used within the valid range
- In JavaScript, variables can be divided into
- global variable
- local variable
Global and local variables
- Global variables are variables defined outside all functions, and the scope of action is all codes after the variable is defined
- A local variable is a variable declared and defined in a function body using the var keyword. This variable can only be used in the function and in the code after the variable is defined
<!DOCTYPE html>
<html lang="en">
<head>
	<meta charset="UTF-8">
	<title>Global and local variables</title>
</head>
<body>
	<script>
		var a="This is a global variable";
		function myFunction(){
			var b="This is a local variable";
			document.write(a+"<br>");
			document.write(b);
		}
		myFunction();
	</script>
</body>
</html>
Change local variable position
- Since the local variable b only acts on the function body, an error will occur if the value of the local variable b is printed outside the function
<!DOCTYPE html>
<html lang="en">
<head>
	<meta charset="UTF-8">
	<title>Incorrect use of local variables</title>
</head>
<body>
	<script>
		var a="This is a global variable";
		function myFunction(){
			var b="This is a local variable";
			document.write(a+"<br>");
		}
		myFunction();
		document.write(b);
	</script>
</body>
</html>
Priority of variables
- If a local variable with the same name as the global variable is defined in the function body, the global variable will not work in the function body
use
<!DOCTYPE html>
<html lang="en">
<head>
	<meta charset="UTF-8">
	<title>Priority of variables</title>
</head>
<body>
	<script>
		var a="This is a global variable";
		function myFunction(){
			var a="This is a local variable";
			document.write(a);
		}
		myFunction();
	</script>
</body>
</html>
Scope chain
concept
- The access permissions of global variables and local variables are actually determined by the scope chain
- Each time you enter a new execution environment, a scope chain for searching variables and functions is created. A scope chain is a collection of objects in the scope in which a function is created. It can ensure orderly access to all variables and functions that the execution environment has access to
working principle
- The front end is always the variable object of the environment where the currently executed code is located. The next variable object comes from the containing environment, and the next variable object comes from the containing environment of the containing environment, up to the variable object of the global execution environment. If it is still not found at the top (global) of the scope chain, an error will be reported
Explanation of working principle
- The concept and working principle of scope chain are abstract and difficult to understand. The following is a case to illustrate the working principle of scope chain
<!DOCTYPE html>
<html lang="en">
<head>
	<meta charset="UTF-8">
	<title>Scope chain</title>
</head>
<body>
	<script>
		var a=1;
		function f1(){
			var b=2;
			function f2(){
				var c=3;
				function f3(){
					var d=4;
					console.log(a);
					console.log(b);
					console.log(c);
					console.log(d);
					console.log(e);
				}
				f3();
			}
			f2();
		}
		f1();
	</script>
</body>
</html>
First, the JavaScript engine queries the variables a, b, c, d and E in the innermost active object (i.e. f3() function), but only finds the variable d and obtains its value of 4; Then, along the scope chain, continue to find the variable in the upper active object (i.e. f2() function), find the variable c, and obtain its value of 3; Then, continue to look up along the scope chain, find the variable b in the f1() function, and obtain its value of 2; Then continue to look up, find the global variable a, and obtain its value of 1; However, the variable E is not found in the whole scope chain, so the error "e is not defined" will be reported.
Understand the use of closures
- In a function, global variables can be read directly inside the function, but local variables inside the function cannot be read outside the function
<!DOCTYPE html>
<html lang="en">
<head>
	<meta charset="UTF-8">
	<title>Reasons for using closures</title>
</head>
<body>
	<script>
		//Read global variables inside a function
		var num1=1;
	  function f1(){
	    console.log(num1);
	  }
	  f1();

		//Read local variables inside the function outside the function
		function f2(){
			var num2=2;
	  }
		f2();
	  console.log(num2);
	</script>
</body>
</html>
In the above code, there are two sections of code respectively. The first section reads the global variable num1 inside the f1() function and the second section reads the local variable num2 inside the function outside the f2() function.
conclusion
It can be found from the rendering that the first code outputs "1" on the console, but the second code reports an error because the local variables in the function cannot be read outside the function.
(3) Throw questions
So, in JavaScript, how to read the local variables inside the function outside the function?
Read local variables from outside
- Inside the function, define another function
<DOCTYPE html>
<html lang="en">
<head>
	<meta charset="UTF-8">
	<title>Read local variables from outside</title>
</head>
<body>
	<script>
		//Read local variables inside the function outside the function
		function f1(){
			var num1=1;
			function f2(){
				console.log(num1);
			}
			f2();
	  }
		f1();
	</script>
</body>
</html>
In the above code, the f2() function is included in the f1() function. At this time, all local variables in the f1() function are visible to the f2() function. Therefore, the value of num1 will be output in the console
2) Conclusion
At this time, the local variables can be read outside the function, but not vice versa. The local variables inside the f2() function are invisible to the f1() function. This is the unique "chain scope" structure of JavaScript language. Child objects will look up all parent object variables level by level. Therefore, all variables of the parent object are visible to the child object, and vice versa.
Closure concept
Read local variables from outside
- Since f2() function can read the local variables in f1() function, as long as f2() function is used as the return value, can its internal variables be read outside f1() function?
<!DOCTYPE html>
<html lang="en">
<head>
	<meta charset="UTF-8">
	<title>Read local variables from outside</title>
</head>
<body>
	<script>
		//Read local variables inside the function outside the function
		function f1(){
			var num1=1;
			function f2(){
				console.log(num1);
			}
			return f2;
	  }
		var result=f1();
		result();
	</script>
</body>
</html>
Closure purpose
concept
- Closures are functions that can read internal variables of other functions
- In JavaScript, only child functions inside a function can read local variables, so closures can be simply understood as "functions defined inside a function". In essence, closure is a bridge between the inside and outside of a function
benefit
- You can read variables inside a function
- Keep the values of these variables in memory all the time
Closure purpose
The value of the variable is always kept in memory
- Modify the previous example code to illustrate how to always keep the value of a variable in memory
<!DOCTYPE html>
<html lang="en">
<head>
	<meta charset="UTF-8">
	<title>Use of closures</title>
</head>
<body>
	<script>
		//Read local variables inside the function outside the function
		var nAdd;
		function f1(){
			var num1=1;
			nAdd=function(){
	            num1+=1;
	        }
			function f2(){
				console.log(num1);
			}
			return f2;
	  }
		var result=f1();
		result();
		nAdd();
		result();
	</script>
</body>
</html>- When using closures, you should pay attention to the following two points:
- Because closures will save the variables in the function in memory and consume a lot of memory, closures cannot be abused, otherwise it will cause performance problems of web pages and memory leakage in IE
- Closures will change the value of the internal variable of the parent function outside the parent function, so use closures with caution and do not change the value of the internal variable of the parent function
JavaScript Popup
BOM classification
Browser object model classification
- BOM can access and operate the browser window, as follows:
| Object name | explain |
|---|---|
| window | Window object, which can be used to control the current window or open a new window |
| screen | Screen object to get screen related information |
| navigator | Browser object, which can determine the browser used by the user |
| history | A history object that can be used to move forward or backward a page |
| location | Address object, which can be used to obtain the information of the current URL |
| JavaScript timing event | Execute code after a set interval, rather than immediately after the function is called |
| localStorage and SessionStorage | Storage object, which can be used to store data |
JS pop up window
window object method
- In JavaScript, the window object can be used to control the current window or open a new window. The method is as follows:
- window.innerHeight: get the internal height of the browser window (including the scroll bar)
- window.innerWidth: get the internal width of the browser window (including the scroll bar)
- window.open(): open a new window
- window.close(): close the current window
- window.moveTo(): move the current window
- window.resizeTo(): resizes the current window
- In addition, the most commonly used window object is JavaScript pop-up, that is:
- window.alert(): warning box
- window.confirm(): confirmation box
- window.prompt(): prompt box
Warning box
- It is often used to ensure that users can get some information. When the warning box appears, users need to click the OK button to continue the operation
window.alert("sometext");use alert()Method when the user clicks the button, a "Hello, I am a warning box" pops up!
<!DOCTYPE html>
<html lang="en">
<head>
	<meta charset="UTF-8">
	<title>Warning box</title>
</head>
<body>
	<input type="submit" value="Submit" onclick="myFunction()">
	<script>
		function myFunction(){
			alert("Hello, I am a warning box!");
		}
	</script>
</body>
</html>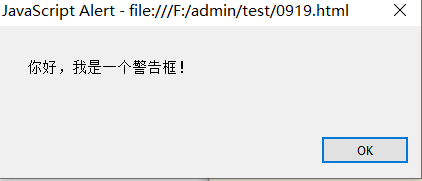
Warning box
- It is often used to ensure that users can get some information. When the warning box appears, users need to click the OK button to continue the operation
window.alert("sometext");- Use alert() method to pop up "Hello, I'm a warning box" when the user clicks the button
<!DOCTYPE html>
<html lang="en">
<head>
	<meta charset="UTF-8">
	<title>Warning box</title>
</head>
<body>
	<input type="submit" value="Submit" onclick="myFunction()">
	<script>
		function myFunction(){
			alert("Hello, I am a warning box!");
		}
	</script>
</body>
</html>
Confirmation box
- It is usually used to verify whether the user operation is accepted. When the confirmation box pops up, the user can click "OK" or "Cancel" to confirm the user operation. If the user clicks "OK", the confirmation box returns true. If the user clicks "Cancel", the confirmation box returns false
window.confirm("sometext");Use confirm() Method: when the user clicks the "OK" button, "you click the [OK] button!" will be printed on the page. When the user clicks the "Cancel" button, "you click the [Cancel] button" will be printed on the page
<!DOCTYPE html>
<html lang="en">
<head>
	<meta charset="UTF-8">
	<title>Confirmation box</title>
</head>
<body>
	<script>
		function myFunction(){
			var r=confirm("Click the button!");
			if (r==true){
				document.write("You clicked the [OK] button!");
			}
			else{
				document.write("You clicked the [Cancel] button!");
			}
		}
		myFunction();
	</script>
</body>
</html>
prompt box
- It is often used to prompt the user to enter a value before entering the page. When the prompt box appears, the user needs to enter a value, and then click the "confirm" or "Cancel" button to continue the operation. If the user clicks the "confirm" button, the returned value is the entered value; if the user clicks the "Cancel" button, the returned value is null
window.prompt("sometext","defaultvalue");- Using prompt() Methods print your name and greeting on the page
<!DOCTYPE html>
<html lang="en">
<head>
	<meta charset="UTF-8">
	<title>prompt box</title>
</head>
<body>
	<script>
		function myFunction(){
			var person=prompt("Please enter your name","Marry");
			if (person!=null && person!=""){
			    document.write("Hello" + person + "! How was your sleep last night?");
			}
		}
		myFunction();
	</script>
</body>
</html>
Timer Event
concept
- Using JavaScript, you can execute code after a set time interval, rather than immediately after the function is called. We call it a timed event
classification
- In JavaScript, there are four methods for timing events:
- setInterval(): executes the specified code continuously for the specified number of milliseconds
- clearInterval(): function code used to stop the execution of setInterval() method
- setTimeout(): executes the specified code after the specified number of milliseconds
- clearTimeout(): function code used to stop the execution of the setTimeout() method
setInterval()
- Used to execute the specified code continuously for the specified number of milliseconds
window.setInterval("javascript function",milliseconds);- Use the setInterval() method to pop up "hello" every 3 seconds after clicking the "start" button
<!DOCTYPE html>
<html lang="en">
<head>
	<meta charset="UTF-8">
	<title>setInterval()method</title>
</head>
<body>
	<input type="submit" value="start" onclick="start()">
	<script>
		function start(){
			setInterval(function(){
				alert("Hello");
			},3000)
		}
	</script>
</body>
</html>
clearInterval()
- Function code to stop the execution of setInterval() method
window.clearInterval(intervalVariable);
- Use the clearInterval() method to cancel the setInterval() method in the previous example, so that the page will no longer pop up the "hello" warning box every 3 seconds
<!DOCTYPE html>
<html lang="en">
<head>
	<meta charset="UTF-8">
	<title>clearInterval()method</title>
</head>
<body>
	<input type="submit" value="start" onclick="start()">
	<input type="submit" value="stop it" onclick="stop()">
	<script>
		var timer;
		function start(){
			timer=setInterval(function(){
				alert("Hello");
			},3000)
		}
		function stop(){
			clearInterval(timer);
		}
	</script>
</body>
</html>
setTimeout()
- Used to pause execution of the specified code after the specified number of milliseconds
window.setTimeout("javascript function", milliseconds);- Modify the code of the first example to wait for 3 seconds, and then pop up the "hello" warning box
<!DOCTYPE html>
<html lang="en">
<head>
	<meta charset="UTF-8">
	<title>setTimeout()method</title>
</head>
<body>
	<input type="submit" value="start" onclick="start()">
	<script>
		function start(){
			setTimeout(function(){
				alert("Hello");
			},3000)
		}
	</script>
</body>
</html>
clearTimeout()
- Function code for stopping the execution of the setTimeout() method
window.clearTimeout(timeoutVariable);
- Modify the previous example so that the page stops executing the setTimeout() method before the "hello" warning box pops up
<!DOCTYPE html>
<html lang="en">
<head>
	<meta charset="UTF-8">
	<title>clearTimeout()method</title>
</head>
<body>
	<input type="submit" value="start" onclick="start()">
	<input type="submit" value="stop it" onclick="stop()">
	<script>
		var timer;
		function start(){
			timer=setTimeout(function(){
				alert("Hello");
			},3000)
		}
		function stop(){
			clearTimeout(timer);
		}
	</script>
</body>
</html>
Common methods of DOM
method
- In JavaScript, there are three ways to find HTML elements, as follows:
- document.getElementById: find HTML elements by id
- document.getElementsByTagName: find HTML elements by tag name
- document.getElementsByClassName: find HTML elements by class name
Find element
use
- Create three Tags: title, paragraph and hyperlink in the web page, add id attribute to the title and class attribute to the hyperlink. Then operate HTML elements through JavaScript to enable users to click different tags to pop up different scripts
<!DOCTYPE html>
<html lang="en">
<head>
	<meta charset="UTF-8">
	<title>lookup HTML element</title>
</head>
<body>
	<h3 id="title">I am a person with id The title of the property</h3>
	<p>I'm a paragraph label</p>
	<a href="#"Class =" intro "> I am a hyperlink with class attribute</a>
	<script>
		// Find HTML elements by id
		var myTitle=document.getElementById("title");
		myTitle.onclick=function(){
			alert("Congratulations, through id Found title label");
		}

		//Find HTML elements by tag name
		var myp=document.getElementsByTagName("p")[0];
		myp.onclick=function(){
			alert("Congratulations, you found the paragraph tag by the tag name");
		}

		//Find HTML elements by class name
		var myIntro=document.getElementsByClassName("intro")[0];
		myIntro.onclick=function(){
			alert("Congratulations, you found the hyperlink tag through the class name");
		}
	</script>
</body>
</html>
method
- In JavaScript, there are three ways to change HTML, as follows:
- document.write(): used to change the HTML output stream
- innerHTML: used to change HTML content
- Object. Attribute = new attribute value: used to change HTML attributes
Change HTML content
- innerHTML is used to change the HTML content. Its syntax is as follows
document.getElementById(id).innerHTML=new HTML;
- Change the text in the paragraph label according to the syntax
<!DOCTYPE html>
<html lang="en">
<head>
	<meta charset="UTF-8">
	<title>innerHTML</title>
</head>
<body>
	<p id="p1">Hello World!</p>
	<script>
		document.getElementById("p1").innerHTML="new text!";
	</script>
</body>
</html> 
Change HTML attributes
- In JavaScript, the following syntax is used to change the attributes of HTML elements
document.getElementById(id).attribute=New attribute value;
- Change the path of the image label according to the syntax to change it into a picture
<!DOCTYPE html>
<html lang="en">
<head>
	<meta charset="UTF-8">
	<title>change HTML attribute</title>
</head>
<body>
	<img src="images/1.jpg" alt="" width="200" height="150">
	<img id="pic" src="images/1.jpg" alt="" width="200" height="150">
	<script>
		document.getElementById("pic").src="images/2.jpg";
	</script>
</body>
</html>
Change HTML style
- In JavaScript, to change the style of HTML elements, you can use the following syntax
document.getElementById(id).style.property=New style;
- Change the text color of the paragraph label to red and the font size to 32 pixels according to the syntax
<!DOCTYPE html>
<html lang="en">
<head>
	<meta charset="UTF-8">
	<title>change HTML style</title>
</head>
<body>
	<p id="p1">I'm paragraph one</p>
	<p id="p2">I'm paragraph two</p>
	<script>
		document.getElementById("p2").style.color="red";
		document.getElementById("p2").style.fontSize="32px";
	</script>
</body>
</html>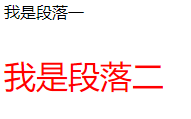
DOM node relationships and attributes
DOM node
- In JavaScript, DOM can plan the whole page into a document composed of node levels
<html>
	<head>
    	<title>Sample Page</title>
	</head>
	<body>
		<p>hello world!</p>
	</body>
</html>
conclusion
- It can be concluded from the pictures on the previous page that all contents in the HTML document are nodes, that is:
- The entire document is a document node
- Each HTML element is an element node
- The text within an HTML element is a text node
- Each HTML attribute is an attribute node
- Annotations are annotation nodes
Hierarchical relationship
- Nodes in the node tree have hierarchical relationships with each other. Terms such as parent, child and sibling are often used to describe these relationships. The parent node has child nodes; Children of the same level are called siblings (brothers or sisters). The specific hierarchical relationship is as follows:
- In the node tree, the top node is called root
- Every node has a parent node, except the root node
- A node can have any number of child nodes
- Siblings are nodes that have the same parent node
classification
- In JavaScript, access node attributes as shown in the following table
| Attribute name | describe |
|---|---|
| parentNode | Returns the parent node of the node |
| childNodes | Returns the collection of child nodes, childNodes[i] |
| firstChild | Returns the first child node of the node |
| lastChild | Returns the last child node of a node |
| nextSibling | Next node |
| previousSibling | Previous node |
use
- Build spring, summer and autumn titles and related idioms through an unordered list, and access each content through node attributes
<!DOCTYPE html>
<html lang="en">
<head>
	<meta charset="UTF-8">
	<title>Use of node attributes</title>
</head>
<body>
	<div id="list"><h1>Four seasons</h1>
		<ul>
			<li><h3>spring</h3><p>Related idioms: flowers bloom in spring and everything recovers</p></li>
			<li><h3>summer</h3><p>Related idioms: hot summer, sweating like rain</p></li>
			<li><h3>autumn</h3><p>Related idioms: falling leaves know autumn, autumn wind is blowing</p></li>
			<li><h3>winter</h3><p>Related idioms: goose feather, heavy snow, cold weather</p></li>
		</ul><a href="#"> see more idioms > > < / a > < / div >
	<script>
		var list=document.getElementById("list");
		//Get the parent node of the list
		console.log(list.parentNode);

		//Get child nodes under list
		console.log(list.childNodes);

		//Get the first child node under the list
		console.log(list.firstChild);

		//Get the last child node under the list
		console.log(list.lastChild);

		//Get the next sibling of the next sibling adjacent to the first child node under the list
		console.log(list.firstChild.nextSibling.nextSibling);

		//Get the last sibling adjacent to the last child node under the list
		console.log(list.lastChild.previousSibling);
	</script>
</body>
</html>
- Parent node (list.parentNode)
- It can be seen from the HTML code that the parent node of div element with id of list is body, so the console will print out all the contents of body
- Child nodes (list.childNodes)
- It can be seen from the HTML code that the child nodes of div element with id of list have h1 title, space (note that space, comment and carriage return all belong to the node), ul list and hyperlink, so the console will print out four child nodes
- First child node (list.firstChild)
- It can be seen from the HTML code that the first child node of div element with id of list is h1 title, so the console will print the content of h1 title
- Last child node (list.lastChild)
- It can be seen from the HTML code that the last child node of div element with id of list is a hyperlink, so the console will print out the contents of a tag
- The next sibling of the next sibling adjacent to the first child node (list.firstChild.nextSibling.nextSibling)
- It can be seen from the HTML code that the first child node of div element with id of list is h1 title, the next sibling of h1 title is space, and the next sibling of space is ul list, so the console will print the contents of ul list
- The last sibling adjacent to the last child node (list.lastChild.previousSibling)
- It can be seen from the HTML code that the last child node of div element with id of list is a hyperlink, and the last sibling of the hyperlink is the ul list, so the console will print the contents of the ul list
DOM node operation
method
- In JavaScript, nodes can be operated dynamically, as shown in the following table
| name | describe |
|---|---|
| document.createElement("element name") | Create element node |
| document.createTextNode("text") | Create text node |
| A.appendChild( B) | Add node B to the end of node A |
| Parent node. Removechild (child node) | Deletes the specified node |
| Parent node. Replacechild (newnode, oldnode) | Replace the specified node with another node |
Create and add nodes
- If you want to create a new HTML element (node), you need to create an element first, and then add the created element to the specified location
- Next, create a new paragraph using the DOM node operation method and add the new paragraph to the existing element
<!DOCTYPE html>
<html lang="en">
<head>
	<meta charset="UTF-8">
	<title>Create and add nodes</title>
</head>
<body>
	<div id="box">
		<p>I'm paragraph 1</p>
		<p>I'm paragraph 2</p>
	</div>
	<script>
		var newP=document.createElement("p");
		var text=document.createTextNode("I am a newly created paragraph 3");
		newP.appendChild(text);
		var box=document.getElementById('box');
		box.appendChild(newP);
	</script>
</body>
</html> 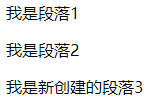
- Step 1: create a < p > element using the "document.createElement()" method
- Step 2: create a new text node for the < p > element using the "document.createTextNode()" method
- Step 3: add a new text node to the < p > element using the "appendChild()" method
- Step 4: you want to place the < p > element in the < div > element with id "box", so you need to get the < div > element first
- Step 5: use the "appendChild()" method again to add the < p > element to the < div > element
Delete node
- Delete the first < p > element in the previous example
-
<!DOCTYPE html>
<html lang="en">
<head>
	<meta charset="UTF-8">
	<title>Delete node</title>
</head>
<body>
	<div id="box">
		<p>I'm paragraph 1</p>
		<p>I'm paragraph 2</p>
	</div>
	<script>
		var box=document.getElementById('box');
		var p1=document.getElementsByTagName('p')[0];
		box.removeChild(p1);
	</script>
</body>
</html>
-
Replace node
- Modify the above example to replace the first < p > element with a < H3 > element
<!DOCTYPE html>
<html lang="en">
<head>
	<meta charset="UTF-8">
	<title>Replace node</title>
</head>
<body>
	<div id="box">
		<p>I'm paragraph 1</p>
		<p>I'm paragraph 2</p>
	</div>
	<script>
		var newH3=document.createElement("h3");
		var text=document.createTextNode("I'm a replacement h3 element");
		newH3.appendChild(text);
		var box=document.getElementById('box');
		var p1=document.getElementsByTagName('p')[0];
		box.replaceChild(newH3,p1);
	</script>
</body>
</html>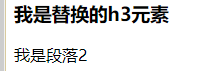
JS object oriented
- There are two different ways to create your own new objects through JavaScript, namely:
- Use Object to define and create an instance of an Object
- Create objects using object literals
Object mode
grammar
- Objects created through instances of Object reference types inherit properties and methods from Object.prototype
new Object()
use
- Create a user object and add two properties and a method to it
<!DOCTYPE html>
<html>
<head lang="en">
    <meta charset="UTF-8">
    <title>Object mode</title>
</head>
<body>
<script>
    //Create user objects in Object mode
    var user = new Object();
    user.name = "Zhang San";
    user.pwd = "123456";
    user.show=function(){
        document.write("user name:"+this.name+"<br>"+"password:"+this.pwd);
    }
    user.show();
</script>
</body>
</html>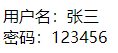
Object Literal
grammar
- An object literal is a short form of defining an object and is used when passing a large number of optional parameters to a function
use
- Modify the previous example to change the Object creation method to the Object literal method
<!DOCTYPE html>
<html>
<head lang="en">
    <meta charset="UTF-8">
    <title>Object from face</title>
</head>
<body>
<script>
    //Create user objects using object from face method
    var user = {
        name : "Zhang San",
        pwd : "123456",
        show:function(){
            document.write("user name:"+this.name+"<br>"+"password:"+this.pwd);
        }
    }
    user.show();
</script>
</body>
</html>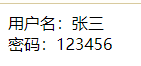
put questions to
- If you want to create multiple objects at this time, how should you implement it?
terms of settlement
- In a simple and crude way, copy and paste multiple directly
<!DOCTYPE html>
<html>
<head lang="en">
    <meta charset="UTF-8">
    <title>Create multiple objects</title>
</head>
<body>
<script>
    //Object 1
    var user = {
        name : "Zhang San",
        pwd : "123456",
        show:function(){
            document.write("user name:"+this.name+"<br>"+"password:"+this.pwd);
        }
    }
    user.show();

    //Object 2
    var user2={};
    user2.name="Li Si";
    user2.pwd="654321";
    user2.show=function(){
        document.write("<br>"+"user name:"+this.name+"<br>"+"password:"+this.pwd+"<br>")
    }
    user2.show();

    //Object 3
    var user3={};
    user3.name="Wang Wu";
    user3.pwd="987654";
    user3.show=function(){
        document.write("user name:"+this.name+"<br>"+"password:"+this.pwd)
    }
    user3.show();
</script>
</body>
</html>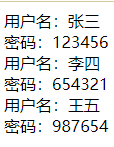
- Although multiple objects can be created, the amount of code is cumbersome and repetitive
Constructor
- In JavaScript, a function called with the new keyword is called a constructor. Constructors are generally capitalized
use
- Pass these attributes as arguments to the constructor, and then pass them through the new keyword to create an object
<!DOCTYPE html>
<html lang="en">
<head>
	<meta charset="UTF-8">
	<title>Constructor to create an object</title>
</head>
<body>
	<script>
		//Create user in constructor mode
	    function User(name,pwd){
	        this.name = name;
	        this.pwd = pwd;

	        this.show=function(){
	            document.write("user name:"+this.name+"<br>"+"password:"+this.pwd+"<br>");
	        }
	    }
	    var user1 = new User("Zhang San","123456");
	    var user2 = new User("Li Si","654321");
	    var user3 = new User("Wang Wu","987654");
	    user1.show();
	    user2.show();
	    user3.show();
	</script>
</body>
</html> 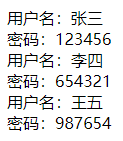
Understanding prototype
Constructor
- If it is called through the new operator, it is a constructor. If it is not called through the new operator, it is an ordinary function. Take the constructor as an example, that is:
-
var person1 = new Person('Mike',10);prototype
- The function person (object) has an attribute prototype (pointer) pointing to the prototype object. Person.prototype (prototype object, which is also an object in essence) has an attribute constructor (pointer) , It also points to the person function object. The code is explained as follows:
-
console.log(Person === Person.prototype.constructor); //true
Instance object
- The instance object person1 has an attribute_ proto_ Point to the prototype object. The instance object can access the properties and methods on the prototype object through this property, that is:
Perons.prototype._proto_ == person1._proto_
- In JavaScript, each function has a prototype attribute that points to an object that allows all object instances to share its properties and methods
<!DOCTYPE html>
<html lang="en">
<head>
	<meta charset="UTF-8">
	<title>prototype</title>
</head>
<body>
	<script>
		//Constructor
		function Person(name, age) {
		    this.name = name;
		    this.age = age;
		}
		//Add properties or methods to the prototype object
		Person.prototype.sex = 'male';
		var person1 = new Person('Mike',10);
		var person2 = new Person('Alice',20);
		//Set gender only for person2
		person2.sex = 'female';
		console.log(person1.sex)  // 'male '
		console.log(person2.sex)  //'female'
	</script>
</body>
</html>
Creating objects in mixed mode
- In JavaScript, you can create objects by combining constructors with prototypes
<!DOCTYPE html>
<html>
<head lang="en">
    <meta charset="UTF-8">
    <title>Creating objects in mixed mode</title>
</head>
<body>
<script>
    //Constructor mode create user
    function User(name,pwd){
        this.name = name;
        this.pwd = pwd;
    }

    //Prototype: adds the information of the object instance to the prototype object
    User.prototype.show=function(){
        document.write("user name:"+this.name+"<br>"+"password:"+this.pwd+"<br>");
    };

    //When calling the constructor, the constructor creates a new object by default, assigns properties and methods to the new object, and finally returns the new object
    var user1 = new User("Zhang San","123456");
    var user2 = new User("Li Si","654321");

    user1.show();
    user2.show();
</script>
</body>
</html>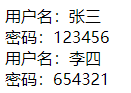
inherit
classification
- In JavaScript, there are six methods to implement inheritance:
- Prototype chain inheritance
- Borrow constructor
- Combinatorial inheritance
- Prototype inheritance
- Parasitic inheritance
- Parasitic combinatorial inheritance
Prototype chain inheritance
- The core point is that the prototype of the child class is an instance of the parent class
<!DOCTYPE html>
<html lang="en">
<head>
	<meta charset="UTF-8">
	<title>Prototype chain inheritance</title>
</head>
<body>
	<script>
		//Define a parent class Person
		function Person(name){
		    this.name=name;
		}
		Person.prototype.age=25;
		Person.prototype.show=function(){
			console.log(this.name);
		}

		//The prototype of a subclass is an instance of the parent class
		function subType(){}
		subType.prototype=new Person();

		// test
		var p1=new subType();
		console.log(p1.name); //Undefined, accessible, but name is not initialized, so it is undefined
		console.log(p1.age); //25
	</script>
</body>
</html>- Although inheritance is implemented, there are some problems, namely:
- The properties and methods in the prototype are shared in the instance. Properties and methods in constructors are not shared in instances. This shows that all attributes in the parent class will be shared in the instances of the child class. If the parent class has an array, the instances of the child class will share this attribute. When a child class instance changes the items of the array, the attribute in all instances will change accordingly
- When you create a subclass instance, you cannot pass parameters to a supertype constructor
Borrow constructor
- Calling the parent class constructor in the subclass constructor
<!DOCTYPE html>
<html lang="en">
<head>
	<meta charset="UTF-8">
	<title>Borrow constructor</title>
</head>
<body>
	<script>
		//Define a parent class Person
		function Person(name){
		    this.name=name;
		}
		Person.prototype.age=25;
		Person.prototype.show=function(){
			console.log(this.name);
		}

		//Calling the parent class constructor in the subclass constructor
		function subType(name){
		    Person.call(this,name);
		}

		// test
		var p2=new subPerson("zhangsan");
		console.log(p2.name);    //"zhangsan"
		console.log(p2.age);    //undefined
	</script>
</body>
</html>- The problem of prototype chain inheritance is solved. All subclass instances will not share properties and methods, will not affect each other, and can pass values. However, there are also problems with this method, namely:
- Methods in constructors cannot be shared and reused, and each instance will have the same method
- Methods and properties in the prototype of the parent class are not visible in the child class
Combinatorial inheritance
- That is, combining prototype chain method and borrowing constructor method
<!DOCTYPE html>
<html lang="en">
<head>
	<meta charset="UTF-8">
	<title>Combinatorial inheritance</title>
</head>
<body>
	<script>
		//Define a parent class Person
		function Person(name){
		    this.name=name;
		}
		Person.prototype.age=25;
		Person.prototype.show=function(){
			console.log(this.name);
		}

		//Combining prototype chain method and borrowing constructor method
		function subType(name){
		    Person.call(this,name);
		}
		subType.prototype=new Person();

		//test
		var p3=new subType("lisi");
		console.log(p3.name);    //"lisi"
		p3.show();               //"lisi"
		console.log(p3.age);    //25
	</script>
</body>
</html>- You can not only inherit the properties and methods in the parent class prototype, but also put the constructor of the parent class into the constructor of the child class
jQuery
What is jQuery
- JQuery is a fast and concise JavaScript framework, which was created by John Resig in 2006. The purpose of jQuery design is "write Less, Do More", which advocates writing less code and doing more things
- jQuery encapsulates the common function code of JavaScript, provides a simple JavaScript Design pattern, and optimizes HTML document operation, event processing, animation design and Ajax interaction
jQuery features
- Get document elements quickly
- Provide beautiful page dynamic effects
- Create AJAX no refresh page
- Provides enhancements to the JavaScript language
- Enhanced event handling
- Change page content
jQuery Download
- From the official website( http://jquery.com )Download
- Enter in the browser address bar“ http://jquery.com ”, and press the "enter" key to enter the home page of jQuery
- Click the "Download jQuery" button in the figure to select the version to be downloaded. At present, the latest version of jQuery is jQuery 3.5.1
be careful
- JQuery version 2.0 or above no longer supports IE 6/7/8, so the latest version does not mean the best. It is recommended that you choose the appropriate version according to the project requirements
jQuery Download
- Quote jQuery from Microsoft, Baidu, Sina, etc
- Microsoft jQuery compressed reference address
- https://ajax.aspnetcdn.com/ajax/jquery/jquery-1.9.0.min.js
- Baidu jQuery compressed version reference address
- https://apps.bdimg.com/libs/jquery/2.1.4/jquery.min.js
- Sina jQuery compressed version reference address
- https://lib.sinaapp.com/js/jquery/2.0.2/jquery-2.0.2.min.js
- Microsoft jQuery compressed reference address
jQuery Download
- Take "Microsoft jQuery compressed version reference address" as an example to introduce the use method
- Enter in the browser address bar“ https://ajax.aspnetcdn.com/ajax/jquery/jquery-1.9.0.min.js ”, that is, open the reference address of Microsoft jQuery compressed version
jQuery syntax
- In jQuery, you can use the following syntax to implement the jQuery method when the document is ready
$ (document).ready(function() {/ / start writing jQuery code...});
Concise writing
$(function(){
 	// Start writing jQuery code
});- Reference the jQuery Library in the page and pop up "start learning jQuery!"
<!DOCTYPE html>
<html lang="en">
<head>
	<meta charset="UTF-8">
	<title>jQuery Basic grammar</title>
</head>
<body>
	<script src="js/jquery-1.9.0.min.js"></script>
	<script>
		$(document).ready(function() {
	        alert("Start learning jQuery la");
	    });
	</script>
</body>
</html>
Selector classification
- JQuery selector allows you to operate on HTML element groups or individual elements. It selects HTML elements based on the element's id, class, type, attribute, attribute value, etc. (you can refer to CSS selector). Note that in jQuery, all selectors begin with a dollar sign, that is, "$()"
Basic selector
- Basic selectors are widely used in practical applications. It is recommended to focus on mastering the basic selectors of jQuery, which is the basis of other types of selectors and the most important part of jQuery selectors
| name | selector | describe | Example |
|---|---|---|---|
| ID Selector | #id | Select the specified element through the id attribute of the HTML element | $("#test") indicates that the element with id "test" attribute is selected |
| Class selector | .class | Select the specified element through the class attribute of the HTML element | $(". Test") indicates that the element whose class is "test" attribute is selected |
| tag chooser | element | Select element by element name | $("p") means that all p elements are selected |
| compound selector | selector1,selector2 | Group multiple selectors together | $("div,p") means that all div elements and p elements are selected |
| Wildcard selector | * | Select all elements | $("*") indicates that all elements are selected |
Level selector
- Get the elements through the hierarchical relationship between DOM elements
| name | selector | describe | Example |
|---|---|---|---|
| Descendant Selectors | ancestor descendant | Select all descendant elements in the ancestor element | $("#menu span" ) Indicates the span element under the selected #menu |
| Child selectors | parent>child | Select the child element under the parent element | $(" #menu>span" ) Represents the selected #menu child element span |
| Adjacent element selector | prev+next | Select the next element immediately after the prev element | $(" h2+dl " ) Indicates that the peer element DL immediately after the H2 element is selected |
| Peer element selector | prev~sibings | Select all siblings elements after the prev element | $(" h2~dl " ) Represents all peer elements dl after H2 element is selected |
Filter selector - simple filter
- A simple filter is a filter that starts with a colon and is usually used to achieve a simple filtering effect
| filter | describe | Example |
|---|---|---|
| :first | Match the first element found | $("tr:first " ) Represents the first row of the selection table |
| :last | Match the last element found | $("tr:last" ) Represents the last row of the selection table |
| :even | Matches all elements with even index values | $("tr:even" ) Indicates that rows with even index values are selected |
| :odd | Matches all elements with odd index values | $("tr:odd" ) Indicates that rows with odd index values are selected |
| :eq(index) | An element that matches a given index value | $("div:eq(1) " ) Indicates that the second div element is selected |
| :gt(index) | Matches all elements greater than the given index value | $("div:gt(0) " ) Indicates that div elements with index greater than 0 are selected |
| :lt(index) | Matches all elements less than the given index value | $("div:lt(2) " ) Indicates that div elements with index less than 2 are selected |
| :header | Match Title elements such as h1, h2, h3 | $(":header" ) Indicates that all title elements are selected |
| :not(selector) | Removes all elements that match the given selector | $("input:not(:checked) " ) Indicates to select an input element that is not selected |
| :animated | Matches all elements that are performing animation effects | $(":animated " ) Indicates that all elements that are performing animation effects are selected |
Filter selector - content filter
- The content filter is used to filter the text content contained in DOM elements and whether they contain matching elements
| filter | describe | Example |
|---|---|---|
| :contains(text) | Matches the element that contains the given text | $(": contains(" Baidu ")" means to select an element containing "Baidu" text |
| :empty | Matches all empty elements that do not contain child elements or text | $("td:empty" ) Indicates the selection of cells that do not contain child elements or text |
| :has(selector) | Matches the element that contains the element that the selector matches | $("td:has(p)" ) Indicates that a cell containing a P element is selected |
| :parent | Matches elements that contain child elements or text | $("td:parent" ) Indicates the selection of cells containing child elements or text |
Filter selector - visibility filter
filter
describe
Example
:visible
Select all visible elements
$(":visible" ) Indicates that all visible elements are selected
:hidden
Select all hidden elements
$(":hidden" ) Indicates that all hidden elements are selected
- Match elements by their status attributes (such as selected, unavailable, and so on)
| filter | describe | Example |
|---|---|---|
| :checked | Match all selected elements | $("input:checked" ) Indicates that the input element whose checked attribute is checked is selected |
| :disabled | Match all unavailable elements | $("input:disabled" ) Indicates that the input element whose disabled attribute is disabled is selected |
| :enabled | Match all available elements | $("input:enabled" ) Indicates that the input element whose enabled attribute is enabled is selected |
| :selected | Match all selected option elements | $("input:selected" ) Represents the selected option element in the selected element |
- Filter the child elements of a given element. The specific filter conditions depend on the type of selector
| filter | describe | Example |
|---|---|---|
| :first-child | Matches the first child of all given elements | $("ul li:first-child" ) Indicates that the first child element Li in the UL element is selected |
| :last-child | Matches the last child of all given elements | $("ul li:last-child" ) Indicates that the last child element Li in the UL element is selected |
| :only-child | The only child element in the matching element | $("ul li:only-child" ) Represents the selection of Li in a UL element that contains only one Li element |
| :nth-child() | Matches the nth child element under its parent element | $("ul li:nth-child(3)" ) Indicates that the third child element Li in the UL element is selected |
- Select elements through the attributes of HTML elements
| selector | describe | Example |
|---|---|---|
| [attribute] | Matches the element that contains the given attribute | $("div[name]" ) Indicates that the div element with the name attribute is selected |
| [attribute=value] | The element that matches a given attribute is a specific value | $("div[name='test']" ) Indicates that the div element whose name attribute is test is selected |
| [attribute^=value] | Matching a given attribute is an element that starts with some specific value | $(" [href^='en']" ) Indicates that the element whose href attribute value starts with en is selected |
| [attribute$=value] | Matching a given attribute is an element that ends with some specific value | $(" [href$='.jpg']" ) Indicates to select an element whose href attribute value ends in. Jpg |
| [attribute*=value] | Matches a given attribute to an element that contains some value | $(" [href* ='txt']" ) Indicates to select the element with txt in the href attribute value |
- Match the elements that often appear in the form, but the matching elements are not necessarily in the form
| selector | describe | Example |
|---|---|---|
| :input | Match all input elements | $(": input") / / indicates that all input elements are selected |
| :checkbox | Match all check boxes | $(": checkbox") / / indicates that all checkboxes are selected |
| :file | Match all file fields | $(": file") / / indicates that all file fields are selected |
| :hidden | Match all invisible elements, or elements of type hidden | $(": hidden") / / indicates that all hidden fields are selected |
| :password | Match all password fields | $(": password") / / indicates that all password fields are selected |
| :radio | Match all radio buttons | $(": Radio") / / indicates that all radio buttons are selected |
| :submit | Match all submit buttons, that is, the input element of type="submit" | $(": Submit") / / indicates that all submit buttons are selected |
| :text | Match all single line text boxes | $(": text") / / indicates that all single line text boxes are selected |
Use of jQuery selectors
- Take the news list as an example to demonstrate how to use the selector in jQuery
<DOCTYPE html>
<html lang="en">
<head>
	<meta charset="UTF-8">
	<title>News list</title>
	<style>
		*{padding:0;margin:0;}
		html,body{font-family:"Microsoft YaHei ";}
		.contain{width:320px;margin:5px auto; border: 1px solid #2a65ba;}
		ul{list-style:none;}
		li{padding-left:15px;line-height:40px;color:#000;border-bottom:1px #aaaaaa dashed;}
		h2{font-size:16px;padding-left:20px;line-height:40px;}
	</style>
</head>
<body>
	<div class="contain">
		<h2>News list</h2>
		<ul>
			<li class="li1"> Realistic version of fan shengmei's family</li>
			<li> The consequences of grooming your pet</li>
			<li class="li3"> Fast thin belly exercises are necessary for people who want to cook </li>
			<li> File transfer assistant becomes a private tree hole for workers</li>
			<li> Happy way to eat chicken</li>
			<li> What winter sports do you like?(Click to enter the survey page)</li>
		</ul>
	</div>
	<script src="js/jquery-1.9.0.min.js"></script>
	<script>
		$(document).ready(function(){
		    //Use the filter selector to set the background color and font color for h2
		    $(".contain :header").css({"background":"#2a65ba","color":"#ffffff"});
		    //Use the hierarchy selector to set all li font sizes
		    $(".contain ul li").css("fontSize","12px");
		    //Use the filter selector to set the background color for even rows
		    $(".contain li:even").css("background","#f0f0f0");
		    //Use the filter selector to set the background color of odd rows
		    $(".contain li:odd").css("background","#cccccc");
		    //Use the attribute selector to set the first li font color
		    $("li[class='li1']").css("color","red");
		    //Set the third li background color with the basic selector
		    $(".li3").css("background","#02acaa");
		     //Use the filter selector to set the last li without a border
		    $(".contain li:last").css("border","none");
		});
	</script>
</body>
</html> 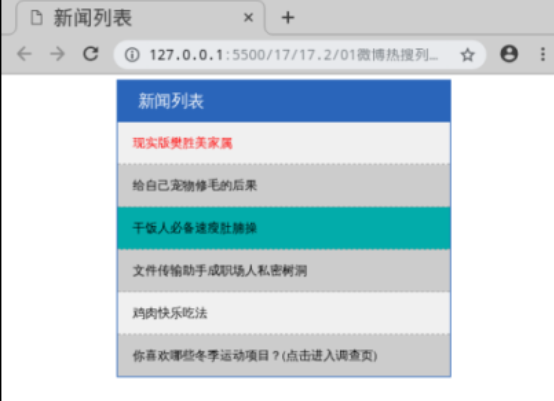
- Take the news list as an example to demonstrate how to use the selector in jQuery
<!DOCTYPE html>
<html lang="en">
<head>
	<meta charset="UTF-8">
	<title>News list</title>
	<style>
		*{padding:0;margin:0;}
		html,body{font-family:"Microsoft YaHei ";}
		.contain{width:320px;margin:5px auto; border: 1px solid #2a65ba;}
		ul{list-style:none;}
		li{padding-left:15px;line-height:40px;color:#000;border-bottom:1px #aaaaaa dashed;}
		h2{font-size:16px;padding-left:20px;line-height:40px;}
	</style>
</head>
<body>
	<div class="contain">
		<h2>News list</h2>
		<ul>
			<li class="li1"> Realistic version of fan shengmei's family</li>
			<li> The consequences of grooming your pet</li>
			<li class="li3"> Fast thin belly exercises are necessary for people who want to cook </li>
			<li> File transfer assistant becomes a private tree hole for workers</li>
			<li> Happy way to eat chicken</li>
			<li> What winter sports do you like?(Click to enter the survey page)</li>
		</ul>
	</div>
	<script src="js/jquery-1.9.0.min.js"></script>
	<script>
		$(document).ready(function(){
		    //Use the filter selector to set the background color and font color for h2
		    $(".contain :header").css({"background":"#2a65ba","color":"#ffffff"});
		    //Use the hierarchy selector to set all li font sizes
		    $(".contain ul li").css("fontSize","12px");
		    //Use the filter selector to set the background color for even rows
		    $(".contain li:even").css("background","#f0f0f0");
		    //Use the filter selector to set the background color of odd rows
		    $(".contain li:odd").css("background","#cccccc");
		    //Use the attribute selector to set the first li font color
		    $("li[class='li1']").css("color","red");
		    //Set the third li background color with the basic selector
		    $(".li3").css("background","#02acaa");
		     //Use the filter selector to set the last li without a border
		    $(".contain li:last").css("border","none");
		});
	</script>
</body>
</html>
jQuery event
- Common basic events in jQuery include mouse events, keyboard events, form events, and document / window events
| Mouse event | Keyboard events | Form Events | Document / window events |
|---|---|---|---|
| click | keypress | submit | load |
| dblclick | keydown | change | resize |
| mouseover | keyup | focus | scroll |
| mouseout | blur | unload | |
| hover |
- The jQuery event method triggers an event that matches elements, or binds a function to an event that matches all elements
- To bind a click event to a p element:
$("p").click();- The next step is to define when to trigger the event, which can be realized through an event function:
$("p").click(function(){
	// Code executed after the action is triggered!!
});
use
- According to the jQuery event syntax and combined with the form event, when the input element obtains the focus, the form background color is gray; When the input element loses focus, the form background color is white
<!DOCTYPE html>
<html lang="en">
<head>
	<meta charset="UTF-8">
	<title>jQuery Event syntax and usage</title>
</head>
<body>
	<p>full name:<input type="text"></p>
	<p>password:<input type="text"></p>
	<script src="js/jquery-1.9.0.min.js"></script>
	<script>
		$(document).ready(function(){
		  $("input").focus(function(){
		    $(this).css("background-color","#cccccc");
		  });
		  $("input").blur(function(){
		    $(this).css("background-color","#ffffff");
		  });
		});
	</script>
</body>
</html>
Composite event
- In jQuery, the hover() method is a mouse event and a composite event, which is used to simulate mouse cursor hover. When the mouse moves over the element, the specified first function will be triggered; When the mouse moves out of this element, the specified second function is triggered
<!DOCTYPE html>
<html lang="en">
<head>
	<meta charset="UTF-8">
	<title>hover( )method</title>
	<style>
		#box{
			width: 100px;
			height: 100px;
			background: red;
		}
	</style>
</head>
<body>
	<div id="box"></div>
	<script src="js/jquery-1.9.0.min.js"></script>
	<script>
		$(document).ready(function(){
		    $("#box").hover(
			    function(){
			        alert("You're in div!");
			    },
			    function(){
			        alert("bye-bye! Now you're gone div!");
			    }
			);
		});
	</script>
</body>
</html>
Achieve hiding and display effects
- With jQuery, you can use hide() and show() methods to hide and display HTML elements
<!DOCTYPE html>
<html lang="en">
<head>
	<meta charset="UTF-8">
	<title>Hide and show elements</title>
	<style>
		div{
			width:100px;
			height: 100px;
			background: red;
			color: #fff;
		}
	</style>
</head>
<body>
	<div>I will hide and show!</div>
	<input type="submit" value="hide" id="hide">
	<input type="submit" value="display" id="show">
	<script src="js/jquery-1.9.0.min.js"></script>
	<script>
		$(document).ready(function(){
		  $("#hide").click(function(){
		    $("div").hide();
		  });
		  $("#show").click(function(){
		    $("div").show();
		  });
		});
	</script>
</body>
</html>
With parameter syntax
- In jQuery, you can also specify the speed of element hiding and displaying and the callback function. Its syntax is as follows
//hide
$(selector).hide(speed,callback);

//display
$(selector).show(speed,callback);
With parameters - use
- According to the syntax, set the hiding and display effects with parameters for div elements on the basis of the previous example, and use the callback function to pop up "hide() method completed!" or "show() method completed!" after the hiding or display is completed
<!DOCTYPE html>
<html lang="en">
<head>
	<meta charset="UTF-8">
	<title>Hide and show elements-With parameters</title>
	<style>
		div{
			width:100px;
			height: 100px;
			background: red;
			color: #fff;
		}
	</style>
</head>
<body>
	<div>I will hide and show!</div>
	<input type="submit" value="hide" id="hide">
	<input type="submit" value="display" id="show">
	<script src="js/jquery-1.9.0.min.js"></script>
	<script>
		$(document).ready(function(){
		  $("#hide").click(function(){
		    $("div").hide(1000,function(){
		    	alert("hide()Method completed!");
		    });
		  });
		  $("#show").click(function(){
		    $("div").show(2000,function(){
		    	alert("show()Method completed!");
		    });
		  });
		});
	</script>
</body>
</html>- Through jQuery, you can use the toggle() method to switch the hide() and show() methods
<!DOCTYPE html>
<html lang="en">
<head>
	<meta charset="UTF-8">
	<title>toggle()Use of methods</title>
	<style>
		div{
			width:100px;
			height: 100px;
			background: red;
			color: #fff;
		}
	</style>
</head>
<body>
	<div>I will hide and show!</div>
	<input type="submit" value="Hide or show" id="btn">
	<script src="js/jquery-1.9.0.min.js"></script>
	<script>
		$(document).ready(function(){
		  $("#btn").click(function(){
		    $("div").toggle();
		  });
		});
	</script>
</body>
</html>
animate() method
grammar
- In jQuery, the animate() method is used to create custom animations
$(selector).animate({params},speed,callback);parameter
- The required params parameter is used to define the CSS properties that form the animation
- The optional speed parameter specifies the duration of the effect. It can be taken as "slow", "fast" or milliseconds
- The optional callback parameter is the name of the function to be executed after the animation is completed
use
- The div element is 200 pixels to the left, that is, the element needs to move 200 pixels to the right
<!DOCTYPE html>
<html lang="en">
<head>
	<meta charset="UTF-8">
	<title>animate()Use of methods</title>
	<style>
		div{
			width: 100px;
			height: 100px;
			background: red;
			position: absolute;
		}
	</style>
</head>
<body>
	<input type="submit" value="Start animation" id="btn">
	<div></div>
	<script src="js/jquery-1.9.0.min.js"></script>
	<script>
		$(document).ready(function(){
		  $("#btn").click(function(){
		    $("div").animate({left:'200px'});
		  });
		});
	</script>
</body>
</html>
Operate on multiple properties
- Modify the previous example code so that the div element is not only 200 pixels from the left, but also changes its width and height to 200 pixels
<!DOCTYPE html>
<html lang="en">
<head>
	<meta charset="UTF-8">
	<title>Operate on multiple properties</title>
	<style>
		div{
			width: 100px;
			height: 100px;
			background: red;
			position: absolute;
		}
	</style>
</head>
<body>
	<input type="submit" value="Start animation" id="btn">
	<div></div>
	<script src="js/jquery-1.9.0.min.js"></script>
	<script>
		$(document).ready(function(){
		  $("#btn").click(function(){
		    $("div").animate({
			    left:'200px',
			    width:'200px',
			    height:'200px'
			  });
		  });
		});
	</script>
</body>
</html>
stop() method
- jQuery's stop() method is used to stop the animation or effect before the animation is completed
$(selector).stop(stopAll,goToEnd);
parameter
- The optional stopAll parameter specifies whether the animation queue should be cleared. The default is false, that is, only the active animation is stopped, and any queued animation is allowed to execute backward
- The optional goToEnd parameter specifies whether to complete the current animation immediately. The default is false
- Click the "Stop Animation" button before completing the animation in the previous example to stop the animation
<!DOCTYPE html>
<html lang="en">
<head>
	<meta charset="UTF-8">
	<title>stop()Use of methods</title>
	<style>
		div{
			width: 100px;
			height: 100px;
			background: red;
			position: absolute;
		}
	</style>
</head>
<body>
	<input type="submit" value="Start animation" id="btn">
	<input type="submit" value="Stop Animation" id="btnStop">
	<div></div>
	<script src="js/jquery-1.9.0.min.js"></script>
	<script>
		$(document).ready(function(){
		  $("#btn").click(function(){
		    $("div").animate({
			    left:'200px',
			    width:'200px',
			    height:'200px'
			  },5000);
		  });
		  $("#btnStop").click(function(){
		    $("div").stop();
		  });
		});
	</script>
</body>
</html>
Plug ins in jQuery
jQuery UI
- Open source JavaScript web user interface code base based on jQuery. Contains visual controls for underlying user interaction, animation, special effects, and replaceable themes. We can directly use it to build web applications with good interactivity
Full screen scrolling plug-in fullPage.js
- fullPage.js is a plug-in based on jQuery, which can easily and easily produce a full screen website. Its main functions are: support mouse scrolling, support forward and backward and keyboard control, support mobile phone, tablet touch events, support CSS3 animation and so on
Validate plug-in validate.js
- Validate is a lightweight form validation plug-in based on jQuery. It has built-in rich validation rules and flexible custom rule interface to meet various needs of applications
jQuery Growl plug-in
- The jQuery Growl plug-in (message reminder) allows you to easily display feedback messages in an overlay. The message will disappear automatically after a period of time without clicking the "OK" button, etc. Users can also move the mouse or click the close button to speed up the hidden information
Rotation chart plug-in Swiper . js
- Swiper.js is an open source, free and powerful touch sliding plug-in, which is oriented to mobile terminals such as mobile phones and tablets. It can achieve common effects such as touch screen focus map, touch screen Tab switching, touch screen rotation map switching, etc
download
- Log in to Swiper's official website“ https://www.swiper.com.cn/ ”, select download Swiper in get Swiper
- Then select the latest version to download
- Step 1: first load the plug-in. The required files are swiper-bundle.min.js and swiper-bundle.min.css. The code is as follows:
<!DOCTYPE html>
<html>
<head>
    ...
    <link href="css/swiper-bundle.min.css">
</head>
<body>
    ...
    <script src="js/swiper-bundle.min.js"></script>
    ...
</body>
</html>- Step 2: write html code as follows:
<div class="swiper-container">
    <div class="swiper-wrapper">
        <div class="swiper-slide">Slide 1</div>
        <div class="swiper-slide">Slide 2</div>
        <div class="swiper-slide">Slide 3</div>
    </div>
    <!-- If pager is required -->
    <div class="swiper-pagination"></div>

    <!-- If you need navigation buttons -->
    <div class="swiper-button-prev"></div>
    <div class="swiper-button-next"></div>

    <!-- Scroll bar if required -->
    <div class="swiper-scrollbar"></div>
</div>- Step 3: initialize Swiper Code:
<script>
  var mySwiper = new Swiper ('.swiper-container', {
    direction: 'vertical', // Vertical switching options
    loop: true, // Loop mode options

    // If pager is required
    pagination: {
      el: '.swiper-pagination',
    },

    // If necessary, press the forward and backward buttons
    navigation: {
      nextEl: '.swiper-button-next',
      prevEl: '.swiper-button-prev',
    },

    // Scroll bar if required
    scrollbar: {
      el: '.swiper-scrollbar',
    },
  })
</script>- According to the above three steps, a rotation chart with pager and forward and backward buttons is realized
<!DOCTYPE html>
<html lang="en">
<head>
  <meta charset="utf-8">
  <title>Use of carousel map plug-in</title>
  <link rel="stylesheet" href="css/swiper-bundle.min.css">
  <style>
    html,body {
      position: relative;
      height: 100%;
    }
    body {
      background: #eee;
      font-size: 14px;
      color: #000;
      margin: 0;
      padding: 0;
    }
    .swiper-container {
      width: 100%;
      height: 100%;
    }
    .swiper-slide {
      text-align: center;
      font-size: 18px;
      background: #fff;
      display: flex;
      justify-content: center;
      align-items: center;
    }
    img{
      width: 800px;
      height: 400px;
    }
  </style>
</head>
<body>
  <div class="swiper-container">
    <div class="swiper-wrapper">
      <div class="swiper-slide"><img src="images/nature-1.jpg" alt=""></div>
      <div class="swiper-slide"><img src="images/nature-2.jpg" alt=""></div>
      <div class="swiper-slide"><img src="images/nature-3.jpg" alt=""></div>
      <div class="swiper-slide"><img src="images/nature-4.jpg" alt=""></div>
      <div class="swiper-slide"><img src="images/nature-5.jpg" alt=""></div>
    </div>
    <div class="swiper-pagination"></div>
    <div class="swiper-button-next"></div>
    <div class="swiper-button-prev"></div>
  </div>
  <script src="js/swiper-bundle.min.js"></script>
  <script>
    var swiper = new Swiper('.swiper-container', {
      pagination: {
        el: '.swiper-pagination',
        type: 'fraction',
      },
      navigation: {
        nextEl: '.swiper-button-next',
        prevEl: '.swiper-button-prev',
      },
    });
  </script>
</body>
</html>