Ionic (ionic framework) is close to native HTML5 Mobile App Development Framework.
IONIC is currently the most potential HTML5 mobile application development framework. Building applications through SASS provides many UI components to help developers develop powerful applications. Its use JavaScript MVVM framework and AngularJS To enhance the application. Provide two-way binding of data, and use it to become Web and Mobile development The common choice of the two. Ionic is a development framework that focuses on WEB development technology and creates native applications similar to mobile platform based on HTML5. The purpose of Ionic framework is to develop mobile phone applications from the perspective of web. The compiler platform based on PhoneGap can compile applications into various platforms.
Note: This is about the knowledge points of ionic 2. After all, it is quite different from ionic 1.0.
(1) Installation and operation of Ionic
1. Download and install Node.js The node v command can be used on the command line to view the version of node.js currently installed.
2. Ionic can be installed by using the npm install ionic-g command, but it should be noted that the version installed at this time is Ionic 1.0. You can use npm install ionic@beta-g to install beta versions, such as npm install ionic@2.0.0-beta.22 Install beta.22 version of _____________
3. After installing Ionic, an empty project can be initialized with ionic start ionicdemo-v2, and tabs template is used by default as the template of the initialization project. If other templates are needed, the corresponding template name can be added after the project name, such as: ionic start ionicdemo tutorial-v2; (v2 parameter specifies the use of version 2.0 to initialize the project)
4. Ionic server can run Ionic project.
5. Use ionic platform add Android Or ionic platform add iOS Commands can add deployment files for two mobile platforms (using ionic platform) The list command can view the current platform information.
6. The deployment files of two platforms are added to the project, which can be viewed through the platform folder. Accordingly, the ios deployment files can be imported in Xcode or the Android deployment files can be imported in Android studio to debug the corresponding real-time machine.
(2) Life Cycle of Ionic Pages
- //The function called after the page is loaded will not be reloaded when the page is switched because of the existence of cache.
- onPageLoaded() {
- console.log('page 1: page loaded.');
- }
- //When the page is about to enter
- onPageWillEnter() {
- //Here are some things you can do to initialize pages.
- console.log('page 1: page will enter.');
- }
- //When the page has entered
- onPageDidEnter() {
- console.log('page 1: page did enter.');
- }
- //When the page is about to leave.
- onPageWillLeave() {
- console.log('page 1: page will leave.');
- }
- //When the page has left.
- onPageDidLeave() {
- console.log('page 1: page did leave.');
- }
- //Lifecycle of execution when removed from DOM
- onPageWillUnload() {
- }
- //Remove execution completion from DOM
- onPageDidUnload() {
- }
(3) Ionic components
1. Tab control
Icon: http://ionicframework.com/docs/v2/ionicons/
tabs.html
- <ion-tabs>
- <ion-tab [root]="tab1Root" tabTitle="Home" tabIcon="home"></ion-tab>
- <ion-tab [root]="tab2Root" tabTitle="About" tabIcon="information-circle"></ion-tab>
- <ion-tab [root]="tab3Root" tabTitle="Contact" tabIcon="contacts"></ion-tab>
- </ion-tabs>

- <ion-tabs>
- <ion-tab [root]="tab1Root" tabTitle="Home" tabIcon="home"></ion-tab>
- <ion-tab [root]="tab2Root" tabTitle="About" tabIcon="information-circle"></ion-tab>
- <ion-tab [root]="tab3Root" tabTitle="Contact" tabIcon="contacts" tabBadge="3"></ion-tab>
- </ion-tabs>

- <ion-tabs>
- <ion-tab [root]="tab1Root" tabTitle="Home" tabIcon="home"></ion-tab>
- <ion-tab [root]="tab2Root" tabTitle="About" tabIcon="information-circle"></ion-tab>
- <ion-tab [root]="tab3Root" tabTitle="Contact" tabIcon="contacts" tabBadge="3" tabBadgeStyle="danger"></ion-tab>
- </ion-tabs>

By default, you first go to the third tab page:
Html control
- <ion-tabs selectedIndex="2">
- <ion-tab [root]="tab1Root" tabTitle="Home" tabIcon="home"></ion-tab>
- <ion-tab [root]="tab2Root" tabTitle="About" tabIcon="information-circle"></ion-tab>
- <ion-tab [root]="tab3Root" tabTitle="Contact" tabIcon="contacts" tabBadge="3" tabBadgeStyle="danger"></ion-tab>
- </ion-tabs>
JS control
- <ion-tabs #mainTabs>
- <ion-tab [root]="tab1Root" tabTitle="Home" tabIcon="home"></ion-tab>
- <ion-tab [root]="tab2Root" tabTitle="About" tabIcon="information-circle" tabBadge="3" tabBadgeStyle="danger"></ion-tab>
- <ion-tab [root]="tab3Root" tabTitle="User center" tabIcon="person"></ion-tab>
- </ion-tabs>
- import {Component} from '@angular/core';
- import {HomePage} from '../home/home';
- import {AboutPage} from '../about/about';
- import {ContactPage} from '../contact/contact';
- import {Tabs} from 'ionic-angular';
- import {Injectable, ViewChild} from '@angular/core';
- @Component({
- templateUrl: 'build/pages/tabs/tabs.html'
- })
- export class TabsPage {
- @ViewChild('mainTabs') tabRef: Tabs;
- private tab1Root: any;
- private tab2Root: any;
- private tab3Root: any;
- constructor() {
- // this tells the tabs component which Pages
- // should be each tab's root Page
- this.tab1Root = HomePage;
- this.tab2Root = AboutPage;
- this.tab3Root = ContactPage;
- }
- ionViewDidEnter() {
- this.tabRef.select(2);
- }
- }
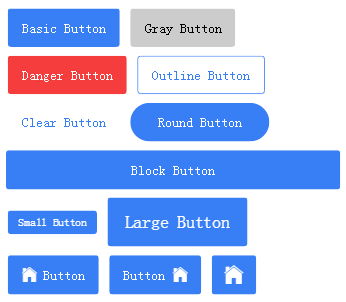
2. Button control
- <button>Basic Button</button>
- <button gray>Gray Button</button>
- <button danger>Danger Button</button>
- <button outline>Outline Button</button>
- <button clear>Clear Button</button>
- <button round>Round Button</button>
- <button block>Block Button</button>
- <button small>Small Button</button>
- <button large>Large Button</button>
- <button>
- <ion-icon name="home"></ion-icon>
- Button
- </button>
- <button>
- Button
- <ion-icon name="home"></ion-icon>
- </button>
- <button>
- <ion-icon name="home"></ion-icon>
- </button>
3. Input control
- <ion-list>
- <ion-item>
- <ion-label floating>User name</ion-label>
- <ion-input type="text" value="" [(ngModel)]="user.username"></ion-input>
- </ion-item>
- <ion-item>
- <ion-label stacked>Password</ion-label>
- <ion-input type="password" value="" [(ngModel)]="user.password"></ion-input>
- </ion-item>
- </ion-list>
- <button block (click)="showFill()">Sign in</button>
- export class ContactPage {
- public user = {
- username: 'parry',
- password: ''
- };
- constructor(private navCtrl: NavController) {
- }
- showFill() {
- alert(this.user.username);
- console.log(this.user.password);
- }
- }
4. Loading control, Alert control
- import {Component} from '@angular/core';
- import {NavController, LoadingController, AlertController} from 'ionic-angular';
- @Component({
- templateUrl: 'build/pages/contact/contact.html'
- })
- export class ContactPage {
- public user = {
- username: 'parry',
- password: ''
- };
- constructor(private navCtrl: NavController,
- private loadingCtrl: LoadingController,
- private alertCtrl: AlertController) {
- this.navCtrl = navCtrl;
- }
- showFill() {
- alert(this.user.username);
- console.log(this.user.password);
- }
- login() {
- /*// Create a loading window and simulate it for 3 seconds. The loading window disappears.
- let loading = Loading.create({
- content: 'Logging in...',
- duration: 3000, //The unit is milliseconds.
- });
- this.navCtrl.present(loading);
- // The real logic should be: to request the API for login, to hide the loading window after returning the result.
- setTimeout(() => {
- loading.dismiss();
- }, 3000);*/
- if(this.user.username == '' || this.user.username.length <= 3) {
- //alert alerts users to the correctness of user names
- let alertUserNameError = this.alertCtrl.create({
- title: 'User center',
- subTitle: 'Input username format is incorrect!',
- buttons: ['OK']
- });
- alertUserNameError.present();
- } else {
- let loading = this.loadingCtrl.create({
- content: 'Please wait...',
- spinner: 'dots',
- duration: 3000, //The unit is milliseconds.
- });
- loading.present();
- setTimeout(() => {
- loading.dismiss();
- }, 3000);
- }
- }
- }
5. Toast control
- //2. Use Toast controls
- let toast = this.toastCtrl.create({
- message: 'Input username format is incorrect!',
- duration: 3000,
- });
- toast.present();
6. Grid Layout
- <ion-row>
- <ion-col>
- <div class="textAlignRight marginTop10"><button clear>No account yet? Click registration</button></div>
- </ion-col>
- </ion-row>
7. modal control
- //Import the registration page
- import {Register} from '../contact/register';
- //Open the registration page.
- openRegisterPage() {
- let modal = this.modalCtrl.create(Register);
- modal.present();
- }
- import {Component} from '@angular/core';
- @Component({
- templateUrl: 'build/pages/contact/register.html'
- })
- export class Register {
- }
8. Toolbar control
- <ion-toolbar>
- <ion-title>User registration</ion-title>
- <ion-buttons end>
- <button (click)="dismiss()">
- <span showWhen="ios">cancel</span>
- <ion-icon name="md-close" showWhen="android,windows"></ion-icon>
- </button>
- </ion-buttons>
- </ion-toolbar>
Amendment:
- <ion-header>
- <ion-toolbar>
- <ion-title>User registration</ion-title>
- <ion-buttons end>
- <button (click)="dismiss()">
- <span showWhen="ios">cancel</span>
- <ion-icon name="md-close" showWhen="android,windows"></ion-icon>
- </button>
- </ion-buttons>
- </ion-toolbar>
- </ion-header>
- <ion-content padding>
- <h5>Parameters passed:</h5>
- </ion-content>
9. List control
- <ion-list>
- <ion-item>
- <ion-avatar item-left><img src="../images/1.jpg" alt="Head portrait"></ion-avatar>
- <h2>Ha-ha</h2>
- <p>(ˇˍˇ) think~</p>
- </ion-item>
- <ion-item>
- <ion-avatar item-left><img src="../images/2.jpg" alt="Head portrait"></ion-avatar>
- <h2>Beauty</h2>
- <p>(ˇˍˇ) think~</p>
- </ion-item>
- </ion-list>
Binding data sources:
Data Source Statement
- //Generally, data sources are obtained from api. Here we just simulate some data that have been retrieved.
- public contacts = [
- {'contactid': 1, 'contactname': 'Dream little white', 'contacttext': '18888888888'},
- {'contactid': 2, 'contactname': 'Dream little white 2', 'contacttext': '18888888888'},
- {'contactid': 3, 'contactname': 'Dream little white 3', 'contacttext': '18888888888'},
- {'contactid': 4, 'contactname': 'Dream little white 4', 'contacttext': '18888888888'},
- {'contactid': 5, 'contactname': 'Dream little white 5', 'contacttext': '18888888888'},
- {'contactid': 6, 'contactname': 'Dream little white 6', 'contacttext': '18888888888'},
- {'contactid': 1, 'contactname': 'Dream little white 7', 'contacttext': '18888888888'},
- {'contactid': 2, 'contactname': 'Dream little white 8', 'contacttext': '18888888888'},
- {'contactid': 3, 'contactname': 'Dream little white 9', 'contacttext': '18888888888'},
- {'contactid': 4, 'contactname': 'Dream little white 10', 'contacttext': '18888888888'},
- {'contactid': 5, 'contactname': 'Dream little white 11', 'contacttext': '18888888888'},
- {'contactid': 6, 'contactname': 'Dream little white 12', 'contacttext': '18888888888'},
- ];
- <ion-list>
- <ion-item *ngFor="#contact of contacts" (click)="itemClick($event, contact)">
- <ion-avatar item-left><img src="../images/{{contact.contactid}}.jpg" alt="Head portrait"></ion-avatar>
- <h2>{{contact.contactname}}</h2>
- <p>{{contact.contacttext}}</p>
- </ion-item>
- </ion-list>
10. Card Layout
- <ion-card>
- <ion-item>
- <ion-avatar item-left>
- <img src="../images/6.jpg" alt="Head portrait">
- </ion-avatar>
- <h2>Elon Musk</h2>
- <p>Come from iPhone 6s</p>
- </ion-item>
- <img src="../images/c1.jpg" alt="picture">
- <ion-card-content>
- <p>I've released a new car. Who's going to give it away? Ha-ha</p>
- </ion-card-content>
- <ion-item>
- <button primary clear item-left><ion-icon name="thumbs-up"></ion-icon><div>888 Fabulous</div></button>
- <button primary clear item-left><ion-icon name="text"></ion-icon><div>600 comment</div></button>
- <ion-note item-right>
- 1 Hours ago
- </ion-note>
- </ion-item>
- </ion-card>
11. navigation control
- itemClick(event, contact) {
- //console.log(event);
- //console.dirxml(contact);
- //alert(contact.contactname);
- this.navCtrl.push(ContactDetails, {item: contact});
- }
Contact Details page
- /**
- * Created by Administrator on 2016/8/23 0023.
- */
- import {Component} from '@angular/core';
- import {NavParams} from 'ionic-angular';
- @Component({
- templateUrl: 'build/pages/about/contactdetails.html'
- })
- export class ContactDetails {
- private item = '';
- constructor(public params: NavParams) {
- this.item = params.data.item;
- }
- }
- <ion-header>
- <ion-navbar>
- <ion-title>{{item.contactname}}</ion-title>
- </ion-navbar>
- </ion-header>
- <ion-content padding>
- {{item.contactname}} The mobile phone number is:{{item.contacttext}}
- </ion-content>
(4) Introduction of Cordova Components
1. Image Picker Component
2. Geolocation component
- //Obtaining location information
- Geolocation.getCurrentPosition().then((resp) => {
- console.log(resp.coords.latitude);
- console.log(resp.coords.longitude);
- });
3. Local Notifications components
- //Local reminder component
- LocalNotifications.schedule({
- text: 'Localization alert-You started. Ionic App',
- at: new Date(new Date().getTime() + 10000),
- sound: null
- });
(5) Project Practice
1. Quickly Generate App Icon and Start Page
MakeAppicon
Ios.hvims.com
Launcher Icon Generator
iconhandbook.co.uk/reference/chart/android

2. Storing status information using localStorage
localStorage.setItem(key, value)
localStorage.getItem(key)
Note: Closing Modal pages requires using the dismiss method in ViewController.
3. The Concept and Method of Parent Page after Modal Closed
4. Network Request in Ionic
Cross-domain request questions: http://enable-cors.org/ (Not in App, of course, but only in the process of browser debugging)
- //Here is the implementation of the request API. Note the cross-domain request problem. See http://enable-cors.org./
- this.http.get('http://xxx/account/Login?email=' + this.user.username + '&password=' + this.user.password)
- .subscribe(data => {
- let res = data.json();
- if(res.LoginStatus == 1) {
- localStorage.setItem('username', this.user.username);
- localStorage.setItem('logined', 'true');
- //Self-modal Hiding
- this.viewCtrl.dismiss(this.user.username);
- loading.dismiss(); //Login progress hiding
- } else {
- let toast = this.toastCtrl.create({
- message: 'Logon failed!',
- duration: 2000,
- });
- toast.present();
- }
- }, err => {
- let toast = this.toastCtrl.create({
- message: 'Logon failed!',
- duration: 2000,
- });
- toast.present();
- });
5. Sliding Delete Data in List
- <ion-list>
- <ion-item-sliding *ngFor="#contact of contacts">
- <ion-item (click)="itemClick($event, contact)">
- <ion-avatar item-left><img src="images/{{contact.contactid}}.jpg" alt="Head portrait"></ion-avatar>
- <h2>{{contact.contactname}}</h2>
- <p>{{contact.contacttext}}</p>
- </ion-item>
- <ion-item-options>
- <button danger (click)="removeContact(contact)">
- <span padding><ion-icon name="trash"></ion-icon> delete</span>
- </button>
- </ion-item-options>
- </ion-item-sliding>
- </ion-list>
6. Integrated Aurora Push for Message Push
// Set the alias of the client for directional message delivery
window.plugins.jPushPlugin.setAlias('Client' + loginResult.UserId);
// Client (can only be a single value): A single device is bound to jPush, which corresponds to the ID number of the device. When pushed on the server side, it can only be pushed to the ID level.
var arrayObj = new Array('Tags' + loginResult.UserId);
window.plugins.jPushPlugin.setTags(arrayObj);
// Tags: Actually, it means grouping. Then, after this assignment, a group name is assigned to the user when the user logs in, and then the group can be pushed when the message is pushed. Application Scenario: If the user has multiple devices and the app can be logged in at the same time on these devices, then our push message should be pushed to these devices.
// Client - 1, but this device is notified.
// Tag-1, multiple devices are set to be called Tag-1.
7. iOS Packaging and AppStore Uploading
8. Packaging and Publishing Android
Reference learning:
http://kangax.github.io/compat-table/es6/
https://github.com/driftyco/ionic-preview-app/