- Workflow: With the help of computer, it can realize automatic control of process.
-
Workflow systems: If a system has automated management of processes, it is called workflow systems.
BPM(Business Process Management): Business Process Management
BPMN(Business Process Model And Notation): Business Process Models and Symbols -
SaaS-iHRM development process
1. Integrating Activiti
2. Business process modeling and BPMN business flow chart
3. Deploy business processes to Activiti
4. Start process example
5. Query for to-do tasks
6. Handling to-do tasks
7. Ending process
4 Install IDEA Plug-in Process Designer Activiti Designer
First, we find the sub-menu "Settings" in the File menu of IDEA. Then we select the "plugins" menu on the left to search for activiti, as shown in the following figure: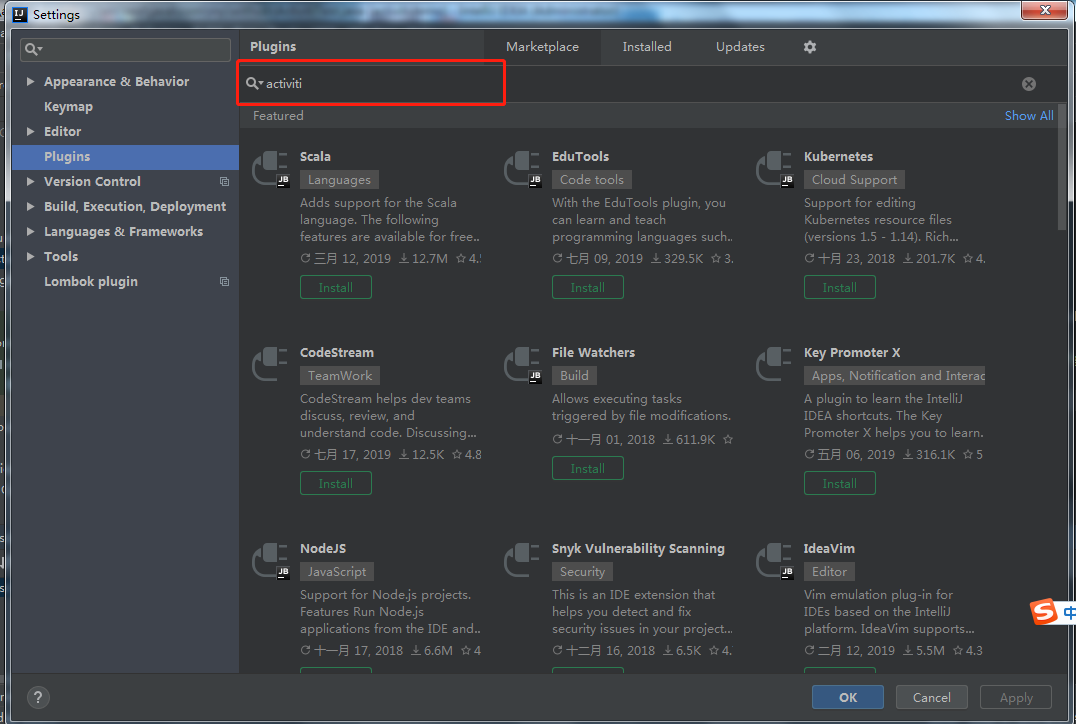 At this point we can search for actiBPM plug-in, which is the IDEA version of Activiti Designer.
After installation, the page is as follows: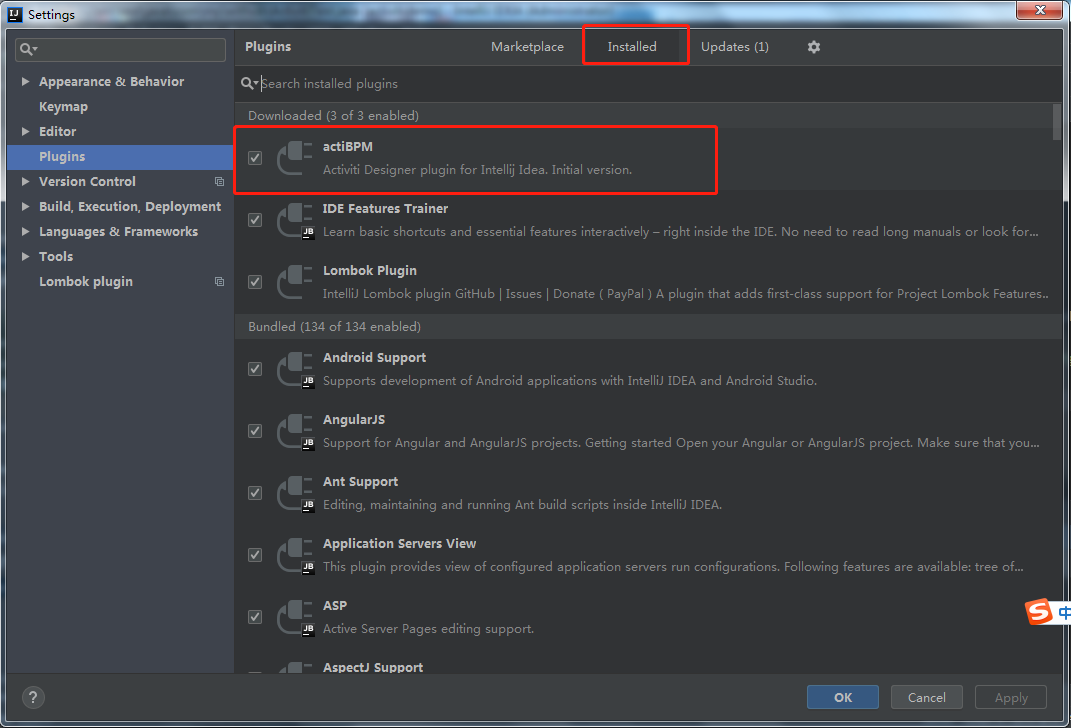
We first create a database activiti manually, and then write code to create tables. If activiti is to work, it must be supported by table structure. No more nonsense, let's look at the code.
1. First, create a maven project using idea. Introduce the relevant jar packages needed in the pom.xml file, including:
-
activiti-engine-7.0.0.beta1.jar
-
jar packages that activiti depends on: mybatis, alf4j, log4j, and so on
-
Actiti-dependent spring package
-
Database Driver
-
Third party data connection pool dbcp
-
Unit test Junit-4.12.jar
     <project xmlns="http://maven.apache.org/POM/4.0.0" xmlns:xsi="http://www.w3.org/2001/XMLSchema-instance"
              xsi:schemaLocation="http://maven.apache.org/POM/4.0.0  http://maven.apache.org/xsd/maven-4.0.0.xsd">
 <modelVersion>4.0.0</modelVersion>
 <groupId>com.my.withub</groupId>
 <artifactId>ActivitiDemo</artifactId>
 <version>1.0-SNAPSHOT</version>
 <properties>
     <slf4j.version>1.6.6</slf4j.version>
     <log4j.version>1.2.12</log4j.version>
 </properties>
 <dependencies>
     <!--activiti-engine-7.0.0.beta1.jar-->
     <dependency>
         <groupId>org.activiti</groupId>
         <artifactId>activiti-engine</artifactId>
         <version>7.0.0.Beta1</version>
     </dependency>
     <dependency>
         <groupId>org.activiti</groupId>
         <artifactId>activiti-spring</artifactId>
         <version>7.0.0.Beta1</version>
     </dependency>
     <dependency>
         <groupId>org.activiti</groupId>
         <artifactId>activiti-bpmn-model</artifactId>
         <version>7.0.0.Beta1</version>
     </dependency>
     <dependency>
         <groupId>org.activiti</groupId>
         <artifactId>activiti-bpmn-converter</artifactId>
         <version>7.0.0.Beta1</version>
     </dependency>
     <dependency>
         <groupId>org.activiti</groupId>
         <artifactId>activiti-json-converter</artifactId>
         <version>7.0.0.Beta1</version>
     </dependency>
     <dependency>
         <groupId>org.activiti</groupId>
         <artifactId>activiti-bpmn-layout</artifactId>
         <version>7.0.0.Beta1</version>
     </dependency>
     <dependency>
         <groupId>org.activiti.cloud</groupId>
         <artifactId>activiti-cloud-services-api</artifactId>
         <version>7.0.0.Beta1</version>
     </dependency>
     <dependency>
         <groupId>mysql</groupId>
         <artifactId>mysql-connector-java</artifactId>
         <version>5.1.40</version>
     </dependency>
     <dependency>
         <groupId>junit</groupId>
         <artifactId>junit</artifactId>
         <version>4.12</version>
     </dependency>
     <!-- log start -->
     <dependency>
         <groupId>log4j</groupId>
         <artifactId>log4j</artifactId>
         <version>${log4j.version}</version>
     </dependency>
     <dependency>
         <groupId>org.slf4j</groupId>
         <artifactId>slf4j-api</artifactId>
         <version>${slf4j.version}</version>
     </dependency>
     <dependency>
         <groupId>org.slf4j</groupId>
         <artifactId>slf4j-log4j12</artifactId>
         <version>${slf4j.version}</version>
     </dependency>
     <!-- log end -->
     <dependency>
         <groupId>org.mybatis</groupId>
         <artifactId>mybatis</artifactId>
         <version>3.4.5</version>
     </dependency>

     <dependency>
         <groupId>commons-dbcp</groupId>
         <artifactId>commons-dbcp</artifactId>
         <version>1.4</version>
     </dependency>
 </dependencies>
 <repositories>
     <repository>
         <id>alfresco</id>
         <name>Activiti Releases</name>
         <url>https://artifacts.alfresco.com/nexus/content/repositories/activiti-releases/</url>
         <releases>
             <enabled>true</enabled>
         </releases>
     </repository>
 </repositories>
2. Create log file log4j.properties under classpath
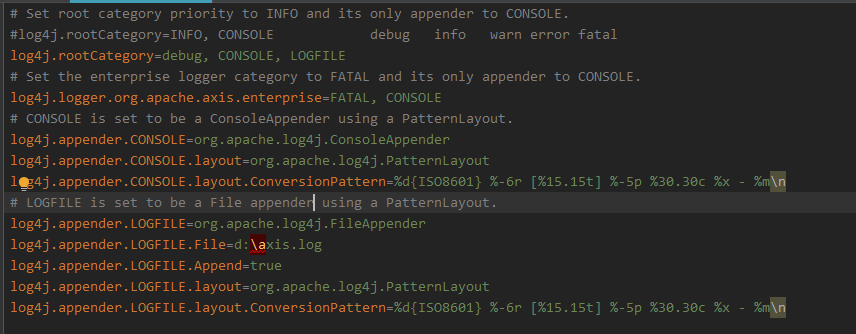
log4j.rootCategory=debug, CONSOLE, LOGFILE
log4j.logger.org.apache.axis.enterprise=FATAL, CONSOLE
log4j.appender.CONSOLE=org.apache.log4j.ConsoleAppender
log4j.appender.CONSOLE.layout=org.apache.log4j.PatternLayout
log4j.appender.CONSOLE.layout.ConversionPattern=%d{ISO8601} %-6r [%15.15t] %-5p %30.30c %x - %m\n
log4j.appender.LOGFILE=org.apache.log4j.FileAppender
log4j.appender.LOGFILE.File=d:\axis.log
log4j.appender.LOGFILE.Append=true
log4j.appender.LOGFILE.layout=org.apache.log4j.PatternLayout
log4j.appender.LOGFILE.layout.ConversionPattern=%d{ISO8601} %-6r [%15.15t] %-5p %30.30c %x - %m\n
3. Create activiti.cgf.xml file under classpath: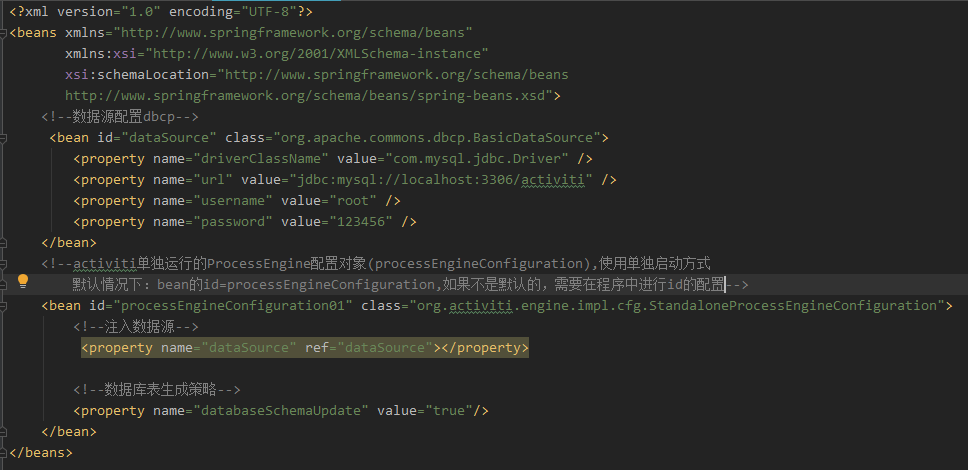
The first way is:<beans xmlns="http://www.springframework.org/schema/beans" xmlns:xsi="http://www.w3.org/2001/XMLSchema-instance" xsi:schemaLocation="http://www.springframework.org/schema/beans http://www.springframework.org/schema/beans/spring-beans.xsd"> <!--Data source configuration dbcp--> <bean id="dataSource" class="org.apache.commons.dbcp.BasicDataSource"> <property name="driverClassName" value="com.mysql.jdbc.Driver" /> <property name="url" value="jdbc:mysql://localhost:3306/activiti" /> <property name="username" value="root" /> <property name="password" value="123456" /> </bean> <!--activiti Individually operated ProcessEngine Configuration object(processEngineConfiguration),Use separate boot mode //By default: the bean's id = process Engine Configuration, if not by default, needs to be configured in the program with ID - >. <bean id="processEngineConfiguration01" class="org.activiti.engine.impl.cfg.StandaloneProcessEngineConfiguration"> <!--Injection data source--> <property name="dataSource" ref="dataSource"></property> <!--Database Table Generation Strategy--> <property name="databaseSchemaUpdate" value="true"/> </bean>
The second way: Data Source and Process Engine Configuration in the activiti.cfg.xml configuration file can also be configured once.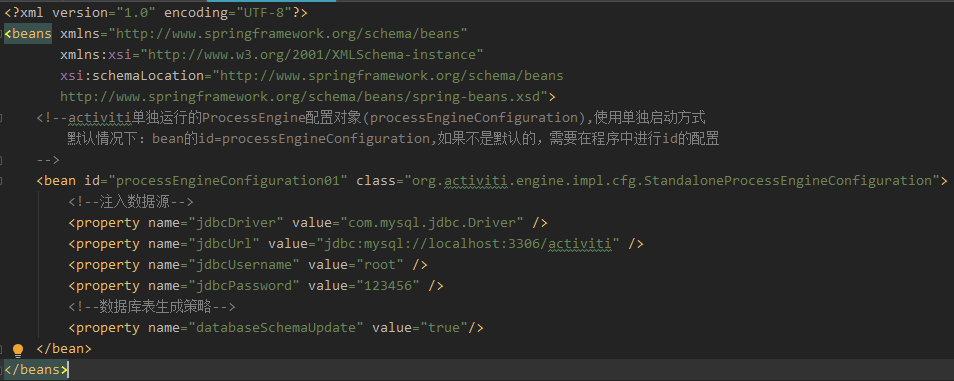
<beans xmlns="http://www.springframework.org/schema/beans"
       xmlns:xsi="http://www.w3.org/2001/XMLSchema-instance"
       xsi:schemaLocation="http://www.springframework.org/schema/beans
       http://www.springframework.org/schema/beans/spring-beans.xsd">
    <!--activiti Individually operated ProcessEngine Configuration object(processEngineConfiguration),Use separate boot mode
        //By default: the bean's id = process Engine Configuration, if not the default, requires ID configuration in the program
    -->
    <bean id="processEngineConfiguration01" class="org.activiti.engine.impl.cfg.StandaloneProcessEngineConfiguration">
        <!--Injection data source-->
        <property name="jdbcDriver" value="com.mysql.jdbc.Driver" />
        <property name="jdbcUrl" value="jdbc:mysql://localhost:3306/activiti" />
        <property name="jdbcUsername" value="root" />
        <property name="jdbcPassword" value="123456" />
        <!--Database Table Generation Strategy-->
        <property name="databaseSchemaUpdate" value="true"/>
    </bean>
</beans>
In general, the first approach is recommended.
On the database SchemaUpdate parameter in process Engine Configuration, activiti is designed with this parameter
Data table generation strategy with the following parameters:
false (default): Check the version of the database table and the version of the dependent library, and throw an exception if the version does not match.
true: When building a process engine, perform checks and update if necessary. If the table does not exist, it is created.
create-drop: Create database tables when building process engines and delete them when closing process engines.
drop-create: Delete the table before creating it.
create: create database tables when building process engines, and do not delete them when closing process engines.
4. Write Java code to create tables automatically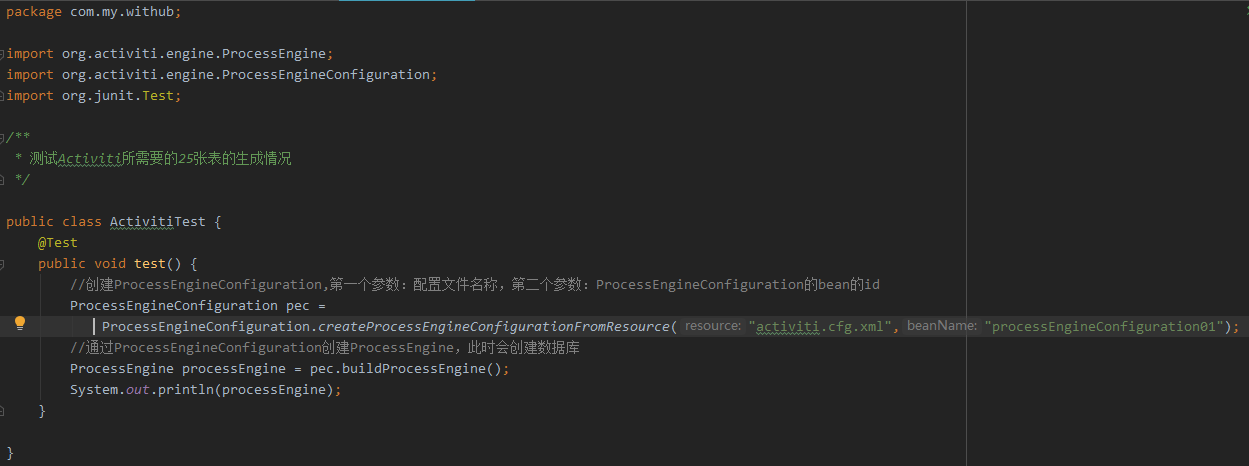
@Test
    public void test() {
        //Create Process Engine Configuration, the first parameter is the name of the configuration file, and the second parameter is the id of the bean of Process Engine Configuration, which can be omitted when the id is the default value.
        ProcessEngineConfiguration pec =         ProcessEngineConfiguration.createProcessEngineConfigurationFromResource("activiti.cfg.xml","processEngineConfiguration01");
        //Create Process Engine through Process Engine Configuration, at which point database tables are created
        ProcessEngine processEngine = pec.buildProcessEngine();
        System.out.println(processEngine);
    }
After running the above program, we can observe that the tables in the database have been generated.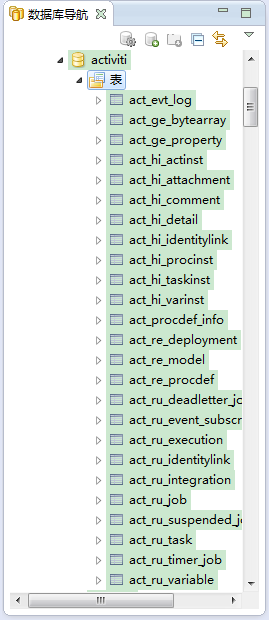
Naming rules for database tables
Activiti tables all start with ACT_ The second part is the two-letter identification indicating the purpose of the table. Uses also correspond to service API s.
ACT_RE_*:'RE'denotes repository. This prefix table contains process definitions and process static resources (pictures, rules, etc.).
ACT_RU_*:'RU'denotes runtime. These runtime tables contain running data such as process instances, tasks, variables, asynchronous tasks, and so on. Activiti only saves these data during the execution of process instances and deletes these records at the end of the process. In this way, the runtime table can always be very small and fast.
ACT_HI_*:'HI'denotes history. These tables contain historical data, such as historical process instances, variables, tasks, and so on.
ACT_GE_*: GE stands for general. General data for different scenarios.