Introduction to image search platform
The image search platform supports two types of image search:
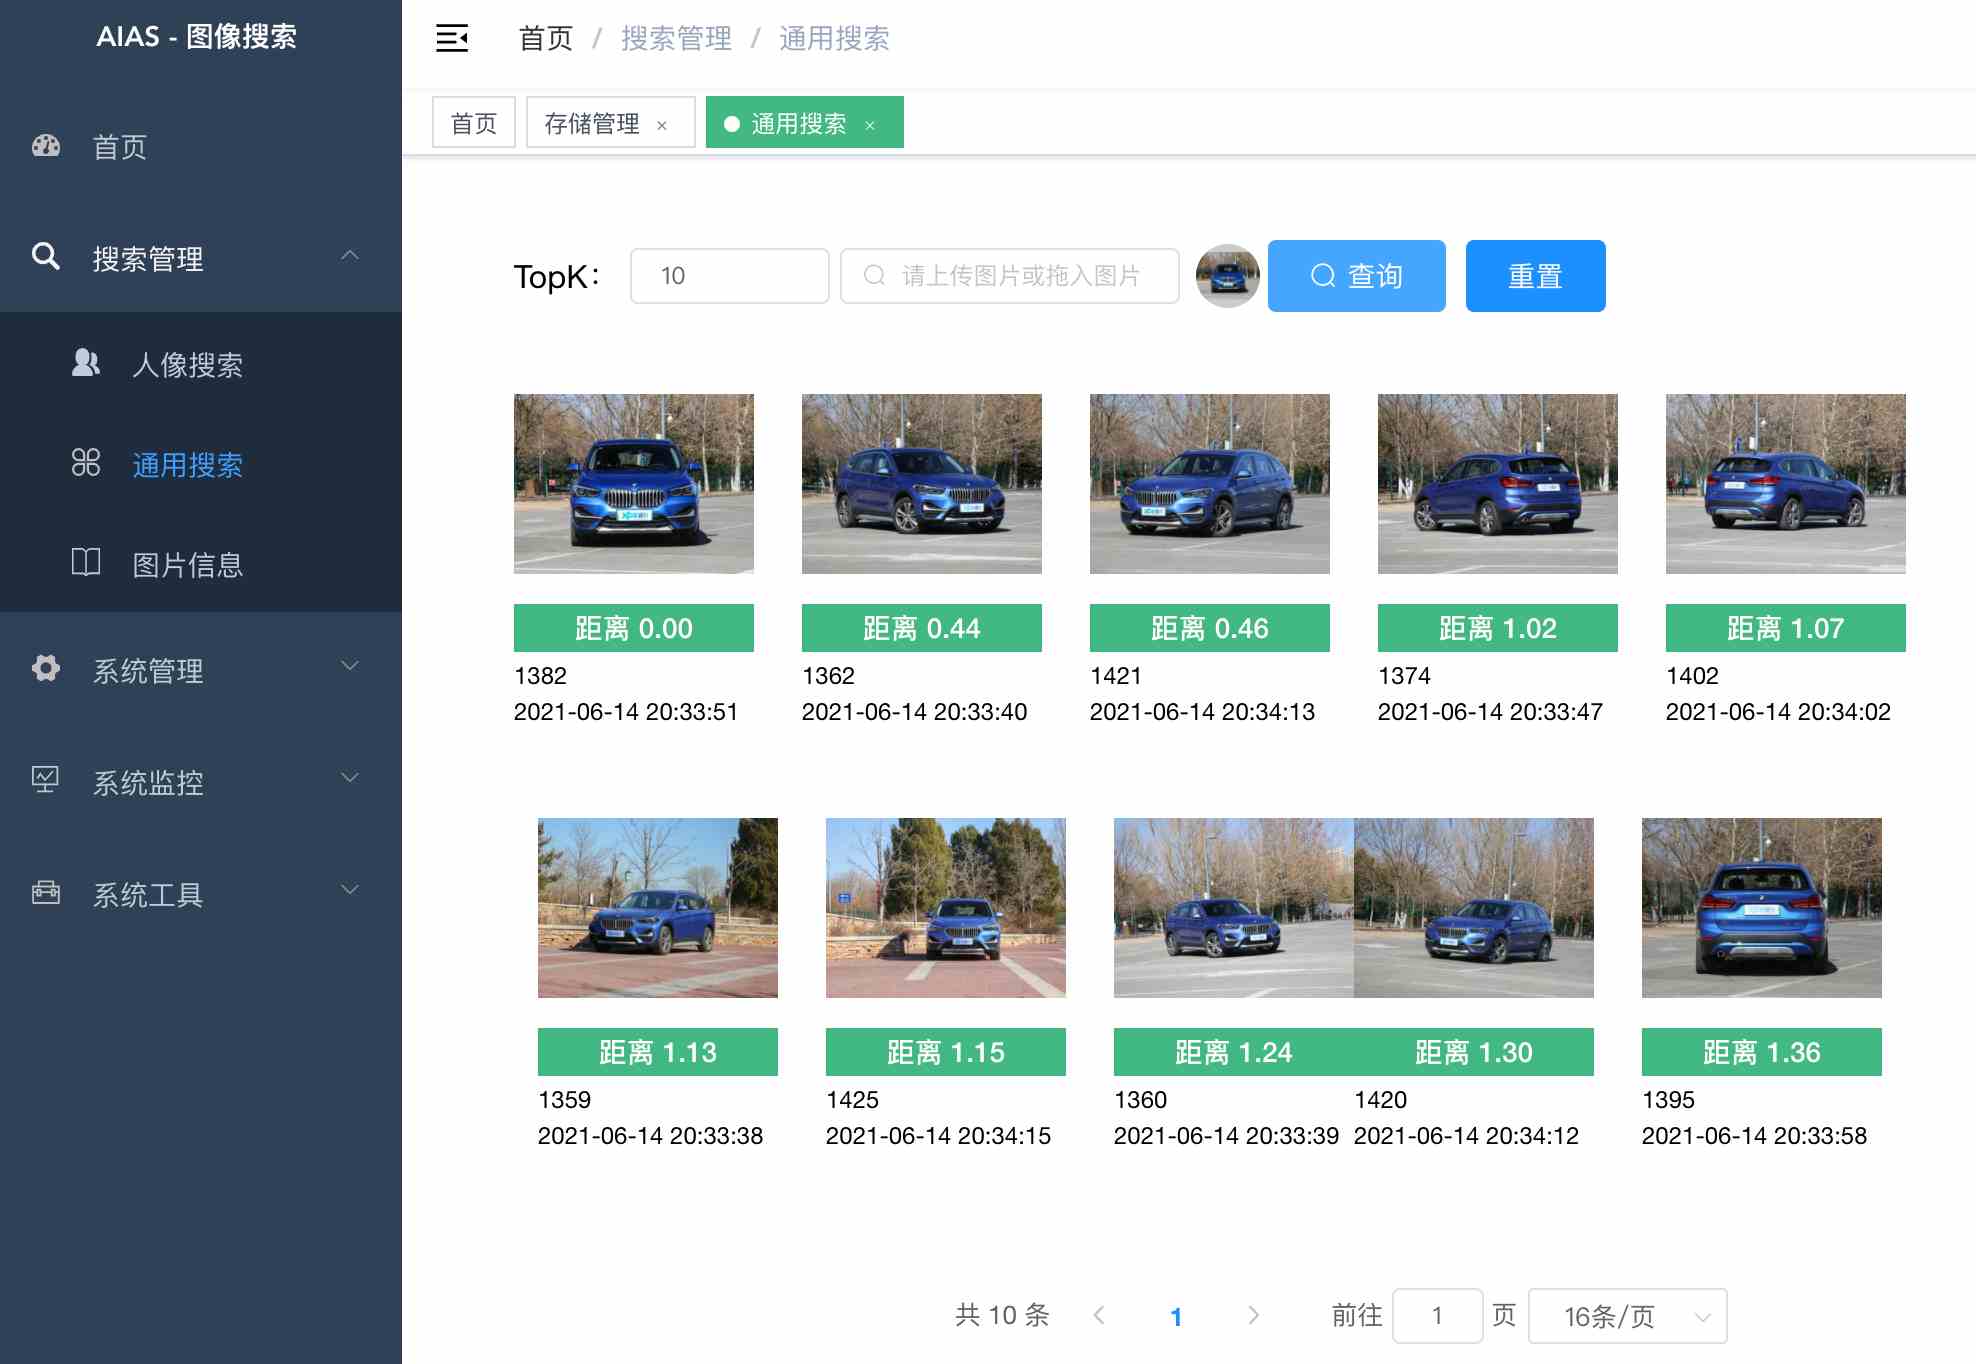
- General image search: 512 dimensional features are extracted using the pre trained model on the ImageNet dataset: resnet50
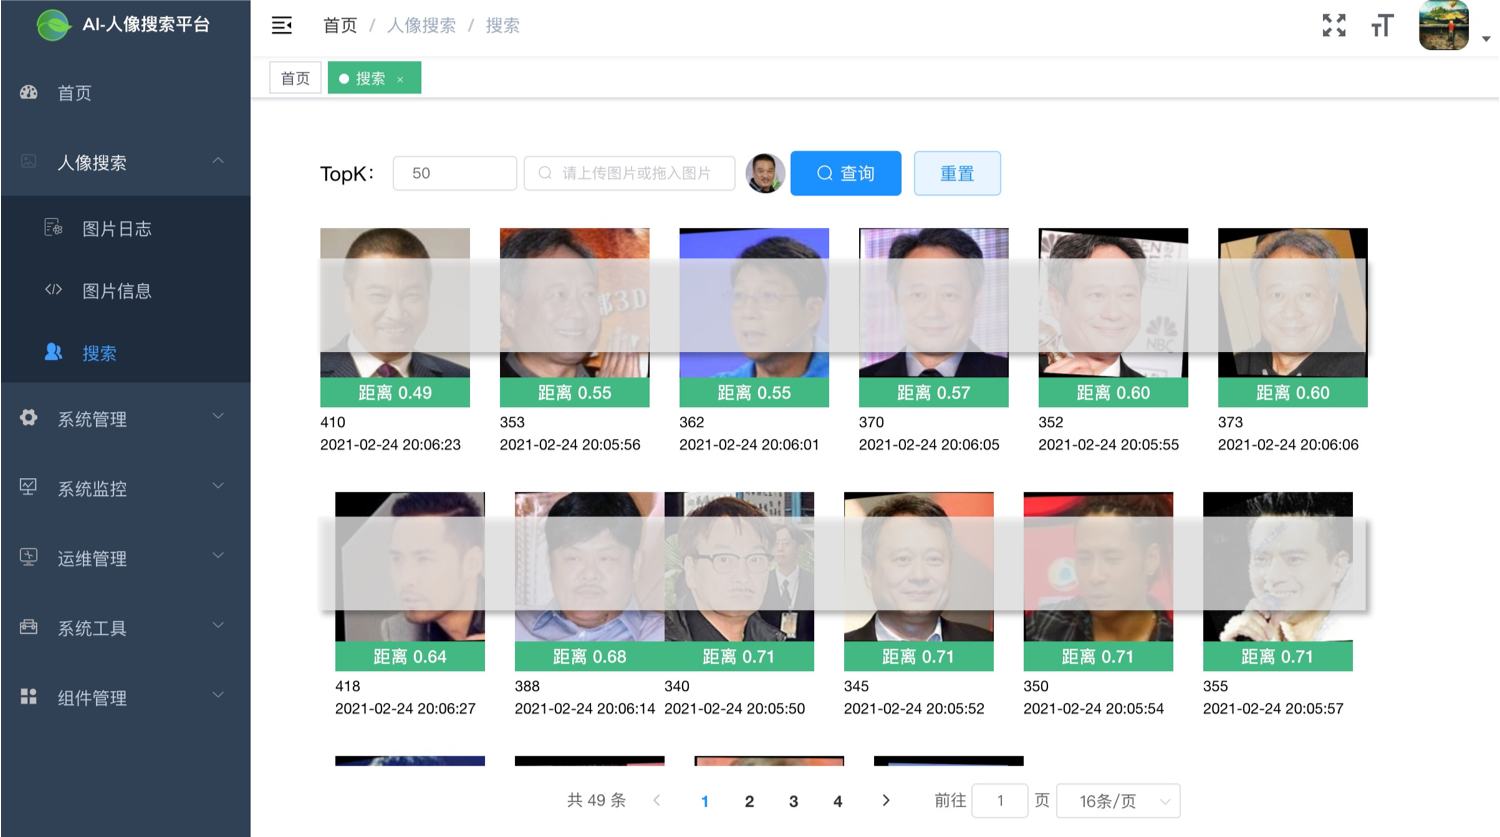
- Portrait high-precision search: before face feature extraction (512 dimensional feature extraction using face feature model) - face detection, face key point extraction and face alignment
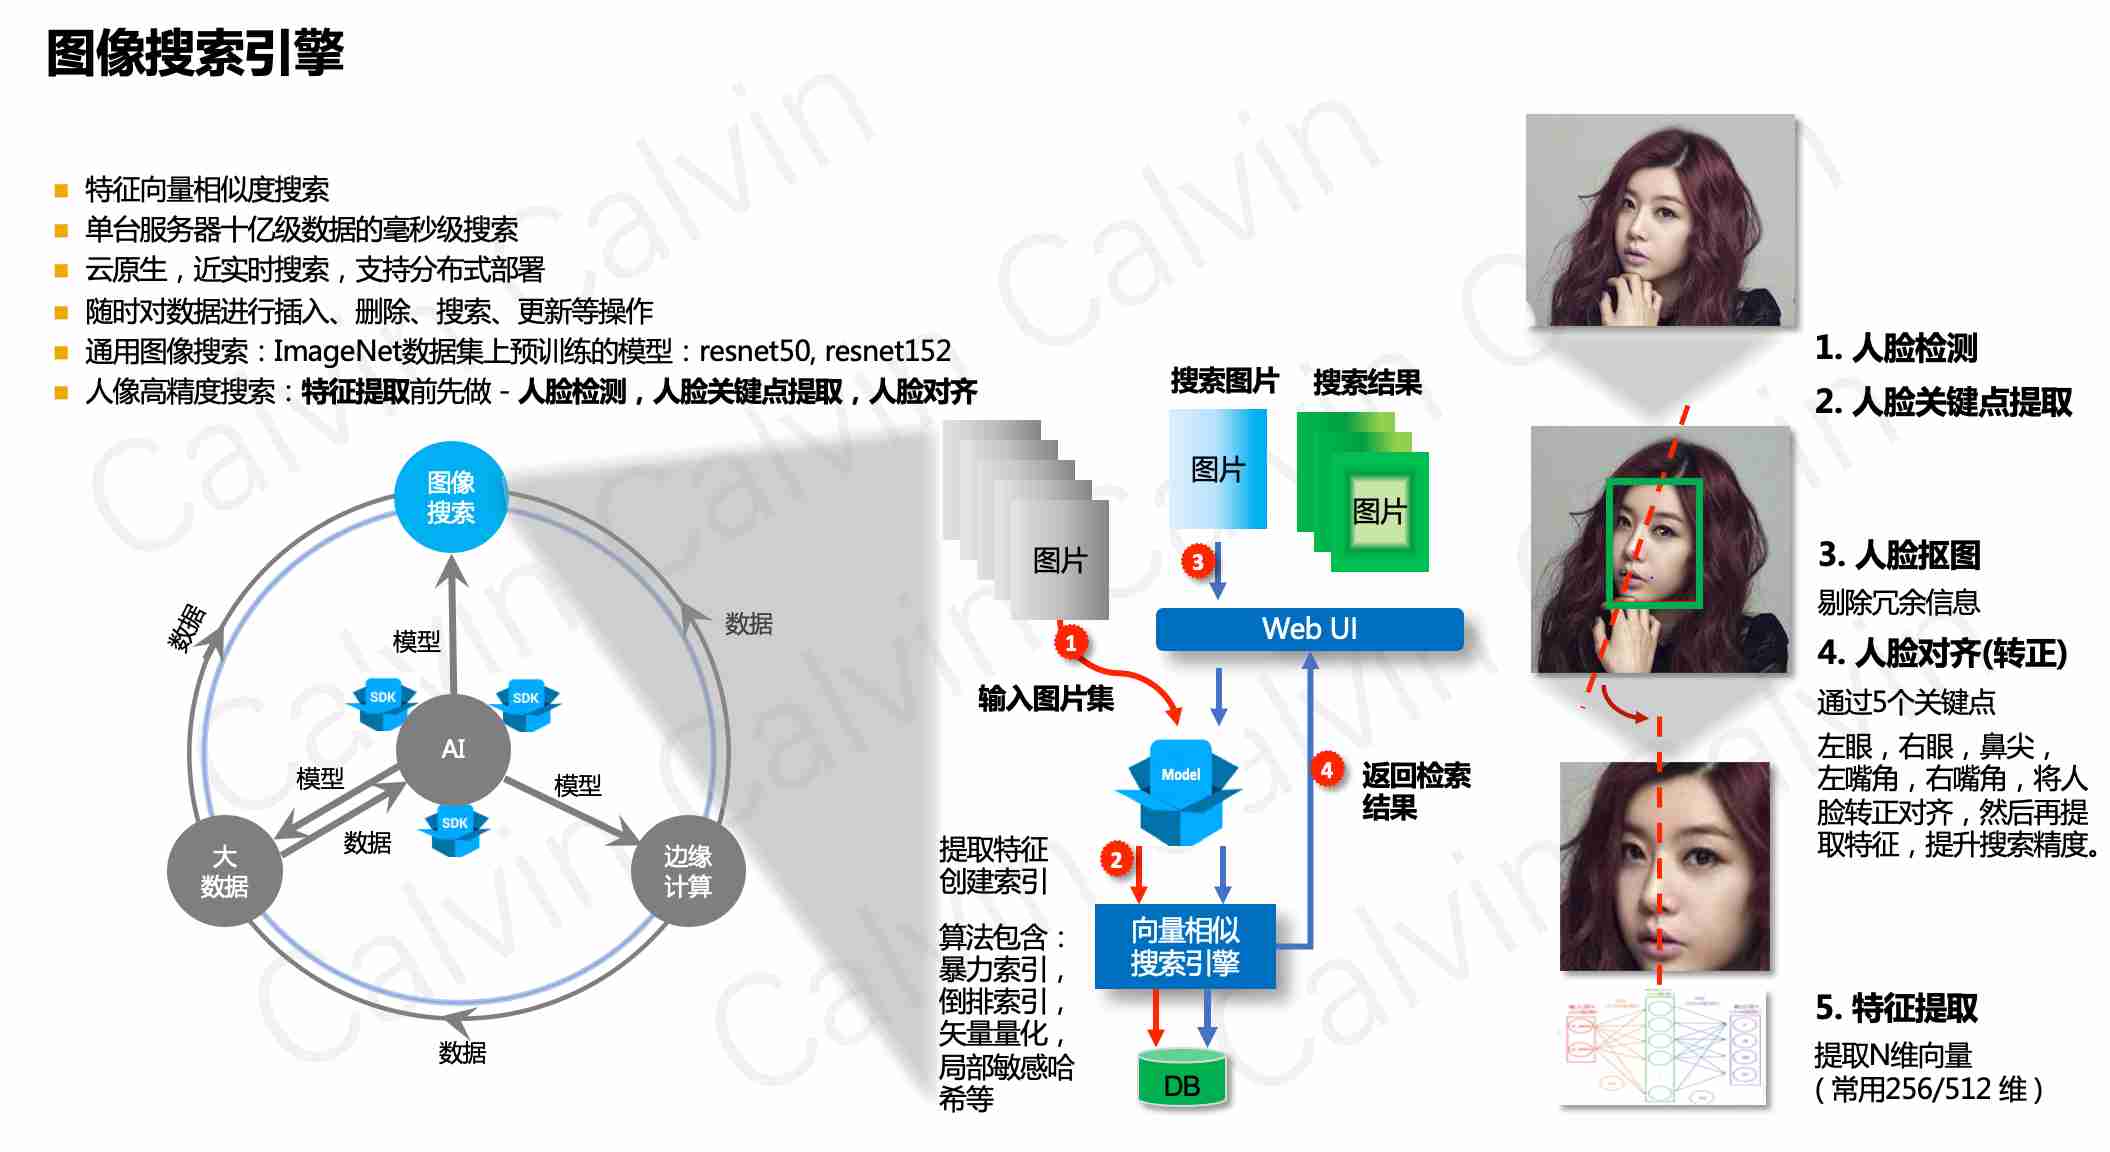
Main characteristics
- The bottom layer uses feature vector similarity search
- Millisecond search of billions of data on a single server
- Near real-time search, supporting distributed deployment
- Insert, delete, search and update data at any time
- Support online user management and server performance monitoring, and limit single user login
system function
- Search management: provide general image search, portrait search and image information viewing
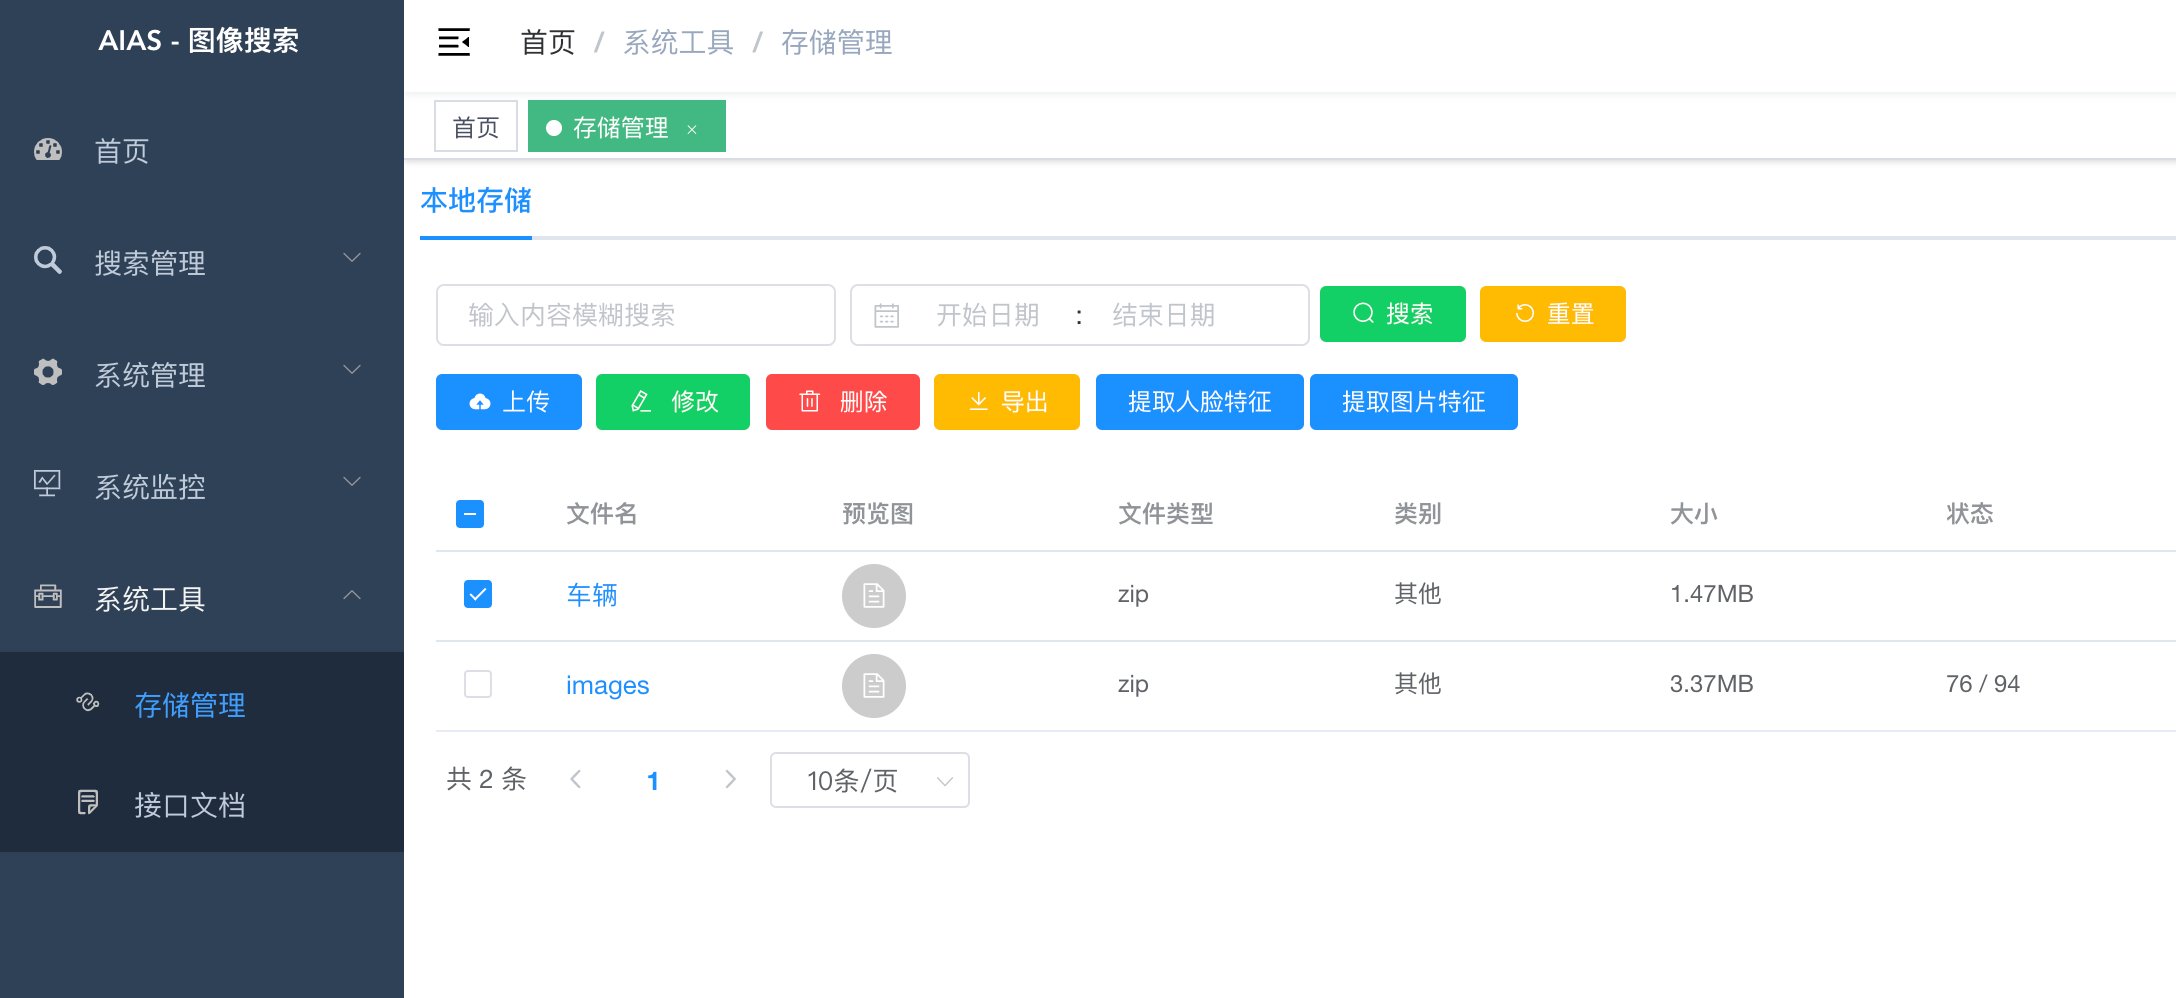
- Storage management: provide image compression package (zip format) upload, portrait feature extraction and general feature extraction
- User management: provides user related configurations. After adding a user, the default password is 123456
- Role management: assign permissions and menus. You can set the data permissions of roles according to departments
- Menu management: dynamic menu routing has been realized, the back-end can be configured, and multi-level menus are supported
- Department management: system organization structure can be configured and displayed in tree form
- Position management: configure positions in each department
- Dictionary management: it can maintain some common fixed data, such as status, gender, etc
- System log: record user operation log and exception log to facilitate developers to locate and troubleshoot errors
- SQL monitoring: druid is used to monitor the database access performance. The default user name is admin and the password is 123456
- Scheduled tasks: integrate Quartz to do scheduled tasks and add task logs to make the task operation clear at a glance
- Service monitoring: monitor the load of the server
1. Front end deployment
Download and install:
nginx deployment run:
cd /usr/local/etc/nginx/
vi /usr/local/etc/nginx/nginx.conf
# Edit nginx.conf

    server {
        listen       8080;
        server_name  localhost;

        location / {
            root   /Users/calvin/Documents/image_search/dist/;
            index  index.html index.htm;
        }

        location /aias {
                alias  /Users/calvin/Documents/image_root/;  (Please update your file path to store uploaded pictures and display them)
                index  index.html index.html;
        }
     ......

# Reload configuration:
sudo nginx -s reload

# After deploying the application, restart:
cd /usr/local/Cellar/nginx/1.19.6/bin

# Quick stop
sudo nginx -s stop

# start-up
sudo nginx
2. Backend jar deployment
2.1 environmental requirements:
- System JDK 1.8+
- redis needs to be installed
- MySQL database needs to be installed
2.2 download jar package:
2.3 download and import SQL files to MySQL database:
Use the command line to import, or mysql workbench, navicat graphical interface to import.
SQL file
2.4 editing environment configuration information
In windows environment, you can use 7-zip to edit the configuration file in the jar package directly.
- application-dev.yml
1) . edit the database name, image search, user name and password as needed
      url: jdbc:log4jdbc:mysql://${DB_HOST:localhost}:${DB_PORT:3306}/${DB_NAME:image-search}?serverTimezone=Asia/Shanghai&characterEncoding=utf8&useSSL=false&allowPublicKeyRetrieval=true
      username: ${DB_USER:root}
      password: ${DB_PWD:??????}
2) . edit the image upload root path imagerootpath as needed (to be configured to nginx)
# File storage path
file:
  mac:
    ...
    imageRootPath: ~/file/image_root/ #Picture file root directory
  linux:
    ....
    imageRootPath: /home/aias/file/image_root/ #Picture file root directory
  windows:
    ...
    imageRootPath: C:\aias\file\image_root\ ##Picture file root directory
    ...
- application.yml
1) . edit redis connection information as needed
  redis:
    #Database index
    database: ${REDIS_DB:0}
    host: ${REDIS_HOST:127.0.0.1}
    port: ${REDIS_PORT:6379}
    password: ${REDIS_PWD:}
    #Connection timeout
    timeout: 5000
2) . edit the image baseurl as needed
image:
  #baseurl is the address prefix of the picture. If necessary, replace 127.0.0.1 with the ip address of the server where nginx is located
  baseurl: http://127.0.0.1:8080/aias/
2.5 configure hosts file:
# Add mapping to the hosts file of the client (browser) machine < 127.0.0.1 	 search.aias.me>,
# Replace 127.0.0.1 with the ip address of the server where the jar package runs

127.0.0.1	search.aias.me
2.6 operation procedure:
# Run the program (template configuration file, template pictures are stored in the current directory)

java -javaagent:aias-aiplatform-search-1.0.jar -jar aias-aiplatform-search-1.0.jar
3. Backend vector engine deployment (docker)
3.1 environmental requirements:
- docker running environment needs to be installed. Docker Desktop can be used in Mac environment
3.2 pull vector engine image (used to calculate eigenvalue vector similarity)
sudo docker pull milvusdb/milvus:0.10.0-cpu-d061620-5f3c00
3.3 downloading configuration files
3.4 start Docker container
/Users/calvin/vector_engine is the host path, which can be modified as needed. conf is the configuration file required by the engine.
docker run -d --name milvus_cpu_0.10.0 \
-p 19530:19530 \
-p 19121:19121 \
-p 9091:9091 \
-v /Users/calvin/vector_engine/db:/var/lib/milvus/db \
-v /Users/calvin/vector_engine/conf:/var/lib/milvus/conf \
-v /Users/calvin/vector_engine/logs:/var/lib/milvus/logs \
-v /Users/calvin/vector_engine/wal:/var/lib/milvus/wal \
milvusdb/milvus:0.10.0-cpu-d061620-5f3c00
3.5 edit vector engine connection configuration information
- application.yml
- Edit the vector engine connection ip address 127.0.0.1 as the host ip address of the container as needed
##################### Vector engine ###############################
search:
  host: 127.0.0.1
  port: 19530
  indexFileSize: 1024 # maximum size (in MB) of each index file
  nprobe: 256
  nlist: 16384
  faceDimension: 512 #dimension of each vector
  faceCollectionName: faces #collection name
  commDimension: 512 #dimension of each vector
  commCollectionName: comm #collection name
4. Open the browser
- Enter address: http://localhost:8080
-
General search
-
Portrait search
-
Picture upload
1) Click the upload button to upload the zip package
2) If it is a portrait picture: click the extract face feature button
3) . if it is not a portrait image: click the extract feature button
4) Refresh the page: you can see the "status" column, such as the feature extraction progress of 45 / 100
5. Help information
-
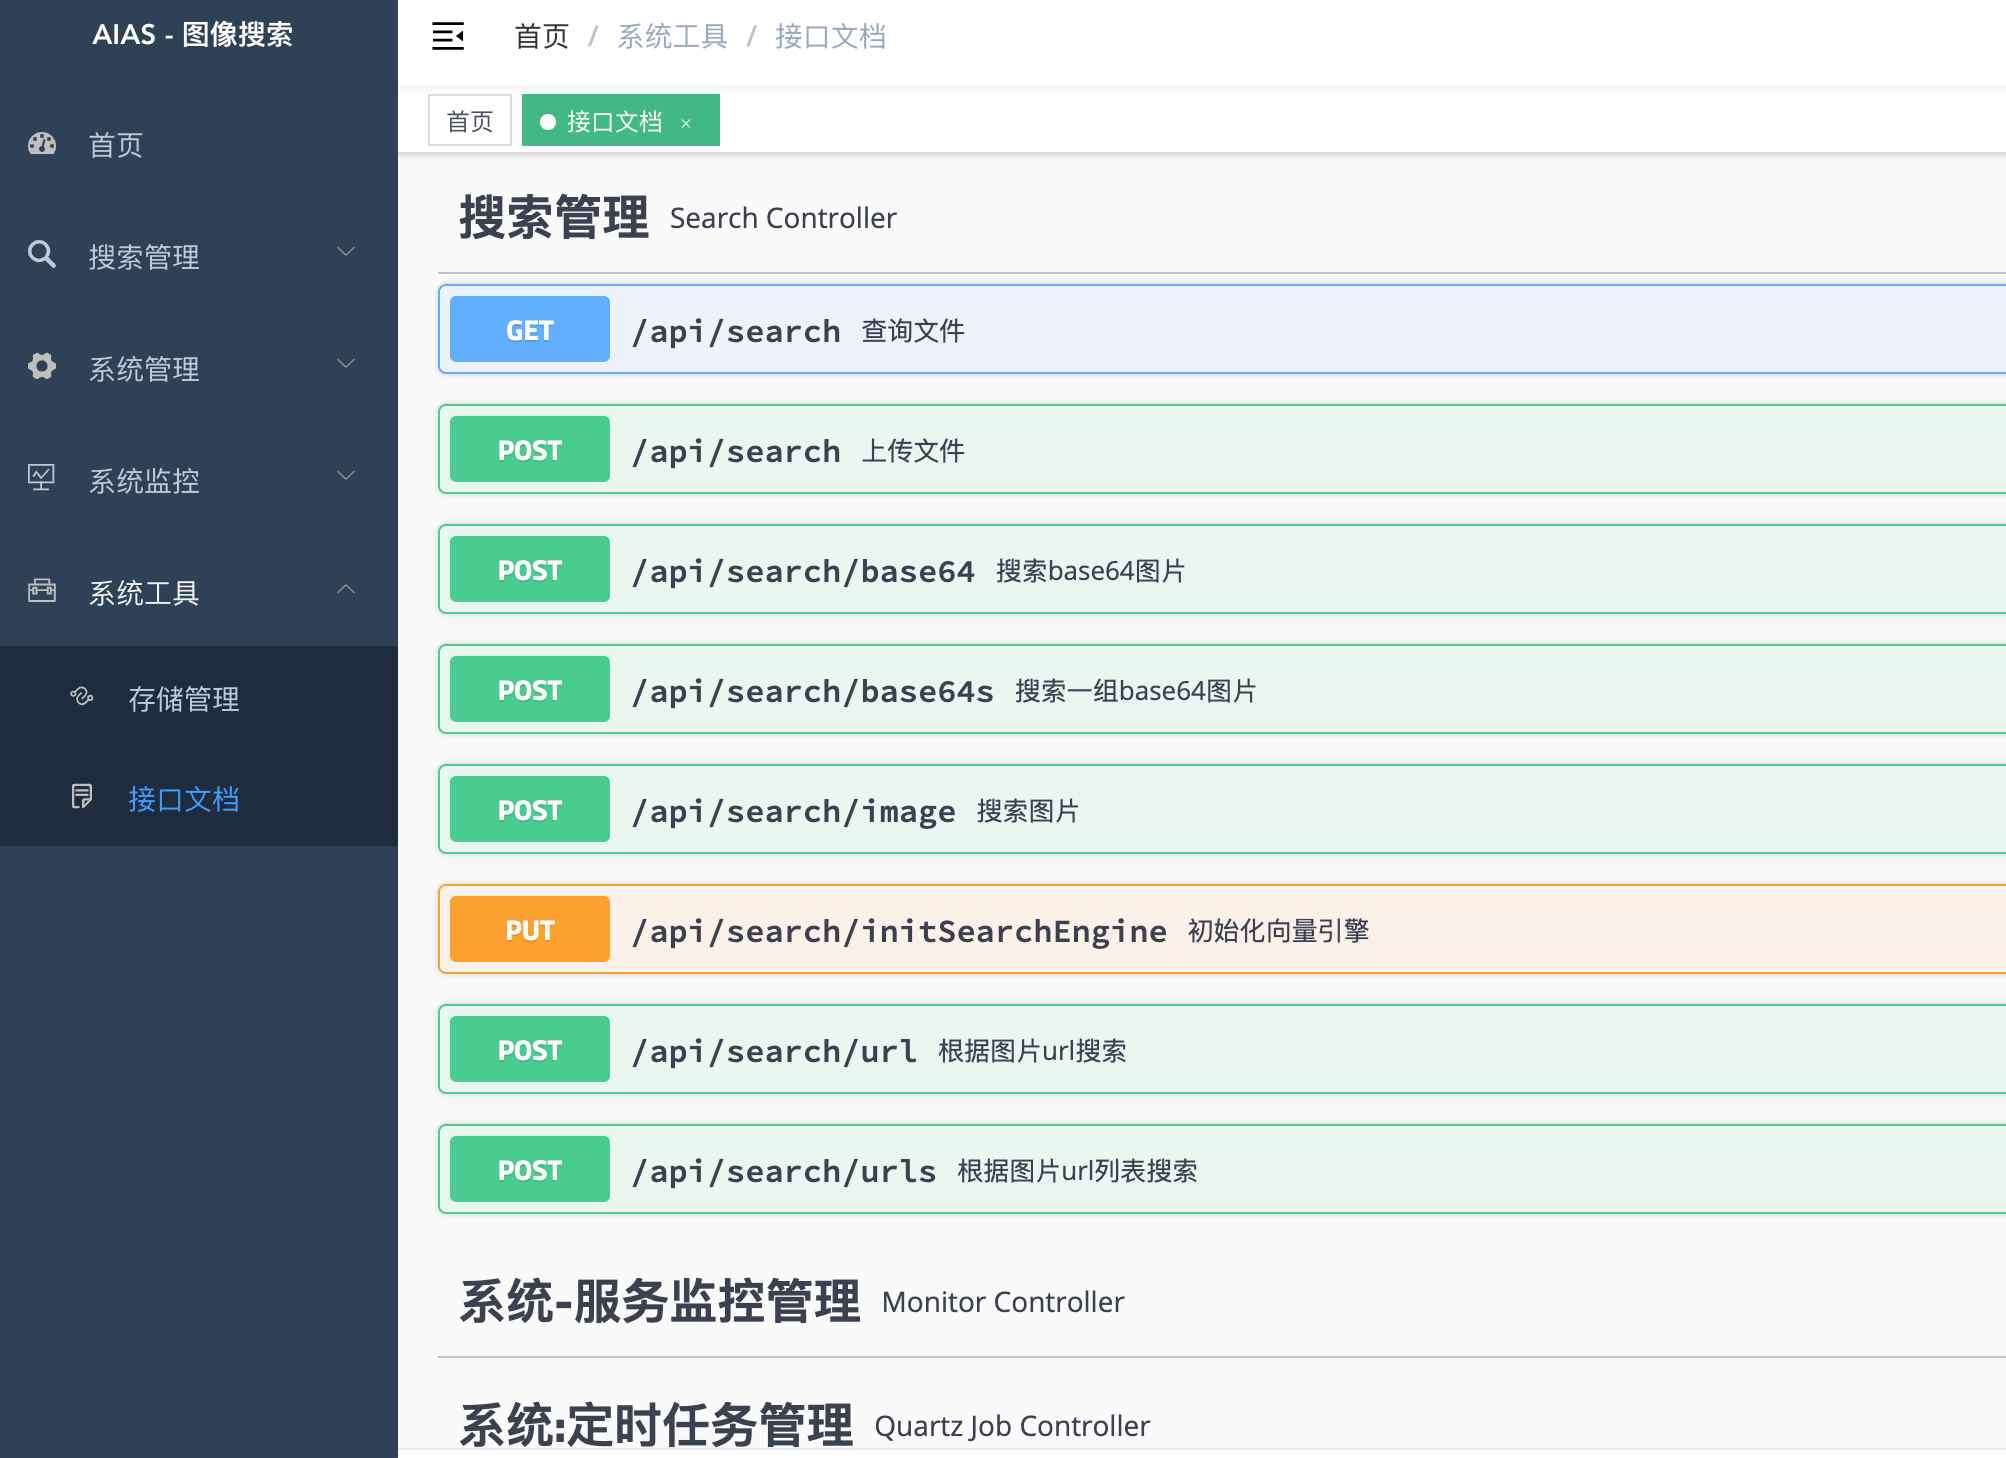
Interface documentation:
Click menu: system tools - interface document
-
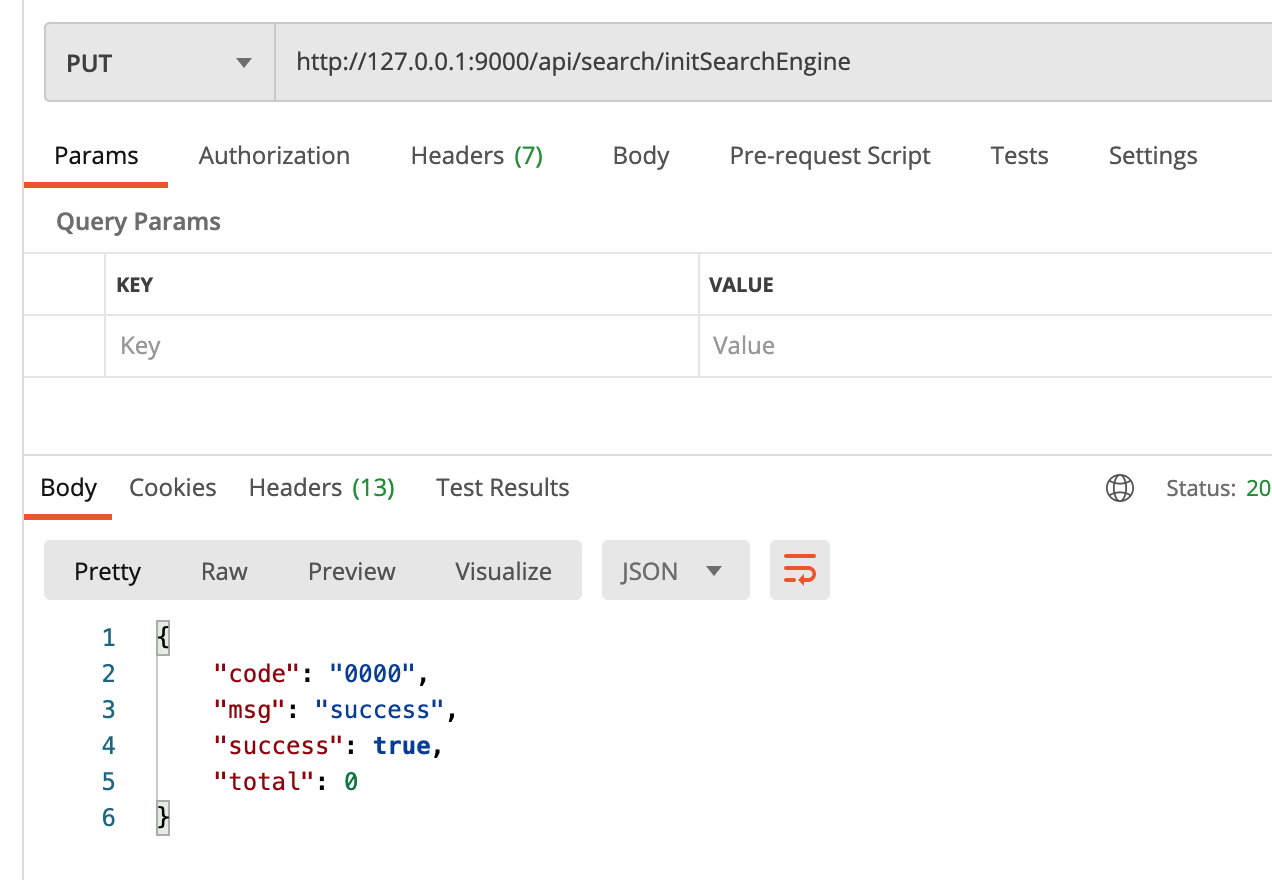
Initialize vector engine (empty data):
127.0.0.1 replace with the host ip where the jar runs.
http://127.0.0.1:9000/api/search/initSearchEngine
Github address:
https://github.com/mymagicpower/AIAS
https://gitee.com/mymagicpower/AIAS