Ant design vue dynamic form
1. Official example
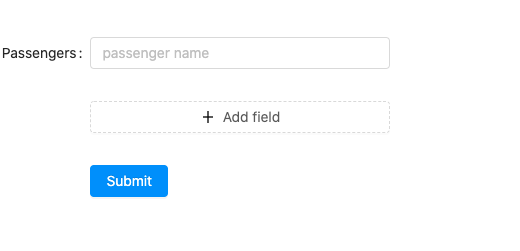
First, let's take a look at the example given on the official website:
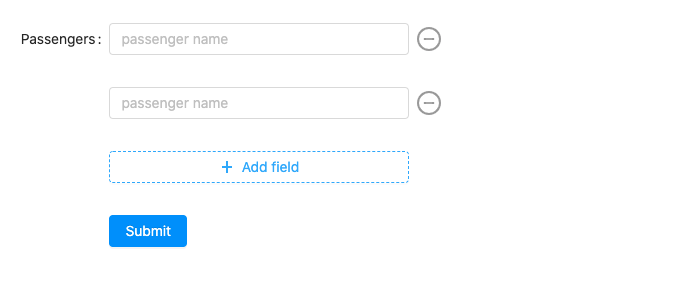
Click Add filed to add a new input field
Click Delete to delete the input box of this line
Here is an example of demo on the official website:
<template>
  <a-form :form="form" @submit="handleSubmit">
    <a-form-item
      v-for="(k, index) in form.getFieldValue('keys')"
      :key="k"
      v-bind="index === 0 ? formItemLayout : formItemLayoutWithOutLabel"
      :label="index === 0 ? 'Passengers' : ''"
      :required="false"
    >
      <a-input
        v-decorator="[
          `names[${k}]`,
          {
            validateTrigger: ['change', 'blur'],
            rules: [
              {
                required: true,
                whitespace: true,
                message: 'Please input passenger\'s name or delete this field.',
              },
            ],
          },
        ]"
        placeholder="passenger name"
        style="width: 60%; margin-right: 8px"
      />
      <a-icon
        v-if="form.getFieldValue('keys').length > 1"
        class="dynamic-delete-button"
        type="minus-circle-o"
        :disabled="form.getFieldValue('keys').length === 1"
        @click="() => remove(k)"
      />
    </a-form-item>
    <a-form-item v-bind="formItemLayoutWithOutLabel">
      <a-button type="dashed" style="width: 60%" @click="add">
        <a-icon type="plus" /> Add field
      </a-button>
    </a-form-item>
    <a-form-item v-bind="formItemLayoutWithOutLabel">
      <a-button type="primary" html-type="submit">
        Submit
      </a-button>
    </a-form-item>
  </a-form>
</template>

<script>
let id = 0;
export default {
  data() {
    return {
      formItemLayout: {
        labelCol: {
          xs: { span: 24 },
          sm: { span: 4 },
        },
        wrapperCol: {
          xs: { span: 24 },
          sm: { span: 20 },
        },
      },
      formItemLayoutWithOutLabel: {
        wrapperCol: {
          xs: { span: 24, offset: 0 },
          sm: { span: 20, offset: 4 },
        },
      },
    };
  },
  beforeCreate() {
    this.form = this.$form.createForm(this, { name: 'dynamic_form_item' });
    this.form.getFieldDecorator('keys', { initialValue: [], preserve: true });
  },
  methods: {
    remove(k) {
      const { form } = this;
      // can use data-binding to get
      const keys = form.getFieldValue('keys');
      // We need at least one passenger
      if (keys.length === 1) {
        return;
      }

      // can use data-binding to set
      form.setFieldsValue({
        keys: keys.filter(key => key !== k),
      });
    },

    add() {
      const { form } = this;
      // can use data-binding to get
      const keys = form.getFieldValue('keys');
      const nextKeys = keys.concat(id++);
      // can use data-binding to set
      // important! notify form to detect changes
      form.setFieldsValue({
        keys: nextKeys,
      });
    },

    handleSubmit(e) {
      e.preventDefault();
      this.form.validateFields((err, values) => {
        if (!err) {
          const { keys, names } = values;
          console.log('Received values of form: ', values);
          console.log(
            'Merged values:',
            keys.map(key => names[key]),
          );
        }
      });
    },
  },
};
</script>
<style>
.dynamic-delete-button {
  cursor: pointer;
  position: relative;
  top: 4px;
  font-size: 24px;
  color: #999;
  transition: all 0.3s;
}
.dynamic-delete-button:hover {
  color: #777;
}
.dynamic-delete-button[disabled] {
  cursor: not-allowed;
  opacity: 0.5;
}
</style>
2. Key analysis
When we analyze the demo provided on the official website, we can see that the key components of the whole form are as follows:
Traverse the keys array in the form form, assign different keys to the form item, and then generate a-input
So we can also speculate that the key to dynamically add and reduce form items is to operate keys array.
When binding data sources for input through v-decorator, we need to use names[${k}], as shown in the following figure:
Before the form is built, we use the life cycle beforeCreate, first create the form with createForm, then set the initial value of the form's keys as an empty array, and set the keys as the reserved item.
In the remove and add methods, we mainly operate on the changes of keys array, and then set the values of keys through setFieldsValue.
For example:
form.setFieldsValue({
keys: keys.filter(key => key !== k),
});
The official website example can meet most of our requirements, but when using the interface data to load forms dynamically, there will be some problems because of the asynchronous problem. Now I will answer these questions for you.
3. Asynchronous dynamic forms
No more bullshit, code first:
<template>
  <a-form
    :form="form"
  >
    <template v-if="show">
      <a-form-item
        v-for="(key, index) in form.getFieldValue('keys')"
        :key="key"
        :label="`${index+1}WHY`"
      >
        <a-input
          v-decorator="[
            `names[${key}]`, {
            }]"
        />
      </a-form-item>
      <a-form-item
        :label="'test'"
      >
        <a-input
          v-decorator="[
            `test`, {
            }]"
        />
      </a-form-item>
    </template>
  </a-form>
</template>

</template>
<script>

export default {
  data () {
    return {
      show: false,
    };
  },
  beforeCreate () {
    this.form = this.$form.createForm(this);
    // Simulate network requests through setTimeout
    setTimeout((res) => {
      this.form.getFieldDecorator('keys', { initialValue: res.keys, preserve: true });
      this.show = true;
      this.$nextTick(() => {
        this.form.setFieldsValue(res);
      });
    }, 2000, { keys: [0, 1, 2, 3], names: ['The bright moon in front of the window', 'Suspected ground frost', 'look at the bright moon', 'Bow your head and think of your hometown'], test: 'test' });
  },
};
</script>
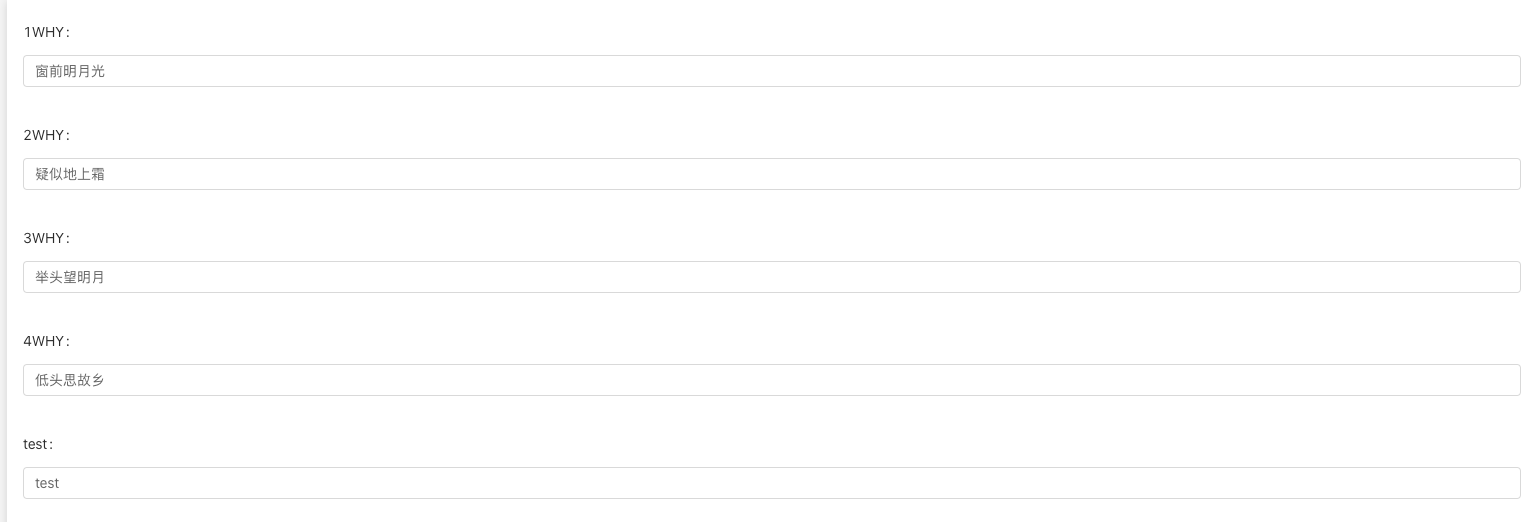
We use setTimeout to simulate network requests to generate dynamic forms in imitation of asynchronous requests.
It should be noted that:
1. We need to set the form to hidden state first, and set the form to display state after the interface returns data.
2. When we use setFieldsValue to set the display value of the form, we need to use nextTick, otherwise it cannot be set successfully.
3. Also note that the keys array must start at 0.
Operation result:
Note:
1. If you encounter that the first input box cannot be assigned, you can try to set the name [0] of the v-decorator of the first input box to a value with a subscript other than 0.
For example: this.form.setFieldsValue({ ‘names[11]’: res[0].whyDescription });
2. If you set the initial value of names in the lifecycle, for example:
this.form.getFieldDecorator('names', { initialValue: [], preserve: false });
The default value will be set to null each time the form is refreshed. If this function is not needed, please delete this line of code.
Reference documents: https://www.jianshu.com/p/a22604f88f3b