Last article: Creation of JBPopup
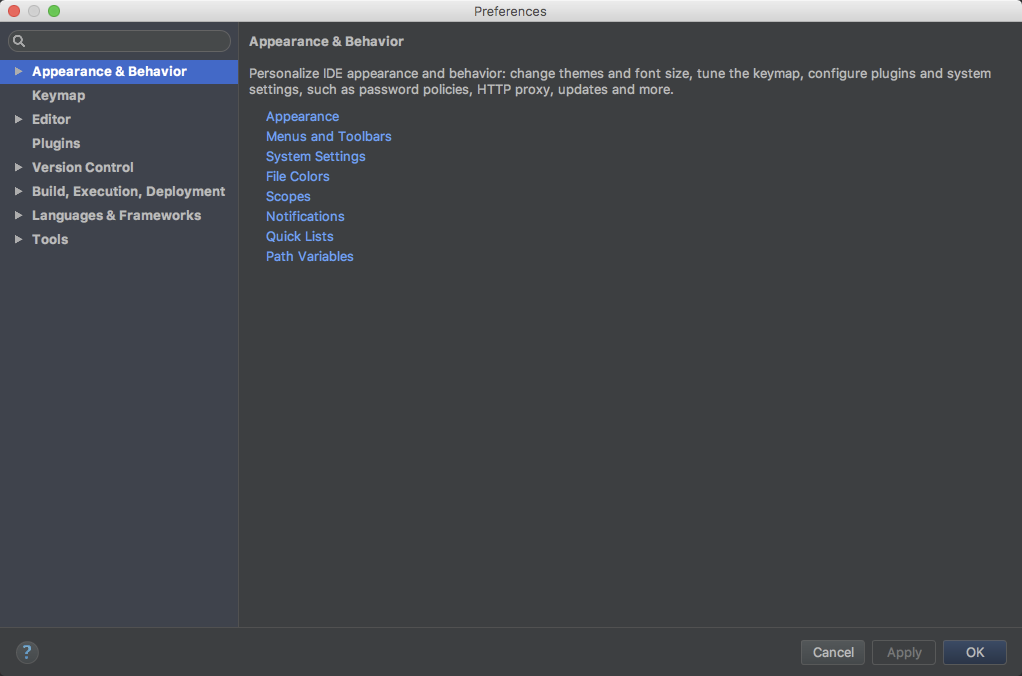
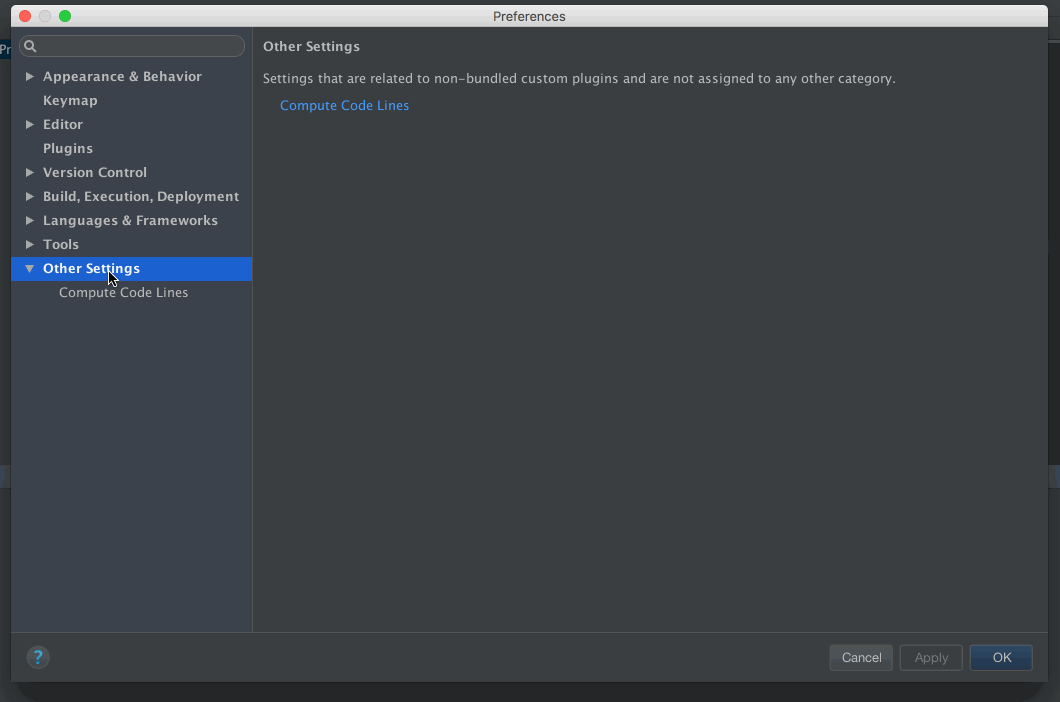
What is the Settings configuration page? Why use it?
What is the configuration page? Maybe it will be more intuitive to see the pictures, as follows:
After completing the basic plug-in, we may need to open some configurations to users for their own use. All we're talking about in today's article is how to add the configuration pages needed by our own plug-in in this Settings configuration page.
Create Configuration Pages
1,
The Java class is created to implement the Configurable interface. The code is as follows:
/**
 * Set the interface 2017/3/20 14:12.
 */
public class Settings implements Configurable {

    private JPanel mMainPanel;
    private JButton buttonDel; // Delete button 2017/3/20 14:20
    private JButton buttonAdd; // Add button 2017/3/20 14:21
    private JTable table1;
    private DefaultTableModel mDefaultTableModel;

    private java.util.List<TypeEntity> _lstType; // Type 2017/3/21 13:49
    private boolean _isModify = false; // Have you modified 2017/3/21 13:52?

    private int _curRow = -1; // Current line 2017/3/27 15:17
    private String _curSuffix = null; // Currently selected suffix name 2017/3/27 15:22
    private java.util.List<String> _lstDels;

    /**
     * Name 2017/3/20 14:12 displayed in settings
     * @return Name
     */
    @Nls
    @Override
    public String getDisplayName() {
        return "Compute Code Lines";
    }

    @Nullable
    @Override
    public String getHelpTopic() {
        return null;
    }

    /**
     * Initialization control 2017/3/20 14:19
     * @return
     */
    @Nullable
    @Override
    public JComponent createComponent() {
        return null;
    }

    /**
     * Whether to modify 2017/3/20 14:12
     * @return true Activate the apply button
     */
    @Override
    public boolean isModified() {
        return false;
    }

    /**
     * Call 2017/3/20 14:12 when clicking on [apply] and [OK].
     * @throws ConfigurationException
     */
    @Override
    public void apply() throws ConfigurationException {

    }

    /**
     * When you click on Reset, call 2017/3/20 14:13
     */
    @Override
    public void reset() {

    }
}
PS
After the implementation of Configurable, several methods are rewritten. The above code has comments. You can see the role of each method.
2. Add information to plugin.xml
Add the following information in <extensions>:
<! - Extended component registration is registered here if application Configurable is used, i.e. project configuration, etc. -->
<extensions defaultExtensionNs="com.intellij">

  <! - Custom Configuration Interface 2017/3/20 14:05 - >
  <applicationConfigurable instance="settings.Settings"/>

</extensions>
3,
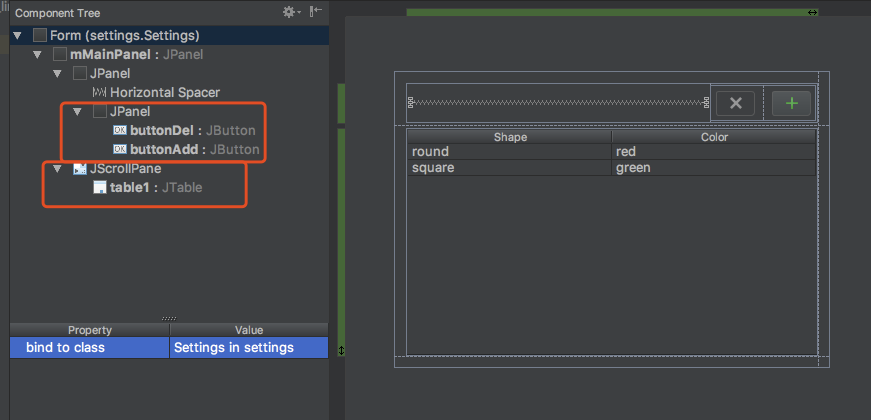
Create a Form interface layout file and bind the Settings class above. The layout structure is as follows:
PS
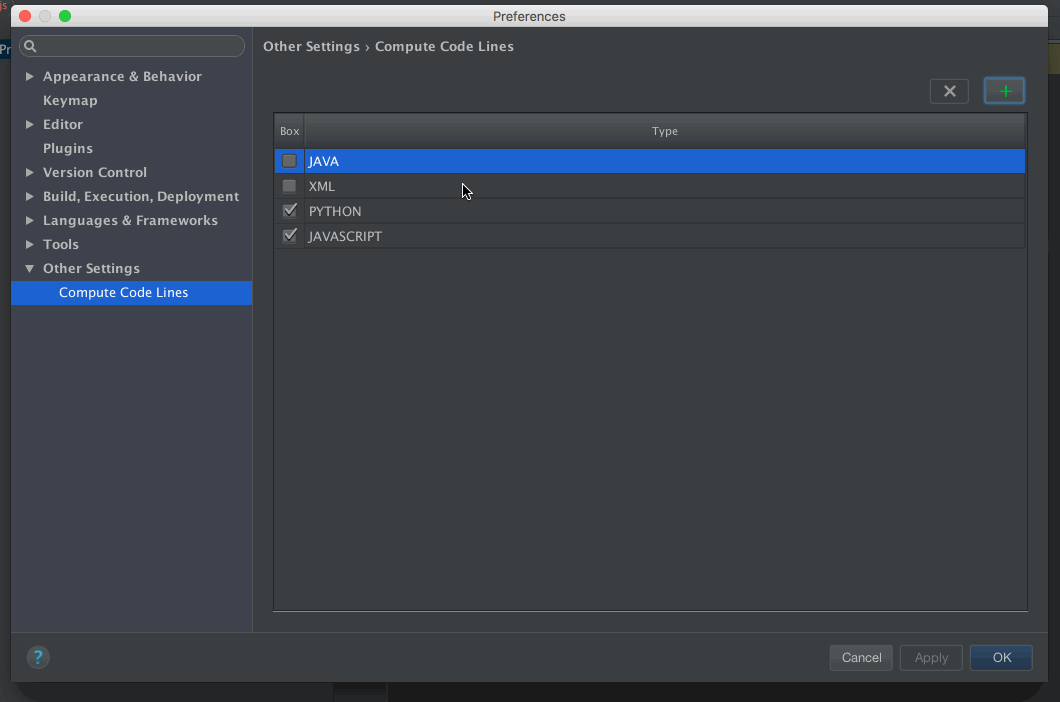
What I do is a code statistics tool. My idea is to open up the statistical type and let the user configure it. So I add two buttons, [delete], [add], and a table to carry the data display, which is relatively simple.
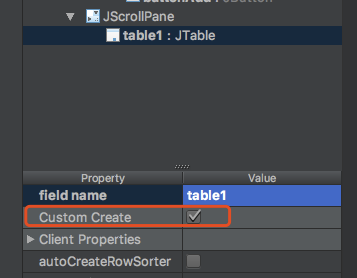
4. Use of Table Control:
First you have to check the Custom Create of the JTable control on the Form page, as shown below:
a. Create the DefaultTableModel model with the following code:
mDefaultTableModel = new DefaultTableModel() {
    @Override
    public Class<?> getColumnClass(int columnIndex) {
        if (columnIndex != 0)
            return super.getColumnClass(columnIndex);

        return Boolean.class; // The first column is checkbox 2017/3/20 15:26
    }
};
b. Initialize DefaultTableModel data, code as follows:
this._lstType = ComputeType.getTypes(); // Obtain display statistics type 2017/3/21 13:49
if (this._lstType.size() == 0)
    return;

// Create two columns 2017/3/20 14:38
Object[][] object = new Object[this._lstType.size()][2];
int i = 0;
for (TypeEntity entity:this._lstType) {
    object[i][0] = entity.isCheck(); // Set boolean directly, CheckBox can be set directly
    object[i][1] = entity.getType();
    i++;
}

tableModel.setDataVector(object, new Object[]{"Box", "Type"});
c, create JTable, code as follows:
table1 = new JTable(mDefaultTableModel) {
    public void tableChanged(TableModelEvent e) {
        super.tableChanged(e);
        repaint();
    }

    @Override
    public boolean isCellEditable(int row, int column) {
        return column == 0;
    }


};
d. Set the table header and column size. The code is as follows. (Note, remember, I was pitted.)
// Setting Head Height
table1.getTableHeader().setPreferredSize(new Dimension(table1.getTableHeader().getWidth(), 35));

// Set the width and number of columns of each column. SetPreferred Width must be set before it can take effect in 2017/3/20 15:54.
table1.getColumnModel().getColumn(0).setPreferredWidth(35);
table1.getColumnModel().getColumn(0).setMaxWidth(30); // Set maximum to prevent window zooming and shrinking, dynamic change 2017/3/20 15:55
table1.getColumnModel().getColumn(1).setPreferredWidth(465);

// Set the height of the row
table1.setRowHeight(25);
e, add JTable click event, get the specific rows and columns clicked, the code is as follows:
// Add Click Event 2017/3/20 16:02
table1.addMouseListener(new MouseAdapter() {
    @Override
    public void mouseClicked(MouseEvent e) {
        super.mouseClicked(e);
        if (e.getClickCount() == 1) { // Get the click check box 2017/3/20 16:02
            int columnIndex = table1.columnAtPoint(e.getPoint()); //Get the column of clicks
            int rowIndex = table1.rowAtPoint(e.getPoint()); //Get the rows clicked
            _curRow = rowIndex;
            if (columnIndex == 0) {
                _isModify = true; // Logo modification, activate apply 2017/3/21 13:53
                boolean isCheck = (boolean) table1.getValueAt(rowIndex, 0);
                String type = (String) table1.getValueAt(rowIndex, 1);
            }

        }
    }
});
PS
At this point, the creation and use of our Settings configuration page and the table controls it contains will be over.
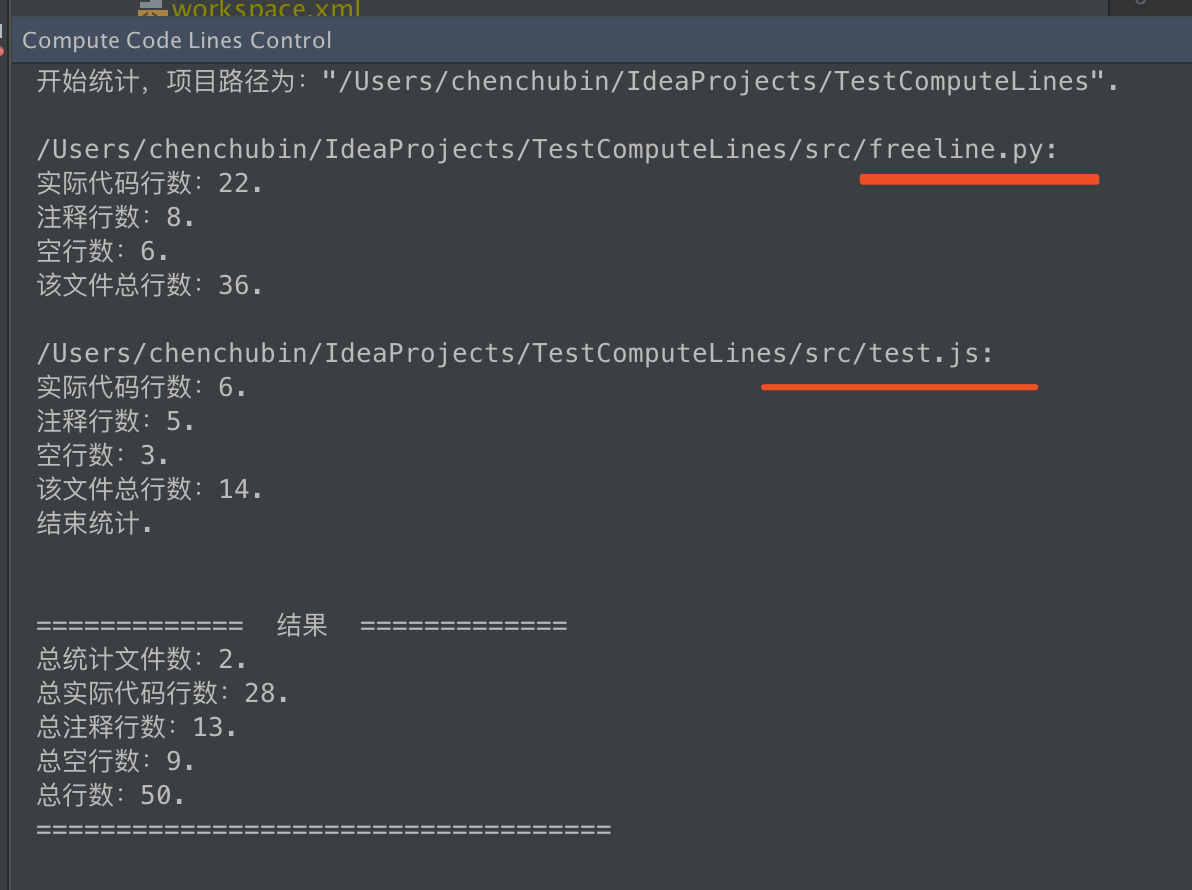
Demonstration effect

The middle red area is the Form layout interface we created. As shown in the picture above, I configure the file types of statistics Python and Javascript, and the results are as follows:
Finally, take a look at the dynamic effects of Settings, as follows:
If you feel a little vague friends, may as well look at the previous articles, I am step by step to achieve the corresponding interface and functions.
In fact, as long as the interface is made, the implementation logic is relatively simple. The main problem that I solve in this article is in me. Plug-in Problem Set 2 Questions 1 to 4.
The Settings Configuration Page we're going to talk about today is over, and what we can talk about here is almost over. After all, I've finished the code statistics plug-in I want to do myself, and I'll probably keep updating two or three articles.~~~
That's all for today. Thank you for your support.~~~