Android Studio Generates SO Files
There may be many ways to generate so. Here's a simple way. It consists of the following three steps.
- Download and configure ndk, write java to call native method of so;
- Generate. h header folder, write c/c++ files, write Android.mk,Application.mk files;
- Compile and use SO files;
1. Download NDK and write java method
Download NDK: Check whether NDK is downloaded in file - > Settings - > Android SDK - > SDK Tools. If not, you need to download and configure NDK. Besides NDK, you also need to download LLDB and CMake.
Configure NDK: file - > project structure - > Sdk Location Configure Android NDK
Write the Native interface method: Write a Java class and declare the native method in the Java file.
package com.myapplication;
public class JNITest {
    public native String sayHello();
}
Execute the javah command and enter the java directory of the android project to execute (note that the package name of the class file should be included here, not the. java suffix)
After the command is executed, A. h file is generated in the java directory
With the. h file, we can proceed to the next step and start writing the files related to so.
2. Write c/c++ code and configuration file
First, create a new jni directory under the main directory, and then copy the generated. h file to the jni directory.
Then create Android.mk and Application.mk files in the jni directory, which are script files used for compiling so. Configuration options are not many, according to our needs to configure, the configuration here as far as possible to choose a little less, according to the following comments to modify the script file,
//Note that these // comments need to be removed when using them.
//Adroid.mk
LOCAL_PATH :=$(call my-dir)//my-dir represents the current folder, generally without modification
include $(CLEAR_VARS)	//This configuration is required, but no modifications are required.
LOCAL_MODULE :=hello //hello is the name of so. If it does not start with lib, the compiled so file name will be named with lib + file name as so name.
LOCAL_SRC_FILES :=SayHello.cpp //Specify the c++/c file to be compiled
include $(BUILD_SHARED_LIBRARY) //This does not need to be modified.

//APPlication.mk
APP_MODULES := hello //Specify the name of the module that needs to be compiled
APP_ABI := armeabi-v7a //Compiling so platforms, select these'armeabi','x86','armeabi-v7a','x86_64'according to your needs
The c++ files are as follows. It is necessary to introduce jni.h and compile the generated. h files. The content of the method is to simply return a string.
#include <jni.h>
#include "com_myapplication_JNITest.h"
JNIEXPORT jstring JNICALL Java_com_myapplication_JNITest_sayHello  (JNIEnv *env, jobject obj){    return env -> NewStringUTF("hello form c++");
                                                                                             }
Compile c++: Switch to the jni directory in terminal and execute ndk-build. (Here you need to configure the Ndk environment variable, that is, configure the NDK path configurated in the project into PATH. )
After the ndk-buil command is finished, the so file of the corresponding platform will be generated in the libs directory. Here I configure only the format of armeabi-v7a.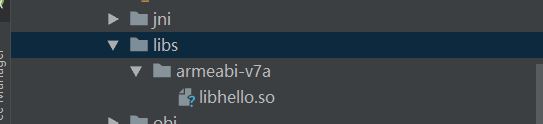
Now that the process of compiling so is complete, the next step is to use so.
3. Use SO files
First, you need to configure the directory of so files in gradle. If you don't specify jniLigs.srcDirs, you will report that you can't find so.
//The configuration in Android {} is as follows.
sourceSets {    main {        jniLibs.srcDirs = ['src/main/libs']    }}
Next is to write our use code. The code is as follows. It should be noted that when we load so files, the prefix "lib" is not needed, so we just use the file name we named ok ay.
public class MainActivity extends AppCompatActivity {

    private JNITest jniTest;
    static {
        System.loadLibrary("hello");
    }

    @Override
    protected void onCreate(Bundle savedInstanceState) {
        super.onCreate(savedInstanceState);
        setContentView(R.layout.activity_main);
        jniTest = new JNITest();
        initView();
    }

    private void initView(){
        findViewById(R.id.btn_jni_test).setOnClickListener(new View.OnClickListener() {
            @Override
            public void onClick(View v) {
                Toast.makeText(MainActivity.this,jniTest.sayHello(),Toast.LENGTH_SHORT).show();
            }
        });
    }
}
After operation, it is as follows