I. Use of WebView
When we need to browse the web page in the application, but can not open the system browser, we can use the WebView control brought by Android to achieve this requirement.
Create a new WebViewTest project and modify the activity_main.xml code.
<RelativeLayout
    xmlns:android="http://schemas.android.com/apk/res/android"
    xmlns:tools="http://schemas.android.com/tools"
    android:id="@+id/activity_main"
    android:layout_width="match_parent"
    android:layout_height="match_parent"
    android:paddingBottom="@dimen/activity_vertical_margin"
    android:paddingLeft="@dimen/activity_horizontal_margin"
    android:paddingRight="@dimen/activity_horizontal_margin"
    android:paddingTop="@dimen/activity_vertical_margin"
    tools:context="com.studio.webviewtest.MainActivity">

    <WebView
        android:id="@+id/web_view"
        android:layout_width="match_parent"
        android:layout_height="match_parent">

    </WebView>

</RelativeLayout>
Here we use the WebView control in our layout, which is used to display web pages. Then modify the code in MainActivity
    @Override
    protected void onCreate(Bundle savedInstanceState)
    {
        super.onCreate(savedInstanceState);
        setContentView(R.layout.activity_main);
        WebView webView= (WebView) findViewById(R.id.web_view);
        webView.getSettings().setJavaScriptEnabled(true);
        webView.setWebViewClient(new WebViewClient());
        webView.loadUrl("http://www.baidu.com");
    }
After getting the WebView control instance, calling the WebView getSettings() method can set some browser properties. Here we simply call the setJavaScript Enabled () method to enable WebView to support JavaScript scripts.
Next, we call the setWebViewClient() method of WebView and pass in an instance of WebViewClient. The purpose of this code is that when we need to jump from one page to another, we want the target page to still be displayed in the current WebView instead of opening the system browser.
Finally, the loadUrl method of WebView is invoked to set the page to be visited. Because we use the network, we need to declare network permissions in the Manifest file.
<manifest xmlns:android="http://schemas.android.com/apk/res/android"
          package="com.studio.webviewtest">

    <uses-permission android:name="android.permission.INTERNET"></uses-permission>
    ....
    ....
Then we run the program to see the effect. 
II. Accessing the Network Using Http Protocol
The principle of using Http protocol to access the network is that the client sends a Http request to the server. After the server receives the request, it will return some data to the client. Then the client can parse and process the data. In fact, the WebView control in the previous section has already helped us to complete the steps of sending Http requests, receiving data returned by the server, parsing the returned data and displaying the final page in the background.
1. Use HttpURLConnection
There were two ways to send Http requests on Android, HttpClient and HttpURLConnection, but HttpClient was abolished after Android 6.0 because of the excessive number of API s, so we usually use HttpURLConnection to send Http requests after Android 6.0.
First, we need to get an instance of HttpURLConnection. Generally, we only need a new URL object and pass in the network address of the target. Then we can get it by calling the open Connection () method of the URL.
    URL url=new URL("http://www.baidu.com");
    HttpURLConnection connection=(HttpURLConnection) url.openConnection();
After we get an example of Http URLConnection, we need to set up the methods used for Http requests, the commonly used methods are GET and POST. GET indicates that it wants to get data from the server, POST indicates that it wants to submit data to the server, as follows.
connection.setRequestMethod("GET");Next you can set the connection timeout, milliseconds of read timeout, and some headers that the server wants to get.
    connection.setConnectionTimeout(8000);
    connection.setReadTimeout(8000);
Then call the getInputStream() method of HttpURLConnection to get the input stream returned by the server. The remaining task is to read the input stream.
InputStream in=connection.getInputStream();
Finally, the disconnect method can be called to close the Http connection.
connection.disconnect();Let's use a real example to show how to create a new Android project and modify the activity_main.xml file
<LinearLayout
    xmlns:android="http://schemas.android.com/apk/res/android"
    xmlns:tools="http://schemas.android.com/tools"
    android:orientation="vertical"
    android:id="@+id/activity_main"
    android:layout_width="match_parent"
    android:layout_height="match_parent"
    tools:context="com.studio.networktest.MainActivity">

    <Button
        android:id="@+id/send_request"
        android:layout_width="match_parent"
        android:layout_height="wrap_content"
        android:text="Send Request"/>

    <ScrollView
        android:layout_width="match_parent"
        android:layout_height="match_parent">

        <TextView
            android:id="@+id/response_text"
            android:layout_width="match_parent"
            android:layout_height="wrap_content"/>

    </ScrollView>

</LinearLayout>
We define a Button to send Http requests and display the returned data in TextView. Then modify the code in MainActivity.
public class MainActivity extends AppCompatActivity implements View.OnClickListener
{
    private Button sendRequest;
    private TextView responseText;

    @Override
    protected void onCreate(Bundle savedInstanceState)
    {
        super.onCreate(savedInstanceState);
        setContentView(R.layout.activity_main);
        sendRequest= (Button) findViewById(R.id.send_request);
        responseText= (TextView) findViewById(R.id.response_text);
        sendRequest.setOnClickListener(this);
    }

    @Override
    public void onClick(View v)
    {
        if (v.getId()==R.id.send_request)
        {
            sendRequestWithHttpURLConnection();
        }
    }

    private void sendRequestWithHttpURLConnection()
    {
        //Open subthreads to initiate time-consuming network requests
        new Thread(new Runnable()
        {
            @Override
            public void run()
            {
                BufferedReader reader=null;
                HttpURLConnection connection=null;
                try
                {
                    URL url=new URL("https://www.baidu.com");
                    connection= (HttpURLConnection) url.openConnection();
                    connection.setRequestMethod("GET");
                    connection.setConnectTimeout(8000);
                    connection.setReadTimeout(8000);
                    InputStream in=connection.getInputStream();
                    //The following reads the input stream obtained
                    reader=new BufferedReader(new InputStreamReader(in));
                    StringBuilder response=new StringBuilder();
                    String line=null;
                    while ((line=reader.readLine())!=null)
                    {
                        response.append(line);
                    }
                    showResponse(response.toString());
                }
                catch (java.io.IOException e)
                {
                    e.printStackTrace();
                }
                finally
                {
                    if (reader!=null)
                    {
                        try
                        {
                            reader.close();
                        }
                        catch (IOException e)
                        {
                            e.printStackTrace();
                        }
                    }
                    if (connection!=null)
                    {
                        connection.disconnect();
                    }
                }
            }
        }).start();
    }

    private void showResponse(final String response)
    {
        runOnUiThread(new Runnable()
        {
            @Override
            public void run()
            {
                //UI operations are performed here, and the returned results are displayed on the interface.
                responseText.setText(response);
            }
        });
    }
}
It's important to note that because network requests are time-consuming requests, we need to put them in the sub-thread to execute; but because Android does not allow UI operations in the sub-thread, we need to switch to the main thread through the runOnUiThread() method to update the text information when we want to set TextView text information.
Running the program, the effect is as follows. 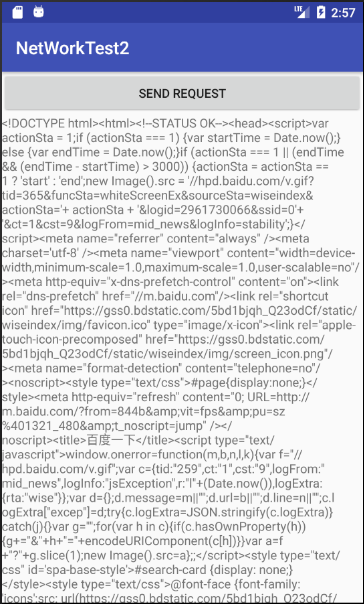
These codes are the source code of Baidu interface, that is, the data returned by the server to the client. Because there is no WebView to parse and display the returned data this time, only a bunch of source code will be displayed.
Be careful not to forget to declare network permissions!
So what if you want to use the Http protocol to submit data to the server? Just change the method of Http request to POST and write out the data to be submitted before getting the input stream. Note that each piece of data exists in the form of key-value pairs, separated from the data, such as the user name and password we want to submit to the server:
connection.setRequestMethod("POST");
DataOutputStream out=new DataOutputStream(connection.getOutputStream);
out.writeBytes("username=admin&password=123456");
2. Use OkHttp
With the popularity of open source libraries, there are many excellent network communication libraries that can replace Android's native HttpURLConnection. OkHttp is one of them and has become the preferred network communication library for Android developers.
First add the dependencies of the OkHttp library (as of this article, the latest official version of Github is OkHttp 3.8.0).
compile 'com.squareup.okhttp3:okhttp:3.8.0'Let's take a look at the specific usage of OkHttp. First, we need to create an example of OkHttpClient.
OkHttpClient client=new OkHttpClient();Next, if you want to initiate an Http request, you need to create a Request object
Request request=new Request.Builder().build();The above code just creates an empty Request object, which can be enriched in many other ways by prefixing the final build() method, such as setting the target's network address by url().
Request request=new Request.Builder().url("http://www.baidu.com").build();Then call OkHttpClient's newCall() method to create a Call object, and call its execute() method to send the request and get the data returned by the server.
Response response=client.newCall(request).execute();Response object is the data encapsulation class returned by the server. We can use the following to get the specific content of the returned data.
String responseData=response.body().string();If a POST request is more complex than a GET request, we need to build a RequestBody object to store the parameters to be submitted.
RequestBody requestBody=new FormBody.Builder().add("username","admin")
                    .add("password","123456").build();
Then call the post() method in Request.Builder and pass in the RequestBody object
Request request=new Request.Builder().url("http://www.baidu.com")
                .post(requestBody).build();
The next step is to call the execute() method to send the request and GET the data returned by the server. Let's go through the previous operation OkHttp
    private void sendRequestWithOkHttp()
    {
        new Thread(new Runnable()
        {
            @Override
            public void run()
            {
                try
                {
                    OkHttpClient client=new OkHttpClient();
                    Request request=new Request.Builder().url("http://www.baidu.com").build();
                    Response response=client.newCall(request).execute();
                    String responseData=response.body().string();
                    showResponse(responseData);
                }
                catch (IOException e)
                {
                    e.printStackTrace();
                }
            }
        }).start();
    }
You can see that the amount of code using OkHttp is much less than before, which is the strength of OkHttp.