preface
you are already familiar with the MVVM framework pattern in these articles. The specific architecture pattern is shown in the following figure:
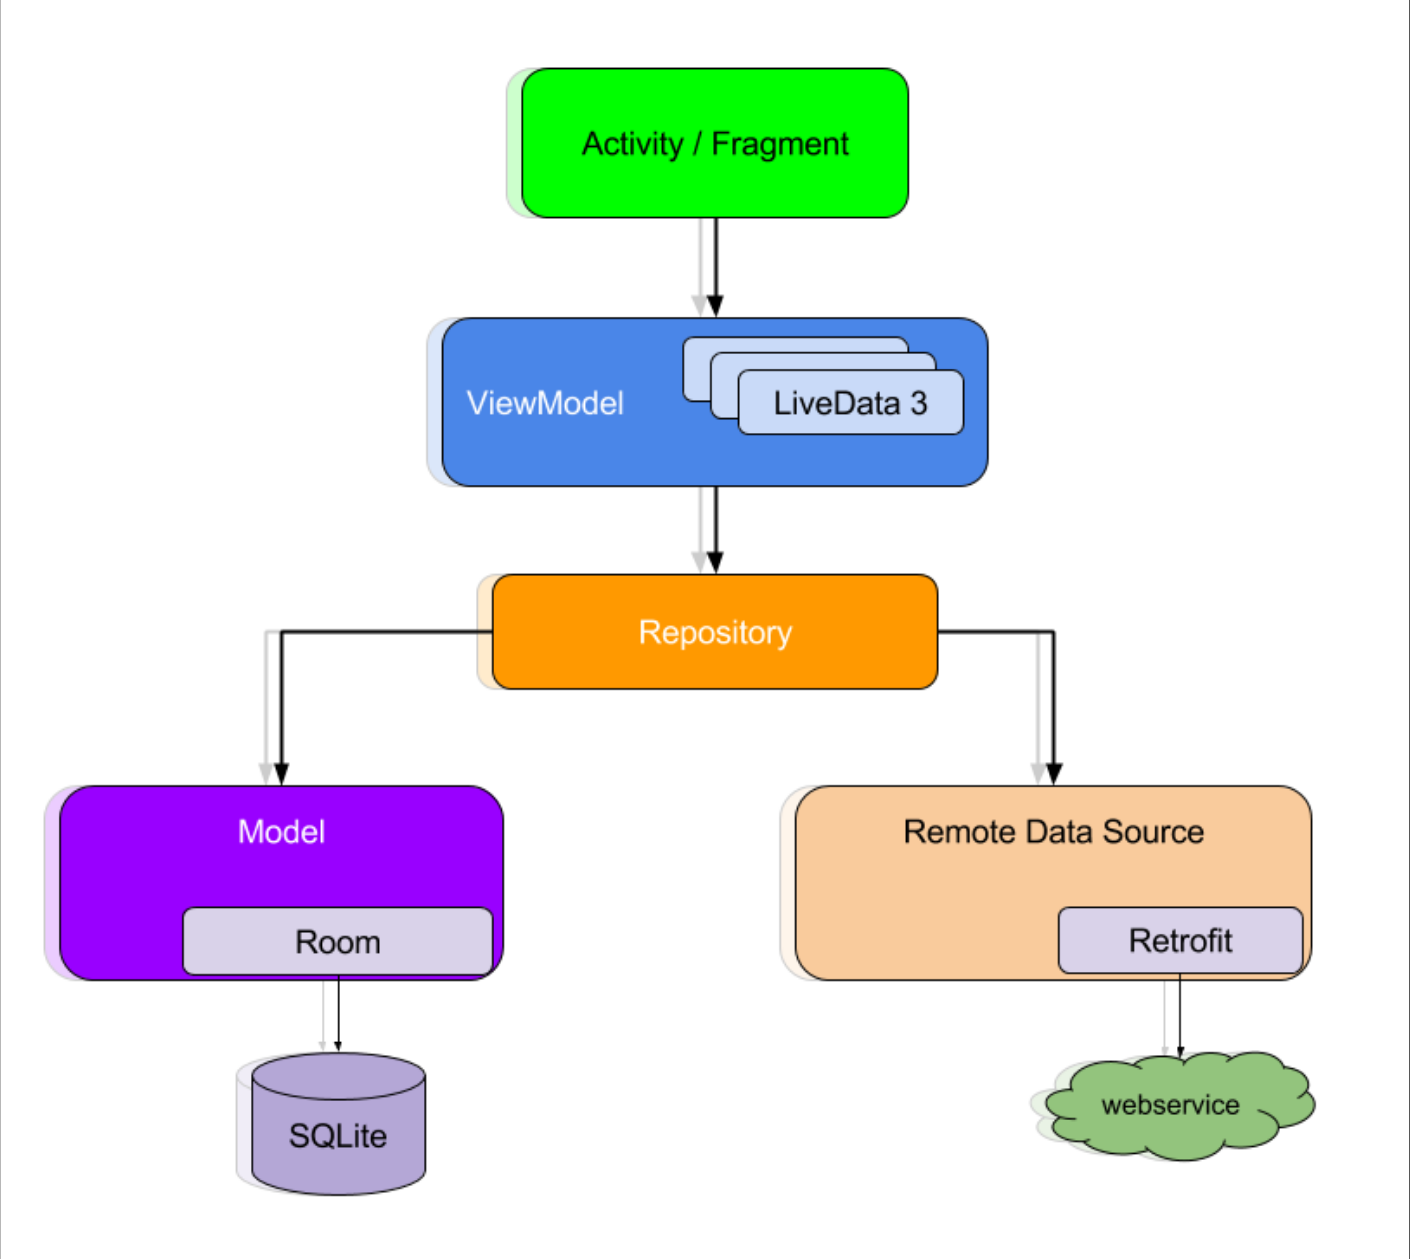
The Activity/Fragment of the upper layer is represented as the View layer, which operates the data through the ViewModel, and then the Repository controls the source of the data, which can be local database or network data. This mode is reflected in the article and code, which is relatively complete.
The renderings of this paper are as follows:
text
the construction of MVVM framework is reasonably completed, but since we want to get a practical framework, we can't just stay at the stage of framework construction, but also have practical scenarios. I like my framework can meet the use of most development. Although our framework has an Activity, we haven't used Fragment yet. When is Fragment usually used? For example, the five sub modules of the main page, Fragment, represent five functions respectively. Will this be good? In this way, we can perfectly integrate Fragment into it. At the same time, we can also combine it with the actual development mode. Well, good. Let's go.
1, Add dependency
you need to add dependencies to use Navigation. Add the following dependencies in the dependencies {} closure in build.gradle of app:
	// navigation relies on ui and fragment s
    implementation 'androidx.navigation:navigation-fragment:2.3.2'
    implementation 'androidx.navigation:navigation-ui:2.3.2'
Then Sync Now synchronizes the dependent items.
2, Fragment creation
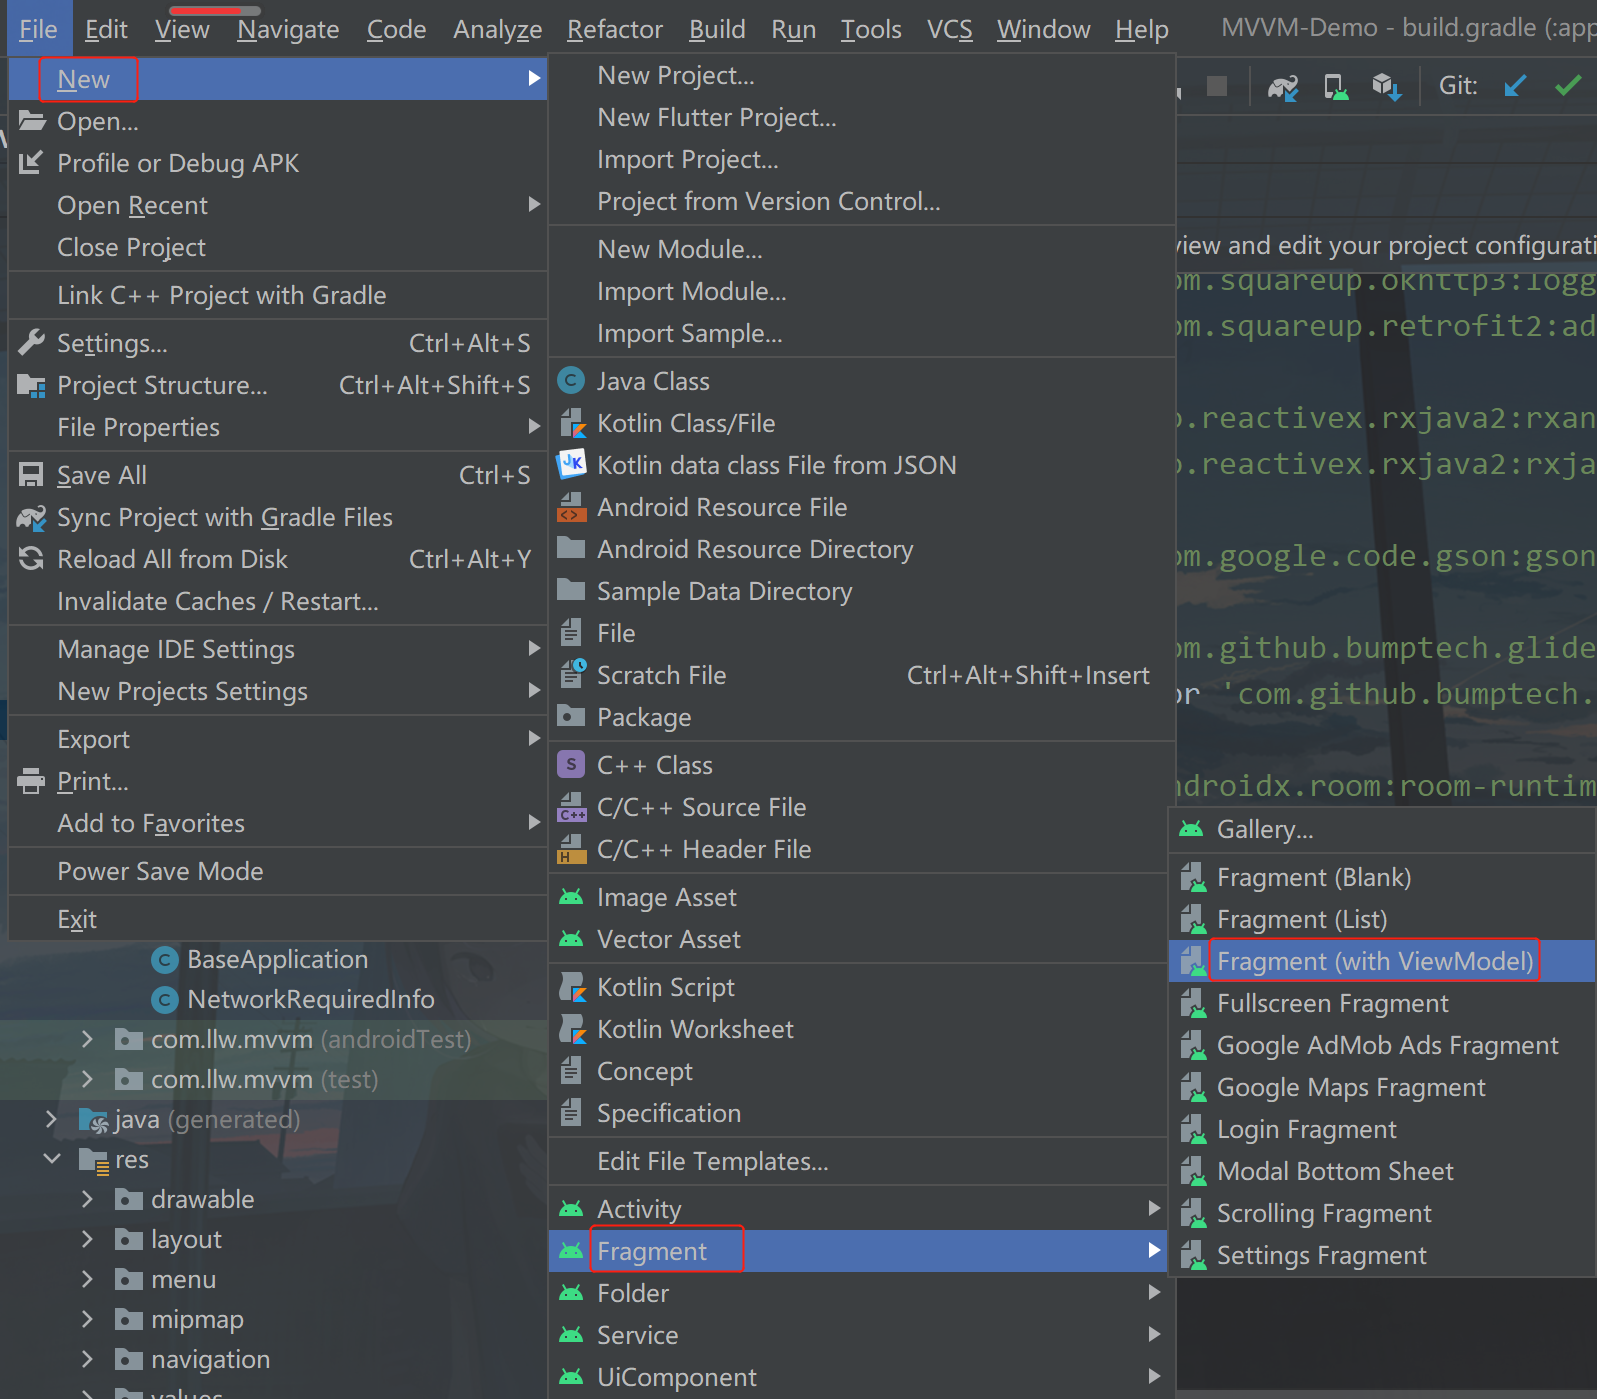
create a Fragment with its own ViewModel through a shortcut, as shown in the following figure:
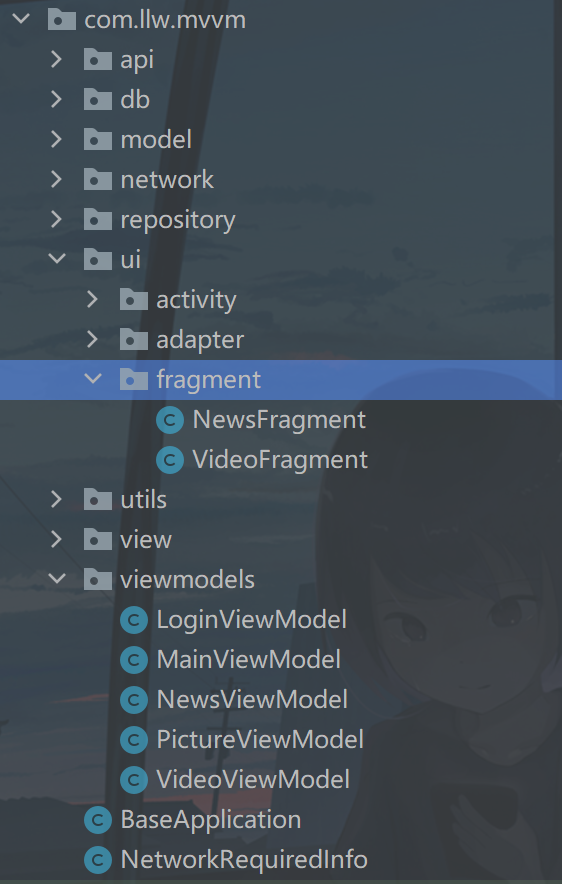
two fragments are created here, NewsFragment and VideoFragment. The corresponding layout file is news_fragment.xml and video_fragment.xml, ViewModel is NewsViewModel and VideoViewModel.
let's subcontract the project. I regard activity, fragment and adapter as ui. Then I create a new ui package under com.llw.mvvm package, a new fragment package under the package, then put NewsFragment and VideoFragment into the fragment package, then move the adapter package under the ui package, and create an activity package under the ui package, Move all activities in the project into the package, and finally put NewsViewModel and VideoViewModel into the viewmodels package. The directory structure is shown in the following figure:
Next, modify news in turn_ Fragment.xml and video_ Content in fragment.xml:
<?xml version="1.0" encoding="utf-8"?>
<layout xmlns:android="http://schemas.android.com/apk/res/android">

    <FrameLayout
        android:layout_width="match_parent"
        android:layout_height="match_parent">

        <androidx.recyclerview.widget.RecyclerView
            android:id="@+id/rv"
            android:layout_width="match_parent"
            android:layout_height="match_parent" />
    </FrameLayout>
</layout>
The contents of the two xml are the above code. Just copy and paste. We'll write the contents of the two fragments later.
3, BaseActivity creation
because we have many activities, and some methods in activities may overlap or be common, in this case, we can put some methods into a basic class, such as BaseActivity. Create it below and create a BaseActivity class under the activity package. The code is as follows:
/**
 * Basic Activity
 *
 * @author llw
 */
public class BaseActivity extends AppCompatActivity {

    protected AppCompatActivity context;

    @Override
    protected void onCreate(@Nullable Bundle savedInstanceState) {
        super.onCreate(savedInstanceState);
        this.context = this;
    }

    protected void showMsg(CharSequence msg) {
        Toast.makeText(context, msg, Toast.LENGTH_SHORT).show();
    }

    protected void showLongMsg(CharSequence msg) {
        Toast.makeText(context, msg, Toast.LENGTH_LONG).show();
    }

    /**
     * Jump page
     * @param clazz Target page
     */
    protected void jumpActivity(final Class<?> clazz) {
        startActivity(new Intent(context, clazz));
    }

    /**
     * Jump to the page and close the current page
     * @param clazz Target page
     */
    protected void jumpActivityFinish(final Class<?> clazz) {
        startActivity(new Intent(context, clazz));
        finish();
    }

    /**
     * Status bar text icon color
     * @param dark Dark false is light
     */
    protected void setStatusBar(boolean dark) {
        View decor = getWindow().getDecorView();
        if (dark) {
            decor.setSystemUiVisibility(View.SYSTEM_UI_FLAG_LAYOUT_FULLSCREEN | View.SYSTEM_UI_FLAG_LIGHT_STATUS_BAR);
        } else {
            decor.setSystemUiVisibility(View.SYSTEM_UI_FLAG_LAYOUT_FULLSCREEN | View.SYSTEM_UI_FLAG_LAYOUT_STABLE);
        }
    }
}
There are also some simple methods. If there are new needs in the development, they can be added all the time. According to the actual situation, don't add everything. In fact, it's not necessary.
4, Start page
although our MVVM Demo is only a Demo, we need to set a higher standard for ourselves, so I plan to give a startup page, a simple animation, and then enter our login page. Although we are a fake login, the meaning has arrived. Then we record whether the program has logged in on the login page. If we have logged in, the next time we enter the program, we will no longer enter the login page, but directly enter the main page. This logic is very simple. Let's implement it below.
Create a new SplashActivity under the activity package, and the corresponding layout is activity_splash.xml, the XML code is as follows:
<?xml version="1.0" encoding="utf-8"?>
<layout xmlns:android="http://schemas.android.com/apk/res/android">
    <LinearLayout
        xmlns:tools="http://schemas.android.com/tools"
        android:layout_width="match_parent"
        android:layout_height="match_parent"
        android:gravity="center"
        android:orientation="vertical"
        tools:context=".ui.activity.SplashActivity">

        <RelativeLayout
            android:layout_width="160dp"
            android:layout_height="160dp">

            <ImageView
                android:layout_width="160dp"
                android:layout_height="160dp"
                android:src="@mipmap/ic_splash_logo" />

            <TextView
                android:visibility="invisible"
                android:id="@+id/tv_mvvm"
                android:layout_width="wrap_content"
                android:layout_height="wrap_content"
                android:layout_alignParentBottom="true"
                android:layout_centerHorizontal="true"
                android:layout_marginBottom="46dp"
                android:text="MVVM"
                android:textColor="@color/white"
                android:textSize="28sp"
                android:textStyle="bold" />
        </RelativeLayout>

        <RelativeLayout
            android:layout_width="wrap_content"
            android:layout_height="wrap_content"
            android:layout_marginTop="20dp">

            <TextView
                android:layout_width="wrap_content"
                android:layout_height="wrap_content"
                android:text="Model View ViewModel"
                android:textColor="@color/black"
                android:textSize="24sp" />

            <TextView
                android:id="@+id/tv_translate"
                android:layout_width="wrap_content"
                android:layout_height="wrap_content"
                android:background="@color/white"
                android:text="Model View ViewModel"
                android:textColor="@color/white"
                android:textSize="24sp" />
        </RelativeLayout>
    </LinearLayout>
</layout>
There is an icon IC in it_ splash_ Logo.png, I'll post it here, but you'd better go to my source code, so there will be no watermark, and the image format is also right.

For the startup page, I specially made a theme style and added the following code style under themes.xml:
	<style name="SplashTheme" parent="Theme.MaterialComponents.DayNight.NoActionBar">
        <item name="android:statusBarColor" tools:targetApi="lollipop">#00FFFFFF</item><!-- Set the color of the status bar -- >
    </style>
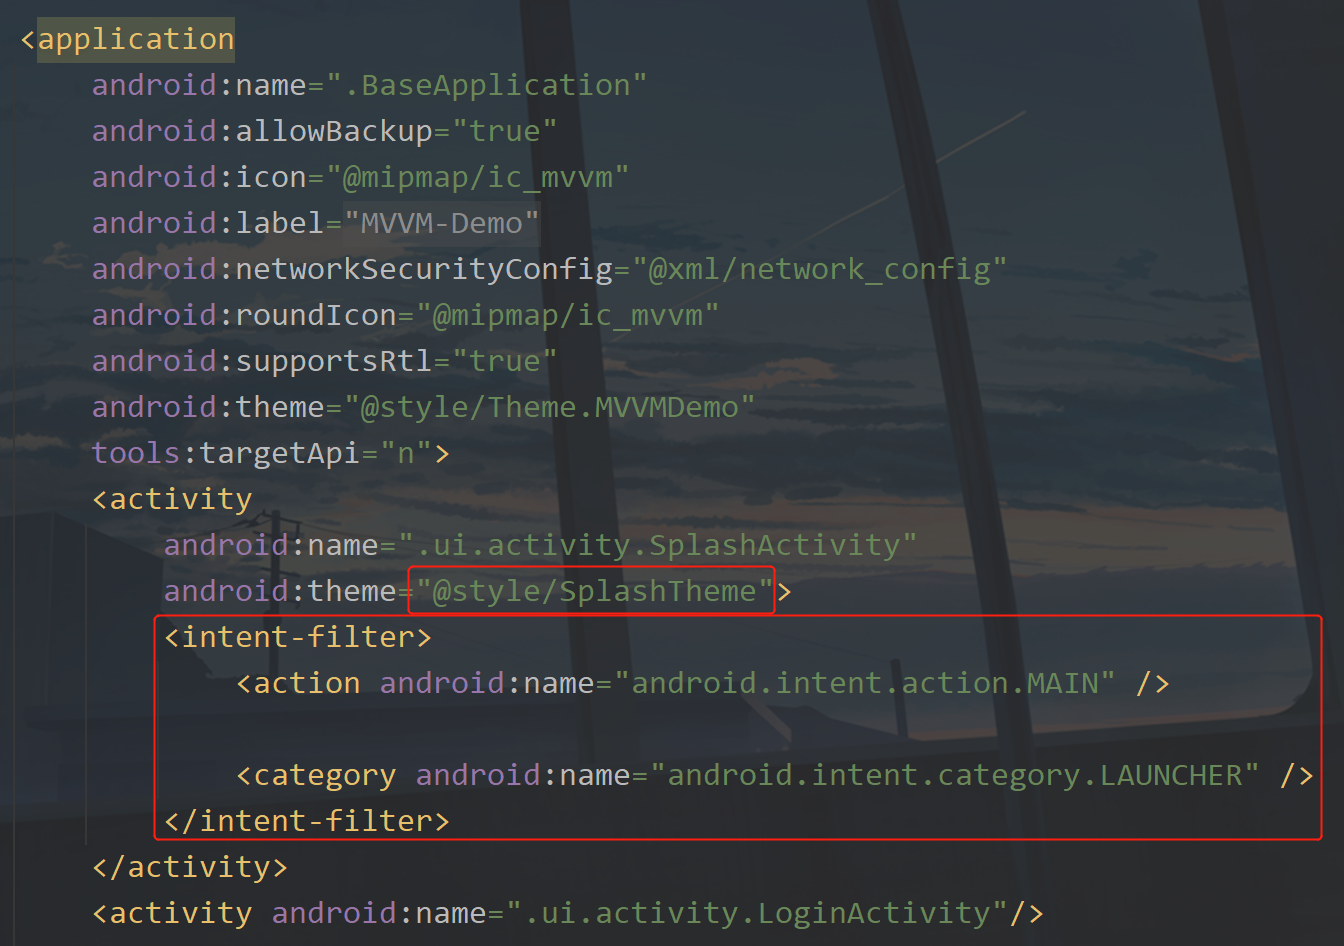
Then we modify the code in AndroidManifest.xml, because the previous startup Activity is LoginActivity, which needs to be changed. As shown in the figure below:
Next, we add an animation help tool class and create an EasyAnimation class under the utils package. The code is as follows:
public class EasyAnimation {

    /**
     * Start blinking animation
     *
     * @param view View to be animated
     */
    public static void startBlink(View view) {
        AlphaAnimation alphaAnimation = new AlphaAnimation(0.0f, 1.0f);
        alphaAnimation.setDuration(500);
        alphaAnimation.setStartOffset(20);
        alphaAnimation.setRepeatMode(Animation.REVERSE);
        alphaAnimation.setRepeatCount(Animation.INFINITE);
        view.startAnimation(alphaAnimation);
    }

    /**
     * Start blinking animation
     *
     * @param view           View to be animated
     * @param alphaAnimation Transparency animation (self configuring)
     */
    public static void startBlink(View view, AlphaAnimation alphaAnimation) {
        view.startAnimation(alphaAnimation);
    }


    /**
     * Stop blinking animation
     *
     * @param view You need to clear the View of the animation
     */
    public static void stopBlink(View view) {
        if (view != null) {
            view.clearAnimation();
        }
    }

    /**
     * Moves the width of the specified View
     *
     * @param view
     */
    public static void moveViewWidth(View view, TranslateCallback callback) {
        view.post(() -> {
            //tvTranslate.getWidth() obtained through post will not be 0.
            TranslateAnimation translateAnimation = new TranslateAnimation(0, view.getWidth(), 0, 0);
            translateAnimation.setDuration(1000);
            translateAnimation.setFillAfter(true);
            view.startAnimation(translateAnimation);

            //Animation monitor
            translateAnimation.setAnimationListener(new Animation.AnimationListener() {
                @Override
                public void onAnimationStart(Animation animation) {

                }

                @Override
                public void onAnimationEnd(Animation animation) {
                    //Check Android version
                    callback.animationEnd();
                }

                @Override
                public void onAnimationRepeat(Animation animation) {

                }
            });
        });
    }

    /**
     * Moves the width of the specified View
     *
     * @param view               View requiring displacement
     * @param callback           Displacement animation callback
     * @param translateAnimation Displacement animation (self configuring)
     */
    public static void moveViewWidth(View view, TranslateCallback callback, TranslateAnimation translateAnimation) {
        view.post(() -> {
            //tvTranslate.getWidth() obtained through post will not be 0.

            view.startAnimation(translateAnimation);

            //Animation monitor
            translateAnimation.setAnimationListener(new Animation.AnimationListener() {
                @Override
                public void onAnimationStart(Animation animation) {

                }

                @Override
                public void onAnimationEnd(Animation animation) {
                    //Check Android version
                    callback.animationEnd();
                }

                @Override
                public void onAnimationRepeat(Animation animation) {

                }
            });
        });
    }

    public interface TranslateCallback {
        //End of animation
        void animationEnd();
    }
}
Because you need to know whether the program is logged in on the startup page, add a Constant in Constant, as shown below:
	/**
     * Have you logged in
     */
    public static final String IS_LOGIN = "isLogin";
Let's modify the code of SplashActivity and use this constant to determine which page to jump to. The code is as follows:
public class SplashActivity extends BaseActivity {

    @Override
    protected void onCreate(Bundle savedInstanceState) {
        super.onCreate(savedInstanceState);
        ActivitySplashBinding binding = DataBindingUtil.setContentView(this, R.layout.activity_splash);
        setStatusBar(true);
        EasyAnimation.moveViewWidth(binding.tvTranslate, () -> {
            binding.tvMvvm.setVisibility(View.VISIBLE);
            jumpActivity(MVUtils.getBoolean(Constant.IS_LOGIN) ? MainActivity.class : LoginActivity.class);
        });
    }
}
Here, I inherited BaseActivity and set the status bar dark mode, because our page is white. If the status bar is also white, I can't see it. Then I jump to the page at the end of the animation, which is a very simple code. The code of this page is finished. Let's modify the code in LoginActivity. First, modify the inherited Activity to BaseActivity. The code inside is as follows:
public class LoginActivity extends BaseActivity {

    private ActivityLoginBinding dataBinding;
    private LoginViewModel loginViewModel;

    @Override
    protected void onCreate(Bundle savedInstanceState) {
        super.onCreate(savedInstanceState);
        //Data binding view
        dataBinding = DataBindingUtil.setContentView(this, R.layout.activity_login);
        loginViewModel = new LoginViewModel();
        //Model → View
        User user = new User("admin", "123456");
        loginViewModel.getUser().setValue(user);
        //Get observation object
        MutableLiveData<User> user1 = loginViewModel.getUser();
        user1.observe(this, user2 -> dataBinding.setViewModel(loginViewModel));

        dataBinding.btnLogin.setOnClickListener(v -> {
            if (loginViewModel.user.getValue().getAccount().isEmpty()) {
                showMsg("Please enter the account number");
                return;
            }
            if (loginViewModel.user.getValue().getPwd().isEmpty()) {
                showMsg("Please input a password");
                return;
            }
            //The record has been logged in
            MVUtils.put(Constant.IS_LOGIN,true);
            showMsg("Login succeeded");
            jumpActivity(MainActivity.class);
        });
    }
}
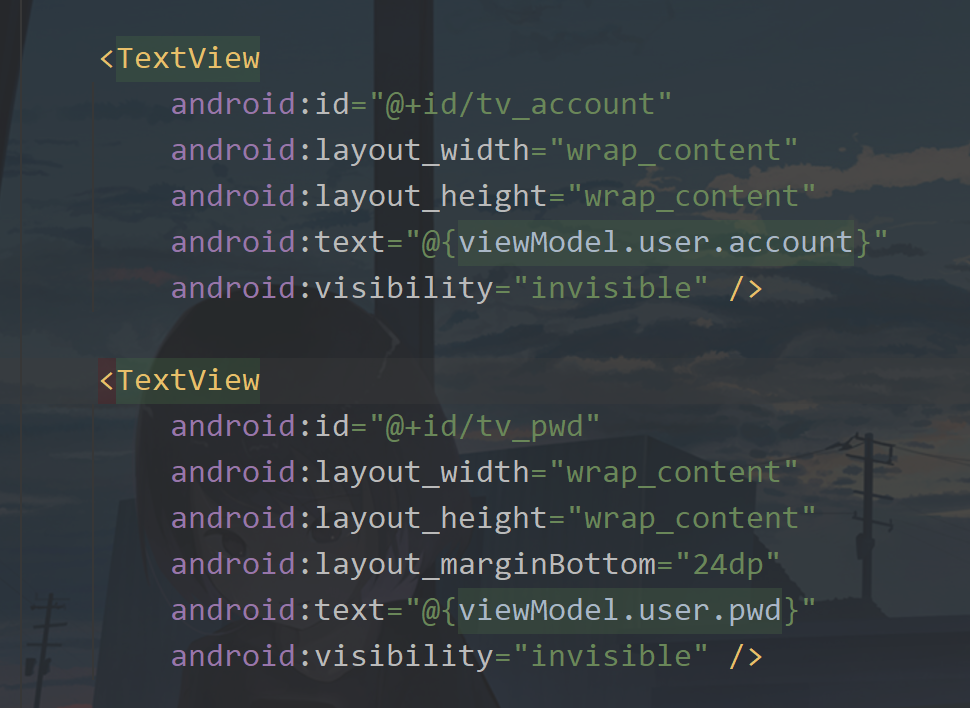
There is nothing to say here, but the method in BaseActivity is used. At the same time, I modified the code in the layout, and I hid the two textviews
At the same time, we modify the bitmap or the default background image before the image display. The two pictures are as follows:


Then a picture displayed when an error occurs in loading a picture:

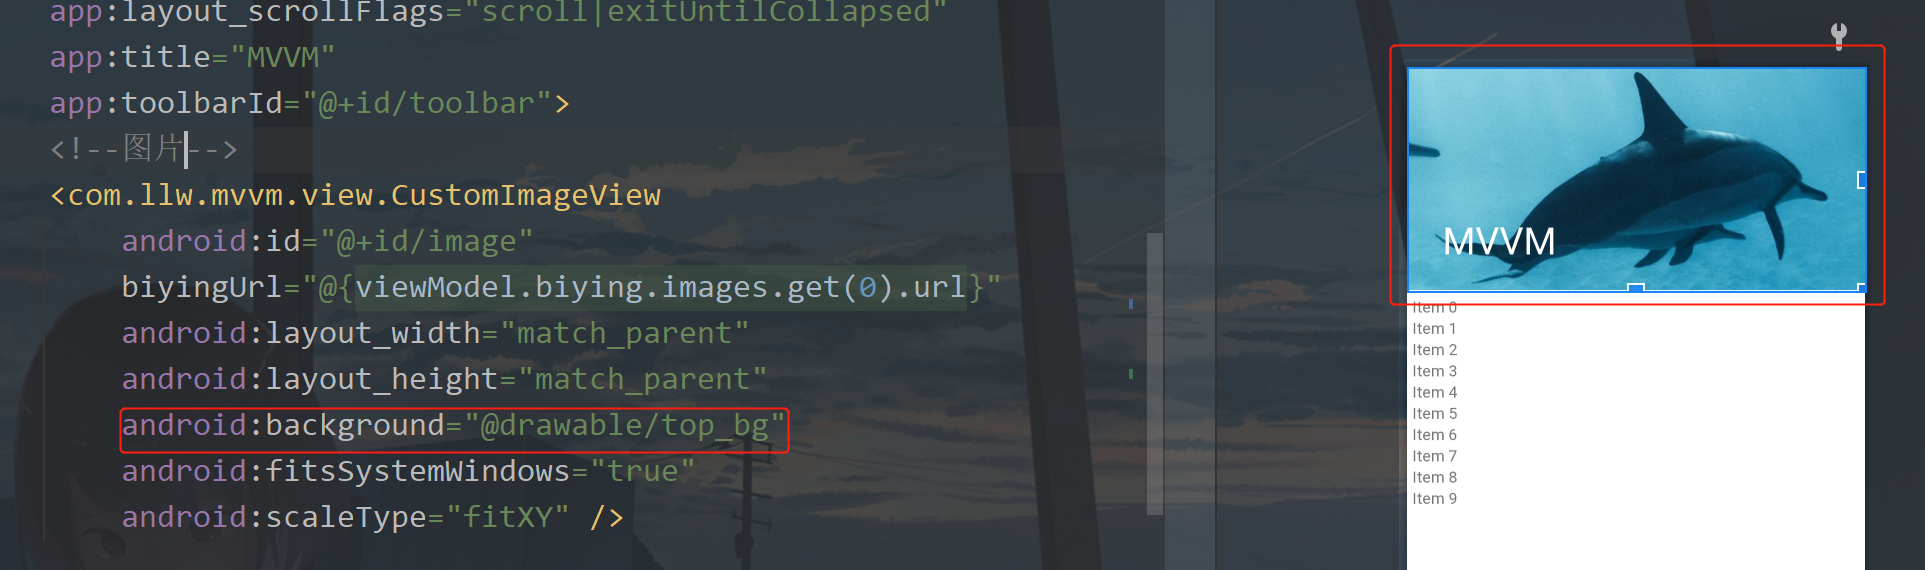
First, in the MainActivity, the position where Bing pictures are displayed. Modify the activity_main.xml
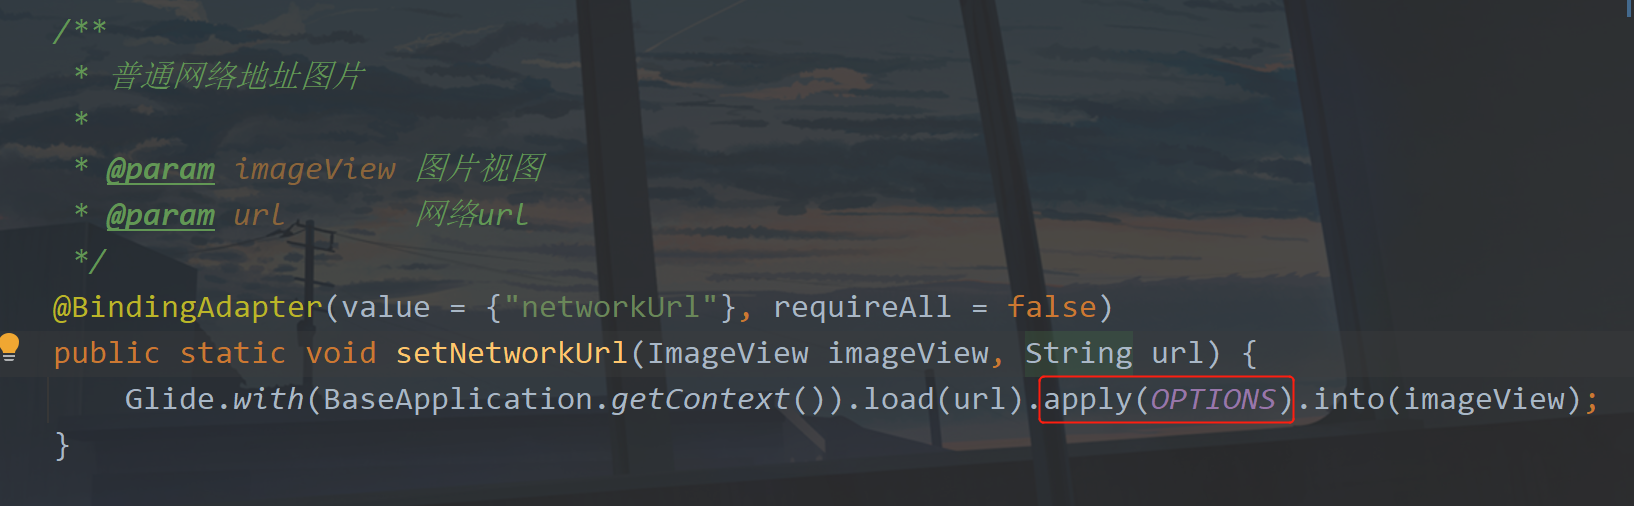
Then open CustomImageView and add the following code:
	private static final RequestOptions OPTIONS = new RequestOptions()
            .placeholder(R.drawable.wallpaper_bg)//The picture displayed before the picture is loaded
            .fallback(R.drawable.wallpaper_bg) //When the url is empty, the image displayed
            .error(R.mipmap.ic_loading_failed);//The picture displayed after the picture failed to load
Configure this value, as shown in the following figure:
Let's run it to see what the effect is.
The effect is OK. Let's enter the code writing of the main page.
5, Main page
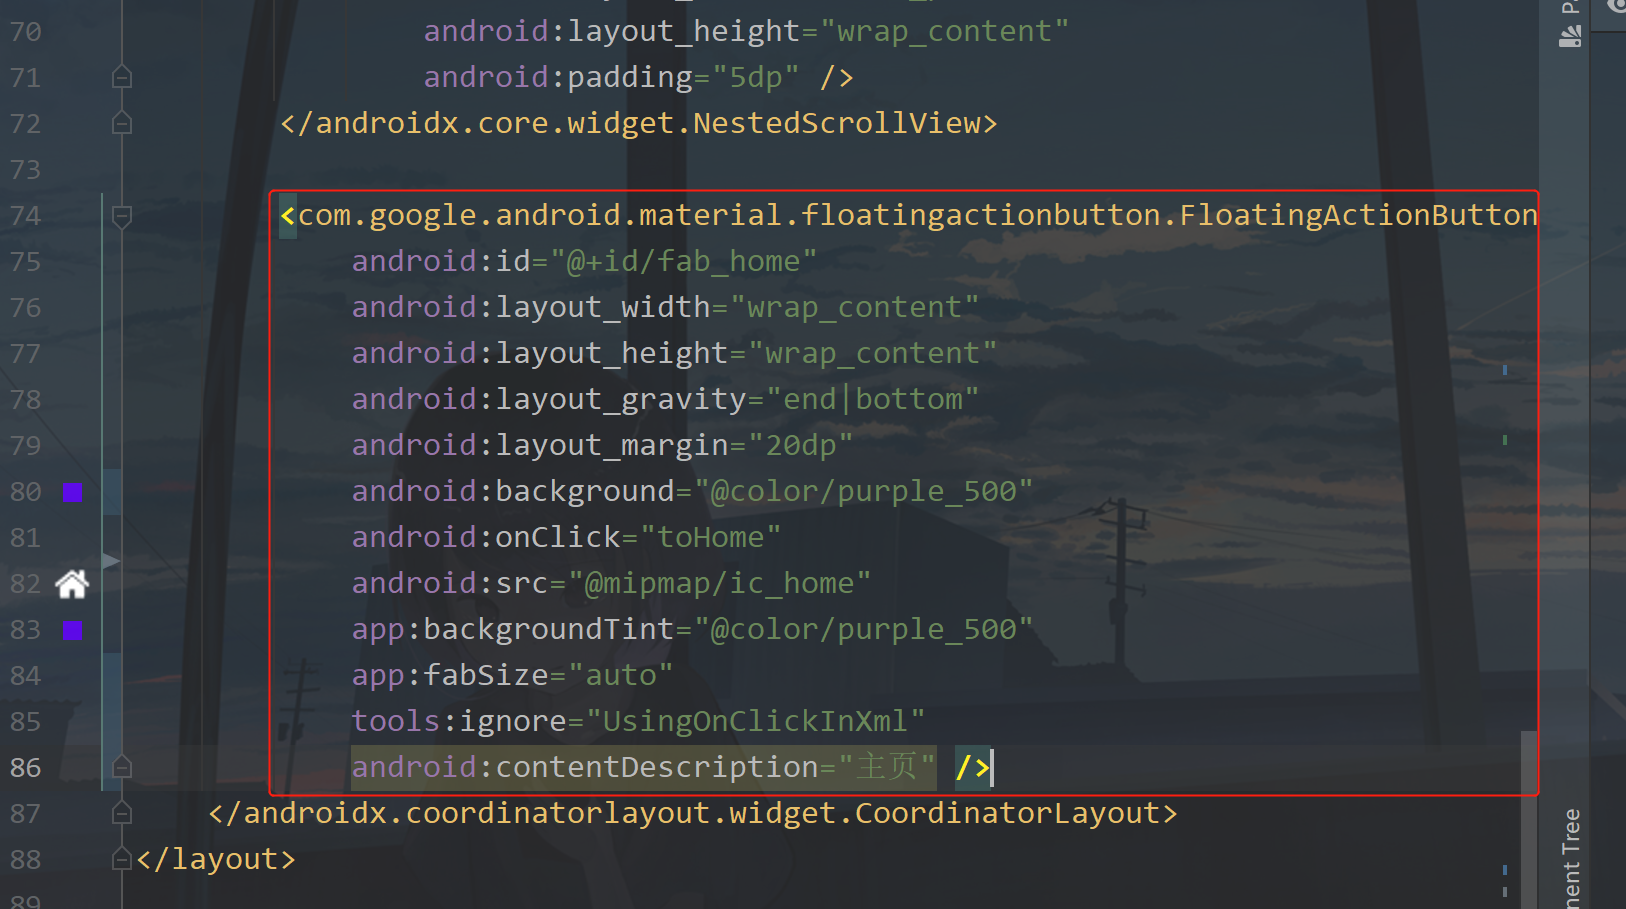
when we get to the daily wallpaper page, we need to provide another entry to enter the next page. The current daily wallpaper page can not be regarded as the real main page, so we write an entry to add a floating button in MainActivity to control the display and disappearance of the button when the page slides up and down. Below is activity_ Add the following layout code to main.xml:
<com.google.android.material.floatingactionbutton.FloatingActionButton
            android:id="@+id/fab_home"
            android:layout_width="wrap_content"
            android:layout_height="wrap_content"
            android:layout_gravity="end|bottom"
            android:layout_margin="20dp"
            android:background="@color/purple_500"
            android:onClick="toHome"
            android:src="@mipmap/ic_home"
            app:backgroundTint="@color/purple_500"
            app:fabSize="auto"
            tools:ignore="UsingOnClickInXml"
            android:contentDescription="homepage" />
The added position is as follows. Just take the icons here in my source code. You can't see the white ones when you put them out.
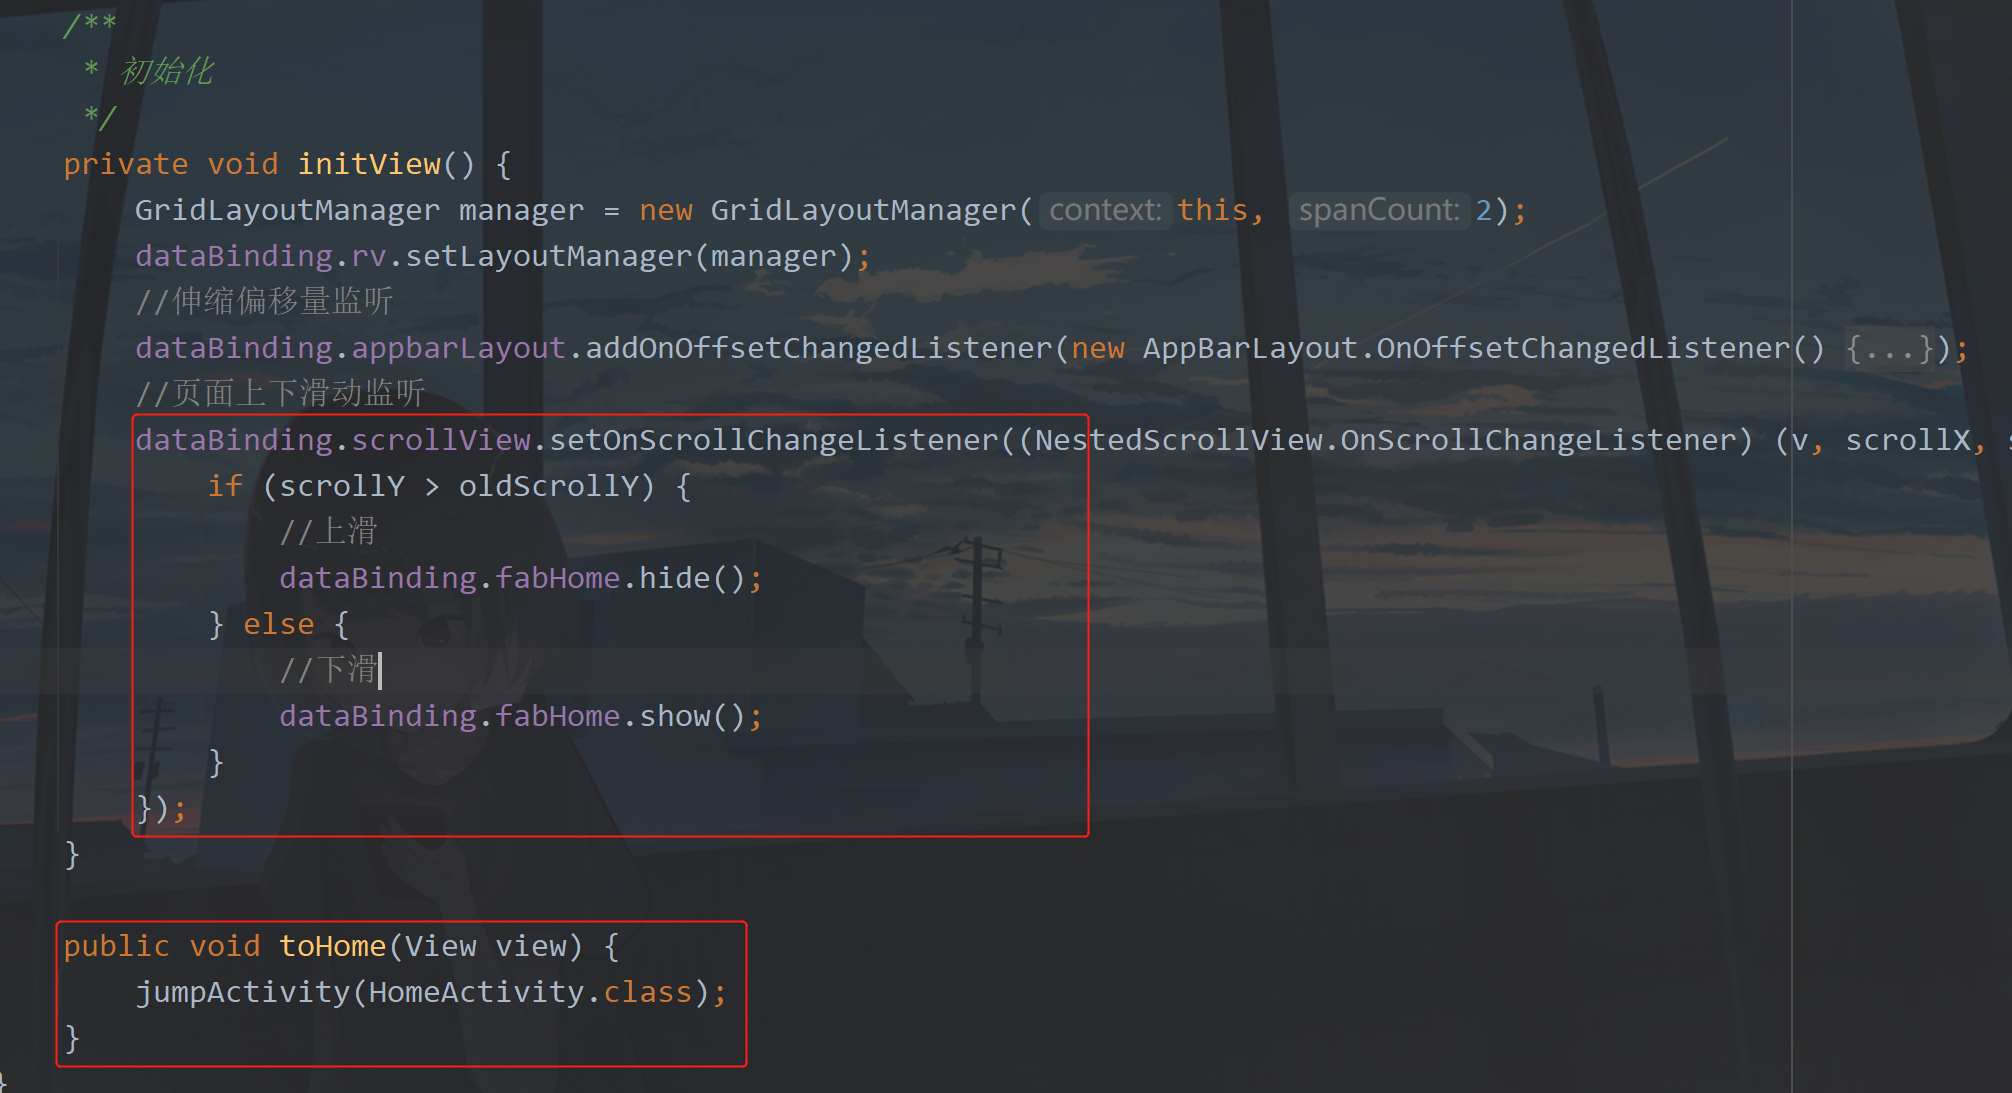
Now go back to MainActivity, inherit BaseActivity, and add the following code in initView method:
		//Slide up and down the page to listen
        dataBinding.scrollView.setOnScrollChangeListener((NestedScrollView.OnScrollChangeListener) (v, scrollX, scrollY, oldScrollX, oldScrollY) -> {
            if (scrollY > oldScrollY) {
                //Slide up
                dataBinding.fabHome.hide();
            } else {
                //slide downward
                dataBinding.fabHome.show();
            }
        });
Then, a method is added to jump to HomeActivity when clicked. We will display fragments in this HomeActivity. Not yet. It will be created below.
	public void toHome(View view) {
        jumpActivity(HomeActivity.class);
    }
The code addition location is shown in the following figure:
Next, create a HomeActivity under the activity package, and the corresponding layout is activity_home.xml, we should make preparations before making changes.
6, Navigation use
create a navigation package under the res package and a NAV package under the package_ Graph.xml, the code inside is as follows:
<?xml version="1.0" encoding="utf-8"?>
<navigation xmlns:android="http://schemas.android.com/apk/res/android"
    xmlns:app="http://schemas.android.com/apk/res-auto"
    xmlns:tools="http://schemas.android.com/tools"
    android:id="@+id/nav_graph"
    app:startDestination="@id/news_fragment">

    <fragment
        android:id="@+id/news_fragment"
        android:name="com.llw.mvvm.ui.fragment.NewsFragment"
        android:label="news_fragment"
        tools:layout="@layout/news_fragment" />
    <fragment
        android:id="@+id/video_fragment"
        android:name="com.llw.mvvm.ui.fragment.VideoFragment"
        android:label="video_fragment"
        tools:layout="@layout/video_fragment" />
</navigation>
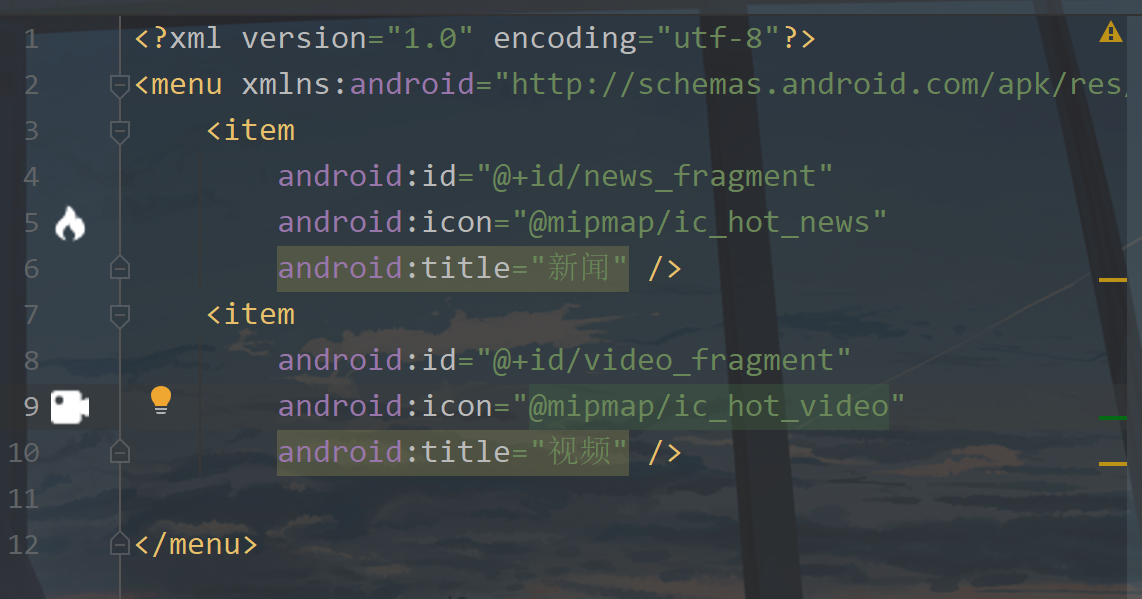
Here is how to configure the Fragment into Navigation. app:startDestination represents the first Fragment displayed. Then this step is completed. The following is another operation, which is to switch fragments by clicking the Navigation bar menu at the bottom. We will create a new menu package under res and a Navigation package under the package_ Menu.xml, the code inside is as follows:
<?xml version="1.0" encoding="utf-8"?>
<menu xmlns:android="http://schemas.android.com/apk/res/android">
    <item
        android:id="@+id/news_fragment"
        android:icon="@mipmap/ic_hot_news"
        android:title="Journalism" />
    <item
        android:id="@+id/video_fragment"
        android:icon="@mipmap/ic_hot_video"
        android:title="video" />

</menu>
Here are two icons, also white.
Let's go back to activity_ In home.xml, the code is as follows:
<?xml version="1.0" encoding="utf-8"?>
<layout xmlns:android="http://schemas.android.com/apk/res/android"
    xmlns:app="http://schemas.android.com/apk/res-auto"
    xmlns:tools="http://schemas.android.com/tools">

    <RelativeLayout
        android:layout_width="match_parent"
        android:layout_height="match_parent"
        tools:context=".ui.activity.HomeActivity">

        <com.google.android.material.appbar.MaterialToolbar
            android:id="@+id/toolbar"
            android:layout_width="match_parent"
            android:layout_height="?attr/actionBarSize"
            android:background="@color/purple_500">

            <TextView
                android:id="@+id/tv_title"
                android:layout_width="wrap_content"
                android:layout_height="wrap_content"
                android:layout_gravity="center"
                android:text="Headlines"
                android:textColor="@color/white"
                android:textSize="18sp"
                android:textStyle="bold" />
        </com.google.android.material.appbar.MaterialToolbar>
        <!--NavHost-->
        <fragment
            android:id="@+id/nav_host_fragment"
            android:name="androidx.navigation.fragment.NavHostFragment"
            android:layout_width="match_parent"
            android:layout_height="match_parent"
            android:layout_above="@+id/bottom_navigation"
            android:layout_below="@+id/toolbar"
            app:navGraph="@navigation/nav_graph" />

        <!--Bottom navigation-->
        <com.google.android.material.bottomnavigation.BottomNavigationView
            android:id="@+id/bottom_navigation"
            android:layout_width="match_parent"
            android:layout_height="?attr/actionBarSize"
            android:layout_alignParentBottom="true"
            android:background="#FFF"
            app:menu="@menu/navigation_menu" />

    </RelativeLayout>
</layout>
There are three parts here. One is the title bar, the other is the container for loading fragments, and the other is to control Fragment switching.
Let's go to the HomeActivity page and modify the code as follows:
public class HomeActivity extends BaseActivity {

    private ActivityHomeBinding binding;

    @Override
    protected void onCreate(Bundle savedInstanceState) {
        super.onCreate(savedInstanceState);
        binding = DataBindingUtil.setContentView(this, R.layout.activity_home);

        initView();
    }

    /**
     * initialization
     */
    private void initView() {
        //Get navController
        NavController navController = Navigation.findNavController(this, R.id.nav_host_fragment);
        binding.bottomNavigation.setOnNavigationItemSelectedListener(item -> {
            switch (item.getItemId()) {
                case R.id.news_fragment:
                    binding.tvTitle.setText("Headlines");
                    navController.navigate(R.id.news_fragment);
                    break;
                case R.id.video_fragment:
                    binding.tvTitle.setText("Popular videos");
                    navController.navigate(R.id.video_fragment);
                    break;
                default:
            }
            return true;
        });
    }
}
Next, create a BaseFragment under the fragment package. The code inside is as follows:
public class BaseFragment extends Fragment {

    protected AppCompatActivity context;

    @Override
    public View onCreateView(@NonNull @NotNull LayoutInflater inflater, @Nullable ViewGroup container, @Nullable Bundle savedInstanceState) {
        return super.onCreateView(inflater, container, savedInstanceState);
    }

    @Override
    public void onViewCreated(@NonNull @NotNull View view, @Nullable Bundle savedInstanceState) {
        super.onViewCreated(view, savedInstanceState);
    }

    @Override
    public void onAttach(@NonNull @NotNull Context context) {
        super.onAttach(context);
        if(context instanceof AppCompatActivity){
            this.context = (AppCompatActivity) context;
        }
    }

    @Override
    public void onDetach() {
        super.onDetach();
        context = null;
    }

    protected void showMsg(String msg) {
        Toast.makeText(context, msg, Toast.LENGTH_SHORT).show();
    }


}
Then modify the code in NewsFragment:
public class NewsFragment extends BaseFragment {

    private NewsFragmentBinding binding;

    public static NewsFragment newInstance() {
        return new NewsFragment();
    }

    @Override
    public View onCreateView(@NonNull LayoutInflater inflater, @Nullable ViewGroup container,
                             @Nullable Bundle savedInstanceState) {
        binding = DataBindingUtil.inflate(inflater, R.layout.news_fragment, container, false);
        return binding.getRoot();
    }

    @Override
    public void onActivityCreated(@Nullable Bundle savedInstanceState) {
        super.onActivityCreated(savedInstanceState);

        NewsViewModel mViewModel = new ViewModelProvider(this).get(NewsViewModel.class);

    }

}
Modify the code of VideoFragment:
public class VideoFragment extends BaseFragment {

    private VideoFragmentBinding binding;

    public static VideoFragment newInstance() {
        return new VideoFragment();
    }

    @Override
    public View onCreateView(@NonNull LayoutInflater inflater, @Nullable ViewGroup container,
                             @Nullable Bundle savedInstanceState) {
        binding = DataBindingUtil.inflate(inflater, R.layout.video_fragment, container, false);
        return binding.getRoot();
    }

    @Override
    public void onActivityCreated(@Nullable Bundle savedInstanceState) {
        super.onActivityCreated(savedInstanceState);
        VideoViewModel mViewModel = new ViewModelProvider(this).get(VideoViewModel.class);

    }

}
Here, when we click the bottom navigation bar, we switch Fragment and change the text of the title bar. Let's run it.
For detailed instructions, see this article: Android Navigation + Fragment making APP homepage navigation (steps + source code) , you may know more after reading it.
7, Aggregate data request
here we use aggregated API data, Aggregation API , click enter to complete registration and login, and then you can apply for data API.
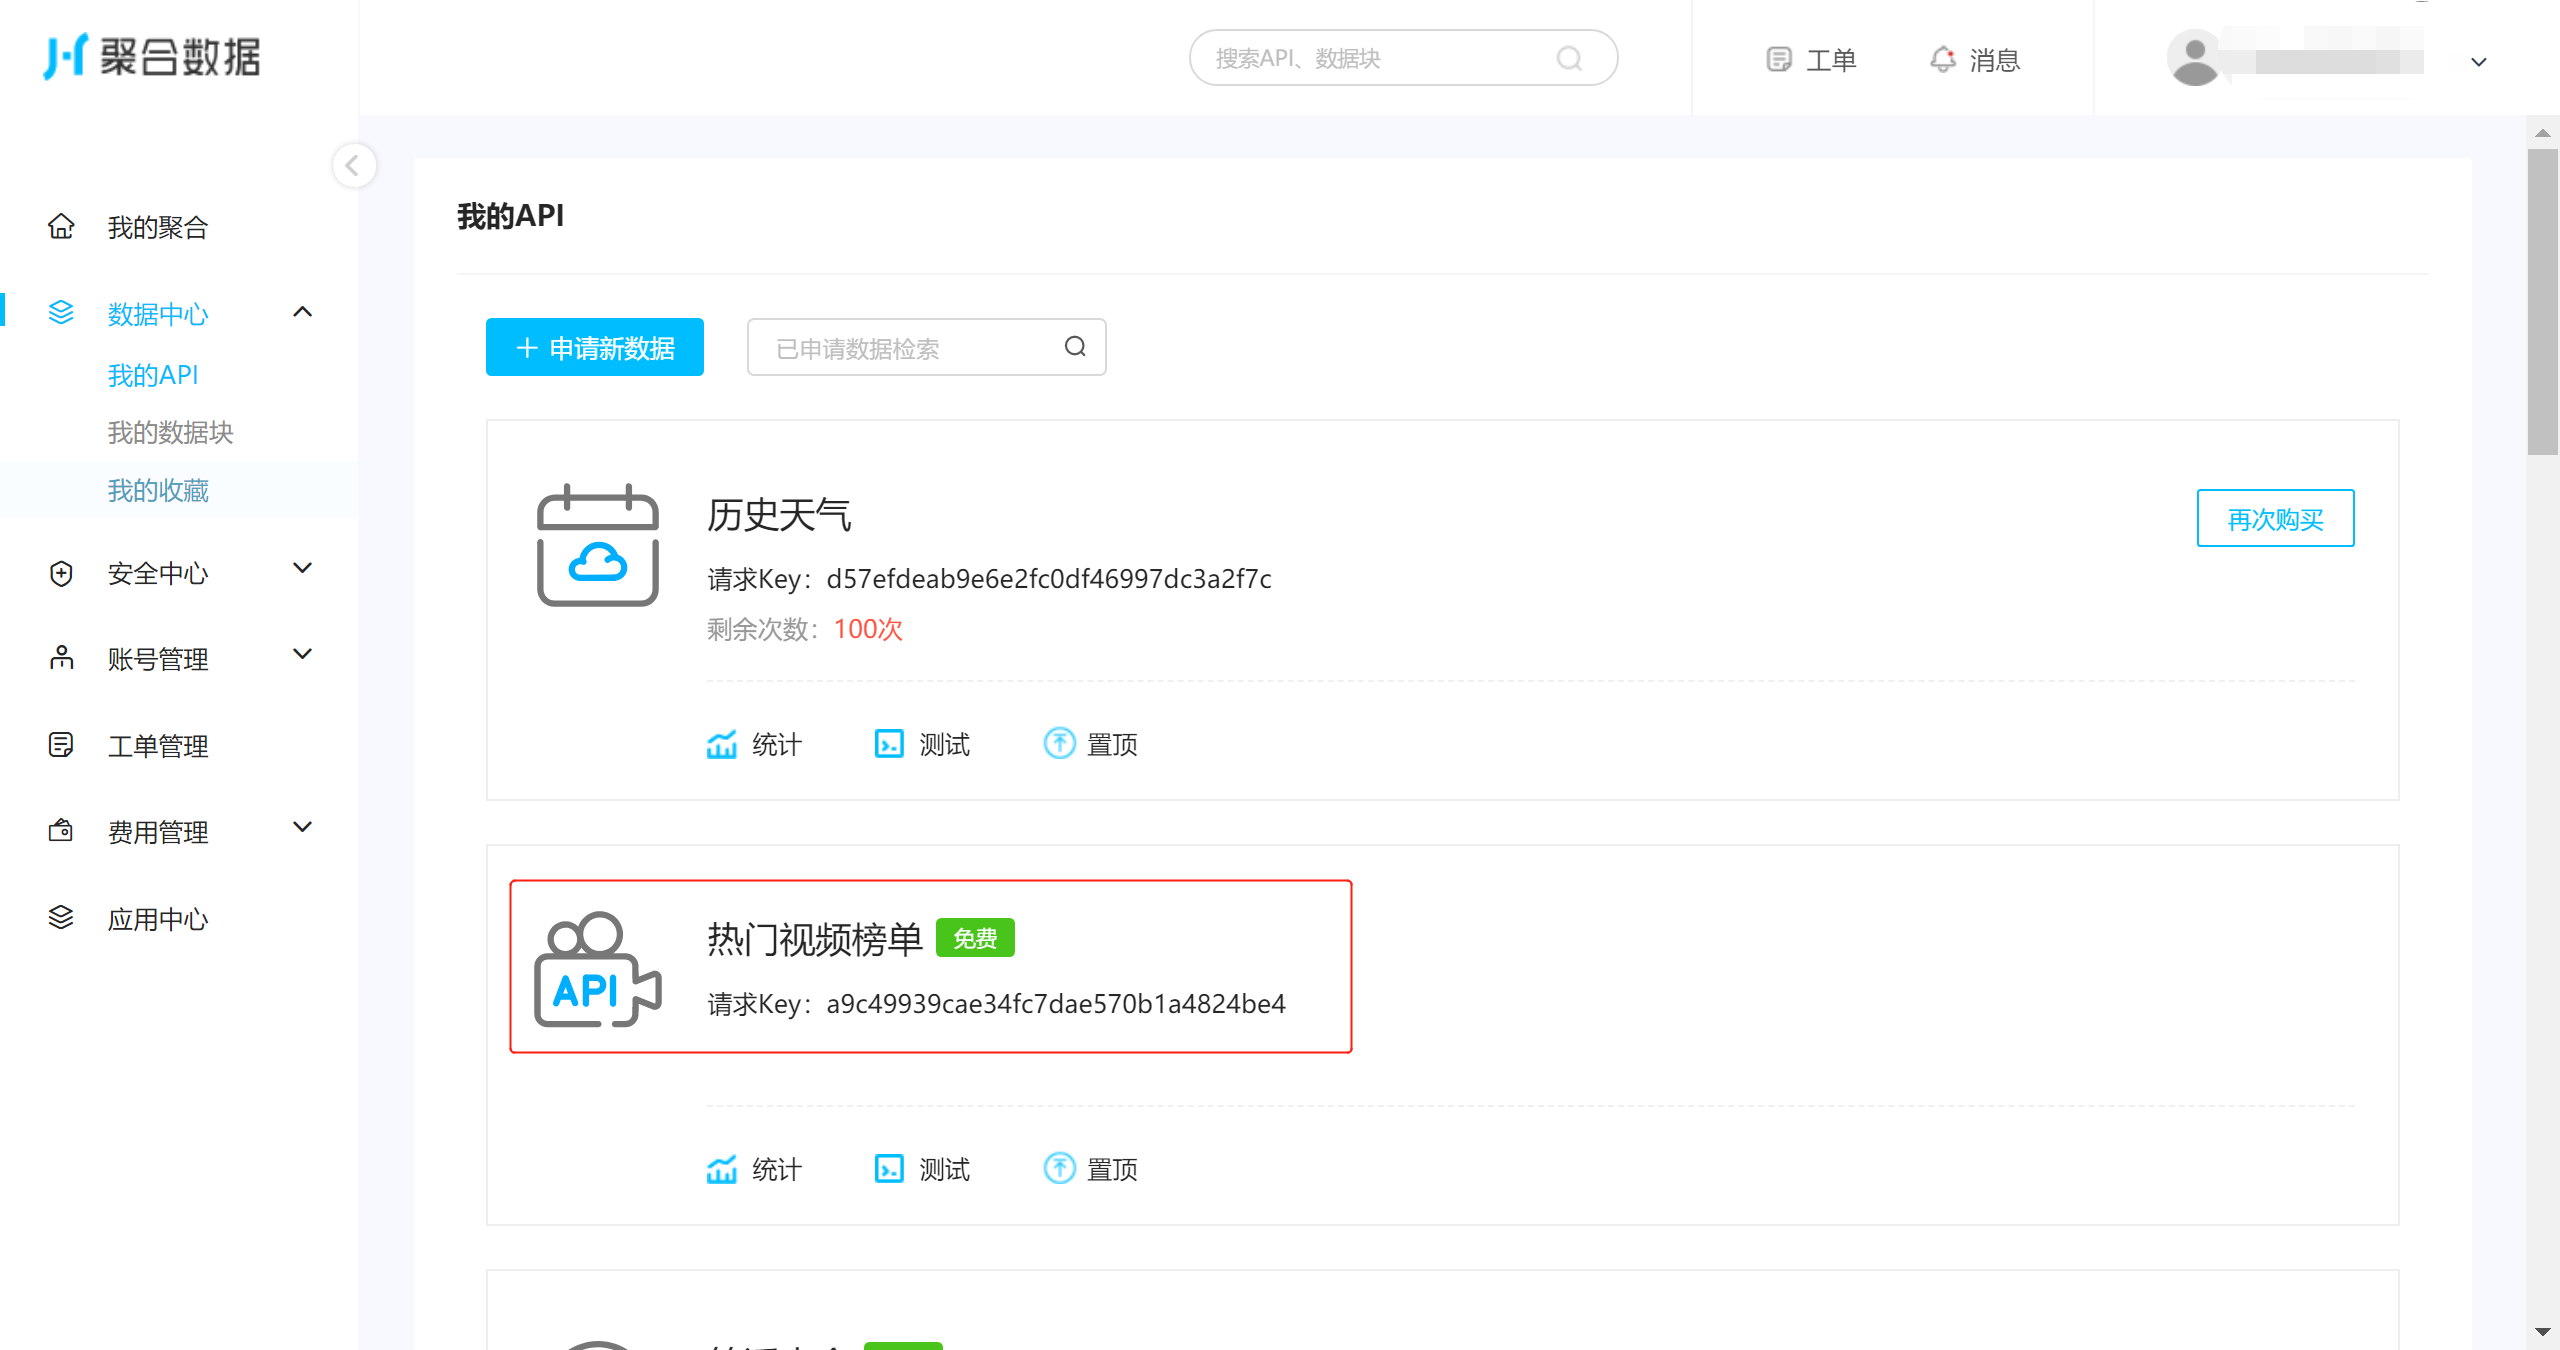
To apply for a free API, there are 100 requests a day, so we can request the data once and save it to the local database.
① NetworkApi
The interfaces of the two API s have different addresses. Modify the setUrlType method in NetworkApi.
	private static void setUrlType(int type) {
        switch (type) {
            case 0:
                //Bing
                BASE_URL = "https://cn.bing.com";
                break;
            case 1:
                //Popular wallpaper
                BASE_URL = "http://service.picasso.adesk.com";
                break;
            case 2:
                //Aggregate API 1
                BASE_URL = "http://v.juhe.cn";
                break;
            case 3:
                //Aggregation API 2
                BASE_URL = "http://apis.juhe.cn";
                break;
            default:
                break;
        }
    }
The two interfaces here are used to request news data and video data respectively.
② ApiService
add two interfaces in ApiService, and the code is as follows:
/**
* Aggregate news data
*/
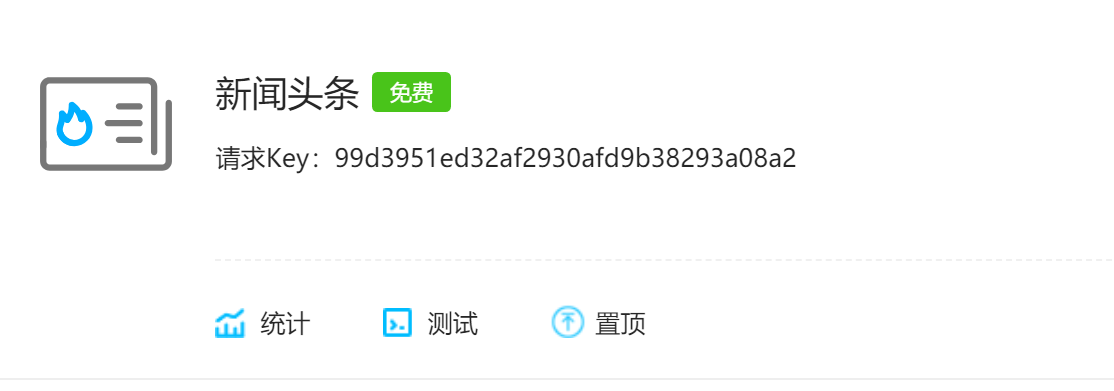
@GET("/toutiao/index?type=&page=&page_size=&is_filter=&key=99d3951ed32af2930afd9b38293a08a2")
Observable<NewsResponse> news();
/**
* Aggregate popular video data
*/
@GET("/fapig/douyin/billboard?type=hot_video&size=20&key=a9c49939cae34fc7dae570b1a4824be4")
Observable<VideoResponse> video();
In this case, we also need to upgrade the database. This time, we add two tables.
③ Database upgrade
first, create two entities under the bean package, News and Video. The contents are made according to the data returned by the interface. The code in News is as follows:
@Entity(tableName = "news")
public class News {
    @PrimaryKey(autoGenerate = true)
    private int uid;
    private String uniquekey;
    private String title;
    private String date;
    private String category;
    private String author_name;
    private String url;
    private String thumbnail_pic_s;
    private String is_content;

    public int getUid() {
        return uid;
    }

    public void setUid(int uid) {
        this.uid = uid;
    }

    public String getUniquekey() {
        return uniquekey;
    }

    public void setUniquekey(String uniquekey) {
        this.uniquekey = uniquekey;
    }

    public String getTitle() {
        return title;
    }

    public void setTitle(String title) {
        this.title = title;
    }

    public String getDate() {
        return date;
    }

    public void setDate(String date) {
        this.date = date;
    }

    public String getCategory() {
        return category;
    }

    public void setCategory(String category) {
        this.category = category;
    }

    public String getAuthor_name() {
        return author_name;
    }

    public void setAuthor_name(String author_name) {
        this.author_name = author_name;
    }

    public String getUrl() {
        return url;
    }

    public void setUrl(String url) {
        this.url = url;
    }

    public String getThumbnail_pic_s() {
        return thumbnail_pic_s;
    }

    public void setThumbnail_pic_s(String thumbnail_pic_s) {
        this.thumbnail_pic_s = thumbnail_pic_s;
    }

    public String getIs_content() {
        return is_content;
    }

    public void setIs_content(String is_content) {
        this.is_content = is_content;
    }

    public News() {}

    @Ignore
    public News(String uniquekey, String title, String date, String category, String author_name, String url, String thumbnail_pic_s, String is_content) {
        this.uniquekey = uniquekey;
        this.title = title;
        this.date = date;
        this.category = category;
        this.author_name = author_name;
        this.url = url;
        this.thumbnail_pic_s = thumbnail_pic_s;
        this.is_content = is_content;
    }
}
The code of Video is as follows:
@Entity(tableName = "video")
public class Video {
    @PrimaryKey(autoGenerate = true)
    private int uid;
    private String title;
    private String share_url;
    private String author;
    private String item_cover;
    private String hot_words;

    public int getUid() {
        return uid;
    }

    public void setUid(int uid) {
        this.uid = uid;
    }

    public String getTitle() {
        return title;
    }

    public void setTitle(String title) {
        this.title = title;
    }

    public String getShare_url() {
        return share_url;
    }

    public void setShare_url(String share_url) {
        this.share_url = share_url;
    }

    public String getAuthor() {
        return author;
    }

    public void setAuthor(String author) {
        this.author = author;
    }

    public String getItem_cover() {
        return item_cover;
    }

    public void setItem_cover(String item_cover) {
        this.item_cover = item_cover;
    }

    public String getHot_words() {
        return hot_words;
    }

    public void setHot_words(String hot_words) {
        this.hot_words = hot_words;
    }

    @Ignore
    public Video(String title, String share_url, String author, String item_cover, String hot_words) {
        this.title = title;
        this.share_url = share_url;
        this.author = author;
        this.item_cover = item_cover;
        this.hot_words = hot_words;
    }

    public Video() {}
}
Next is Dao class. Create a new interface between NewsDao and VideoDao under Dao package. The NewsDao code is as follows:
@Dao
public interface NewsDao {

    @Query("SELECT * FROM news")
    Flowable<List<News>> getAll();

    @Insert(onConflict = OnConflictStrategy.REPLACE)
    Completable insertAll(List<News> news);

    @Query("DELETE FROM news")
    Completable deleteAll();
}
VideoDao code is as follows:
@Dao
public interface VideoDao {

    @Query("SELECT * FROM video")
    Flowable<List<Video>> getAll();

    @Insert(onConflict = OnConflictStrategy.REPLACE)
    Completable insertAll(List<Video> videos);

    @Query("DELETE FROM video")
    Completable deleteAll();
}
Finally, we enter the AppDatabase, upgrade and migrate the database, and add the following code in the AppDatabase:
	/**
     * Version upgrade and migrate to 3 new news tables and video tables
     */
    static final Migration MIGRATION_2_3 = new Migration(2, 3) {
        @Override
        public void migrate(SupportSQLiteDatabase database) {
            //Create a news table
            database.execSQL("CREATE TABLE `news` " +
                    "(uid INTEGER NOT NULL, " +
                    "uniquekey TEXT, " +
                    "title TEXT, " +
                    "date TEXT," +
                    "category TEXT," +
                    "author_name TEXT," +
                    "url TEXT," +
                    "thumbnail_pic_s TEXT," +
                    "is_content TEXT," +
                    "PRIMARY KEY(`uid`))");
            //Create video table
            database.execSQL("CREATE TABLE `video` " +
                    "(uid INTEGER NOT NULL, " +
                    "title TEXT," +
                    "share_url TEXT," +
                    "author TEXT," +
                    "item_cover TEXT," +
                    "hot_words TEXT," +
                    "PRIMARY KEY(`uid`))");
        }
    };
Then add two more abstract methods, namely, the previous two data operation classes. After we write this, we will implement the interfaces in these two abstract classes through Room's compile time technology, and we don't need to manage it.
	public abstract NewsDao newsDao();

    public abstract VideoDao videoDao();
The following is the upgrade of the database, as shown in the following figure:
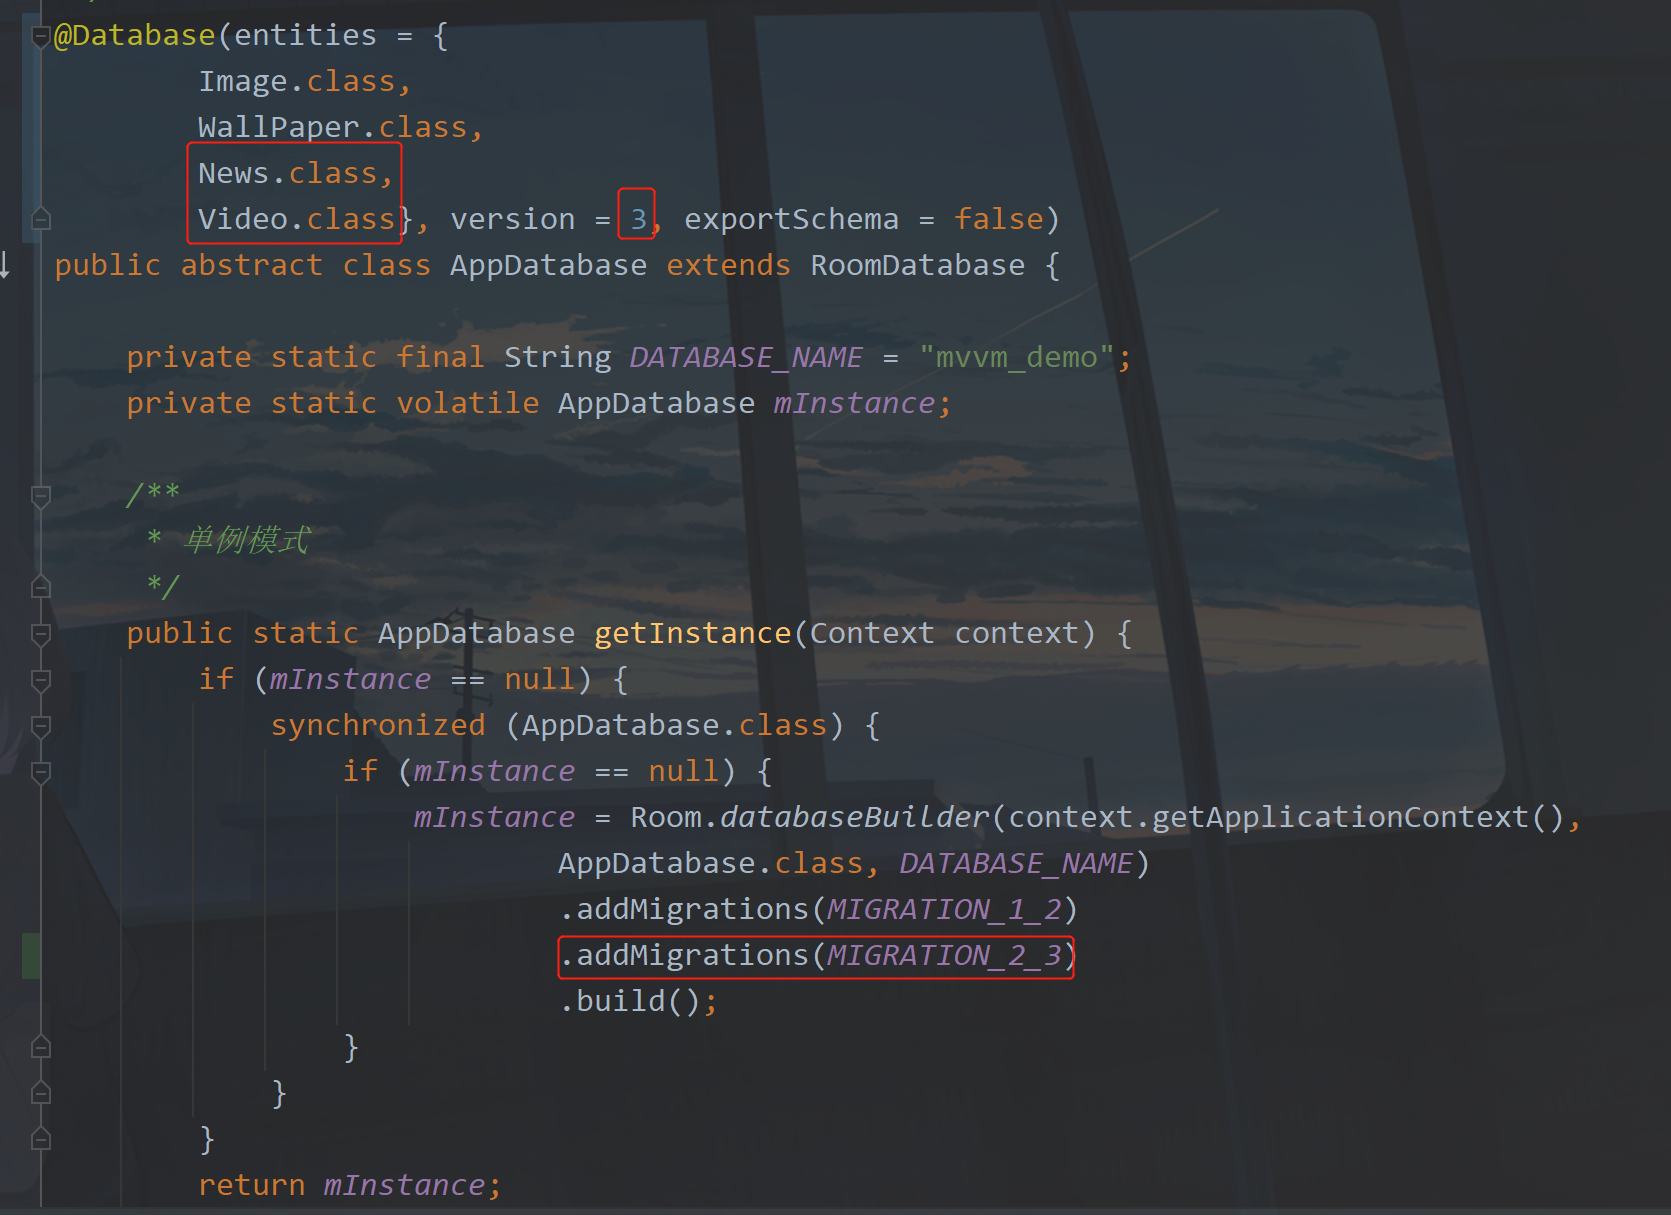
Pay attention to the places I marked. If there is one less, the upgrade will not succeed, or your direct compilation will not succeed, or the program will flash back.
Now that we have a database, the next thing to do is to and save the data.
④ Data repository
the following is the repository. We create two classes newsrsrepository and VideoRepository under the repository package. Then, in order to facilitate the management of data request methods, we also need to add several constants in Constant to save whether there are requests for network interface data on that day. Add the following code in Constant:
	/**
     * Is aggregate news data requested today
     */
    public static final String IS_TODAY_REQUEST_NEWS = "isTodayRequestNews";

    /**
     * Timestamp of today's request to aggregate news data
     */
    public static final String REQUEST_TIMESTAMP_NEWS = "newsRequestTimestamp";

    /**
     * Is aggregate video data requested today
     */
    public static final String IS_TODAY_REQUEST_VIDEO = "isTodayRequestVideo";

    /**
     * Timestamp of today's request to aggregate video data
     */
    public static final String REQUEST_TIMESTAMP_VIDEO = "videoRequestTimestamp";
Then we will edit the code of NewsRepository:
@SuppressLint("CheckResult")
public class NewsRepository {

    private static final String TAG = NewsRepository.class.getSimpleName();
    final MutableLiveData<NewsResponse> news = new MutableLiveData<>();

    public final MutableLiveData<String> failed = new MutableLiveData<>();

    /**
     * Get news data
     * @return news
     */
    public MutableLiveData<NewsResponse> getNews() {
        //Has this interface been requested today
        if (MVUtils.getBoolean(Constant.IS_TODAY_REQUEST_NEWS)) {
            if (DateUtil.getTimestamp() <= MVUtils.getLong(Constant.REQUEST_TIMESTAMP_NEWS)) {
                getNewsForLocalDB();
            } else {
                getNewsForNetwork();
            }
        } else {
            getNewsForNetwork();
        }
        return news;
    }

    /**
     * Get news from local database
     */
    private void getNewsForLocalDB() {
        Log.d(TAG, "getNewsForLocalDB: Get news data from local database");
        NewsResponse newsResponse = new NewsResponse();
        NewsResponse.ResultBean resultBean = new NewsResponse.ResultBean();

        List<NewsResponse.ResultBean.DataBean> dataBeanList = new ArrayList<>();
        Flowable<List<News>> listFlowable = BaseApplication.getDb().newsDao().getAll();
        CustomDisposable.addDisposable(listFlowable, newss -> {
            for (News news1 : newss) {
                NewsResponse.ResultBean.DataBean dataBean = new NewsResponse.ResultBean.DataBean();
                dataBean.setUniquekey(news1.getUniquekey());
                dataBean.setTitle(news1.getTitle());
                dataBean.setDate(news1.getDate());
                dataBean.setAuthor_name(news1.getAuthor_name());
                dataBean.setCategory(news1.getCategory());
                dataBean.setThumbnail_pic_s(news1.getThumbnail_pic_s());
                dataBean.setIs_content(news1.getIs_content());
                dataBeanList.add(dataBean);
            }
            resultBean.setData(dataBeanList);
            newsResponse.setResult(resultBean);
            news.postValue(newsResponse);
        });
    }

    /**
     * Get wallpaper data from the network
     */
    private void getNewsForNetwork() {
        Log.d(TAG, "getNewsForNetwork: Get popular wallpapers from the web");
        NetworkApi.createService(ApiService.class, 2).
                news().compose(NetworkApi.applySchedulers(new BaseObserver<NewsResponse>() {
            @Override
            public void onSuccess(NewsResponse newsResponse) {
                if (newsResponse.getError_code() == 0) {
                    //Save local data
                    saveNews(newsResponse);
                    news.setValue(newsResponse);
                } else {
                    failed.postValue(newsResponse.getReason());
                }
            }

            @Override
            public void onFailure(Throwable e) {
                failed.postValue("News Error: " + e.toString());
            }
        }));
    }

    /**
     * Save popular wallpaper data
     */
    private void saveNews(NewsResponse newsResponse) {
        MVUtils.put(Constant.IS_TODAY_REQUEST_NEWS, true);
        MVUtils.put(Constant.REQUEST_TIMESTAMP_NEWS, DateUtil.getMillisNextEarlyMorning());

        Completable deleteAll = BaseApplication.getDb().newsDao().deleteAll();
        CustomDisposable.addDisposable(deleteAll, () -> {
            Log.d(TAG, "saveNews: Data deleted successfully");
            List<News> newsList = new ArrayList<>();
            for (NewsResponse.ResultBean.DataBean dataBean : newsResponse.getResult().getData()) {
                newsList.add(new News(dataBean.getUniquekey(),dataBean.getTitle(),dataBean.getDate(),dataBean.getCategory(),
                        dataBean.getAuthor_name(),dataBean.getUrl(),dataBean.getThumbnail_pic_s(),dataBean.getIs_content()));
            }
            //Save to database
            Completable insertAll = BaseApplication.getDb().newsDao().insertAll(newsList);
            Log.d(TAG, "saveNews: Insert data:" + newsList.size() + "strip");
            //RxJava handles Room data storage
            CustomDisposable.addDisposable(insertAll, () -> Log.d(TAG, "saveNews: News data saved successfully"));
        });
    }
}
the code here is similar to the code in the previous WallPaperRepository. It is basically the same in logic, except that there are different interfaces and different data tables. Colleague, I added a LiveData of exception information in the current Repository, because you may need many situations to request the interface. You can obtain data at the most ideal time, but there are other situations, For example, the interface address is wrong, the data returned by the request is empty, and the number of requests reaches the upper limit. Therefore, it is necessary to handle the exception information, and then transfer it to the ViewModel. Finally, observe the exception in the Activity and notify the page in time. Otherwise, I just print the log, and the user can't see it.
The code of VideoRepository is as follows:
@SuppressLint("CheckResult")
public class VideoRepository {

    public static final String TAG = VideoRepository.class.getSimpleName();

    final MutableLiveData<VideoResponse> video = new MutableLiveData<>();

    public final MutableLiveData<String> failed = new MutableLiveData<>();

    /**
     * Get video data
     * @return video
     */
    public MutableLiveData<VideoResponse> getVideo() {
        //Has this interface been requested today
        if (MVUtils.getBoolean(Constant.IS_TODAY_REQUEST_VIDEO)) {
            if (DateUtil.getTimestamp() <= MVUtils.getLong(Constant.REQUEST_TIMESTAMP_VIDEO)) {
                getVideoForLocalDB();
            } else {
                getVideoForNetwork();
            }
        } else {
            getVideoForNetwork();
        }
        return video;
    }

    /**
     * Get news from local database
     */
    private void getVideoForLocalDB() {
        Log.d(TAG, "getVideoForLocalDB: Get video data from local database");
        VideoResponse videoResponse = new VideoResponse();

        List<VideoResponse.ResultBean> dataBeanList = new ArrayList<>();
        Flowable<List<Video>> listFlowable = BaseApplication.getDb().videoDao().getAll();
        CustomDisposable.addDisposable(listFlowable, videos -> {
            for (Video video : videos) {
                VideoResponse.ResultBean resultBean = new VideoResponse.ResultBean();
                resultBean.setTitle(video.getTitle());
                resultBean.setShare_url(video.getShare_url());
                resultBean.setAuthor(video.getAuthor());
                resultBean.setHot_words(video.getHot_words());
                resultBean.setItem_cover(video.getItem_cover());
                dataBeanList.add(resultBean);
            }
            videoResponse.setResult(dataBeanList);
            video.postValue(videoResponse);
        });
    }

    /**
     * Get wallpaper data from the network
     */
    private void getVideoForNetwork() {
        Log.d(TAG, "getVideoForNetwork: Get popular wallpapers from the web");
        NetworkApi.createService(ApiService.class, 3)
                .video().compose(NetworkApi.applySchedulers(new BaseObserver<VideoResponse>() {
            @Override
            public void onSuccess(VideoResponse videoResponse) {
                if (videoResponse.getError_code() == 0) {
                    //Save local data
                    saveVideo(videoResponse);
                    video.postValue(videoResponse);
                } else {
                    failed.postValue(videoResponse.getReason());
                }
            }

            @Override
            public void onFailure(Throwable e) {
                failed.postValue("Video Error: " + e.toString());
            }
        }));
    }

    /**
     * Save popular wallpaper data
     */
    private void saveVideo(VideoResponse videoResponse) {
        MVUtils.put(Constant.IS_TODAY_REQUEST_VIDEO, true);
        MVUtils.put(Constant.REQUEST_TIMESTAMP_VIDEO, DateUtil.getMillisNextEarlyMorning());

        Completable deleteAll = BaseApplication.getDb().videoDao().deleteAll();
        CustomDisposable.addDisposable(deleteAll, () -> {
            Log.d(TAG, "saveVideo: Data deleted successfully");
            List<Video> videoList = new ArrayList<>();
            for (VideoResponse.ResultBean resultBean : videoResponse.getResult()) {
                videoList.add(new Video(resultBean.getTitle(),resultBean.getShare_url(),resultBean.getAuthor(),
                        resultBean.getItem_cover(), resultBean.getHot_words()));
            }
            //Save to database
            Completable insertAll = BaseApplication.getDb().videoDao().insertAll(videoList);
            Log.d(TAG, "saveVideo: Insert data:" + videoList.size() + "strip");
            //RxJava handles Room data storage
            CustomDisposable.addDisposable(insertAll, () -> Log.d(TAG, "saveVideo: Video data saved successfully"));
        });
    }
}
The code is similar. If we have a failed in each ViewModel, we can define a basic ViewModel, and then all viewmodels inherit it, which will be better.
⑤ BaseViewModel
create a BaseViewModel under the viewmodels package. The code inside is as follows:
public class BaseViewModel extends ViewModel {

    public LiveData<String> failed;
}
Oh, that's all the code? Yes, that's all for now. You can add it later according to the actual needs. Don't worry. Let's modify the code in NewsViewModel as follows:
public class NewsViewModel extends BaseViewModel {

    public LiveData<NewsResponse> news;

    public void getNews() {
        NewsRepository newsRepository = new NewsRepository();
        failed = newsRepository.failed;
        news = newsRepository.getNews();
    }
}
Then modify the code of VideoViewModel:
public class VideoViewModel extends BaseViewModel {

    public LiveData<VideoResponse> video;

    public void getVideo() {
        VideoRepository videoRepository = new VideoRepository();
        failed = videoRepository.failed;
        video = videoRepository.getVideo();
    }
}
In addition, other viewmodels are also modified in this way. I won't paste the code again. If I don't understand it, just look at the source code and change it.
8, News and video data display
so much has been done before. The most important thing is to display the data on the Fragment. Next, we write two adapters and two xml files.
Next, create an XML file and create an item under layout_ The code in the news.xml file is as follows:
① item layout
<?xml version="1.0" encoding="utf-8"?>
<layout xmlns:android="http://schemas.android.com/apk/res/android"
    xmlns:app="http://schemas.android.com/apk/res-auto"
    xmlns:tools="http://schemas.android.com/tools">

    <data>

        <variable
            name="news"
            type="com.llw.mvvm.model.NewsResponse.ResultBean.DataBean" />
    </data>

    <RelativeLayout
        android:background="@color/white"
        android:layout_width="match_parent"
        android:layout_height="wrap_content"
        android:paddingStart="12dp"
        android:paddingTop="12dp"
        android:paddingEnd="12dp">

        <TextView
            android:id="@+id/tv_title"
            android:layout_width="wrap_content"
            android:layout_height="wrap_content"
            android:layout_alignParentStart="true"
            android:layout_toStartOf="@id/image"
            android:text="@{news.title}"
            android:textColor="@color/black"
            android:textSize="14sp" />

        <com.llw.mvvm.view.CustomImageView
            android:id="@+id/image"
            android:layout_marginStart="12dp"
            networkUrl="@{news.thumbnail_pic_s}"
            android:layout_width="140dp"
            android:layout_height="80dp"
            android:layout_alignParentEnd="true"
            android:scaleType="centerCrop"
            app:shapeAppearanceOverlay="@style/roundedImageStyle_6" />

        <TextView
            android:id="@+id/tv_author"
            android:layout_width="wrap_content"
            android:layout_height="wrap_content"
            android:layout_above="@+id/tv_date"
            android:layout_below="@+id/tv_title"
            android:layout_marginTop="4dp"
            android:text="@{news.author_name}"
            android:textSize="12sp"
            tools:ignore="NestedWeights" />

        <TextView
            android:id="@+id/tv_date"
            android:layout_width="wrap_content"
            android:layout_height="wrap_content"
            android:layout_alignBottom="@id/image"
            android:text="@{news.date}"
            android:textSize="12sp" />

        <View
            android:layout_width="match_parent"
            android:layout_height="0.5dp"
            android:layout_below="@id/image"
            android:layout_marginTop="12dp"
            android:background="@color/line" />
    </RelativeLayout>

</layout>
The color value line used here is #eeee. Just add it in colors.xml.
Then create an item under layout_ The code in the video.xml file is as follows:
<?xml version="1.0" encoding="utf-8"?>
<layout xmlns:android="http://schemas.android.com/apk/res/android"
    xmlns:app="http://schemas.android.com/apk/res-auto"
    xmlns:tools="http://schemas.android.com/tools">

    <data>

        <variable
            name="video"
            type="com.llw.mvvm.model.VideoResponse.ResultBean" />
    </data>

    <RelativeLayout
        android:background="@color/white"
        android:layout_width="match_parent"
        android:layout_height="wrap_content"
        android:paddingStart="12dp"
        android:paddingTop="12dp"
        android:paddingEnd="12dp">

        <TextView
            android:id="@+id/tv_title"
            android:layout_width="wrap_content"
            android:layout_height="wrap_content"
            android:layout_alignParentEnd="true"
            android:layout_toEndOf="@id/image"
            android:ellipsize="end"
            android:maxLines="2"
            android:text="@{video.title}"
            android:textColor="@color/black"
            android:textSize="14sp" />

        <com.llw.mvvm.view.CustomImageView
            android:id="@+id/image"
            networkUrl="@{video.item_cover}"
            android:layout_width="140dp"
            android:layout_height="80dp"
            android:layout_marginEnd="12dp"
            android:scaleType="centerCrop"
            app:shapeAppearanceOverlay="@style/roundedImageStyle_6" />

        <ImageView
            android:layout_width="wrap_content"
            android:layout_height="wrap_content"
            android:layout_alignStart="@+id/image"
            android:layout_alignTop="@+id/image"
            android:layout_alignEnd="@id/image"
            android:layout_alignBottom="@+id/image"
            android:padding="20dp"
            android:src="@mipmap/ic_play" />

        <TextView
            android:id="@+id/tv_author"
            android:layout_width="wrap_content"
            android:layout_height="wrap_content"
            android:layout_above="@+id/tv_words"
            android:layout_below="@+id/tv_title"
            android:layout_alignParentEnd="true"
            android:layout_marginTop="4dp"
            android:layout_toEndOf="@id/image"
            android:text="@{video.author}"
            android:textSize="12sp"
            tools:ignore="NestedWeights" />

        <TextView
            android:id="@+id/tv_words"
            android:layout_width="wrap_content"
            android:layout_height="wrap_content"
            android:layout_alignBottom="@id/image"
            android:layout_alignParentEnd="true"
            android:layout_toEndOf="@id/image"
            android:ellipsize="end"
            android:maxLines="1"
            android:text="@{video.hot_words}"
            android:textSize="12sp" />

        <View
            android:layout_width="match_parent"
            android:layout_height="0.5dp"
            android:layout_below="@id/image"
            android:layout_marginTop="12dp"
            android:background="@color/line" />
    </RelativeLayout>

</layout>
② Adapter
Write the adapter below and create a NewsAdapter class under the adapter package. The code is as follows:
public class NewsAdapter extends BaseQuickAdapter<NewsResponse.ResultBean.DataBean, BaseDataBindingHolder<ItemNewsBinding>> {

    public NewsAdapter(@Nullable List<NewsResponse.ResultBean.DataBean> data) {
        super(R.layout.item_news, data);
    }

    @Override
    protected void convert(@NotNull BaseDataBindingHolder<ItemNewsBinding> bindingHolder, NewsResponse.ResultBean.DataBean dataBean) {
        ItemNewsBinding binding = bindingHolder.getDataBinding();
        if (binding != null) {
            binding.setNews(dataBean);
            binding.executePendingBindings();
        }
    }
}
I'm sure you can understand the general code. Next, create a VideoAdapter class. The code is as follows:
public class VideoAdapter extends BaseQuickAdapter<VideoResponse.ResultBean, BaseDataBindingHolder<ItemVideoBinding>> {

    public VideoAdapter(@Nullable List<VideoResponse.ResultBean> data) {
        super(R.layout.item_video, data);
    }

    @Override
    protected void convert(@NotNull BaseDataBindingHolder<ItemVideoBinding> bindingHolder, VideoResponse.ResultBean dataBean) {
        ItemVideoBinding binding = bindingHolder.getDataBinding();
        if (binding != null) {
            binding.setVideo(dataBean);
            binding.executePendingBindings();
        }
    }
}
After the adapter is written, go to the Fragment to display the data. The first is NewsFragment. The modification code is as follows:
	@Override
    public void onActivityCreated(@Nullable Bundle savedInstanceState) {
        super.onActivityCreated(savedInstanceState);

        NewsViewModel mViewModel = new ViewModelProvider(this).get(NewsViewModel.class);
        //Get news data
        mViewModel.getNews();
        binding.rv.setLayoutManager(new LinearLayoutManager(context));
        //Data Refresh
        mViewModel.news.observe(context, newsResponse ->
                binding.rv.setAdapter(new NewsAdapter(newsResponse.getResult().getData())));
        mViewModel.failed.observe(context, this::showMsg);
    }
Then there is VideoFragment. The modification code is as follows:
	@Override
    public void onActivityCreated(@Nullable Bundle savedInstanceState) {
        super.onActivityCreated(savedInstanceState);
        VideoViewModel mViewModel = new ViewModelProvider(this).get(VideoViewModel.class);

        //Get video data
        mViewModel.getVideo();
        binding.rv.setLayoutManager(new LinearLayoutManager(context));
        //Data Refresh
        mViewModel.video.observe(context, videoResponse ->
                binding.rv.setAdapter(new VideoAdapter(videoResponse.getResult())));
        mViewModel.failed.observe(context, this::showMsg);
    }
Let's run:
9, Source code
Welcome to Star and Fork
GitHub: MVVM-Demo
CSDN: MVVMDemo_5.rar