First, when using the SMS authentication code of Mob platform, you need to register your account on the official website and obtain the developer's qualification to apply for AppKey and AppSecret.
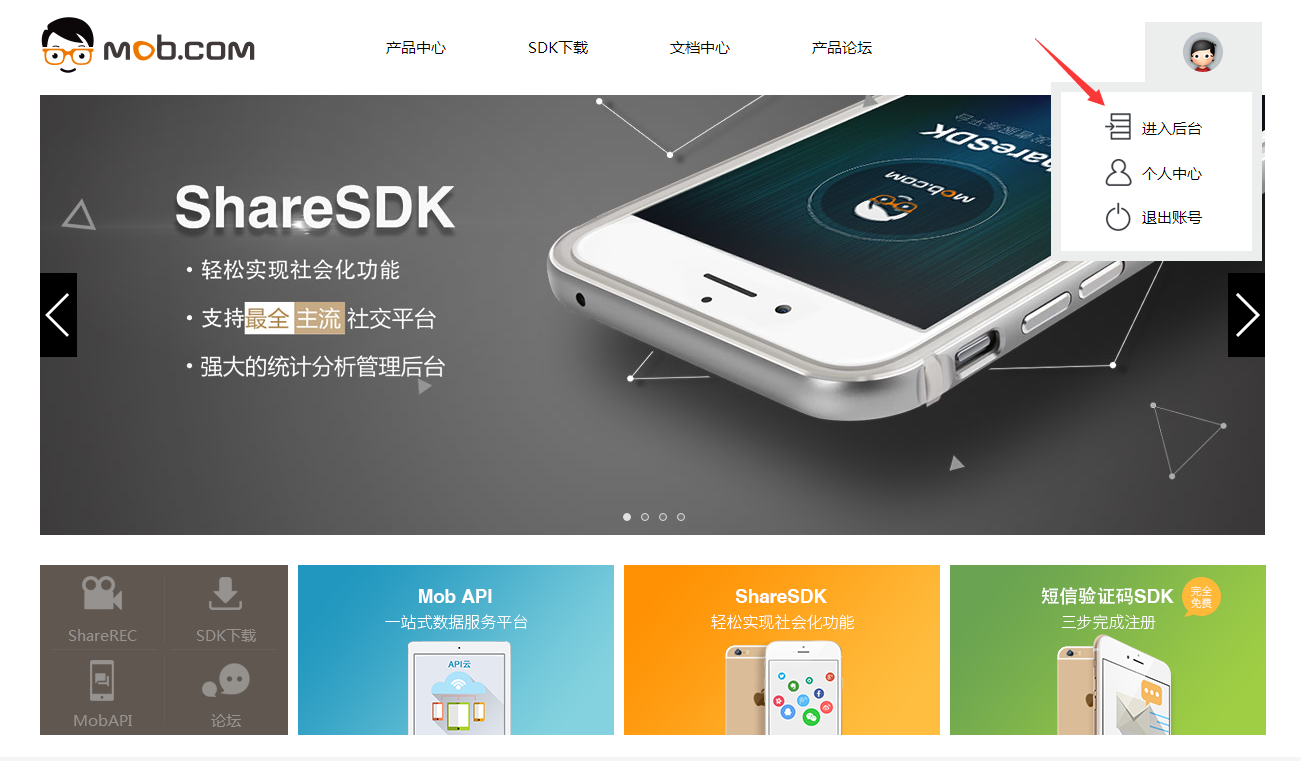
Register Mob Account Official Address: http://www.mob.com After registering, Click to enter the background.
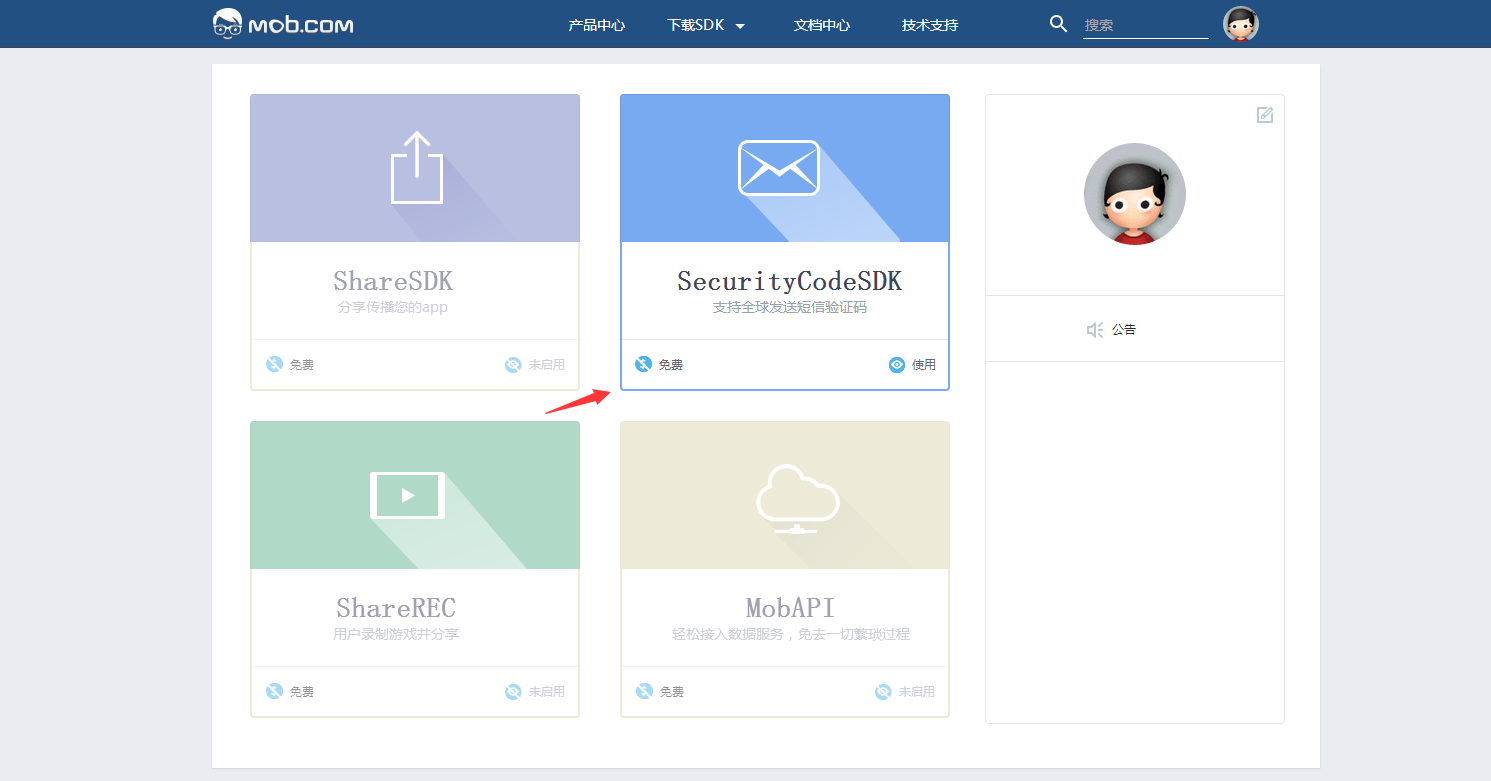
Enter the background and click on the SMS Verification Code to select Enable Click Enter
Get AppKey and AppSecret as follows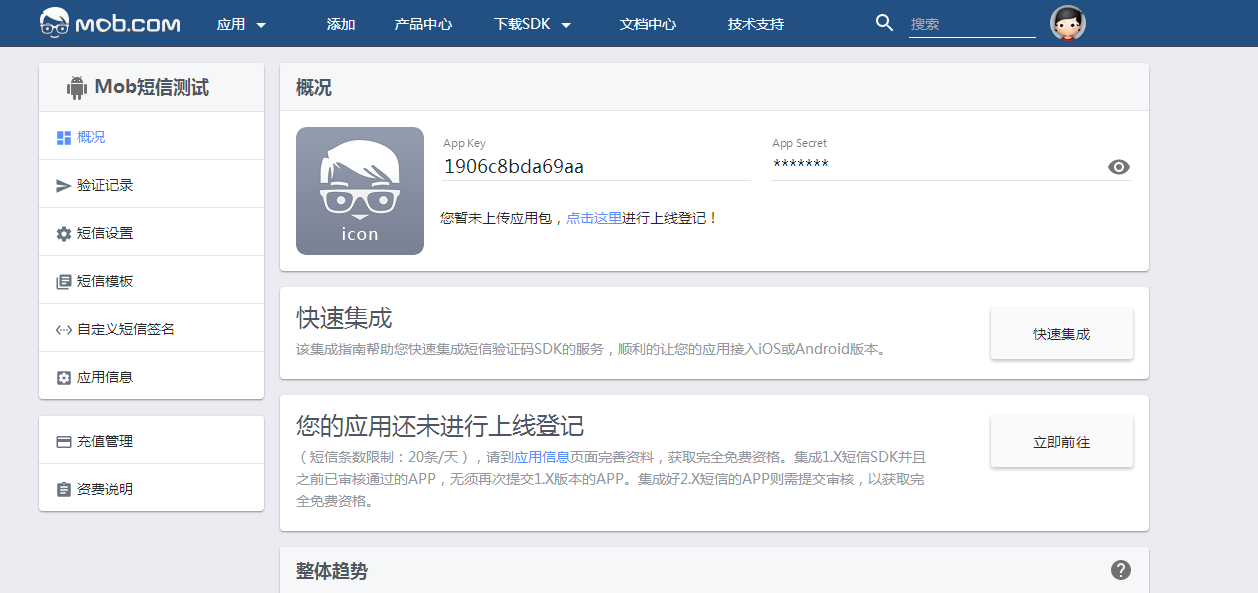
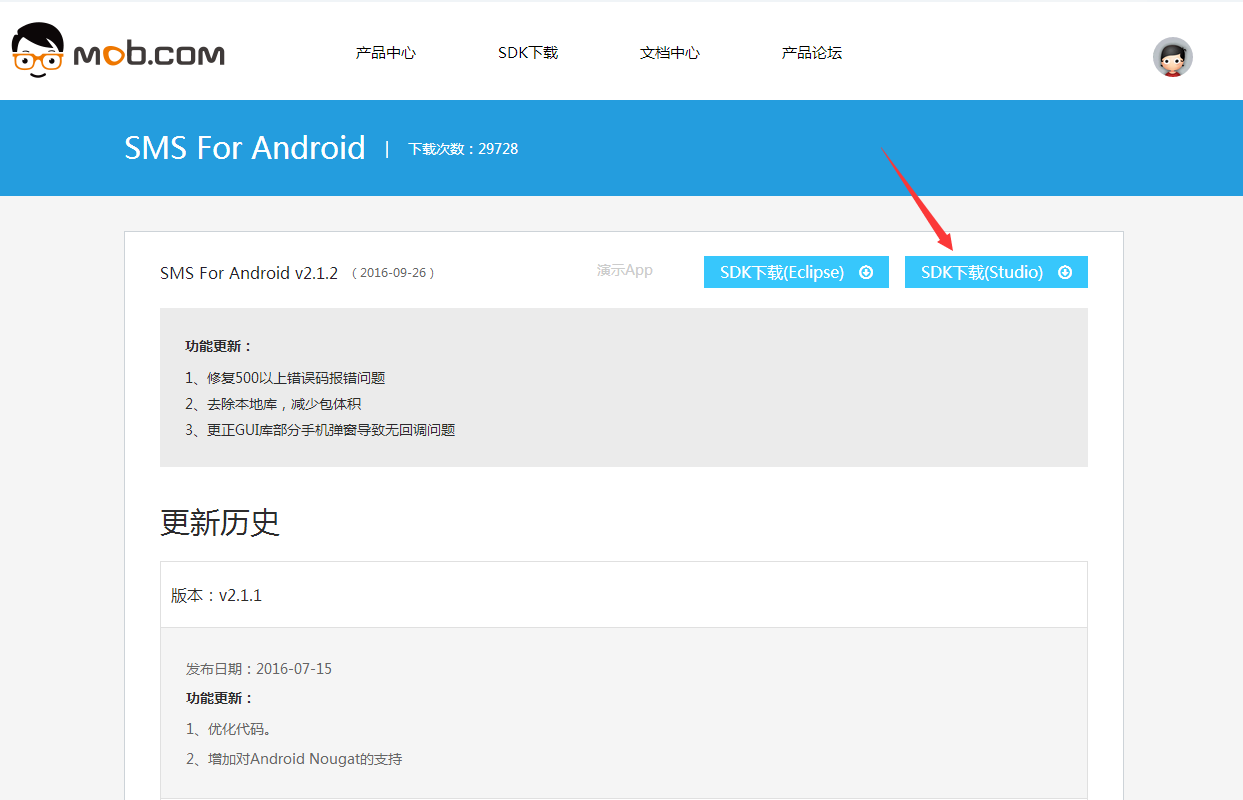
2. After getting Key, download the SDK we need and then develop it at http://www.mob.com/#/download Detail/SMS/ Android You can choose Eclipse and Android
We chose Android Studio for the two versions of Studio
Create a new Android Studio project and put the jar package and SMSDK. AAR file in the SDK SMSSDK folder we downloaded into our project libs as follows
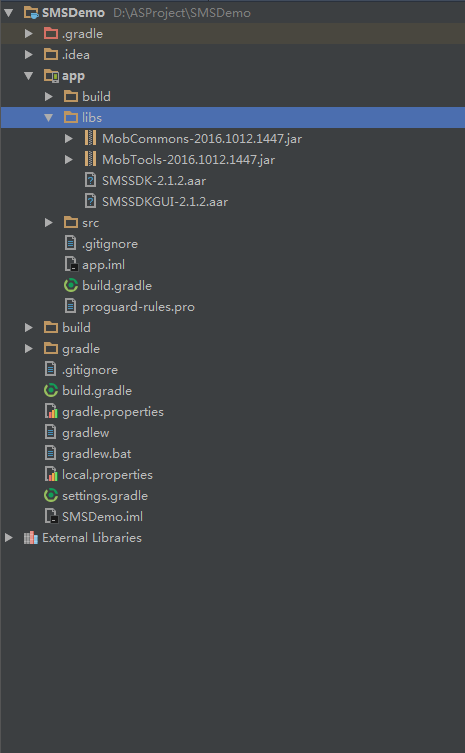
Then add the dependency attention aar file to build.gradle, which is the version you downloaded when you downloaded SDK
-
repositories{
-
flatDir{
-
dirs 'libs'
-
}
-
}
-
-
dependencies {
-
compile fileTree(include: ['*.jar'], dir: 'libs')
-
androidTestCompile('com.android.support.test.espresso:espresso-core:2.2.2', {
-
exclude group: 'com.android.support', module: 'support-annotations'
-
})
-
compile 'com.android.support:appcompat-v7:24.2.1'
-
testCompile 'junit:junit:4.12'
-
compile files('libs/MobTools-2016.1012.1447.jar')
-
compile files('libs/MobCommons-2016.1012.1447.jar')
-
compile name:'SMSSDK-2.1.2',ext:'aar'
-
compile name:'SMSSDKGUI-2.1.2',ext:'aar'
-
}
3. Start writing our code layout file with a simple Button button
-
<?xml version="1.0" encoding="utf-8"?>
-
<RelativeLayout xmlns:android="http://schemas.android.com/apk/res/android"
-
xmlns:tools="http://schemas.android.com/tools"
-
android:id="@+id/activity_main"
-
android:layout_width="match_parent"
-
android:layout_height="match_parent"
-
tools:context="com.shiran.smsdemo.MainActivity">
-
-
<Button
-
android:id="@+id/button_Sms"
-
android:layout_width="match_parent"
-
android:layout_height="wrap_content"
-
android:layout_centerInParent="true"
-
android:text="Get the authentication code"/>
-
</RelativeLayout>
Next up is the code in our Activity
-
package com.shiran.smsdemo;
-
-
import android.support.v7.app.AppCompatActivity;
-
import android.os.Bundle;
-
import android.view.View;
-
import android.widget.Button;
-
-
import java.util.HashMap;
-
import java.util.Random;
-
-
import cn.smssdk.EventHandler;
-
import cn.smssdk.SMSSDK;
-
import cn.smssdk.gui.RegisterPage;
-
-
public class MainActivity extends AppCompatActivity implements View.OnClickListener{
-
private Button mButton = null;
-
-
@Override
-
protected void onCreate(Bundle savedInstanceState) {
-
super.onCreate(savedInstanceState);
-
setContentView(R.layout.activity_main);
-
-
SMSSDK.initSDK(this, "1906c8bda69aa", "a0bb14448c09bb3a03be461a18c512ff");
-
mButton = (Button) findViewById(R.id.button_Sms);
-
mButton.setOnClickListener(this);
-
}
-
-
@Override
-
public void onClick(View v) {
-
if(mButton == v){
-
-
RegisterPage registerPage = new RegisterPage();
-
registerPage.setRegisterCallback(new EventHandler() {
-
-
@Override
-
public void afterEvent(int event, int result, Object data) {
-
super.afterEvent(event, result, data);
-
-
-
if (result == SMSSDK.RESULT_COMPLETE) {
-
-
HashMap<String, Object> dataMaps = (HashMap<String, Object>) data;
-
-
String country = (String) dataMaps.get("country");
-
-
String phone = (String) dataMaps.get("phone");
-
-
submitInfo(country, phone);
-
}
-
-
}
-
});
-
-
-
registerPage.show(MainActivity.this);
-
-
}
-
}
-
private void submitInfo(String country, String phone) {
-
Random r = new Random();
-
String uid = Math.abs(r.nextInt()) + "";
-
String nickName = "Set up a nickname";
-
SMSSDK.submitUserInfo(uid, nickName, null, country, phone);
-
}
-
}
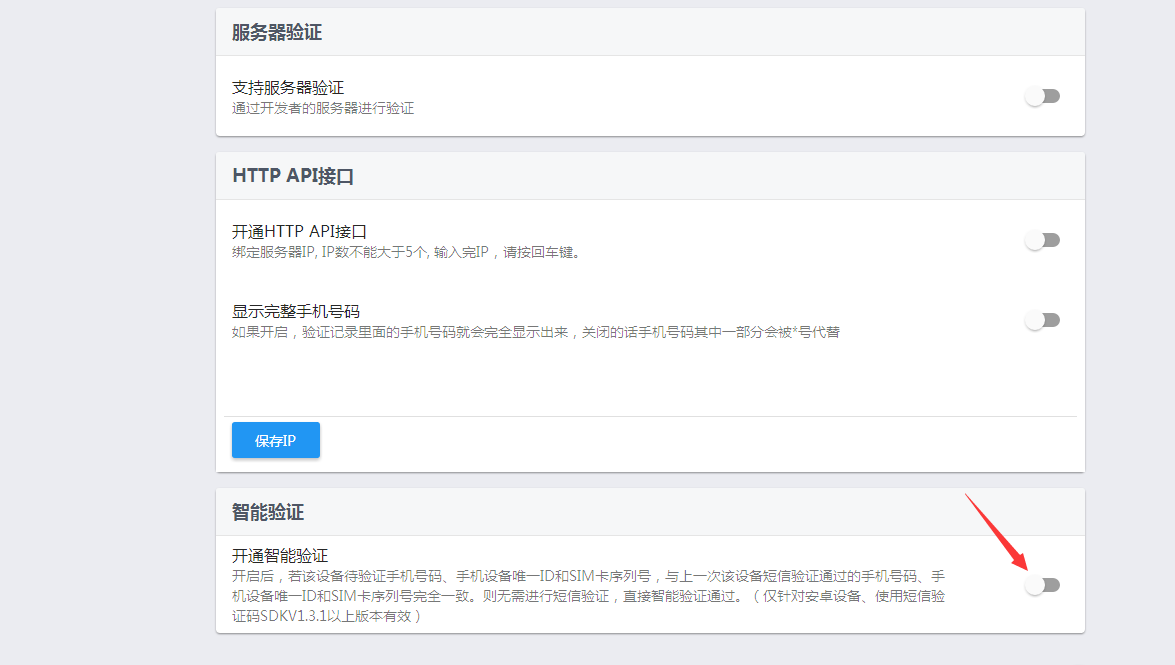
When Mob is enabled by default, only validation can be done, that is, after the first validation of a mobile phone number, the next validation can be done intelligently, and the smart validation can be turned off in the Mob background management SMS settings as follows:
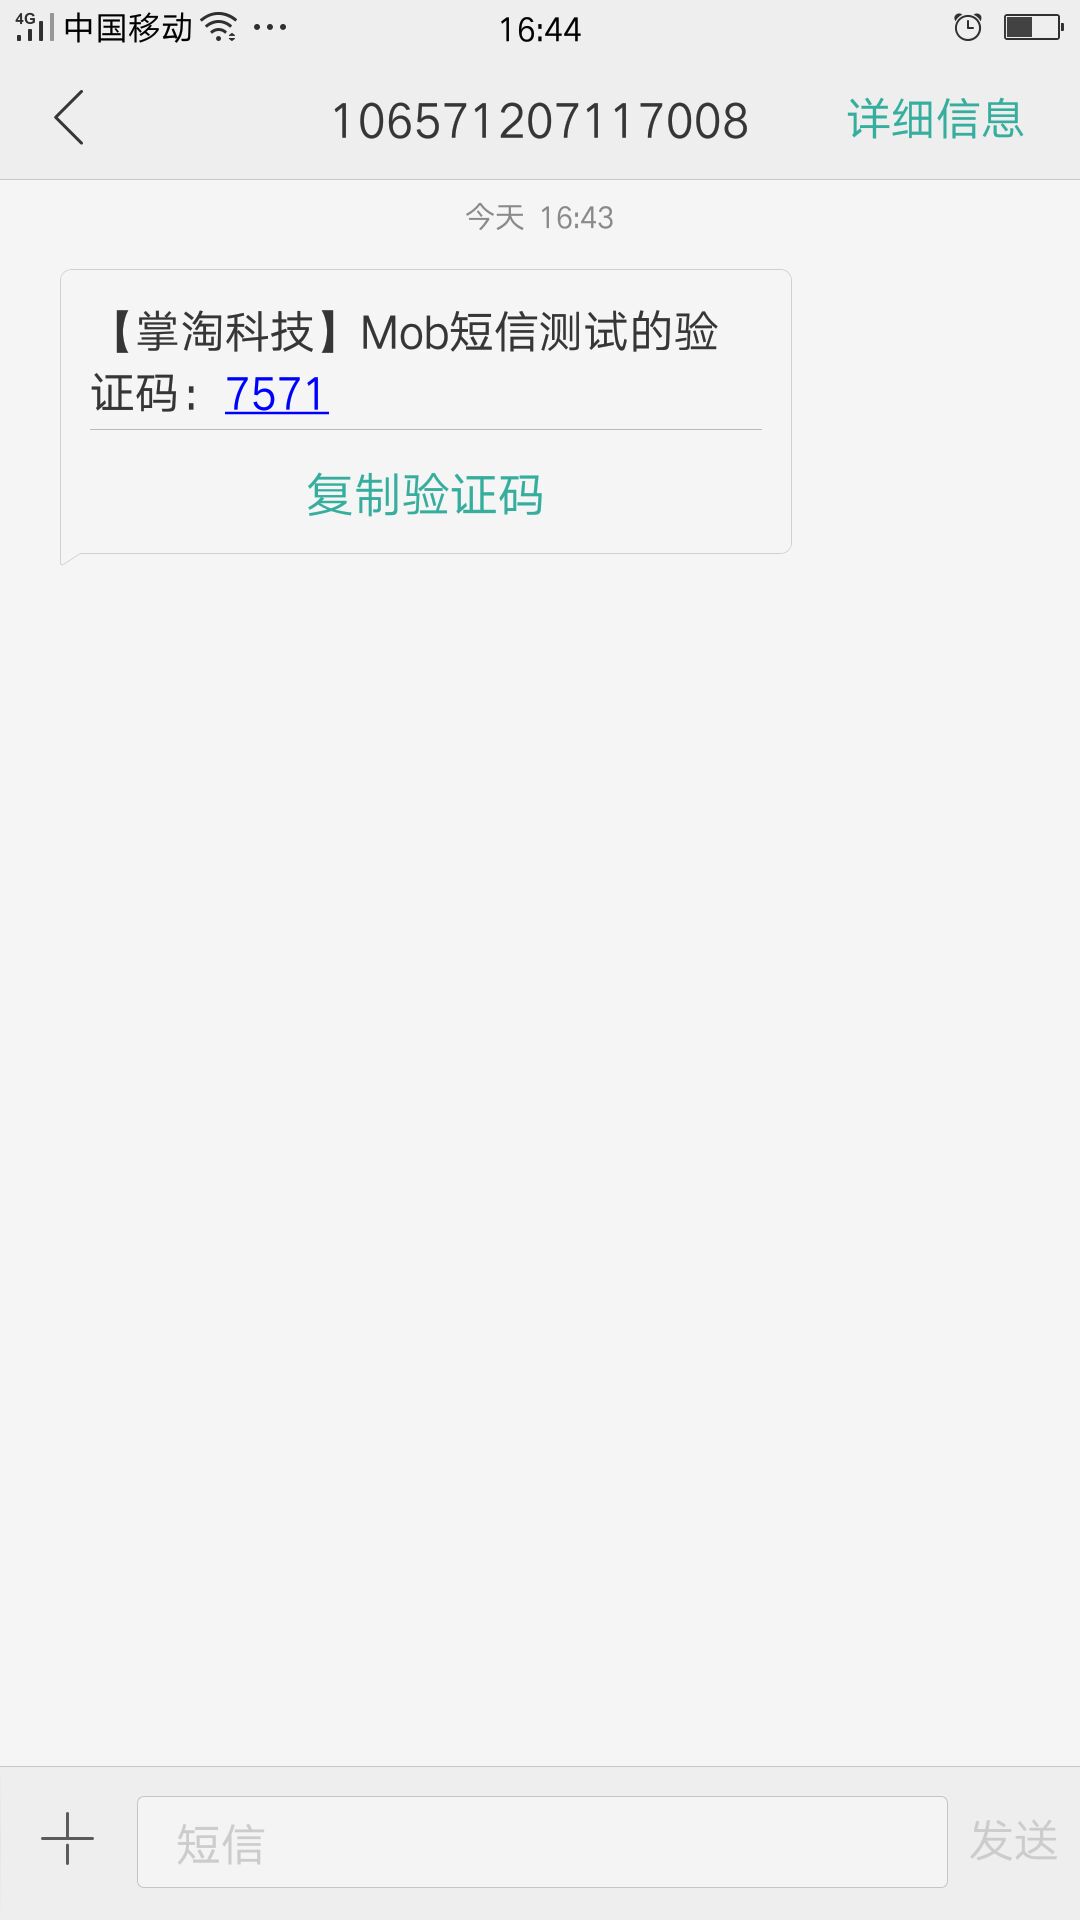
Run the test and paste out the screenshots by the way.
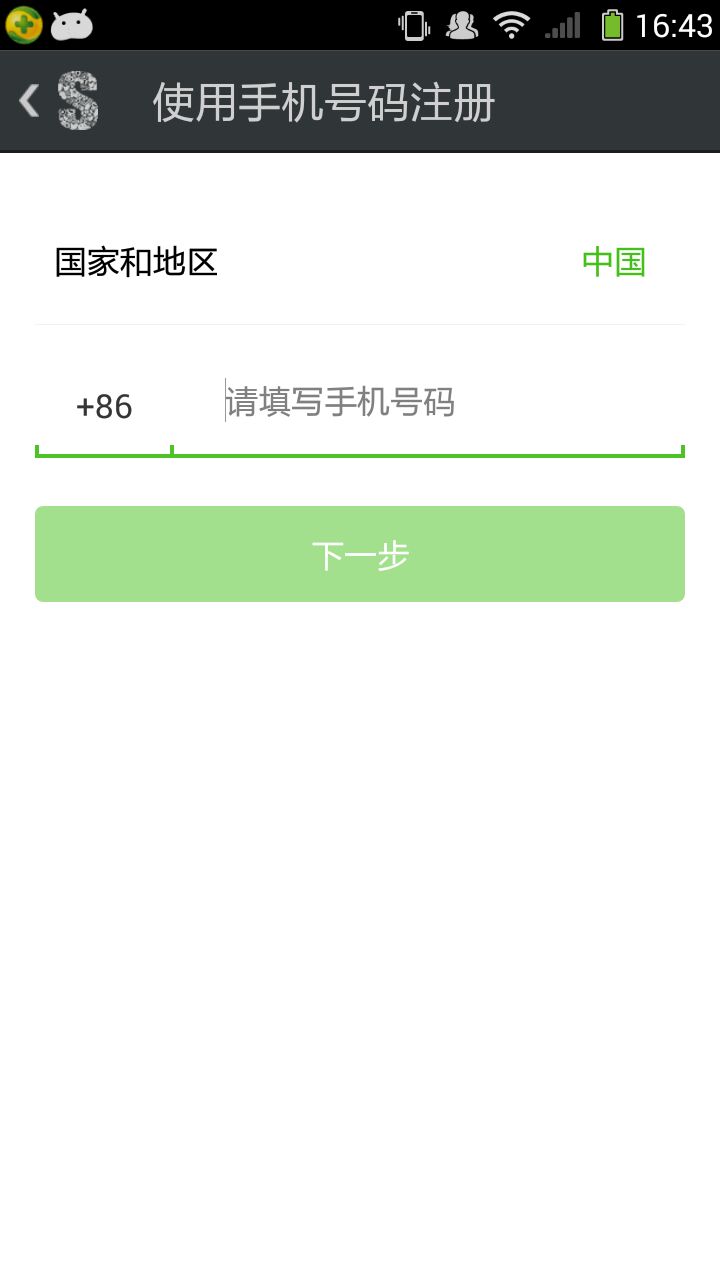
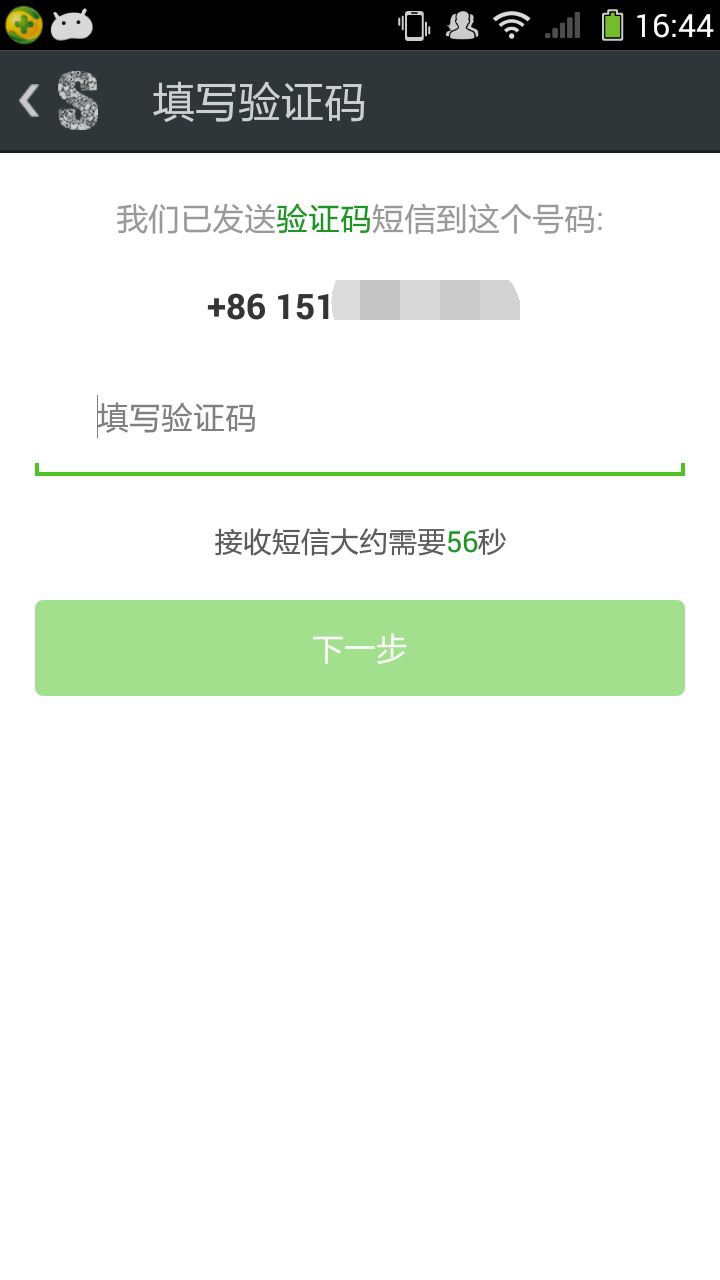
test When I use the test machine, I use my own mobile phone to receive short messages. This is the authentication code received by the mobile phone.