Why customize view?
- Add new functionality to the view(textview,imageview, etc.) provided by android
- Handling unique user interactions
- When android does not provide us with enough views to meet our needs, such as waterfall flow layout, sticky animation and so on, we need to define views ourselves.
- With a good command of custom controls, you can achieve all kinds of cool effects. x-Installation Requirements
General steps for customizing view s
- Declaration and acquisition of custom attributes
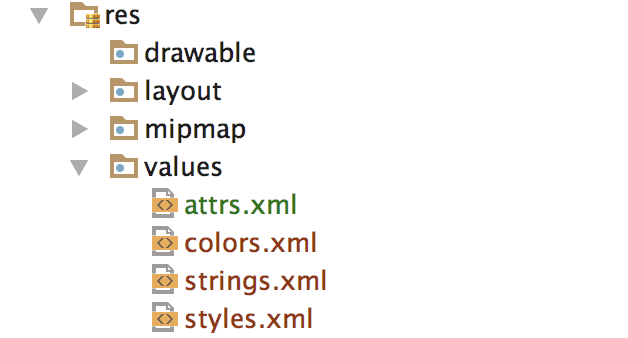
First, we need to define the declaration in res/values/attrs.xml. I use as. By default, there is no XML file. We need to create it ourselves.
<?xml version="1.0" encoding="utf-8"?>
<resources>
    <declare-styleable name="CustomView">
        <attr name="image" format="reference"/>
        <attr name="color" format="color"/>
        <attr name="text" format="string"/>
        <attr name="text_size" format="integer"/>
    </declare-styleable>
</resources>
Reference to custom attributes in layout
<?xml version="1.0" encoding="utf-8"?>
<RelativeLayout xmlns:android="http://schemas.android.com/apk/res/android"
    xmlns:tools="http://schemas.android.com/tools"
    xmlns:zsy="http://schemas.android.com/apk/res-auto"
    android:layout_width="match_parent"
    android:layout_height="match_parent"
    tools:context="com.zsy.demo.stickyview.MainActivity">
    <com.zsy.demo.stickyview.CustomView
        android:layout_width="100dp"
        android:layout_height="100dp"
        zsy:text="hello,world!"
        zsy:text_size="9527"
        />
</RelativeLayout>
Note that the name in the node must be the same as your custom control class name in as, otherwise the namespace cannot find the property. (Prospective testing) 
Names in nodes are name d for custom attributes, while format s define a type for custom attributes, such as:
- string string type
- integer shaping
- color color type
- reference reference type
...
Then, in the view's construction method, it acquires:
public class CustomView extends View {
    private static final String TAG = "CustomView";
    private BitmapDrawable mBitmap;
    private int mColor;
    private String mText;
    private int mTextInteger;

    public CustomView(Context context) {
        super(context);
    }

    public CustomView(Context context, @Nullable AttributeSet attrs) {
        super(context, attrs);
        TypedArray a = context.obtainStyledAttributes(attrs,
                R.styleable.CustomView);
        int count = a.getIndexCount();
        for (int i = 0; i < count; i++)
        {
            int attr = a.getIndex(i);
            switch (attr)
            {
                case R.styleable.CustomView_image:
                    mBitmap = (BitmapDrawable) a.getDrawable(attr);
                    break;
                case R.styleable.CustomView_color:
                    mColor = a.getColor(attr, 0xFF45C01A);
                    break;
                case R.styleable.CustomView_text:
                    mText = a.getString(attr);
                    Log.d(TAG, mText);
                    break;
                case R.styleable.CustomView_text_size:
                    mTextInteger =   a.getInteger(attr,-1);
                    Log.d(TAG, String.valueOf(mTextInteger));
                    break;
            }
        }
        //Make sure to recycle after you get the attributes
        a.recycle();
    }
}
The print result is as follows

- Measuring onMeasure
Control determines how wide and high it needs by measuring
 @Override
    protected void onMeasure(int widthMeasureSpec, int heightMeasureSpec) {
        super.onMeasure(widthMeasureSpec, heightMeasureSpec);
    }
MeasureSpec can be understood as a measurement specification. It represents a 32-bit int value, a high 2-bit SpecMode, and a low 30-bit SpecSize. SpecSize refers to the measurement mode. SpecSize refers to the size of a measurement mode.
The measurement mode and size of width and height are given below.
  // Width Measurement Mode and Width Measurement
int widthMeasureModle = MeasureSpec.getMode(widthMeasureSpec);
int measureWidth = MeasureSpec.getSize(widthMeasureSpec);
 // Height measurement mode and height measurement
int heightMeasureModle = MeasureSpec.getMode(heightMeasureSpec);
int measureHeight = MeasureSpec.getSize(heightMeasureSpec);
There are three measurement modes:
EXACTLY: Set explicit values for the current control, such as 100dp, match_parent, etc., at which point the final size of view is the value specified by SpecSize
AT_MOST: The parent container specifies an available size, SpecSize, and View cannot be larger than this value. The specific value depends on the specific performance of different views. For example, warp_content
UNSPECIFIED: The parent container does not have any restrictions on viewing, how big to give. For example, listview, scrollview
Here is a pseudocode:
if (widthMeasureModle == MeasureSpec.EXACTLY){
            width = measureWidth;
        }else if (widthMeasureModle == MeasureSpec.AT_MOST){
            width = Math.min(200,measureWidth);
        }else {
            //TODO
        }
//Set width and height
setMeasuredDimension(measureWidth,measureHeight);
The measurement of ViewGroup is similar to that of View, except that it not only completes its own measurement process, but also traverses to call the measurement method of all sub-elements, which are recursively executed by each sub-element. Here you can see from the source code:
    protected void measureChild(View child, int parentWidthMeasureSpec,
            int parentHeightMeasureSpec) {
        final LayoutParams lp = child.getLayoutParams();
        //MeasureSpec for creating child elements
        final int childWidthMeasureSpec = getChildMeasureSpec(parentWidthMeasureSpec,
                mPaddingLeft + mPaddingRight, lp.width);
        final int childHeightMeasureSpec = getChildMeasureSpec(parentHeightMeasureSpec,
                mPaddingTop + mPaddingBottom, lp.height);
       //The measurement method of sub-elements is invoked here.
        child.measure(childWidthMeasureSpec, childHeightMeasureSpec);
    }

    protected void measureChildren(int widthMeasureSpec, int heightMeasureSpec) {
        final int size = mChildrenCount;
        final View[] children = mChildren;
        for (int i = 0; i < size; ++i) {
            final View child = children[I];
            //Traverse through all the child elements and then measure their height
            if ((child.mViewFlags & VISIBILITY_MASK) != GONE) {
                measureChild(child, widthMeasureSpec, heightMeasureSpec);
            }
        }
    }
RequLayout () method can be re-measured
- Layout (ViewGroup)
@Override
    protected void onLayout(boolean changed, int left, int top, int right, int bottom) {
        super.onLayout(changed, left, top, right, bottom);
    }
onLayout is a relatively simple way to lay out all the child elements. This method is not commonly used in custom view s. The requestLayout() method can be repositioned.
The parameter change indicates that the view has a new size or position.
The parameter left represents the LEFT position relative to the parent view.
The parameter top represents the top position relative to the parent view.
The parameter right represents the right position relative to the parent view.
The parameter bottom represents the Bottom position relative to the parent view.
- Draw onDraw
@Override
    protected void onDraw(Canvas canvas) {
        super.onDraw(canvas);
    }
Canvas can be used to draw any shape you want, and the combination of canvas can achieve complex effects. I won't say much here.
Involidate () is called to refresh the canvas in the main thread and postInvalidate() is called in the sub-thread.
- onTouchEvent
- onInterceptTouchEvent(ViewGroup)
Gesture control and event distribution are not the focus of this chapter, but some custom controls need the ability to interact with users. Friends in need can go and have a look. Android Event Distribution Mechanisms: The Most Comprehensive and Easiest to Understand in History . It's written in great detail.