2. Deployment environment
This tutorial uses Apache as the back-end server and creates a MySQL database on the ECs to store data.
one On the ECS server, execute the following command to install the Apache service and its extension package.
yum -y install httpd httpd-manual mod_ssl mod_perl mod_auth_mysql
If a result similar to the following figure is returned, the installation is successful.

two Execute the following command to start the Apache service.
systemctl start httpd.service
three Return to the ECS console and click the created ECS instance ID link on the ECS instance list page to enter the ECS details page.
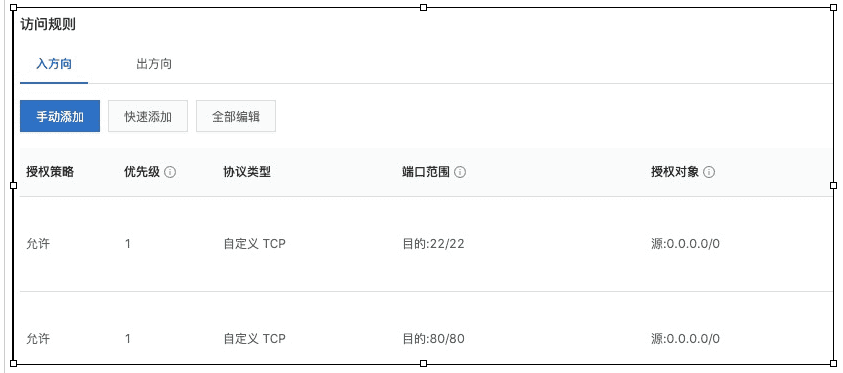
four On the left navigation bar, click the security group of this instance, and then click the ID link of the security group to view the security group configuration.
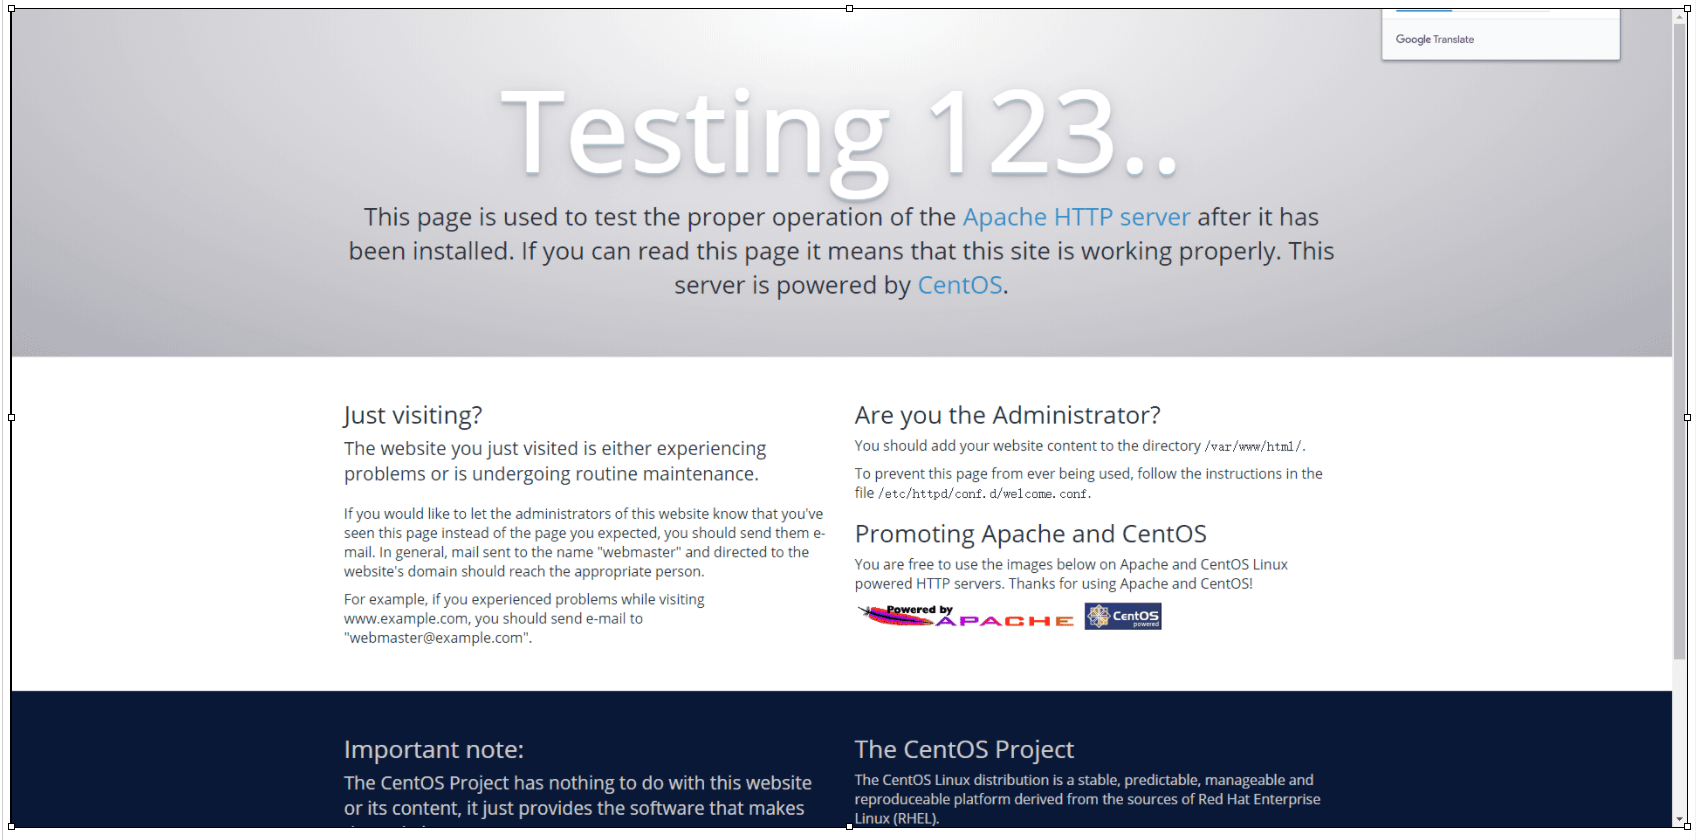
five Open the browser and enter the public IP of the ECS server. If the test page shown in the figure below is displayed, the Apache service installation is successful.
six Refer to the following operations to build a MySQL database on the ECS server.
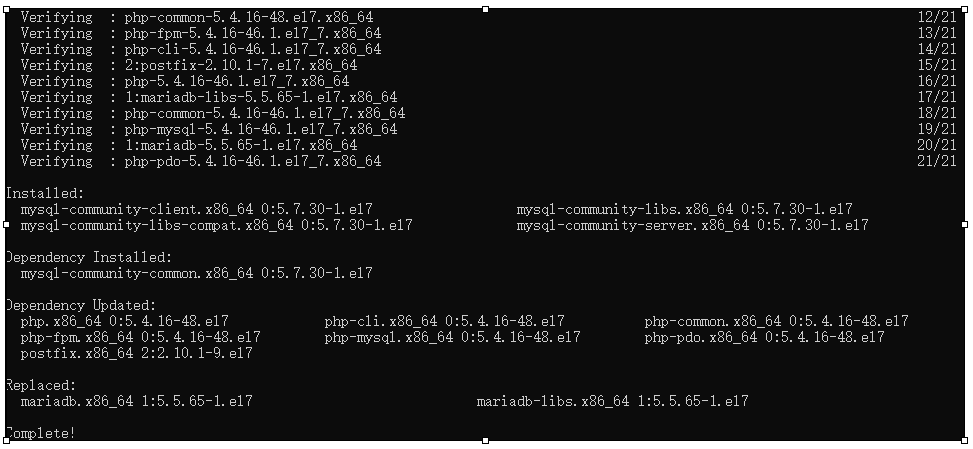
a. Execute the following command to download and install MySQL.
explain If the network speed is slow, the download process may take 10 minutes.
wget http://dev.mysql.com/get/mysql57-community-release-el7-10.noarch.rpm
yum -y install mysql57-community-release-el7-10.noarch.rpm
yum -y install mysql-community-server
b. Execute the following command to start the MySQL database.
systemctl start mysqld.service
c. Execute the following command to view the running status of MySQL.
systemctl status mysqld.service
d. Execute the following command to view the MySQL initial password.
grep "password" /var/log/mysqld.log

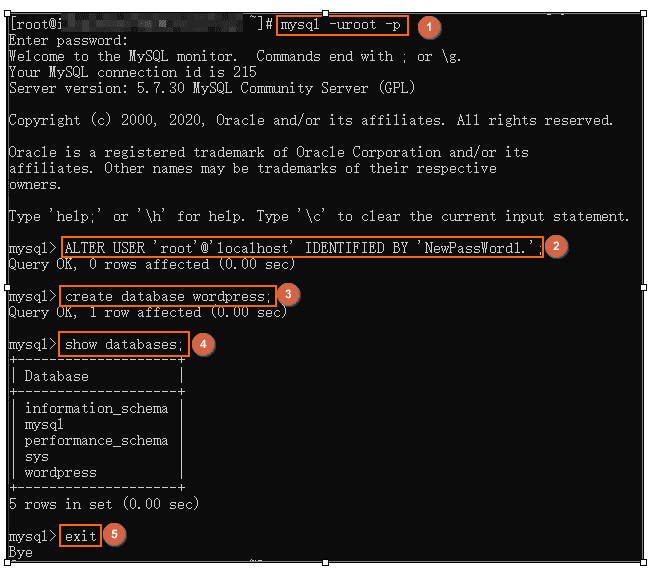
e. Execute the following command to log in to the database.
mysql -uroot -p
f. Execute the following command to modify the MySQL default password.
explain
- You need to change NewPassWord1. In the following command to the database password you want to set.
- If the new password is set too simply, an error will be reported. It must contain three types of characters in upper and lower case English letters, numbers and special symbols at the same time.
- Note that each complete SQL command has a half width semicolon (;) at the end. If there is no semicolon separation between multiple lines of commands, these commands will not be executed until a semicolon is encountered.
ALTER USER 'root'@'localhost' IDENTIFIED BY 'NewPassWord1.';
g. Execute the following command to create a database that stores blog site content.
create database wordpress;
h. Execute the following command to see if the creation is successful.
show databases;
i. Enter exit to exit the database.
seven WordPress is a blog platform developed in PHP language. Refer to the following to install PHP.
a. Execute the following command to install PHP.
yum -y install php php-mysql gd php-gd gd-devel php-xml php-common php-mbstring php-ldap php-pear php-xmlrpc php-imap
b. Execute the following command to create a PHP test page.
echo "<?php phpinfo(); ?>" > /var/www/html/phpinfo.php
c. Execute the following command to restart the Apache service.
systemctl restart httpd
d. Open the browser and visit http: / / < ECS public IP > / phpinfo.php. The following page shows that PHP has been successfully installed.

3. Install and configure WordPress
After setting up the above environment, refer to the following operations to install WordPress.
one Execute the following command to install WordPress.
yum -y install wordpress
The following information is displayed to indicate that the installation was successful.

two Modify the WordPress profile.
a. Execute the following command to change the pointing path of wp-config.php to an absolute path.
# Enter the / usr/share/wordpress directory.
cd /usr/share/wordpress
# Modify the path.
ln -snf /etc/wordpress/wp-config.php wp-config.php
# View the modified directory structure.
ll
b. Execute the following command to move WordPress to the Apache root directory.
# Create a WP blog folder in Apache root directory / var/www/html.
mkdir /var/www/html/wp-blog
mv * /var/www/html/wp-blog/
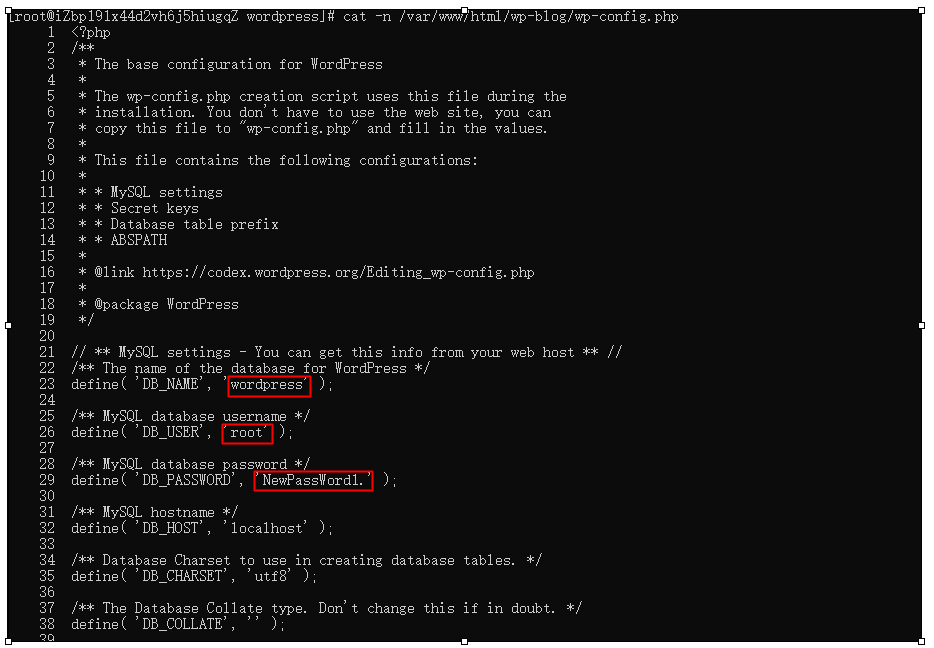
c. Execute the following command to modify the wp-config.php configuration file.
- database_name_here is the name of the database created in the previous step. This example is wordpress.
- username_here is the user name of the MySQL database. This example is root.
- password_here is the login password of MySQL database. This example is NewPassWord1.
sed -i 's/database_name_here/wordpress/' /var/www/html/wp-blog/wp-config.php
sed -i 's/username_here/root/' /var/www/html/wp-blog/wp-config.php
sed -i 's/password_here/NewPassWord1./' /var/www/html/wp-blog/wp-config.php
d. Execute the following command to check whether the configuration file information is modified successfully.
cat -n /var/www/html/wp-blog/wp-config.php
three Execute the following command to restart the Apache service.
systemctl restart httpd
4. Publish blog
After completing WordPress installation, refer to the following operations to create a personal site and publish content.
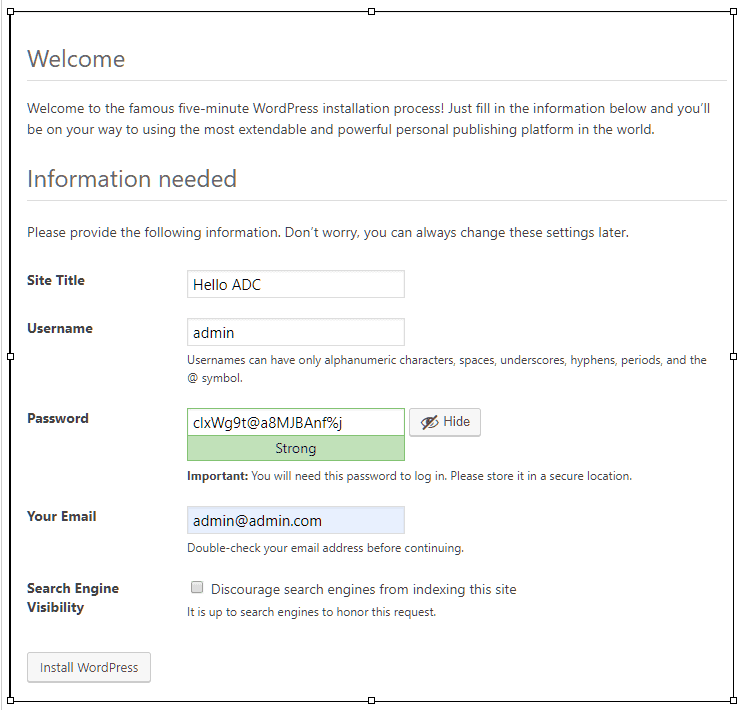
one Open the browser and visit http: / / < ECS public IP > / WP blog / WP admin / install.php.
two Set your site name, administrator user name and password, and then click Install WordPress to complete WordPress initialization.
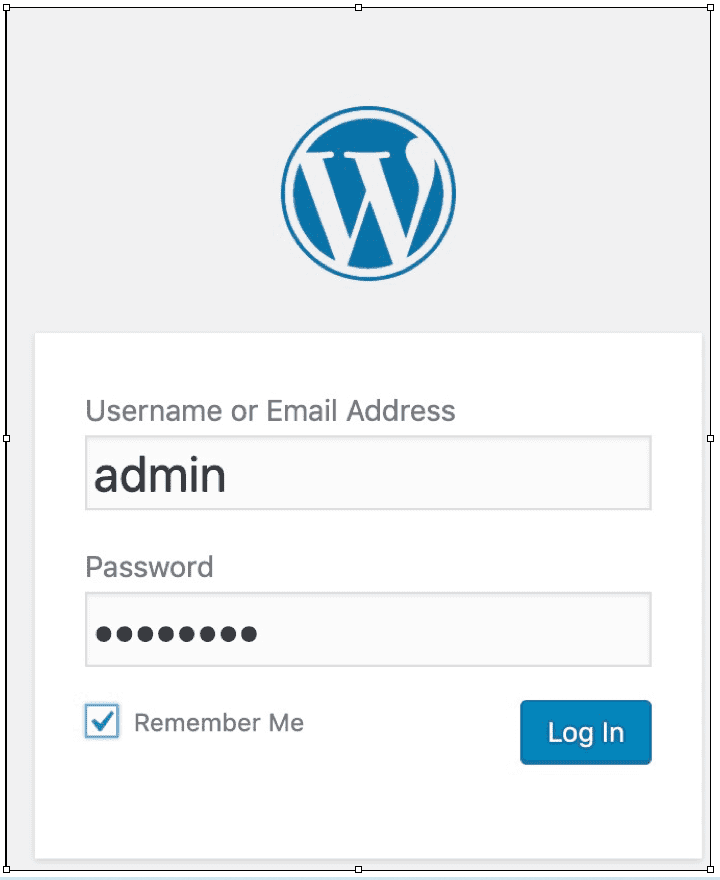
three single click Log In , Enter your user name and password, and then click log in again to open the WordPress site.
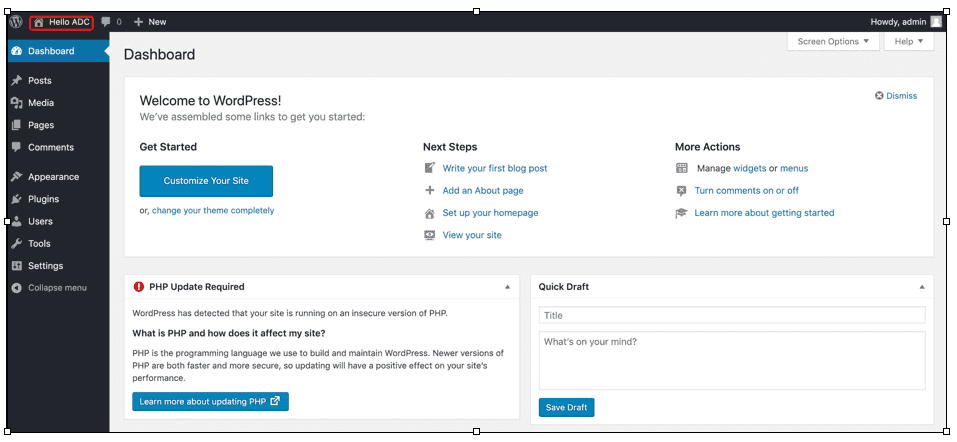
After logging in, you can create content and publish it as needed. So far, you have completed the construction of WordPress.
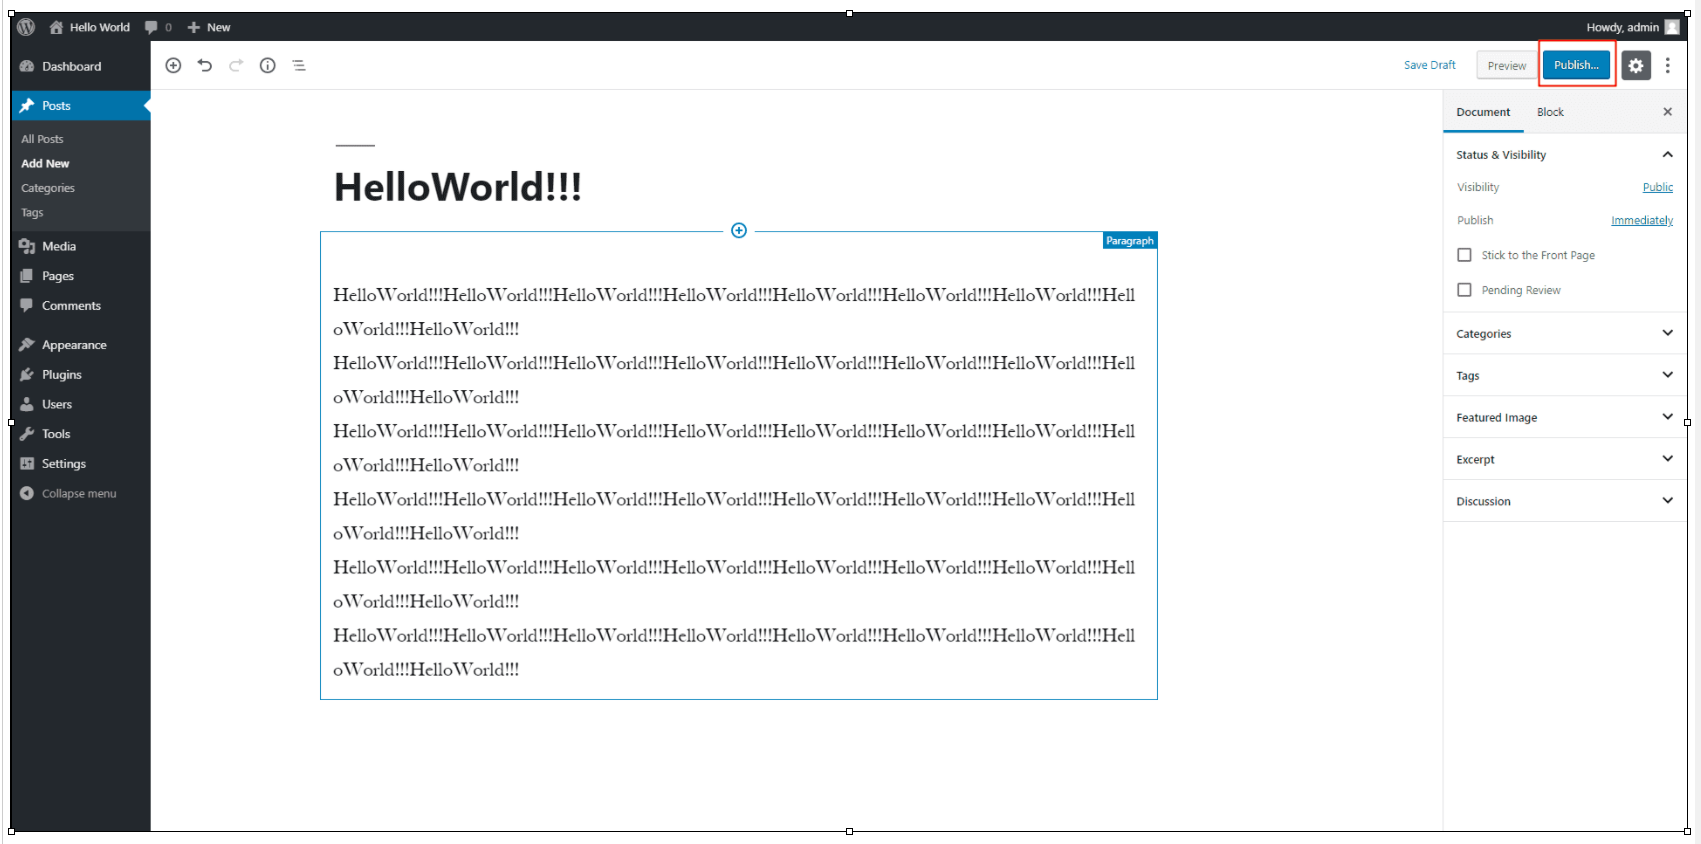
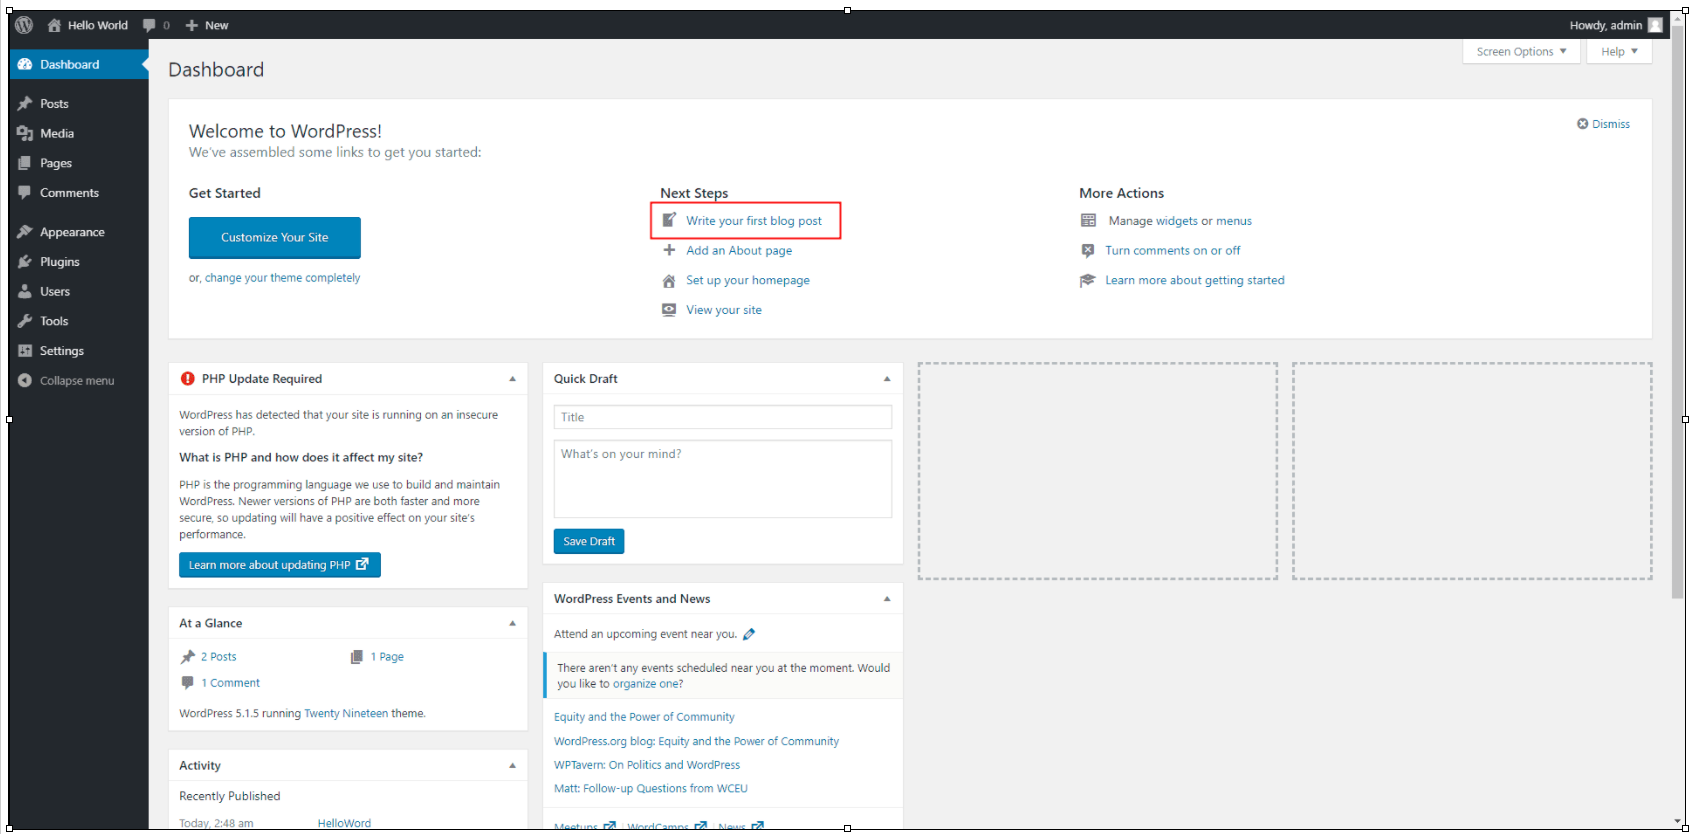
four You can click Write your first blog post to start writing your first blog.
five After writing your first blog, click publish to publish.

six On the left navigation bar, click All Posts to view the published posts.