introduce
knife4j is an enhanced solution for generating Api documents for Java MVC framework integration Swagger, formerly Swagger bootstrap UI, named kni4j in the hope that it can be as small, light and powerful as a dagger!
The predecessor of knife4j is swagger bootstrap Ui. In order to adapt to the development of microservice architecture, the original swagger bootstrap Ui adopts the mixed packaging method of back-end Java code and front-end Ui, which is bloated under the microservice architecture. Therefore, the project is officially renamed knife4j.
At present, the main modules of the project are as follows:
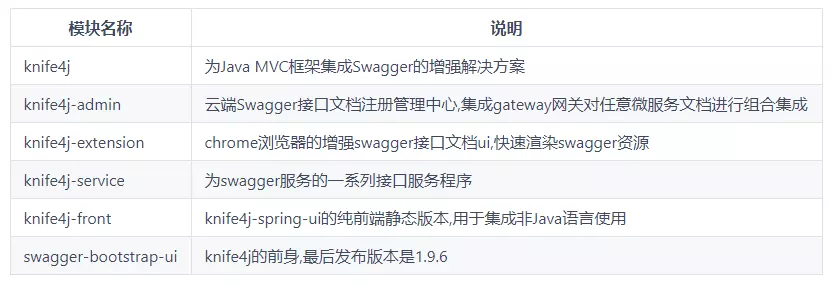
This example introduces the demonstration according to official documents.
Open source warehouse
- Github
https://github.com/xiaoymin/swagger-bootstrap-ui
- Code cloud
https://gitee.com/xiaoym/knife4j
Core functions
The UI enhancement package mainly includes two core functions: documentation and online debugging
-
Document description: according to the specification of Swagger, list the description of interface document in detail, including interface address, type, request example, request parameter, response example, response parameter, response code and other information. Using Swagger bootstrap UI, the usage of the interface can be seen at a glance according to the description of the document.
-
Online debugging: it provides the powerful function of online interface joint debugging, automatically parses the current interface parameters, and includes form validation. Calling the parameters can return the interface response content, headers, Curl request command instance, response time, response status code and other information, helping developers debug online without testing whether the interface is correct through other testing tools. Brief introduction, powerful.
UI enhancements
At the same time, the swagger bootstrap UI not only meets the above functions, but also provides document enhancement functions, which are not available in the official swagger UI. Each enhanced function is practical. Considering the actual development needs of developers, it is an indispensable function, mainly including:
-
Personalized configuration: through the personalized UI configuration item, you can customize the UI related display information
-
Offline document: according to the standard specification, the online markdown offline document is generated. Developers can copy and generate the markdown interface document, which can be converted into html or pdf through other third-party markdown conversion tools. In this way, the swagger2markdown component can also be abandoned
-
Interface sorting: since 1.8.5, the ui supports the interface sorting function. For example, a registration function mainly includes several steps. It can sort the interface according to the interface sorting rules provided by swagger bootstrap ui, and step interface operation, which is convenient for other developers to interface docking
Function Preview
- Online preview
http://knife4j.xiaominfo.com/doc.html
Quick start
I believe that as like as two peas of springboot, most of them know and use swagger, and knife4j's usage is almost the same as swagger. There is no learning cost, what is different is the interface of display, UI document is more friendly and humanized. Let's start with an integration project. Let's first look at pom file dependency:
<dependency>
    <groupId>com.github.xiaoymin</groupId>
    <artifactId>knife4j-spring-boot-starter</artifactId>
    <version>1.9.6</version>
</dependency>
Just introduce a knife4j starter without any other dependency. The configuration file and startup class of springboot do not need any special configuration. Using knife4j requires a configuration class of swagger, which is almost the same as using swagger before:
@Configuration
@EnableSwagger2
@EnableSwaggerBootstrapUi
public class Swagger2Config {
    @Bean
    public Docket createRestApi() {
        return  new Docket(DocumentationType.SWAGGER_2)
                .useDefaultResponseMessages(false)
                .apiInfo(apiInfo())
                .select()
                .apis(RequestHandlerSelectors.basePackage("spring.boot.knife4j.controller"))
                .paths(PathSelectors.any())
                .build();

    }

    private ApiInfo apiInfo() {
        return new ApiInfoBuilder()
                .title("Project interface document")
                .description("Service related interfaces")
                .contact(new Contact("vincent",null,"vincent549@vip.qq.com"))
                .version("1.0")
                .build();
    }

}
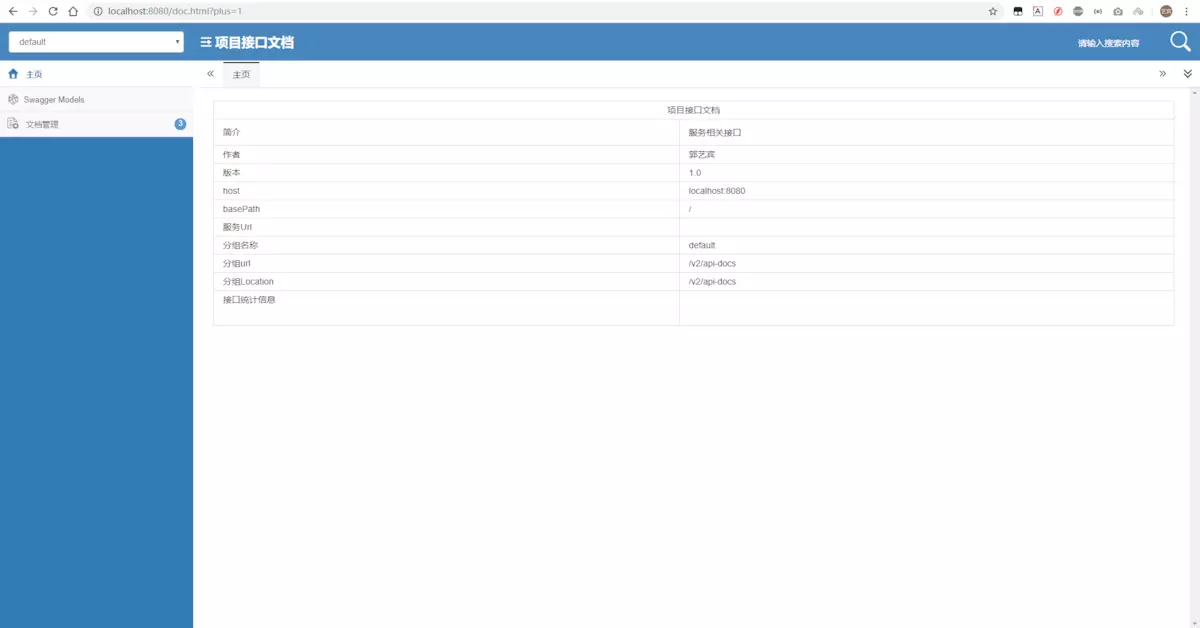
As you can see, there is no change in the content, the only change is that the class annotation needs to add one more @ enableswaggerbootstrap UI than the original swagger. In this way, all configurations of knife4j are completed, and the starting project can access the address:
Take a look at the effect:
Interface configuration
Next, configure a simple interface to view the presentation effect of the document.
First, let's look at the general return results of the interface:
@ApiModel("Common interface return object")
@AllArgsConstructor
@NoArgsConstructor
@Data
public class Results<T> {

    @ApiModelProperty(required = true,notes = "Result code",example = "200")
    private int state;
    @ApiModelProperty(required = true,notes = "time stamp",example = "1567425139000")
    private long time;
    @ApiModelProperty(required = true,notes = "Return information",example = "SUCCESS")
    private String message;
    @ApiModelProperty(required = true,notes = "Return data",example = "{\"name\":\"blues\"}")
    private T content;

}
@ApiModel("User object")
@AllArgsConstructor
@NoArgsConstructor
@Data
public class UserVO {

    @ApiModelProperty(required = true,notes = "user name",example = "blues")
    private String name;

    @ApiModelProperty(required = true,notes = "User return message",example = "hello world")
    private String words;


}
Through the above two definitions, the return type of the interface is completed. Here is the interface:
@Api(tags = "HELLO CONTROLLER Test function interface")
@RestController
public class HelloController {


    @ApiImplicitParams({
            @ApiImplicitParam(name = "name",value = "User name",required = true,dataType = "String",paramType = "path",example = "blues")
    })
    @ApiResponses(value = {
            @ApiResponse(code = 200, message = "Interface returns success status"),
            @ApiResponse(code = 500, message = "Interface returned unknown error, please contact the developer for debugging")
    })
    @ApiOperation(value = "Hello Test interface", notes = "Access this interface, return hello Statement, test interface")
    @GetMapping("hello/{name}")
    public Results<UserVO> hello(@PathVariable String name){
        UserVO userVO = new UserVO(name,"hello " + name);
        Results<UserVO> results = new Results<>(200,"SUCCESS", userVO);
        return results;
    }

}
This interface class is divided into several parts. The first part is the @ Api annotation on the class, which describes the interface classification meaning of the entire class. Another is the @ ApiImplicitParams annotation on each interface, which defines all parameters of the interface. There is also the @ ApiResponses annotation, which defines the meaning of all status codes when returning. Finally, there is the @ ApiOperation annotation, which describes the function of a single interface itself.
After defining the interface, we will restart the project to see the effect of the document:
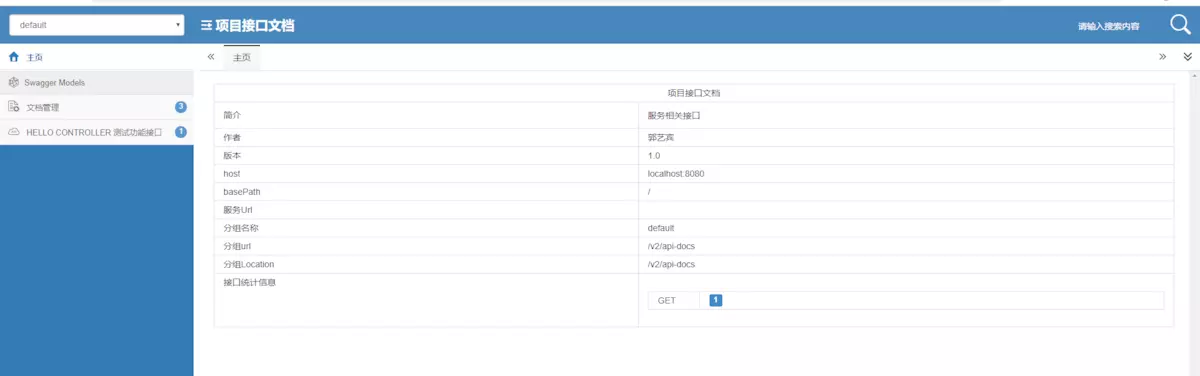
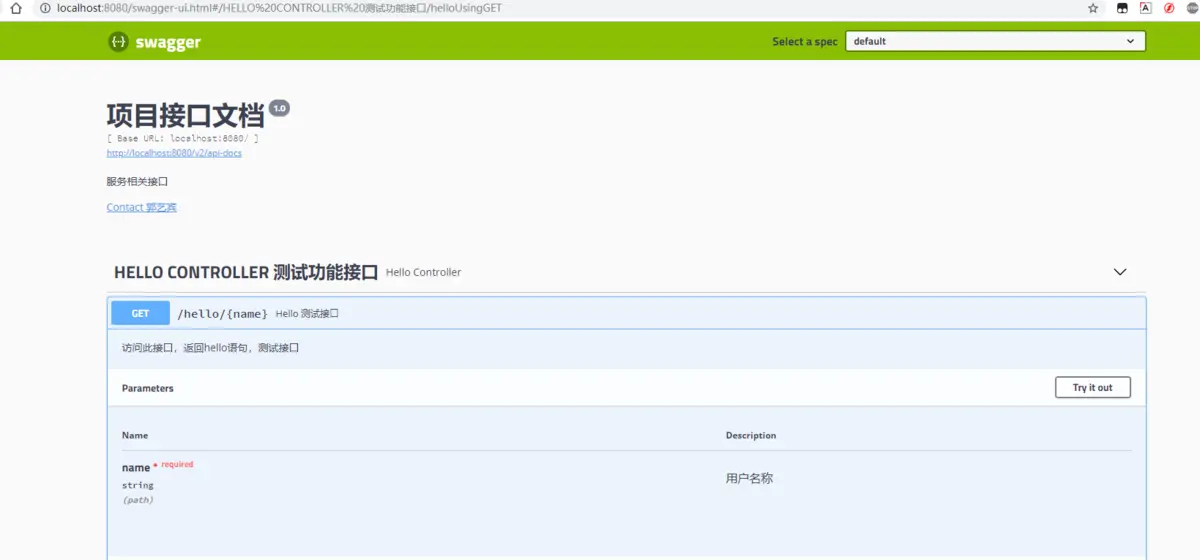
There are some changes on the home page. The left list has the overall description column of HelloController class. Click this column to see all interfaces defined in the class:
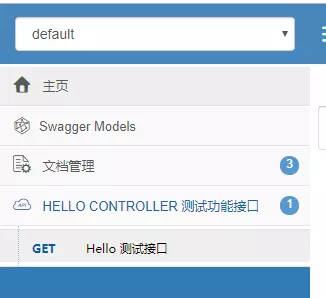
Click this interface to see a very detailed interface document on the right:

The above figure shows the interface address, interface type, interface description and detailed input parameter description. The following corresponding states show the two state types we defined, and the interface parameters are also listed in detail:
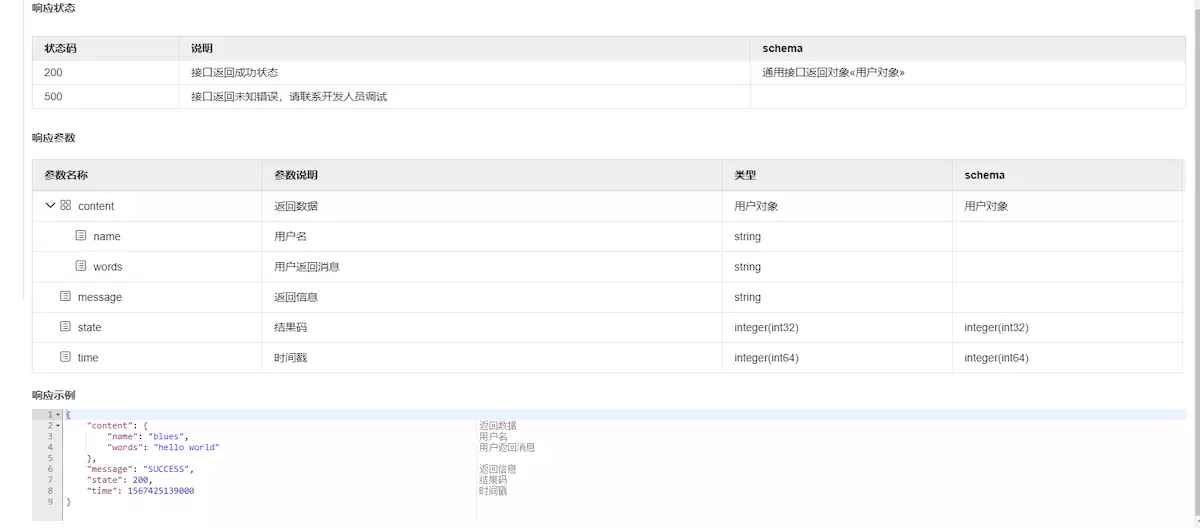
There are text description types, data structures and types. There are also response examples, which are very clear. I think this kind of display effect is much more friendly than the original swagger.
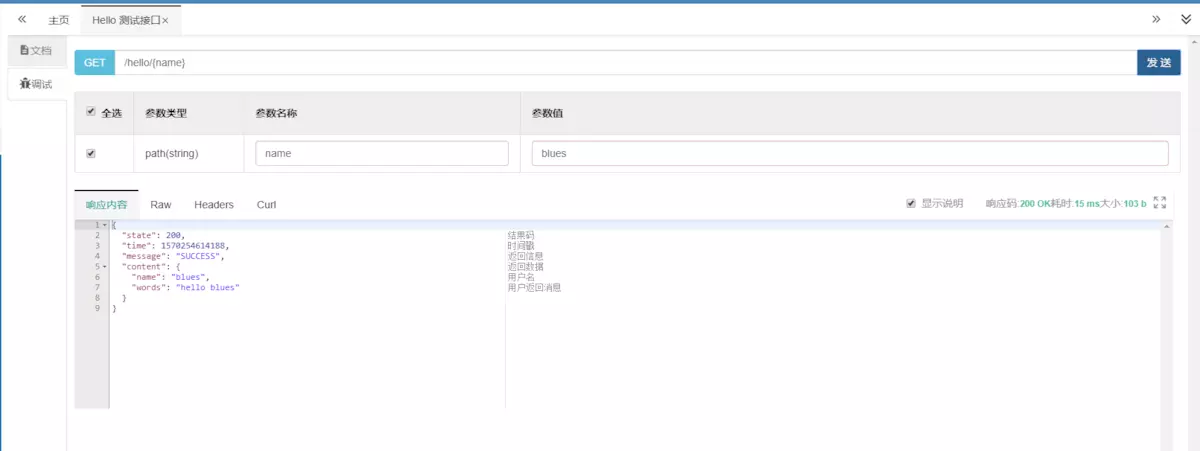
There is also debugging function on the right side, which can be used directly to test the interface:
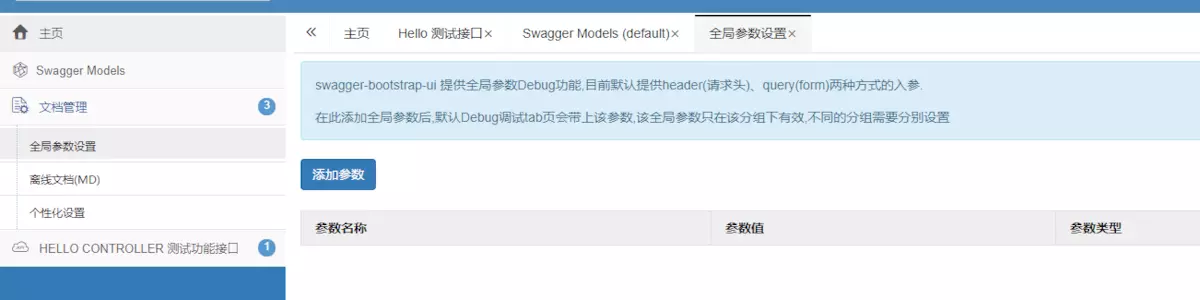
In the document management on the left, you can also set global parameters to support jwt like tests with permissions:
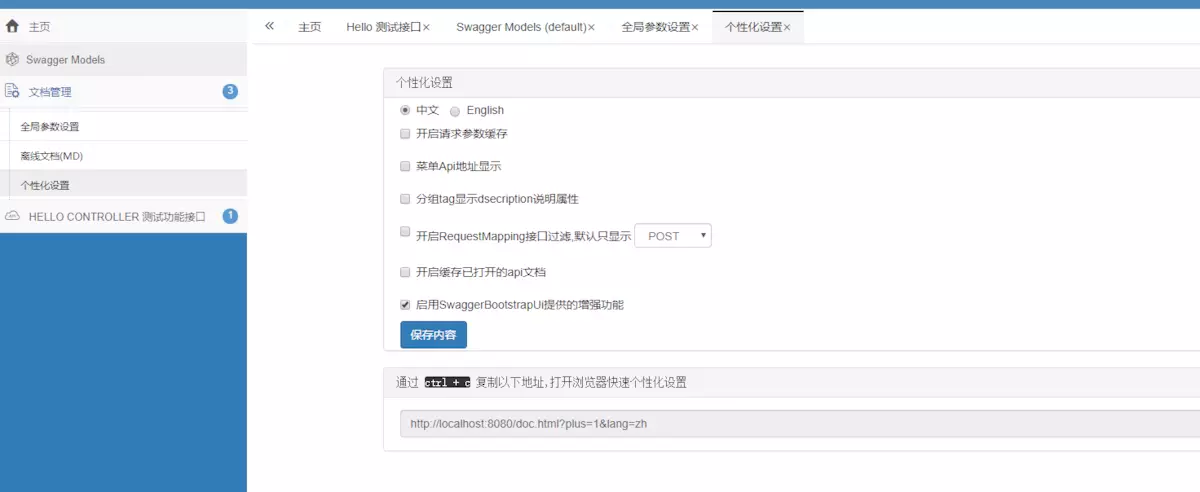
You can also personalize documents:
Explain
The above briefly introduces and demonstrates knife4j. This starter not only supports the swagger bootstrap UI, but also the original swagger UI can be used:
Some students who prefer the original style can see this page. In addition, swagger has many annotations, which can make the information displayed in the document more perfect and friendly. You can try and learn by yourself.