With the development of programs, security is also becoming more and more important. When there was no spring security framework before, we want to achieve rights page interceptor or filter, which is particularly troublesome. After using Spring Security, everything becomes simple, just a few simple thingsConfiguration enables privilege authentication to encrypt data, etc. It is very convenient to implement functions previously achieved by using interceptors and filters without having to write complex logic. Spring Security is the prefix of Spring, so it is well known and listed as a separate project on the Spring.io website.SpringSecurity can also be integrated into any project with ongoing updates.
Next, let's talk about the basic operations:
How to use the SpringSecurity security framework
First, introduce the core dependencies of SpringSecurity into our project's pom.xml.
This tutorial uses the latest version of SpringBoot, 2.1.4
 <dependency>
            <groupId>org.springframework.boot</groupId>
            <artifactId>spring-boot-starter-security</artifactId>
 </dependency>
 	 <dependency>
            <groupId>org.springframework.security</groupId>
            <artifactId>spring-security-test</artifactId>
            <scope>test</scope>
    </dependency>
Once the dependency has been successfully introduced, a random password string will appear at startup
The dependency of SpringSecurity has been introduced into the project, which will be automatically configured by default. The default user name is user, and the password is a string of strings for each console boot, which is different for each boot.And a default login page will be generated for you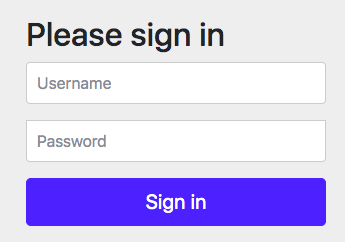
For this page, this page is officially provided by SpringSecurity, but no one will use this page for authentication. It is a custom login page for authentication, but the interface used to process login logic is
2. Create a package and start writing code. The project structure is as follows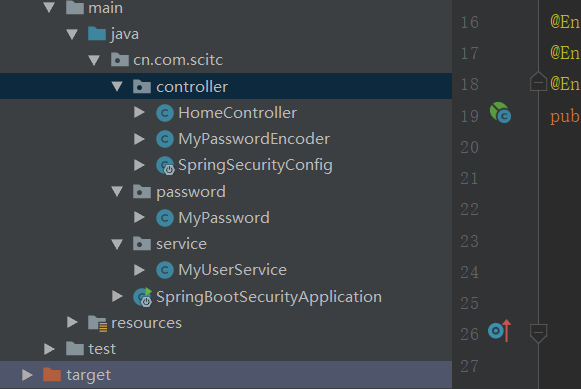
To use it, we need to complete the most basic configuration of SpringSecurity. First, we create a class of WebSecurityConfg to follow the WebSecurityConfigurerAdapter. I will not go into this adapter in depth and implement the http configure method after inheriting it.
public class SpringSecurityConfig extends WebSecurityConfigurerAdapter
Note with notes
@Configuration
The configure method to implement HttpSecurity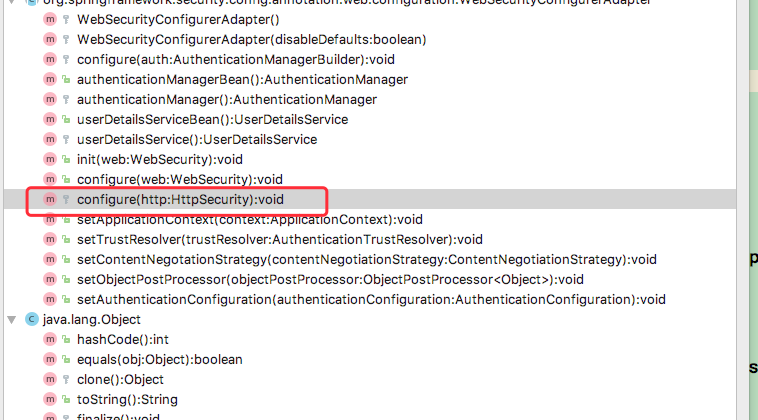
We can't use it by default, and we need to configure it simply to make SpringSecurity work.
    @Override
    protected void configure(HttpSecurity http) throws Exception {
        http.authorizeRequests()
                .antMatchers("/").permitAll()
                .anyRequest().authenticated()
                .and()
                .logout().permitAll()
                .and()
                .formLogin();

//        Turn off default authentication
        http.csrf().disable();
    }
AuizeRequests defines those URLs that need to be protected and those that don't. Usually this comes out on the first line of configuration where antMatchers is the set path, usually the request path on the controller, followed by permitAll s that allow access to anyone without restrictions.
The following anyRequest means that, in addition to the above request, authenticated means that authentication is required.
The and() method is similar to the end label in the xml configuration, and the object returned by the and() method is HttpSecurity, and when we have finished configuring a section of the configuration we need to end with and
formLogin is a form authentication method, and there is also an httpBasic authentication.
csrf.disable turns off cross-station Request Forgery protection
loginProcessingUrl is the default login entry configured (it is emphasized here that the default processing login interface for Spring security is/login, which comes with it)
Then choose to release the static file
  @Override
    public void configure(WebSecurity web) throws Exception {
        web.ignoring().antMatchers("/js/**","/css/**","/images/**");
    }
Write access certification:
@RequestMapping("/")
    private String index(){
        return "success";
    }

    @RequestMapping("/hello")
    private String hello(){
        return "hello";
    }


    @PreAuthorize("hasAnyRole('ROLE_ADMIN')")
    @RequestMapping("/role")
    public String role(){
        return "admin role";
    }
Here we're using custom authentication
 //Identity Formulated
    @Override
    protected void configure(AuthenticationManagerBuilder auth) throws Exception {
        auth.inMemoryAuthentication().withUser("admin").password("123456").roles("ADMIN");

        //Clear Submission
        auth.inMemoryAuthentication().passwordEncoder(new MyPasswordEncoder()).withUser("xs").password("123456").roles("ADMIN");

        //Specify permissions
        auth.inMemoryAuthentication().withUser("lisi").password("123").roles("USER");


    }
When you specify a user name and account of the type, you do not need to log in again with the default password and account at startup, just the account and password that you set up yourself.
Sometimes plain text and specified permissions fail to log in, so the solution is to create a new MyPasswordEncoder class to implement the following
@Configuration
public class MyPasswordEncoder implements PasswordEncoder {
    @Override
    public String encode(CharSequence rawPassword) {
        return rawPassword.toString();
    }

    @Override
    public boolean matches(CharSequence rawPassword, String encodedPassword) {
        return encodedPassword.equals(rawPassword.toString());
    }
}
Submit in clear text or with specified permissions to de-instantiate
auth.inMemoryAuthentication().passwordEncoder(new MyPasswordEncoder()).withUser("xs").password("123456").roles("ADMIN");
3. Next is the database authentication.
Encrypt and match passwords first
public class MyPassword implements PasswordEncoder {

    //Specify salt value
    private final static String SALT = "123456";

    @Override
    public String encode(CharSequence rawPassword) {
       //encryption
        Md5PasswordEncoder encoder = new Md5PasswordEncoder();
        return encoder.encodePassword(rawPassword.toString(),SALT);
    }

    //matching
    @Override
    public boolean matches(CharSequence rawPassword, String encodedPassword) {
        Md5PasswordEncoder encoder = new Md5PasswordEncoder();
        return encoder.isPasswordValid(encodedPassword,rawPassword.toString(),SALT);
    }
}
Then implement it in the specified identity
 //Identity Formulated
    @Override
    protected void configure(AuthenticationManagerBuilder auth) throws Exception {

  //Custom management actions
       auth.userDetailsService(myUserService).passwordEncoder(new MyPasswordEncoder());

        //Use default database validation
        auth.jdbcAuthentication().usersByUsernameQuery("").authoritiesByUsernameQuery("").passwordEncoder(new MyPasswordEncoder());

    }
Custom control of the database in progress
@PreAuthorize("#id<10 and principal.username.equals(#username) and #user.username.equals('abc')")
    @PostAuthorize("returnObject %2 ==0") //integer
    @RequestMapping("/test")
    public Integer test(Integer id , String username , User user){
        //...your own needs
        return id;
    }


    //Filtering parameters and return values
    @PreFilter("filterObject%2 ==0") //Even numbers
    @PostFilter("filterObject%4 ==0") //Return value
    @RequestMapping("/test2")
    public List<Integer> test2 (List<Integer> idList){
        //..Own needs
        return idList;
    }
This is set up to authenticate as well, but if the same url is configured in the security, then the configuration in the security takes precedence over using the @PreAuthorize configuration, both of which can authenticate, depending on your choice.
Other parameters of @PreAuthorize
hasRole (does the current user have a specified role)
HasAnyRole (Multiple roles are a comma-separated string.Returns true if the current user has any of the specified roles
HasAuthority (same effect as hasRole)
HasAnyAuthority (same effect as hasAnyRole)
HasPermission has two parameters, three of which are as follows
@PreAuthorize("hasPermission('user', 'ROLE_USER')")
@PreAuthorize("hasPermission('targetId','targetType','permission')")