Preface
Our springboot rack already contains mysql,redis, timed tasks, mail services, SMS services, file uploads and downloads, docker-compose building mirrors, and more.
Let's move on to another common problem.In general, the front and back ends are separated, and the original intention of this scaffold is to separate the front and back ends, so there is a serious problem involved here. When the protocol, port, IP have a different one, it will produce cross-domain, so cross-domain support is required.
Test cross-domain files
Before that, let's write a test interface for cross-domain html, so that the following tests are more convenient.
<!DOCTYPE html>
<html lang="en">
<head>
    <meta charset="UTF-8">
    <title>Title</title>
</head>
<link type="test/css" href="css/style.css" rel="stylesheet">

<body>

    <input type="text" style="width:600px;height:30px;font-size:14px;" id="urlText" value="" />
    <br>
    <input type="button" style="margin: 10px";  id="cors" value="Determine Accessibility"/>

<p>http://localhost:9090/zlflovemm/</p>
<script type="text/javascript" src="https://code.jquery.com/jquery-3.2.1.min.js"></script>
<script type="text/javascript">
    $(function(){
    $("#cors").click(
        function(){
            var url2 = $("#urlText").val();
            $.post({
                contentType:'application/x-www-form-urlencoded;charset=UTF-8',
                url:url2,
                data: "/rAIeKeSBG1LV+XoIq82/O",
                success:function(data){
                    alert("success");
                }
            })
        });
    });
</script>
</body>
</html>
Next, let's learn how to implement cross-domain support in the springboot project.
@CrossOrigin comment
This method comes with springboot and is relatively simple to use by adding this annotation to the cross-domain interface you need to support.
For example, adding a comment to the demo interface of our project means that this interface supports cross-domain, where origins ='*'
Indicates that all addresses can access this interface, or write a specific address to indicate that only this address can access the interface.
@CrossOrigin(origins = "*")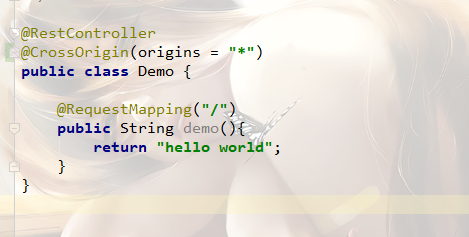
test
Let's also test the html files that run our tests on the browser after you start the project.
localhost:9090/zlflovemm/was found to be accessible.
Indicates that cross-domain is supported.You can test it by removing the comment and then compare it with the comment test.
This is a simple way to do it, but it also has some drawbacks. This annotation is required for cross-domain interfaces, which is not friendly for front-end and back-end separated projects, so it is rarely used.
Override the addCorsMappings method of WebMvcConfigurer.
This method is also used in practical projects and is a global method to support cross-domain.
We create a CorsConfig class.The contents are as follows:
@Configuration
public class CorsConfig implements WebMvcConfigurer {
    @Override
    public void addCorsMappings(CorsRegistry registry) {
        registry.addMapping("/**")//All interfaces in the project support cross-domain
                .allowedOrigins("*")//All addresses are accessible or specific addresses can be configured
                .allowCredentials(true)
                .allowedMethods("*")//"GET", "HEAD", "POST", "PUT", "DELETE", "OPTIONS"
                .maxAge(3600);// Cross-domain Allow Time
    }
}
Add @Configuration to indicate that it is a configuration class that will be loaded when the project starts.Implement the WebMvcConfigurer interface and override the addCorsMappings method.The code is simple and has comments.
If you test it, you can test it yourself. All of my tests pass the same test as above, so it won't take up much space here.
Filter
In addition to the above methods, filters can also be used.We create a CorsFilter class that reads as follows:
@Slf4j
@Component
public class CorsFilter implements Filter {
    @Override
    public void doFilter(ServletRequest servletRequest, ServletResponse servletResponse, FilterChain filterChain) throws IOException, ServletException {
        HttpServletResponse response = (HttpServletResponse)servletResponse;
        response.setHeader("Access-Control-Allow-Origin", "*");
        response.setHeader("Access-Control-Allow-Methods", "POST, PUT, GET, OPTIONS, DELETE");
        response.setHeader("Access-Control-Max-Age", "3600");
        response.setHeader("Access-Control-Allow-Headers", "Origin, X-Requested-With, Content-Type, Accept, client_id, uuid, Authorization");
        response.setHeader("Cache-Control", "no-cache, no-store, must-revalidate");
        response.setHeader("Pragma", "no-cache");
        filterChain.doFilter(servletRequest,response);
    }
}
The response.setHeader("Access-Control-Allow-Origin", "*") is set in the code above; it means that all addresses have access to the project interface.
Xanthopanax
Next, we introduce a common function, front-end and back-end separation, when accessing an interface, some companies often add an exclusive suffix name to access it.Actually, it doesn't do much to increase the security of the system a little.Here I am just going to do it.It's really simple.
The same is to implement the WebMvcConfigurer interface, override configurePathMatch and add a dispatcher Servlet.
The code is as follows:
@Override
    public void configurePathMatch(PathMatchConfigurer configurer) {
        configurer.setUseRegisteredSuffixPatternMatch(true);
    }

    @Bean
    public ServletRegistrationBean servletRegistrationBean(DispatcherServlet dispatcherServlet) {
        ServletRegistrationBean bean = new ServletRegistrationBean(dispatcherServlet);
        bean.addUrlMappings("*.zlf");
        return bean;
    }
This functionality is implemented using only this multicode, configurer.setUseRegisteredSuffixPatternMatch(true) set in the configurePathMatch method; mainly by pointing both index and index. * to the @RequestMapping("/index") configured in our controller.
The servletRegistrationBean method below is primarily to add custom interceptors, and only interfaces suffixed with'.zlf'will be released.
This is a simple two-step implementation of adding custom suffix names to the interface.
So far, the way springboot supports cross-domain is almost the same. Of course, there are other implementations that have not been studied.These hopes will help you all.
Well, that's all.
Code uploaded to github:
https://github.com/QuellanAn/zlflovemm
Follow-up gas
Welcome to your personal public number "Programmer loves yoghurt"
Share all kinds of learning materials, including java, linux, big data, etc.The material contains video documentation and source code, as well as sharing my own and delivered high-quality technical blogs.
If you like to remember to focus and share