preface
DataBinding is a framework officially released by Google. As its name suggests, it is data binding. It is an implementation of MVVM mode on Android. It is used to reduce the coupling between layout and logic and make the code logic clearer. Compared with MVP, MVVM actually replaces the Presenter layer with the ViewModel layer. DataBinding can omit the findViewById() step we have been doing all along and greatly reduce the code in the Activity. The data can be bound to the layout file one way or two ways, which helps to prevent memory leakage. In addition, it can automatically perform null detection to avoid null pointer exceptions
The method to enable DataBinding is to add the following code to the build.gradle file of the corresponding Model. After synchronization, support for DataBinding can be introduced
android {
    dataBinding {
        enabled = true
    }
}
1, Basic introduction
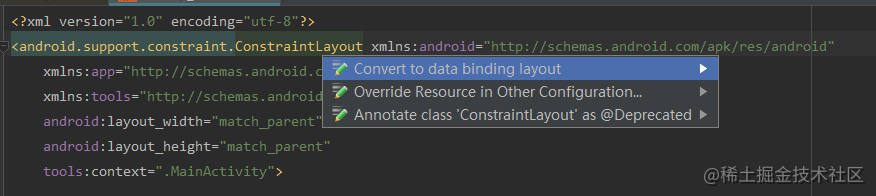
After enabling DataBinding, let's see how to bind the specified variables in the layout file, open the layout file, select the ViewGroup of the root layout, press Alt + enter, and click Convert to data binding layout to generate the layout rules required for DataBinding
<?xml version="1.0" encoding="utf-8"?>
<layout xmlns:android="http://schemas.android.com/apk/res/android"
    xmlns:app="http://schemas.android.com/apk/res-auto"
    xmlns:tools="http://schemas.android.com/tools">

    <data>

    </data>

    <android.support.constraint.ConstraintLayout
        android:layout_width="match_parent"
        android:layout_height="match_parent"
        tools:context=".MainActivity">
    </android.support.constraint.ConstraintLayout>
</layout>
The difference from the original layout is that there is an additional layout tag to wrap the original layout. The data tag is used to declare the variables and variable types to be used. To implement the MVVM ViewModel, you need to bind the data (Model) to the UI (View). The data tag acts like a bridge to build a channel between the View and the Model
Let's declare a mode first
package com.leavesc.databinding_demo.model;

/**
 * Author: ye should be ye
 * Time: 20:20, May 16, 2018
 * Description: https://github.com/leavesC
 */
public class User {

    private String name;

    private String password;

    ···
}
Declare the variable name and the full path of the class to be used in the data tag
    <data>
        <variable
            name="userInfo"
            type="com.leavesc.databinding_demo.model.User" />
    </data>
If the User type needs to be used in many places, you can also import it directly, so you don't have to indicate the whole package name and path every time, and the classes in the java.lang. * package will be imported automatically, so you can use it directly
    <data>
        <import type="com.leavesc.databinding_demo.model.User"/>
        <variable
            name="userInfo"
            type="User"/>
    </data>
If the class name of import is the same, alias can be used to specify the alias
    <data>
        <import type="com.leavesc.databinding_demo.model.User" />
        <import
            alias="TempUser"
            type="com.leavesc.databinding_demo.model2.User" />
        <variable
            name="userInfo"
            type="User" />
        <variable
            name="tempUserInfo"
            type="TempUser" />
    </data>
Here, a User type variable userInfo is declared. What we need to do is to hook this variable with two TextView controls. By setting the variable value of userInfo, we can make TextView display the corresponding text. The complete layout code is as follows
<?xml version="1.0" encoding="utf-8"?>
<layout xmlns:android="http://schemas.android.com/apk/res/android"
xmlns:tools="http://schemas.android.com/tools">
<data>
<import type="com.leavesc.databinding_demo.model.User" />
<variable
name="userInfo"
type="User" />
</data>
<LinearLayout
android:layout_width="match_parent"
android:layout_height="match_parent"
android:layout_margin="20dp"
android:orientation="vertical"
tools:context="com.leavesc.databinding_demo.Main2Activity">
<TextView
android:id="@+id/tv_userName"
···
android:text="@{userInfo.name}" />
<TextView
···
android:text="@{userInfo.password}" />
</LinearLayout>
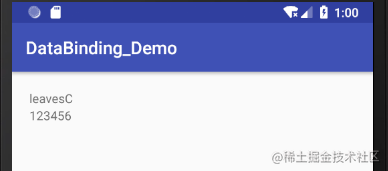
</layout>By @ {userInfo.name} making TextView reference to relevant variables, DataBinding will map it to the corresponding getter method. After that, you can set the layout file through DataBindingUtil in the Activity, omit the setContentView() method of the original Activity, and assign a value to the variable userInfo
    private User user;

    @Override
    protected void onCreate(Bundle savedInstanceState) {
        super.onCreate(savedInstanceState);
        ActivityMain2Binding activityMain2Binding = DataBindingUtil.setContentView(this, R.layout.activity_main2);
        user = new User("leavesC", "123456");
        activityMain2Binding.setUserInfo(user);
    }
Because @ {userInfo.name} does not have a clear value in the layout file, nothing will be displayed in the preview view, making it difficult to observe attributes such as text size and font color. At this time, you can set a default value for it (attributes such as text content or font size are applicable). The default value will only be displayed in the preview view, and the default value cannot contain quotation marks
android:text="@{userInfo.name,default=defaultValue}"In addition, you can also directly obtain the control with the specified ID through ActivityMain2Binding
activityMain2Binding.tvUserName.setText("leavesC");Each data binding layout file will generate a binding class. The instance name of ViewDataBinding is generated according to the layout file name. Change it to the hump naming method with initial capital letters, and omit the underline contained in the layout file name. Control is obtained in a similar way, but with a lowercase initial
You can also customize the instance name of ViewDataBinding in the following ways
    <data class="CustomBinding">

    </data>
In addition, a special variable named context will be generated as needed in the binding expression. The value of context is the context object returned by the getContext() method of the root View, and the context variable will be overwritten by the explicit variable declaration with this name
Data binding is also supported in Fragment and RecyclerView. For example, you can see the use of data binding in Fragment
    @Override
    public View onCreateView(@NonNull LayoutInflater inflater, ViewGroup container, Bundle savedInstanceState) {
        FragmentBlankBinding fragmentBlankBinding = DataBindingUtil.inflate(inflater, R.layout.fragment_blank, container, false);
        fragmentBlankBinding.setHint("Hello");
        return fragmentBlankBinding.getRoot();
    }
**In the above implementation of data binding, whenever the bound variable changes, you need to re pass the new variable value to ViewDataBinding to refresh the UI. Next, let's look at how to automatically refresh the UI**
2, One way data binding
There are three ways to automatically drive UI refresh by data change: BaseObservable, ObservableField and ObservableCollection
BaseObservable
After a pure ViewModel class is updated, the UI will not be updated automatically. After data binding, we naturally hope that the UI will refresh immediately after data changes. Observable is the concept born for this
BaseObservable provides notifyChange() and notifyPropertyChanged(). The former will refresh all value fields, while the latter will only update the flag of the corresponding br. The BR is generated through the annotation @ Bindable, and the view associated with a specific attribute can be generated through BR notify
/**
 * Author: ye should be ye
 * Time: 20:54, May 16, 2018
 * Description:
 */
public class Goods extends BaseObservable {

    //If it is a public modifier, you can add @ Bindable annotation directly above the member variable
    @Bindable
    public String name;

    //If it is a private modifier, add the @ Bindable annotation on the get method of the member variable
    private String details;

    private float price;

    public Goods(String name, String details, float price) {
        this.name = name;
        this.details = details;
        this.price = price;
    }

    public void setName(String name) {
        this.name = name;
        //Update this field only
        notifyPropertyChanged(com.leavesc.databinding_demo.BR.name);
    }

    @Bindable
    public String getDetails() {
        return details;
    }

    public void setDetails(String details) {
        this.details = details;
        //Update all fields
        notifyChange();
    }

    public float getPrice() {
        return price;
    }

    public void setPrice(float price) {
        this.price = price;
    }

}
Only this field is updated in the setName() method, while all fields are updated in the setDetails() method
Add two buttons to change the three attribute values of the goods variable, so you can see the difference between the two notify methods. The button click event binding involved will also be discussed below
<?xml version="1.0" encoding="utf-8"?>
<layout xmlns:android="http://schemas.android.com/apk/res/android"
    xmlns:tools="http://schemas.android.com/tools">

    <data>
        <import type="com.leavesc.databinding_demo.model.Goods" />
        <import type="com.leavesc.databinding_demo.Main3Activity.GoodsHandler" />
        <variable
            name="goods"
            type="Goods" />
        <variable
            name="goodsHandler"
            type="GoodsHandler" />
    </data>

    <LinearLayout
        android:layout_width="match_parent"
        android:layout_height="match_parent"
        android:orientation="vertical"
        android:padding="20dp"
        tools:context=".Main3Activity">

        <TextView
            ···
            android:text="@{goods.name}" />

        <TextView
            ···
            android:text="@{goods.details}" />

        <TextView
            ···
            android:text="@{String.valueOf(goods.price)}" />

        <Button
            ···
            android:onClick="@{()->goodsHandler.changeGoodsName()}"
            android:text="change attributes name and price"
            android:textAllCaps="false" />

        <Button
            ···
            android:onClick="@{()->goodsHandler.changeGoodsDetails()}"
            android:text="change attributes details and price"
            android:textAllCaps="false" />

    </LinearLayout>
</layout>
/**
* Author: ye should be ye
* Time: 21:07, May 16, 2018
* Description:
*/
public class Main3Activity extends AppCompatActivity {
private Goods goods;
private ActivityMain3Binding activityMain3Binding;
@Override
protected void onCreate(Bundle savedInstanceState) {
super.onCreate(savedInstanceState);
setContentView(R.layout.activity_main3);
activityMain3Binding = DataBindingUtil.setContentView(this, R.layout.activity_main3);
goods = new Goods("code", "hi", 24);
activityMain3Binding.setGoods(goods);
activityMain3Binding.setGoodsHandler(new GoodsHandler());
}
public class GoodsHandler {
public void changeGoodsName() {
goods.setName("code" + new Random().nextInt(100));
goods.setPrice(new Random().nextInt(100));
}
public void changeGoodsDetails() {
goods.setDetails("hi" + new Random().nextInt(100));
goods.setPrice(new Random().nextInt(100));
}
}
}
Classes that implement the Observable interface allow a listener to be registered. When the properties of Observable objects change, the listener will be notified. In this case, OnPropertyChangedCallback is required
Among them, propertyId is used to identify specific fields
        goods.addOnPropertyChangedCallback(new Observable.OnPropertyChangedCallback() {
            @Override
            public void onPropertyChanged(Observable sender, int propertyId) {
                if (propertyId == com.leavesc.databinding_demo.BR.name) {
                    Log.e(TAG, "BR.name");
                } else if (propertyId == com.leavesc.databinding_demo.BR.details) {
                    Log.e(TAG, "BR.details");
                } else if (propertyId == com.leavesc.databinding_demo.BR._all) {
                    Log.e(TAG, "BR._all");
                } else {
                    Log.e(TAG, "unknown");
                }
            }
        });
ObservableField
Inheriting from the Observable class is relatively restrictive, and the notify operation is also required. Therefore, you can choose to use ObservableField for simplicity. ObservableField can be understood as the official encapsulation of operations such as annotation and refresh of fields in BaseObservable. The official native provides encapsulation of basic data types, such as ObservableBoolean, ObservableByte, ObservableChar, ObservableShort, ObservableInt, ObservableLong, ObservableFloat, ObservableDouble and ObservableParcelable, Other types can also be declared through the ObservableField generic
/**
 * Author: ye should be ye
 * Time: 21:33, May 13, 2018
 * Description:
 */
public class ObservableGoods {

    private ObservableField<String> name;

    private ObservableFloat price;

    private ObservableField<String> details;

    public ObservableGoods(String name, float price, String details) {
        this.name = new ObservableField<>(name);
        this.price = new ObservableFloat(price);
        this.details = new ObservableField<>(details);
    }

    ```
}
Any change to the ObservableGoods attribute value will immediately trigger UI refresh, which is not conceptually different from Observable. See the source code provided below for specific effects, which will not be repeated here
ObservableCollection
dataBinding also provides wrapper classes to replace the native List and Map, ObservableList and ObservableMap respectively. When the data contained in them changes, the bound view will be refreshed accordingly
<?xml version="1.0" encoding="utf-8"?>
<layout xmlns:android="http://schemas.android.com/apk/res/android"
xmlns:tools="http://schemas.android.com/tools">
<data>
<import type="android.databinding.ObservableList"/>
<import type="android.databinding.ObservableMap"/>
<variable
name="list"
type="ObservableList<String>"/>
<variable
name="map"
type="ObservableMap<String,String>"/>
<variable
name="index"
type="int"/>
<variable
name="key"
type="String"/>
</data>
<LinearLayout
android:layout_width="match_parent"
android:layout_height="match_parent"
android:orientation="vertical"
tools:context="com.leavesc.databinding_demo.Main12Activity">
<TextView
···
android:padding="20dp"
android:text="@{list[index],default=xx}"/>
<TextView
···
android:layout_marginTop="20dp"
android:padding="20dp"
android:text="@{map[key],default=yy}"/>
<Button
···
android:onClick="onClick"
android:text="Change data"/>
</LinearLayout>
</layout> private ObservableMap<String, String> map;
@Override
protected void onCreate(Bundle savedInstanceState) {
super.onCreate(savedInstanceState);
ActivityMain12Binding activityMain12Binding = DataBindingUtil.setContentView(this, R.layout.activity_main12);
map = new ObservableArrayMap<>();
map.put("name", "leavesC");
map.put("age", "24");
activityMain12Binding.setMap(map);
ObservableList<String> list = new ObservableArrayList<>();
list.add("Ye");
list.add("leavesC");
activityMain12Binding.setList(list);
activityMain12Binding.setIndex(0);
activityMain12Binding.setKey("name");
}
public void onClick(View view) {
map.put("name", "leavesC,hi" + new Random().nextInt(100));
}
3, Bidirectional data binding
Two way binding means that when the data changes, the view is refreshed at the same time, and when the view changes, the data can also be changed at the same time
Look at the following example. When the input content of EditText changes, it will be synchronized to the variable goods at the same time. The way of binding variables is an equal sign more than one-way binding: android:text="@={goods.name}"
<?xml version="1.0" encoding="utf-8"?>
<layout xmlns:android="http://schemas.android.com/apk/res/android"
    xmlns:tools="http://schemas.android.com/tools">

    <data>
        <import type="com.leavesc.databinding_demo.model.ObservableGoods"/>
        <variable
            name="goods"
            type="ObservableGoods" />
    </data>

    <LinearLayout
        android:layout_width="match_parent"
        android:layout_height="match_parent"
        android:orientation="vertical"
        tools:context=".Main10Activity">

        <TextView
            ···
            android:text="@{goods.name}" />

        <EditText
            ···
            android:text="@={goods.name}" />

    </LinearLayout>
</layout>
public class Main10Activity extends AppCompatActivity {
@Override
protected void onCreate(Bundle savedInstanceState) {
super.onCreate(savedInstanceState);
ActivityMain10Binding activityMain10Binding = DataBindingUtil.setContentView(this, R.layout.activity_main10);
ObservableGoods goods = new ObservableGoods("code", "hi", 23);
activityMain10Binding.setGoods(goods);
}
}
4, Event binding
Strictly speaking, event binding is also a kind of variable binding, except that the set variable is the callback interface. Event binding can be used for the following callback events
- android:onClick
- android:onLongClick
- android:afterTextChanged
- android:onTextChanged
- ...
Create a new UserPresenter class inside the Activity to declare the callback methods corresponding to onClick() and afterTextChanged() events
public class UserPresenter {

        public void onUserNameClick(User user) {
            Toast.makeText(Main5Activity.this, "user name:" + user.getName(), Toast.LENGTH_SHORT).show();
        }

        public void afterTextChanged(Editable s) {
            user.setName(s.toString());
            activityMain5Binding.setUserInfo(user);
        }

        public void afterUserPasswordChanged(Editable s) {
            user.setPassword(s.toString());
            activityMain5Binding.setUserInfo(user);
        }

}
<?xml version="1.0" encoding="utf-8"?>
<layout xmlns:android="http://schemas.android.com/apk/res/android"
xmlns:tools="http://schemas.android.com/tools">
<data>
<import type="com.leavesc.databinding_demo.model.User" />
<import type="com.leavesc.databinding_demo.MainActivity.UserPresenter" />
<variable
name="userInfo"
type="User" />
<variable
name="userPresenter"
type="UserPresenter" />
</data>
<LinearLayout
android:layout_width="match_parent"
android:layout_height="match_parent"
android:layout_margin="20dp"
android:orientation="vertical"
tools:context="com.leavesc.databinding_demo.MainActivity">
<TextView
···
android:onClick="@{()->userPresenter.onUserNameClick(userInfo)}"
android:text="@{userInfo.name}" />
<TextView
···
android:text="@{userInfo.password}" />
<EditText
···
android:afterTextChanged="@{userPresenter.afterTextChanged}"
android:hint="user name" />
<EditText
···
android:afterTextChanged="@{userPresenter.afterUserPasswordChanged}"
android:hint="password" />
</LinearLayout>
</layout>
5, Using class methods
First, define a static method
public class StringUtils {

    public static String toUpperCase(String str) {
        return str.toUpperCase();
    }

}
Import the tool class in the data tag
<import type="com.leavesc.databinding_demo.StringUtils" />
Then you can call it like a normal function
  <TextView
     android:layout_width="match_parent"
     android:layout_height="wrap_content"
     android:onClick="@{()->userPresenter.onUserNameClick(userInfo)}"
     android:text="@{StringUtils.toUpperCase(userInfo.name)}" />
6, Operator
Base operator
DataBinding supports the following operators, expressions, and keywords in layout files
- Arithmetic + - / *%
- String merge+
- Logical & &||
- Binary & |^
- One yuan + -~
- Shift > > > > ><<
- Compare = = > < > =<=
- Instanceof
- Grouping ()
- character, String, numeric, null
- Cast
- Method call
- Field access
- Array access []
- Ternary?:
The following operations are not currently supported
- this
- super
- new
- Show generic calls
In addition, DataBinding supports the following forms of calls
Null Coalescing
Empty merge operator?? The first non null value will be taken as the return value
 <TextView
     android:layout_width="match_parent"
     android:layout_height="wrap_content"
     android:text="@{user.name ?? user.password}" />
Equivalent to
android:text="@{user.name != null ? user.name : user.password}"Attribute control
You can control the properties of View through variable values
 <TextView
     android:layout_width="match_parent"
     android:layout_height="wrap_content"
     android:text="Visibility change"
     android:visibility="@{user.male  ? View.VISIBLE : View.GONE}" />
Avoid null pointer exceptions
DataBinding will also automatically help us avoid null pointer exceptions. For example, if userInfo in "@ {userInfo. Password}" is null, userInfo.password will be assigned to the default value of null without throwing null pointer exceptions
7, include and viewStub
include
For the included layout file, data binding through dataBinding is also supported. At this time, it is also necessary to use the layout label in the layout to be included to declare the variables to be used
view_include.xml
<?xml version="1.0" encoding="utf-8"?>
<layout xmlns:android="http://schemas.android.com/apk/res/android">

    <data>
        <import type="com.leavesc.databinding_demo.model.User" />
        <variable
            name="userInfo"
            type="User" />
    </data>

    <android.support.constraint.ConstraintLayout
        android:layout_width="match_parent"
        android:layout_height="wrap_content"
        android:background="#acc">

        <TextView
            android:layout_width="match_parent"
            android:layout_height="wrap_content"
            android:gravity="center"
            android:padding="20dp"
            android:text="@{userInfo.name}" />

    </android.support.constraint.ConstraintLayout>
</layout>
In the main layout file, the corresponding variables are passed to the include layout, so that the same variable is shared between the two layout files
<?xml version="1.0" encoding="utf-8"?>
<layout xmlns:android="http://schemas.android.com/apk/res/android"
    xmlns:bind="http://schemas.android.com/apk/res-auto"
    xmlns:tools="http://schemas.android.com/tools">

    <data>
        <import type="com.leavesc.databinding_demo.model.User" />
        <variable
            name="userInfo"
            type="User" />
    </data>

    <LinearLayout
        android:layout_width="match_parent"
        android:layout_height="match_parent"
        android:orientation="vertical"
        tools:context=".Main6Activity">

        <include
            layout="@layout/view_include"
            bind:userInfo="@{userInfo}" />

    </LinearLayout>
</layout>
viewStub
ViewStub layout is supported like dataBinding
Reference viewStub layout in layout file
   <ViewStub
        android:id="@+id/view_stub"
        android:layout_width="match_parent"
        android:layout_height="wrap_content"
        android:layout="@layout/view_stub"/>
Get the ViewStub object, so you can control the visibility of the ViewStub
	ActivityMain6Binding activityMain6Binding = DataBindingUtil.setContentView(this, R.layout.activity_main6);
	View view = activityMain6Binding.viewStub.getViewStub().inflate();
If the variable value needs to be bound for the ViewStub, the layout label should be used for layout like the ViewStub file, and the main layout file uses the custom bind namespace to pass the variable to the ViewStub
    <ViewStub
        android:id="@+id/view_stub"
        android:layout_width="match_parent"
        android:layout_height="wrap_content"
        android:layout="@layout/view_stub"
        bind:userInfo="@{userInfo}" />
If you do not use bind:userInfo="@{userInf}" to bind ViewStub in xml, you can wait until ViewStub is inflated before binding variables. At this time, you need to set setonifflatelistener callback function for ViewStub to bind data in the callback function
        activityMain6Binding.viewStub.setOnInflateListener(new ViewStub.OnInflateListener() {
            @Override
            public void onInflate(ViewStub stub, View inflated) {
                //If you do not use bind:userInfo="@{userInf}" to bind viewStub in xml
                //Then you can bind manually here
                ViewStubBinding viewStubBinding = DataBindingUtil.bind(inflated);
                viewStubBinding.setUserInfo(user);
                Log.e(TAG, "onInflate");
            }
        });
8, BindingAdapter
dataBinding provides the BindingAdapter annotation, which is used to support custom attributes or modify original attributes. The annotation value can be an existing xml attribute, such as android:src, android:text, etc., or you can customize the attribute and use it in xml
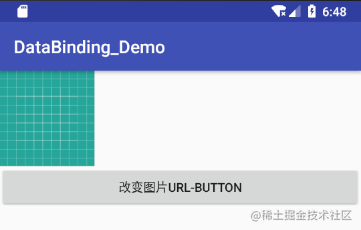
For example, for an ImageView, we want to dynamically change the displayed image when the value of a variable changes. At this time, we can implement it through the BindingAdapter
You need to define a static method and add a BindingAdapter annotation for it. The annotation value is the custom property name for the ImageView control, and the two parameters of the static method can be understood as follows: when the url property value of the ImageView control changes, dataBinding will pass the ImageView instance and the new url value to the loadImage() method, Thus, the related properties of ImageView can be changed dynamically here
    @BindingAdapter({"url"})
    public static void loadImage(ImageView view, String url) {
        Log.e(TAG, "loadImage url : " + url);
    }
Associate variable values in the xml file, and the name bind can be customized
<?xml version="1.0" encoding="utf-8"?>
<layout xmlns:android="http://schemas.android.com/apk/res/android"
    xmlns:bind="http://schemas.android.com/apk/res-auto"
    xmlns:tools="http://schemas.android.com/tools">

    <data>
        <import type="com.leavesc.databinding_demo.model.Image" />
        <variable
            name="image"
            type="Image" />
    </data>

    <android.support.constraint.ConstraintLayout
        android:layout_width="match_parent"
        android:layout_height="match_parent"
        tools:context=".Main8Activity">

        <ImageView
            android:id="@+id/image"
            android:layout_width="wrap_content"
            android:layout_height="wrap_content"
            android:src="@drawable/ic_launcher_background"
            bind:url="@{image.url}" />

    </android.support.constraint.ConstraintLayout>
</layout>
A more powerful aspect of BindingAdapter is that it can override the original control properties of Android. For example, you can set the suffix to be added to the text of each Button: "- Button"
    @BindingAdapter("android:text")
    public static void setText(Button view, String text) {
        view.setText(text + "-Button");
    }
<Button
android:layout_width="match_parent"
android:layout_height="wrap_content"
android:onClick="@{()->handler.onClick(image)}"
android:text='@{"Change picture Url"}'/>In this way, if the "android:text" property is used in the whole project, the text displayed will have an additional suffix
9, BindingConversion
dataBinding also supports data conversion or type conversion
Similar to BindingAdapter, the following method will add the suffix - conversionString to all String type variables referenced in the layout file in the form of @ {String}
    @BindingConversion
    public static String conversionString(String text) {
        return text + "-conversionString";
    }
xml file
        <TextView
            android:layout_width="match_parent"
            android:layout_height="wrap_content"
            android:text='@{"xxx"}'
            android:textAllCaps="false"/>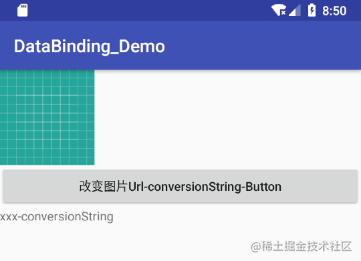
You can see that for a Button, the BindingAdapter and BindingConversion take effect at the same time, and the priority of BindingConversion is higher
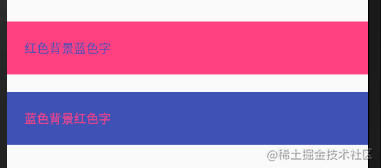
In addition, BindingConversion can also be used to convert the type of attribute value
Look at the following layout. When assigning values to the background and textColor attributes, strings are used directly. Normally, errors will be reported, but with BindingConversion, the value of string type can be automatically converted to the required Drawable and Color
	    <TextView
            android:layout_width="match_parent"
            android:layout_height="wrap_content"
            android:background='@{"gules"}'
            android:padding="20dp"
            android:text="Blue characters on red background"
            android:textColor='@{"blue"}'/>

        <TextView
            android:layout_width="match_parent"
            android:layout_height="wrap_content"
            android:layout_marginTop="20dp"
            android:background='@{"blue"}'
            android:padding="20dp"
            android:text="Red characters on a blue background"
            android:textColor='@{"gules"}'/>
@BindingConversion
public static Drawable convertStringToDrawable(String str) {
if (str.equals("gules")) {
return new ColorDrawable(Color.parseColor("#FF4081"));
}
if (str.equals("blue")) {
return new ColorDrawable(Color.parseColor("#3F51B5"));
}
return new ColorDrawable(Color.parseColor("#344567"));
}
@BindingConversion
public static int convertStringToColor(String str) {
if (str.equals("gules")) {
return Color.parseColor("#FF4081");
}
if (str.equals("blue")) {
return Color.parseColor("#3F51B5");
}
return Color.parseColor("#344567");
}
10, Array, List, Set, Map
dataBinding also supports the use of arrays, Lsit, Set and Map in layout files, and elements can be obtained in the form of list[index] in layout files
In order to distinguish from the angle brackets of the variable tag, you need to use the escape character of angle brackets when declaring data types such as LSIT < string >
<?xml version="1.0" encoding="utf-8"?>
<layout xmlns:android="http://schemas.android.com/apk/res/android"
xmlns:tools="http://schemas.android.com/tools">
<data>
<import type="java.util.List" />
<import type="java.util.Map" />
<import type="java.util.Set" />
<import type="android.util.SparseArray" />
<variable
name="array"
type="String[]" />
<variable
name="list"
type="List<String>" />
<variable
name="map"
type="Map<String, String>" />
<variable
name="set"
type="Set<String>" />
<variable
name="sparse"
type="SparseArray<String>" />
<variable
name="index"
type="int" />
<variable
name="key"
type="String" />
</data>
<LinearLayout
android:layout_width="match_parent"
android:layout_height="match_parent"
android:orientation="vertical"
tools:context=".Main7Activity">
<TextView
···
android:text="@{array[1]}" />
<TextView
···
android:text="@{sparse[index]}" />
<TextView
···
android:text="@{list[index]}" />
<TextView
···
android:text="@{map[key]}" />
<TextView
···
android:text='@{map["leavesC"]}' />
<TextView
···
android:text='@{set.contains("xxx")?"xxx":key}' />
</LinearLayout>
</layout>11, Resource reference
dataBinding supports access to resources such as sizes and strings
dimens.xml
    <dimen name="paddingBig">190dp</dimen>
    <dimen name="paddingSmall">150dp</dimen>
strings.xml
<string name="format">%s is %s</string>
    <data>
        <variable
            name="flag"
            type="boolean" />
    </data>
	<Button
         android:layout_width="match_parent"
         android:layout_height="wrap_content"
         android:paddingLeft="@{flag ? @dimen/paddingBig:@dimen/paddingSmall}"
         android:text='@{@string/format("leavesC", "Ye")}'
         android:textAllCaps="false" />
This is the end of the introduction to DataBinding. Of course, there must be some missing knowledge points, but in general, I think I have made it very clear, and the rest will be added in the future.