preface
After learning about Vuex, it's time to learn the routing operation in Vue.... xdm
1, Installation
Vue cli installation
vue add router
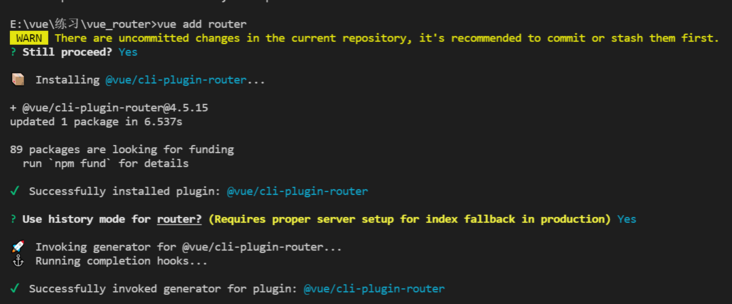
After this step, the basic environment has been set up.
There will be one more in the project
Folder, as follows:
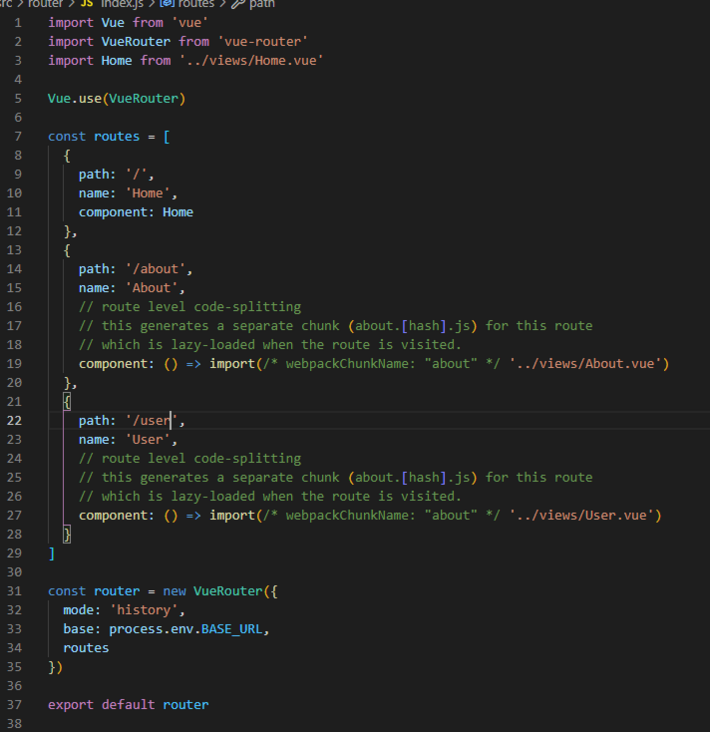
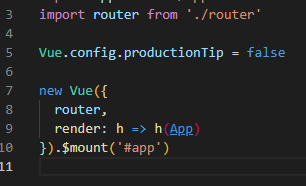
Finally, expose it and reference it in mian.js. I won't go into detail for the time being.
2, Basic routing usage
Basic routing is used. In fact, you already have an example after you install it.
There are the following two lines of code in the App component, which actually means route jump.
<router-link to="/">Home</router-link> |
<router-link to="/about">About</router-link> |
We used to use the a tag, but here it just helps us encapsulate it. The / and / about configured here are the routing rules configured in the router folder, and each path corresponds to which component.
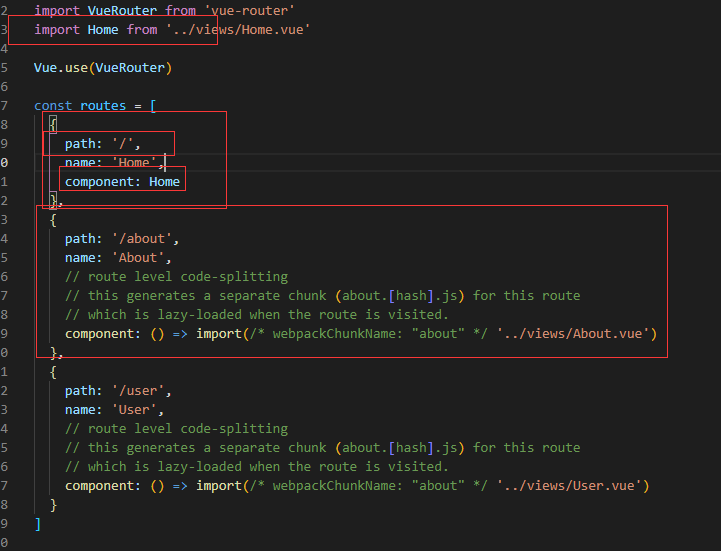
The effects are as follows:

Click to jump
This is the most basic. It's over after a look, because we rarely use this method. Basically, we have to do a lot of things in the process of route jump
But have you found that only the content has changed? Why?
Because the < router view / > code in the app component means to display the component content here when switching routes.
This is the most basic. Everyone will play casually. Let's not say more.
A little question, which component is hidden or destroyed in the process of route jump???
3, Nested routing (dolls)
design sketch:
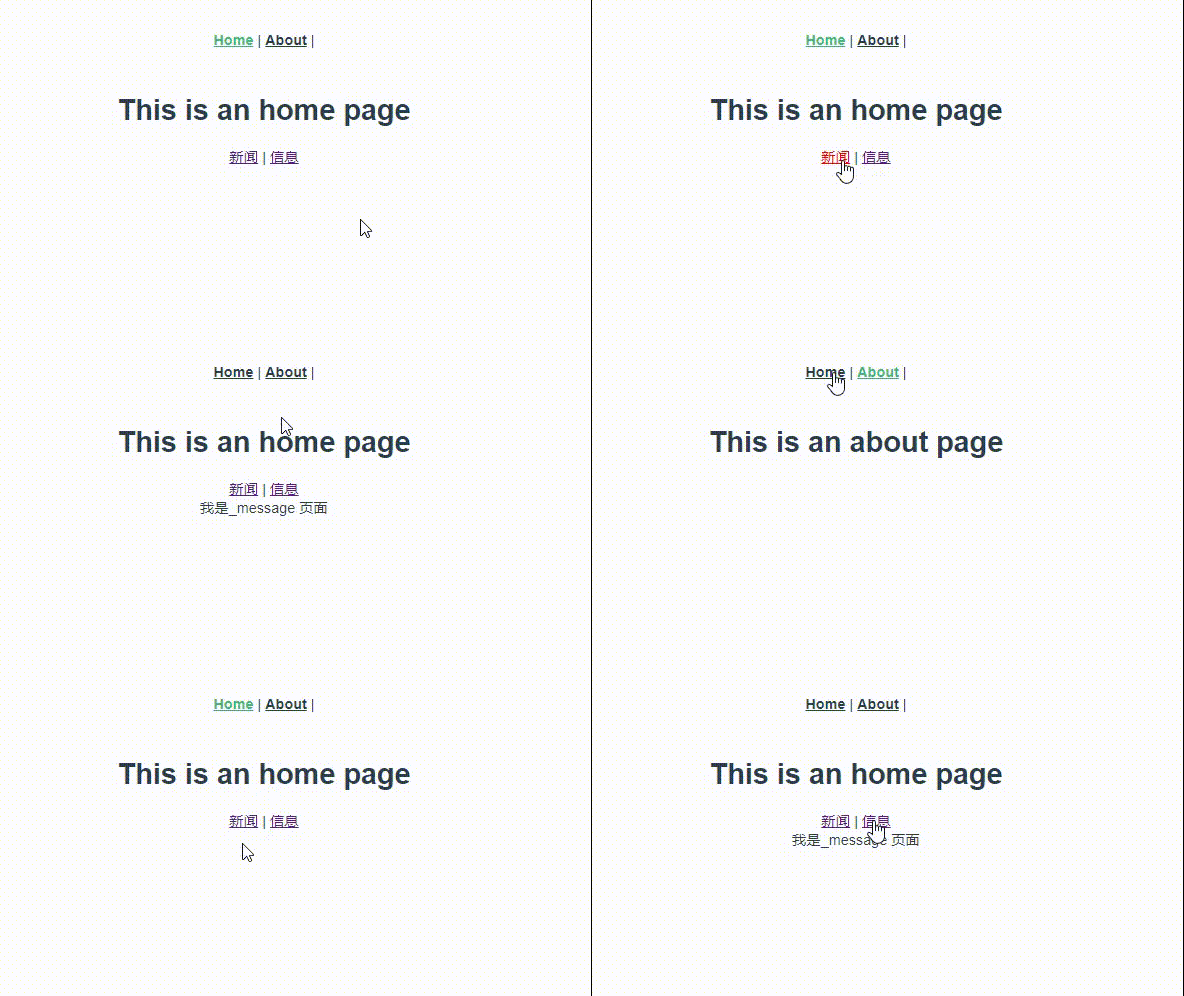
It is also very easy to route under home and about.
Let's add two components first

Let's configure it in the router.
const routes = [
  {
    path: '/',
    name: 'Home',
    component: Home,
    children: [
      {
        path: '/message',
        name: 'message',
        component: () => import(/* webpackChunkName: "about" */ '../components/Message.vue'),
      }
    ]
  },
  {
    path: '/about',
    name: 'About',
    component: () => import(/* webpackChunkName: "about" */ '../views/About.vue'),
    children: [
      {
        path: '/news',
        name: 'news',
        component: () => import(/* webpackChunkName: "about" */ '../components/News.vue'),
      },
    ]
  }
]
In fact, it involves the attribute of children, which is to form a parent-child relationship with the superior route. The two layers of dolls are like this. No matter how many sets are in them, they will be finished.
One time, one time, all the time

4, Routing parameters
effect
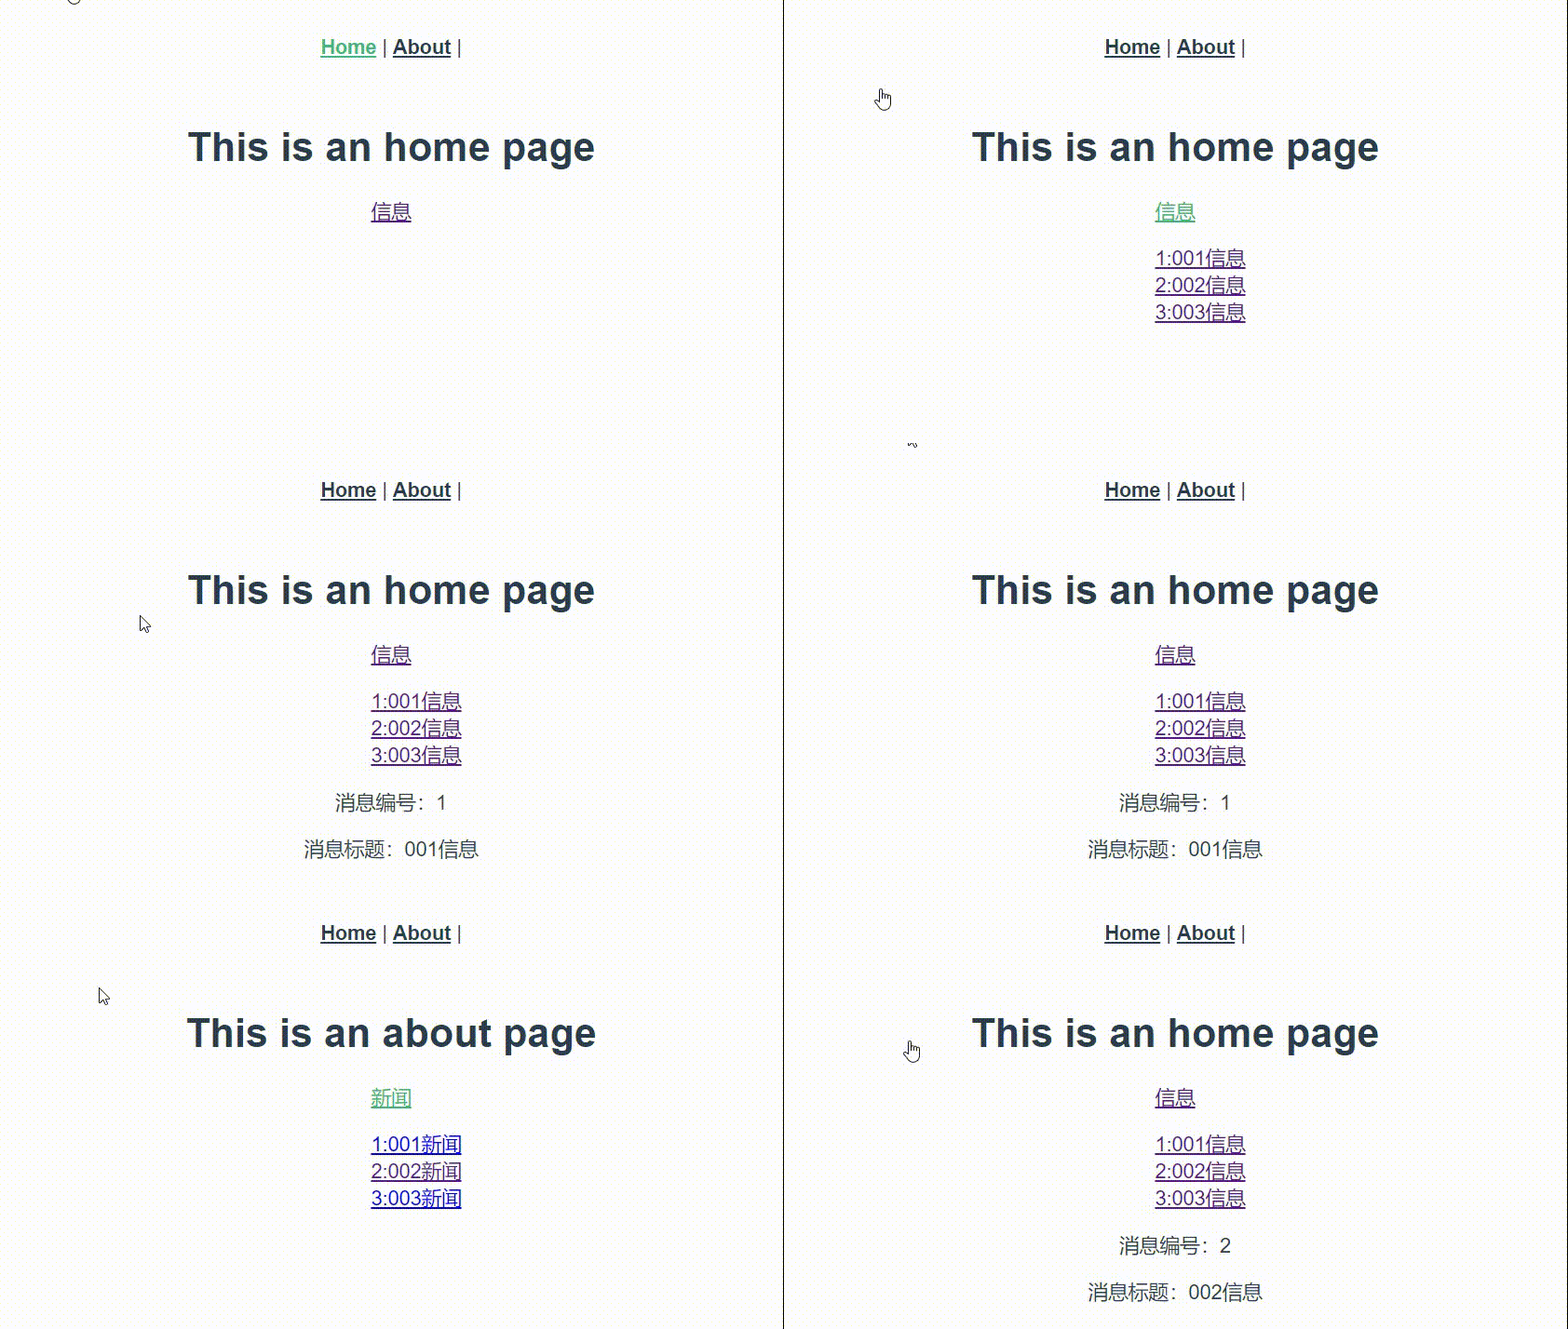
We add another two sub routes to realize route parameter transmission. In addition, change the original components.
4.1. Building basic environment
MessageItem component
<template>
  <div>
    <p>Message number:???<//p>
    <p>Message Title:???<//p>
  </div>
</template>
NewsItem component
<template>
  <div>
    <p>News number:???</p>
    <p>News Title:???</p>
  </div>
</template>
<script>
there??? It is used to receive routing parameters later.
News component
<template>
  <div>
    <ul>
      <li v-for="newItem in news" :key="newItem.id">
        <router-link to="/item">{{newItem.id}}:{{newItem.title}}</router-link>
      </li>
    </ul>
    <router-view></router-view>
  </div>
</template>
<script>
export default {
  data(){
    return {
      news:[
        {id:1, title:"001 Journalism"},
        {id:2, title:"002 Journalism"},
        {id:3, title:"003 Journalism"}
      ]
    }
  }
}
</script>
Message component
<template>
  <div>
      <ul>
      <li v-for="message in messages" :key="message.id">
        <router-link to="/item">{{message.id}}:{{message.title}}</router-link>
      </li>
    </ul>
    <router-view></router-view>
  </div>
</template>
<script>
export default {
    data(){
    return {
      messages:[
        {id:1, title:"001 information"},
        {id:2, title:"002 information"},
        {id:3, title:"003 information"}
      ]
    }
  }
}
</script>
4.2. query parameters
The first is the string writing of to
The URL passes parameters, and the component takes the value of $route.query
Message component
<li v-for="message in messages" :key="message.id">
    <router-link :to="`/item?id=${message.id}&title=${message.title}`">{{message.id}}:{{message.title}}</router-link>
</li>
Note that the to here is preceded by quotation marks, and the content in the middle is also modified with the ` symbol
MessageItem component
<div>
    <p>Message number:{{$route.query.id }}</p>
    <p>Message Title:{{$route.query.title }}</p>
</div>
The second is the object method of to
      <li v-for="message in messages" :key="message.id">
        <!-- to String writing -->
        <!-- <router-link :to="`/item?id=${message.id}&title=${message.title}`">{{message.id}}:{{message.title}}</router-link> -->

        <!-- to Object writing of -->
        <router-link :to="{
          path: '/item',
          query: {
            id: message.id,
            title: message.title
          }
        }">{{message.id}}:{{message.title}}</router-link>
      </li>
The way of receiving on the other side is the same as above.
4.3 params parameters
The first is the string writing of to
The jump link is similar, but it must be configured in the routing rules
<router-link :to="`/item/${message.id}/${message.title}`">{{message.id}}:{{message.title}}</router-link> {
path: '/',
name: 'Home',
component: Home,
children: [
{
path: '/message',
name: 'message',
component: () => import(/* webpackChunkName: "about" */ '../components/Message.vue'),
children: [
{
path: '/item/:id/:title', // Receive params parameters using placeholder declarations
name: 'messageItem',
component: () => import(/* webpackChunkName: "about" */ '../components/MessageItem.vue')
}
]
}
]
},The received also changed slightly:
<p>Message number:{{$route.params.id }}</p>
<p>Message Title:{{$route.params.title }}</p>
The second is the object writing method of to
<!-- to Object writing of -->
<router-link
   :to="{
         name: 'messageItem',
         params:{
                 id:message.id,
                 title: message.title
                }
          }">
    {{message.id}}:{{message.title}}</router-link>
Note: name must be used here, that is, the configured route name. Routing paths cannot be used.
4.4. props configuration of routing (a good tool for laziness)
Let's think about a problem.
Do you think {{$route.params.id}} or {{$route.params.title}} is very repeated to get the value passed from a route???
For each value, you have to write the prefix $route.params or $this.query again. Do you think it is very repetitive? Is there a simpler one?
(one or two are still simple. In case there are too many rumors one day, this props must be lazy 🐥)
1) props configuration mode 1:
{
    path: '/',
        name: 'Home',
            component: Home,
                children: [
                    {
                        path: '/message',
                        name: 'message',
                        component: () => import(/* webpackChunkName: "about" */ '../components/Message.vue'),
                        children: [
                            {
                                path: '/item/:id/:title',
                                name: 'messageItem',
                                component: () => import(/* webpackChunkName: "about" */ '../components/MessageItem.vue'),
      //The first method: if the props value is Boolean and the Boolean value is true, all params parameters received by the route will be passed to the MessageItem component through props
                                props:true
                            }
                        ]
                    }
                ]
},
The parent component passing params parameters does not need to change anything,
Let's change the receiving sub component
<template>
<div>
    <!-- <p>Message number:{{$route.query.id }}</p>
<p>Message Title:{{$route.query.title }}</p> -->
    <!-- <p>Message number:{{$route.params.id }}</p>
<p>Message Title:{{$route.params.title }}</p> -->
    <!-- adopt props receive -->
    <p>Message number:{{id }}</p>
    <p>Message Title:{{title }}</p>
    </div>
</template>
<script>
    export default {
        props:['id','title']
    }
</script>
2) props configuration mode 2:
Think about it. The above method can only solve the abbreviation when passing params parameters. What should I do if passing query parameters?
props configuration can actually be changed to a function
Note: remember that during practice,
{
    path: '/',
    name: 'Home',
    component: Home,
    children: [
      {
        path: '/message',
        name: 'message',
        component: () => import(/* webpackChunkName: "about" */ '../components/Message.vue'),
        children: [
          {
            path: '/item',
            name: 'messageItem',
            component: () => import(/* webpackChunkName: "about" */ '../components/MessageItem.vue'),
            // props:true
            //The second way to write: props value is a function, and each group of key values in the object returned by the function will be passed to the MessageItem component through props
            props($route) {
              return {
                id: $route.query.id,
                title: $route.query.title
              }
            }
          }
        ]
      }
    ]
  },
What we want to receive is what we write here. When we get to the sub component, we use it directly.
Deconstruction
props({query}) {
    return {
        id: query.id,
        title: query.title
    }
}
Even lazier is continuous deconstruction:
props({query:{id,title}}) {
    return {id,title}
}
Indeed, laziness makes people progress.
5, Programmed routing
5.1 programming to realize route jump
Previously, we used < router link to = "/ news" > News < / router link > to jump the route, but in actual development, we only jump by clicking a button or triggering an event, so using router link is not particularly suitable. There is programmed routing.
      <li v-for="message in messages" :key="message.id">
        <router-link
          :to="{
            path: '/item',
            query: {
              id: message.id,
              title: message.title,
            },
          }"
        >
          {{ message.id }}:{{ message.title }}</router-link
        >
        |
        <button type="button" @click="showMessageItem( message.id, message.title,)">
          Click to jump to{{ message.title }}page
        </button>
      </li>
Jump using method
methods: {
    showMessageItem(id,title){
        this.$router.push(
            {
                path: '/item',
                query: {
                    id: id,
                    title:title
                }
            })
    }
}
If it is params, it is the same as before;
showPamarsMessageItem(id,title){
    this.$router.push(
        {
            name: 'messageItem',
            params: {
                id: id,
                title:title
            }
        })
}
The relevant information should also be changed. The props configured in the routing.
5.2 programming control forward and backward
We must be familiar with the forward and backward buttons in the browser.

In fact, this can also be realized in a programmatic way.
<template>
  <div id="app">
    <button id="back" @click="back">back off</button> |
    <button id="forward" @click="forward">forward</button> |
    <button id="forward" @click="go">go</button>

    <div id="nav" >
      <router-link to="/">Home</router-link> |
      <router-link to="/about">About</router-link> |
    </div>
    <router-view/>
  </div>
</template>

<script>
export default {
  methods: {
    back(){
      console.log(this.$router)
      this.$router.back()
    },
    forward(){
      this.$router.forward()
    },
    go(){
      //Directly speaking, the parameter of go () is a number, and a positive number is the number of steps forward,
      // A negative number is how many steps back.
      this.$router.go(2)
    }
  }
}
</script>
In fact, they are implemented through the api on $router, but they cannot be implemented in the traceless state, because these implementations still need to rely on the browser's history.
design sketch:
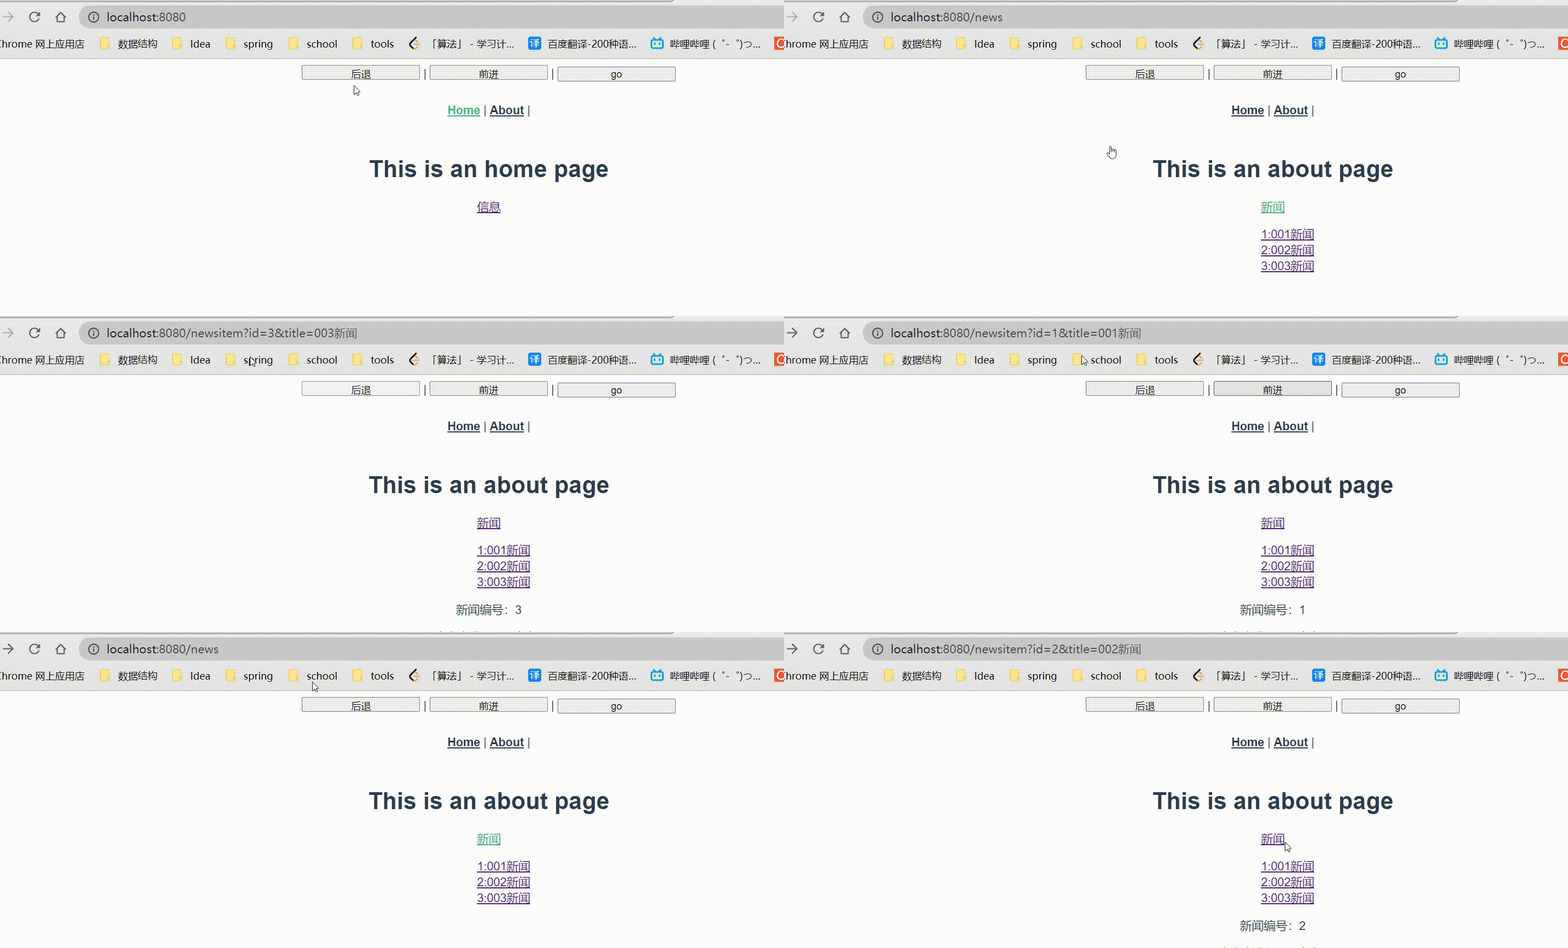
6, Cache routing component
Function: keep the routing components not displayed mounted and not destroyed.
We write a hook function before destruction in the MessageItem component
<template>
  <div>
    <p>Message number:{{ id }}</p>
    <p>Message Title:{{ title }}</p>
  </div>
</template>
<script>
export default {
  name: 'MessageItem',
  props:['id','title'],
  beforeDestroy(){
    console.log('MessageItem The component was destroyed')
  }
}
</script>
This will be printed when we switch from the MessageItem component to another page.
But if we use its parent component, we change it to the following.
<keep-alive include="MessageItem">
    <router-view></router-view>
</keep-alive>
Note: the component name is written in include. Component name. Component name.
If you do not write include, all are cached by default and will not be destroyed.
Writing this way will ensure that the MessageItem will not be destroyed during the switching process.
If the switching is extremely frequent, I think it's OK to add this.
7, Two new life cycle hook functions
In Section 6, we can cache the components, but at the same time, the beforeDestroy life cycle hook function of the car building components will fail.
Then some cleanup operations cannot be performed (such as switching routes and pausing timers), so there are unique life cycle hook functions for two routes.
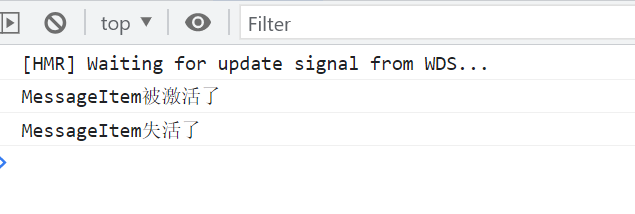
- Triggered when the activated routing component is activated.
- Triggered when the deactivated routing component is deactivated.
activated(){
    console.log('MessageItem Activated')
},
    deactivated(){
        console.log('MessageItem Inactivated')
    }
Post language
Let's cheer together!!! If there are any deficiencies in the article, please point out them in time. Thank you very much.
I feel shallow on paper. I absolutely know that I have to practice it.
Hello, I'm blogger Ning Zaichun: homepage
A young man who likes literature and art but embarks on the road of programming.
Thank you for seeing here.