1 case description and renderings
[case] display hidden password plaintext
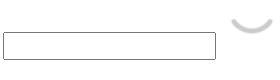
Case analysis: on the login page, in order to optimize the user experience and facilitate the user to enter the password. Therefore, when designing the password box, there will be an "eye" picture to act as a button function. Click to switch the state of the button and control the display and hiding of the password.
The renderings are as follows:


2 write HTML structure and complete page layout
First, the elements we want are designed in the page: input box and picture. The html design steps are as follows:
1. Prepare a parent box div and name its id attribute box;
2. Put two child elements in the parent box: ① input element: type is password and id is pwd; ② img element: the address is an eye closed picture, and the id is eye;
The code is as follows:
    <div id="box">
        <!--Password box-->
        <input type="password" id="pwd">
        <!--Eye picture -->
        <img src="../images/close.png" id="eye">
    </div>
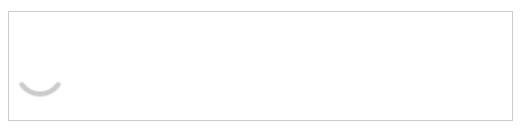
design sketch:
3 write CSS Style
Write css style, set the length and width of the input box, and position the picture on the right side of the password box. The css style design steps are as follows:
1. Set #box style: ① set width, border, outer margin and inner margin to make the box look good; ② Setting relative positioning is related to setting absolute positioning for pictures (explained later).
2. Set input style: ① set width, height and border; ② Set the outline to none to remove the default focus style of the browser;
3. Set the picture style: ① set the absolute positioning of the picture. Because the parent container box of the picture sets the relative positioning, the absolute positioning here is positioned relative to the position of the parent container box; ② Set the width of the picture to keep the picture in proper size; ③ When the mouse is placed on the picture, it is set to the state of hand.
The code is as follows:
    /* Style div */
    #box {
        width: 400px;
        border: 1px solid #ccc;
        margin: 100px auto;
        padding: 1px;
        position: relative;
    }

    /* Style input */
    #box input {
        width: 370px;
        height: 30px;
        border: 0;
        /* Clear browser default focus style */
        outline: none;
    }
    /* Style img */
    #box img {
        position: absolute;
        top: 4px;
        right: 6px;
        width: 24px;
        /* Change the mouse style to a small hand */
        cursor: pointer;
    }

4 writing JavaScript code
Use JavaScript code to set click events and improve functions. The JavaScript design steps are as follows:
1. Get the elements in the page: input and img, set the tag variable and the switch of the tag picture. The tag variable is 0 by default, that is, the picture is turned off;
2. Register the event and define the event handler: when the marked variable is equal to 0, click to open the eyes, the password is displayed, and the marked variable is 1; When the tag variable is 1, click to close the eyes, close the password, and the tag variable is 0.
The code is as follows:
        //1. Get element
        var pwd = document.getElementById("pwd");
        var eye = document.getElementById("eye");
        var flag = 0;//The default eyes are closed
        //2. Register events and define event handlers
        eye.onclick = function () {
            if (flag == 0) {//When the eyes are closed, click:
                pwd.type = "text";//Change the password box style to text to display the password
                eye.src = "../images/open.png";//The picture address is changed to the picture with eyes open
                flag = 1;
            } else {
                pwd.type = "password";//Replace the text box with the password box
                eye.src = "../images/close.png";//Replace the picture with eyes closed
                flag = 0;
            }
        }
Here, the password box is finished.
5 total code
<!DOCTYPE html>
<html lang="en">

<head>
    <meta charset="UTF-8">
    <meta http-equiv="X-UA-Compatible" content="IE=edge">
    <meta name="viewport" content="width=device-width, initial-scale=1.0">
    <title>Document</title>

</head>
<style>
    /* Style div */
    #box {
        width: 400px;
        border: 1px solid #ccc;
        margin: 100px auto;
        padding: 1px;
        position: relative;
    }

    /* Style input */
    #box input {
        width: 370px;
        height: 30px;
        border: 0;
        /* Clear browser default focus style */
        outline: none;
    }

    /* Style img */
    #box img {
        position: absolute;
        top: 4px;
        right: 6px;
        width: 24px;
        /* Change the mouse style to a small hand */
        cursor: pointer;
    }
</style>

<body>
    <div id="box">
        <!--Password box-->
        <input type="password" id="pwd">
        <!--Eye picture -->
        <img src="../images/close.png" id="eye">
    </div>
    <script>
        //1. Get element
        var pwd = document.getElementById("pwd");
        var eye = document.getElementById("eye");
        var flag = 0;//The default eyes are closed
        //2. Register events and define event handlers
        eye.onclick = function () {
            if (flag == 0) {//When the eyes are closed, click:
                pwd.type = "text";//Change the password box style to text to display the password
                eye.src = "../images/open.png";//The picture address is changed to the picture with eyes open
                flag = 1;
            } else {
                pwd.type = "password";//Replace the text box with the password box
                eye.src = "../images/close.png";//Replace the picture with eyes closed
                flag = 0;
            }
        }
    </script>
</body>

</html>