SpringBoot tutorial
01 introduction
1.1 how spring simplifies development
- Lightweight and minimally intrusive programming based on POJO, everything is bean;
- Loose coupling is realized through IOC, dependency injection (DI) and interface oriented;
- Declarative programming based on AOP and conventions;
- Reduce style codes through facets and templates, RedisTemplate and xxtemplate;
1.2 microservices
Microservice is an architectural style, which can be understood as small services. These services communicate through HTTP. There is no official definition of microservices. It is difficult to directly describe microservices. We can understand what microservices are by comparing traditional WEB applications. Traditional applications become "single applications".
Microservices have many advantages over traditional single services. For example, when one of the services needs to be changed, there is no need to reconstruct the whole project, and so on.
I recommend Martin Flow Microservice (English version)
1.3 what is springboot
springboot is based on spring development. It is not a solution to replace spring, but a tool closely combined with spring to improve the spring development experience. Its core idea is that the Convention is greater than the configuration. It integrates a large number of third-party default configurations, so that we can greatly reduce the configuration.
Main advantages of Spring Boot:
- Get started faster for all Spring developers
- Out of the box, various default configurations are provided to simplify project configuration
- Inline containers simplify Web projects
- There are no requirements for redundant code generation and XML configuration
1.4 spring project structure
The project structure of springboot follows the maven project structure
It contains the main startup class of the program, application.properties configuration file, test class and pom.xml
Open pom.xml to see the dependencies of the Spring Boot project:
<!-- Parent dependency -->
<parent>
    <groupId>org.springframework.boot</groupId>
    <artifactId>spring-boot-starter-parent</artifactId>
    <version>2.2.5.RELEASE</version>
    <relativePath/>
</parent>

<dependencies>
    <!-- web Scene launcher -->
    <dependency>
        <groupId>org.springframework.boot</groupId>
        <artifactId>spring-boot-starter-web</artifactId>
    </dependency>
    <!-- springboot unit testing  -->
    <dependency>
        <groupId>org.springframework.boot</groupId>
        <artifactId>spring-boot-starter-test</artifactId>
        <scope>test</scope>
        <!-- Eliminate dependency -->
        <exclusions>
            <exclusion>
                <groupId>org.junit.vintage</groupId>
                <artifactId>junit-vintage-engine</artifactId>
            </exclusion>
        </exclusions>
    </dependency>
</dependencies>

<build>
    <plugins>
        <!-- Package plug-ins -->
        <plugin>
            <groupId>org.springframework.boot</groupId>
            <artifactId>spring-boot-maven-plugin</artifactId>
        </plugin>
    </plugins>
</build>
02 yaml
2.1 general
YAML is a recursive abbreviation for "YAML Ain't a Markup Language". When developing this language, YAML actually means "Yet Another Markup Language"
This language is data centric, not markup language focused!
Yaml is the configuration file format officially recommended by springboot. It is used to modify the default value of springboot configuration. The springboot configuration file also has properties.
-
application.properties
-
- Syntax structure: key=value
-
application.yml
-
- Syntax structure: key: space value
2.2 basic syntax of yaml
Literal: ordinary value (number, Boolean, string)
# number
number: 1
# Boolean
bool: true
# character string
str: I'm a string
Object, Map (key value pair)
# Common writing
student:
	name: Zhang San
	age: 16
# Inline writing
student2: {name: Zhang San, age: 16}
Array (List, set)
# Common writing
pets:
	- cat
	- dog
	- pig
# Inline writing
pets2: [cat, dog, pig]
2.3 yaml injection profile
- First, we write a Dog entity class in the pojo package
package com.example.springboot.pojo;

@Component
@Getter
@Setter
@NoArgsConstructor
@AllArgsConstructor
public class Dog {
    private String name;
    private Integer age;
}
- We use the original method to inject properties into the class, using @ Value
package com.example.springboot.pojo;

@Component
@Getter
@Setter
@NoArgsConstructor
@AllArgsConstructor
public class Dog {
	@Value("chinese rhubarb")
    private String name;
    @Value(3)
    private Integer age;

    //Parameterless construction, get, set method, toString() method
    //....
}
- Test whether attributes are injected under the test class
package com.king.pojo;

@SpringBootTest
public class DogTest {
    @Autowired
    Dog dog;
    @Test
    public void test(){
        System.out.println(dog);
    }
}

// Result output Dog(name = rhubarb, age=3)
// @Value injection succeeded
- We write a more complex Person class in the pojo package
package com.king.pojo;

@Component
@Getter
@Setter
@NoArgsConstructor
@AllArgsConstructor
@ToString
public class Person {
    private String name;
    private Integer age;
    private Boolean happy;
    private Date birth;
    private Map<String,Object> maps;
    private List<Object> lists;
    private Dog dog;
}
- Create an application.yaml configuration file
server:
  port: 8088

person:
  name: Xiao Ming
  age: 18
  happy: true
  birthday: 2000/1/1
  map: {k1: v1, k2: v2}
  list: [o1, o2, o3]
  dog:
    name: chinese rhubarb
    age: 3
- Add the @ ConfigurationProperties annotation for the Person class and bind it
package com.king.pojo;
/*
@ConfigurationProperties effect:
Map the value of each attribute configured in the configuration file to this component;
Tell SpringBoot to bind all properties in this class to the relevant configuration in the configuration file
 Parameter prefix = "person": match all attributes under person in the configuration file one by one
*/
@Component
@Getter
@Setter
@NoArgsConstructor
@AllArgsConstructor
@ToString
@ConfigurationProperties(prefix = "person")
public class Person {
    private String name;
    private Integer age;
    private Boolean happy;
    private Date birthday;
    private Map<String,Object> map;
    private List<Object> list;
    private Dog dog;
}

// Result output
// Person(name = Xiaoming, age = 18, happy = true, birthday = sat Jan 01 00:00:00, CST 2000, map = {K1 = V1, K2 = V2}, list = [O1, O2, O3], dog = dog (name = rhubarb, age=3))
- You can see that the injection is successful, but the idea reports an error and imports the dependency in the pom file
<!-- After importing the configuration file processor, you will be prompted to restart the configuration file binding -->
<dependency>
  <groupId>org.springframework.boot</groupId>
  <artifactId>spring-boot-configuration-processor</artifactId>
  <optional>true</optional>
</dependency>
2.4 multi environment switching
In the process of project development, we often need to use multiple environments to enable an environment by configuring spring.profiles.active in the configuration file.
- First, we create two development environments
application-test.yaml
serve:
	port: 8082
application-dev.yaml
serve:
	port: 8083
- At this point, we can configure the startup environment in the default configuration file
application.yaml
serve:
	port: 8081
spring:
	prefiles:
		active: test
At this point, the test environment starts. We can see from the log that the port started is 8082
Multiple document blocks of 2.5 yaml
Split document blocks with "-"
server:
  port: 8081
#Select the environment block to activate
spring:
  profiles:
    active: prod

---
server:
  port: 8083
spring:
  profiles: dev #Name of the configuration environment


---

server:
  port: 8084
spring:
  profiles: prod  #Name of the configuration environment
The active port is 8084
2.6 configuration file loading location
There are many ways to load configuration files externally. We can select the most commonly used one and configure it in the developed resource file!
springboot startup will scan the application.properties or application.yml file in the following location as the default configuration file of Spring boot:
Priority 1: under the project path config Folder profile
 Priority 2: configuration file under project path
 Priority 3: under resource path config Folder profile
 Priority 4: configuration file under resource path
The priority is from high to bottom, and the configuration of high priority will overwrite the configuration of low priority;
SpringBoot will load all the main configuration files from these four locations; Complementary configuration;
We can also change the default configuration file location through spring.config.location
After the project is packaged, we can use the form of command line parameters to specify the new location of the configuration file when starting the project; In this case, there are usually many operations and maintenance in the later stage. For the same configuration, the externally specified configuration file has the highest priority
java -jar spring-boot-config.jar --spring.config.location=F:/application.properties
03 JSR303 verification
3.1 let's see how to use it first
First, import pom dependencies
<dependency>
    <groupId>org.springframework.boot</groupId>
    <artifactId>spring-boot-starter-validation</artifactId>
</dependency>
In Springboot, @ validated can be used to verify the data. If the data is abnormal, exceptions will be thrown uniformly to facilitate the unified processing of the exception center. Let's write a comment here so that our name can only support Email format;
@Component //Register bean
@ConfigurationProperties(prefix = "person")
@Validated  //data verification
public class Person {

    @Email(message="Mailbox format error") //name must be in mailbox format
    private String name;
}
Running result: default message [not a legal email address];

Using data verification can ensure the correctness of data;
3.2 common parameters
@NotNull(message="Name cannot be empty")
private String userName;
@Max(value=120,message="The oldest can't check 120")
private int age;
@Email(message="Mailbox format error")
private String email;

Empty check
@Null       Verify that the object is null
@NotNull    Verify that the object is not null, Cannot check string with length 0
@NotBlank   Check whether the constraint string is Null And by Trim Is the length greater than 0,String only,And the front and back spaces will be removed.
@NotEmpty   Check whether the constraint element is NULL Or EMPTY.

Booelan inspect
@AssertTrue     verification Boolean Whether the object is true
@AssertFalse    verification Boolean Whether the object is false

Length check
@Size(min=, max=) Validation object( Array,Collection,Map,String)Is the length within the given range
@Length(min=, max=) string is between min and max included.

Date check
@Past       verification Date and Calendar Is the object before the current time
@Future     verification Date and Calendar Is the object after the current time
@Pattern    verification String Whether the object conforms to the rules of regular expressions

.......wait
 In addition, we can also customize some data verification rules
04 web development
4.1 import of static resources
There is no WEB-INF directory in springboot, so we should first determine the location of static resources when developing web.
First, we search the webmvca autoconfiguration class (webmvc related auto assembly class).
We can find an internal static class:
@EnableConfigurationProperties({WebProperties.class})
    public static class EnableWebMvcConfiguration extends DelegatingWebMvcConfiguration implements ResourceLoaderAware{}
In this static class, we can find a method
protected void addResourceHandlers(ResourceHandlerRegistry registry) {
    super.addResourceHandlers(registry);
    // First, judge whether the location of static resources is customized
    if (!this.resourceProperties.isAddMappings()) {
        logger.debug("Default resource handling disabled");
    } else {
        ServletContext servletContext = this.getServletContext();
        // Match resources in all webjar s
        this.addResourceHandler(registry, "/webjars/**", "classpath:/META-INF/resources/webjars/");
        // Match static resources
        this.addResourceHandler(registry, this.mvcProperties.getStaticPathPattern(), (registration) -> {
            registration.addResourceLocations(this.resourceProperties.getStaticLocations());
            if (servletContext != null) {
                registration.addResourceLocations(new Resource[]{new ServletContextResource(servletContext, "/")});
            }

        });
    }
}
4.1.1 first look at what webjar is
The essence of Webjars is to introduce our static resources in the form of jar package. We used to import a static resource file directly.
Webjars is required to use SpringBoot. We can search:
Website: https://www.webjars.org
There are maven versions of various static resources
For example, we need to import jQuery
<dependency>
    <groupId>org.webjars</groupId>
    <artifactId>jquery</artifactId>
    <version>3.4.1</version>
</dependency>
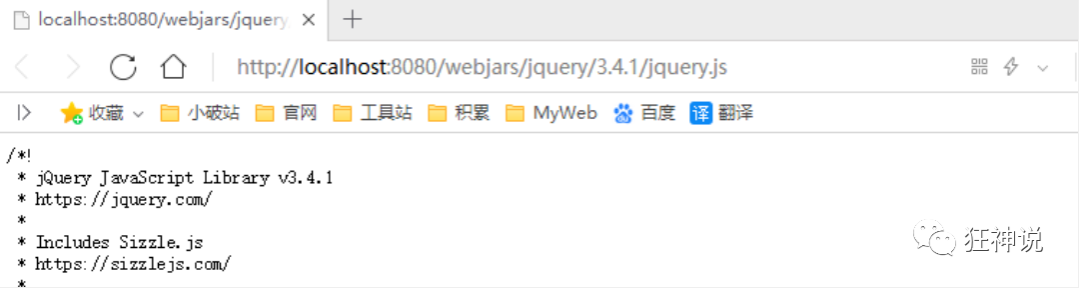
After importing, view the webjars directory structure and access the Jquery.js file!
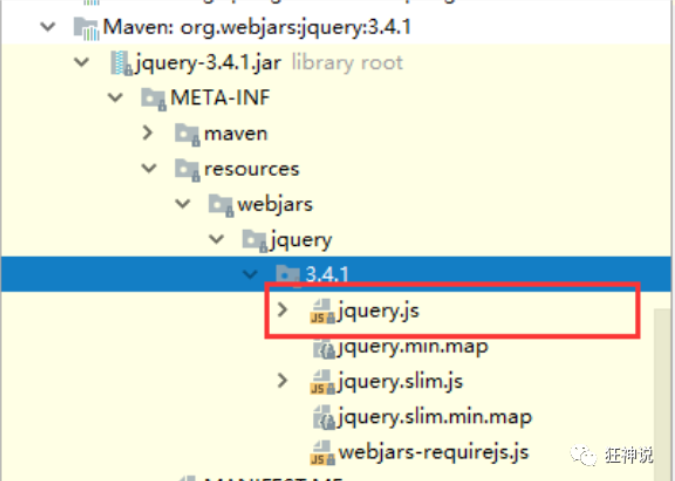
As long as it is a static resource, SpringBoot will go to the corresponding path to find the resource. We visit here: http://localhost:8080/webjars/jquery/3.4.1/jquery.js
4.1.2 next, let's look at how to import common static resources
this.addResourceHandler(registry, this.mvcProperties.getStaticPathPattern(), (registration) -> {
            registration.addResourceLocations(this.resourceProperties.getStaticLocations());
You can see that a resourceProperties is found when matching the path. We ctrl + find it and find that it is an instance of the static class inside the Resource in the class registered through @ EnableConfigurationProperties (XXXProperties configuration class) in the static class where the method is located
public static class Resources {
        private static final String[] CLASSPATH_RESOURCE_LOCATIONS = new String[]{"classpath:/META-INF/resources/", "classpath:/resources/", "classpath:/static/", "classpath:/public/"};
        private String[] staticLocations;
        private boolean addMappings;
        private boolean customized;
        private final WebProperties.Resources.Chain chain;
        private final WebProperties.Resources.Cache cache;

        public Resources() {
            this.staticLocations = CLASSPATH_RESOURCE_LOCATIONS;
            this.addMappings = true;
            this.customized = false;
            this.chain = new WebProperties.Resources.Chain();
            this.cache = new WebProperties.Resources.Cache();
        }

        public String[] getStaticLocations() {
            return this.staticLocations;
        }

        ....
}
This internal static class assigns staticLocations to the constant classpath in the constructor_ RESOURCE_ LOCATIONS
This constant is the default location for static resources
Namely:
- "classpath:/META-INF/resources/"
- "classpath:/resources/"
- "classpath:/static/"
- "classpath:/public/"
We find that there is only one static directory in our directory structure src/main/resources. We create resources and public directories
Run spring boot and access the static resources found in the page. No matter which of the three directories is placed, it will take effect
4.1.2 custom static resource path
We can also specify which folders we need to put static resource files through the configuration file, and configure them in application.properties;
spring.resources.static-locations=classpath:/coding/,classpath:/king/
Once you define the path of the static folder, the original automatic configuration will become invalid!
4.2 home page mapping
When the springboot is not configured, a 404 will appear when accessing, so we need to configure a default home page
Under the webmvcoautoconfiguration class, I searched for things related to the home page and found "welcome page processing matching"
@Bean
public WelcomePageHandlerMapping welcomePageHandlerMapping(ApplicationContext applicationContext, FormattingConversionService mvcConversionService, ResourceUrlProvider mvcResourceUrlProvider) {
    WelcomePageHandlerMapping welcomePageHandlerMapping = new WelcomePageHandlerMapping(new TemplateAvailabilityProviders(applicationContext), applicationContext, this.getWelcomePage(), this.mvcProperties.getStaticPathPattern());
    welcomePageHandlerMapping.setInterceptors(this.getInterceptors(mvcConversionService, mvcResourceUrlProvider));
    welcomePageHandlerMapping.setCorsConfigurations(this.getCorsConfigurations());
    return welcomePageHandlerMapping;
}
An object of WelcomPageeHandlerMapping class is constructed. A getWelcomePage method is found. It is speculated that it is used to obtain the home page. ctrl + Click to enter this method
private Resource getWelcomePage() {
    String[] var1 = this.resourceProperties.getStaticLocations();
    int var2 = var1.length;

    for(int var3 = 0; var3 < var2; ++var3) {
        String location = var1[var3];
        Resource indexHtml = this.getIndexHtml(location);
        if (indexHtml != null) {
            return indexHtml;
        }
    }

    ServletContext servletContext = this.getServletContext();
    if (servletContext != null) {
        return this.getIndexHtml((Resource)(new ServletContextResource(servletContext, "/")));
    } else {
        return null;
    }
}
Combined with the previous knowledge of static resources, we can see that this method is to use the getIndexHtml method to find the home page file in the static resource folder and click this method
private Resource getIndexHtml(String location) {
    return this.getIndexHtml(this.resourceLoader.getResource(location));
}

private Resource getIndexHtml(Resource location) {
    try {
        Resource resource = location.createRelative("index.html");
        if (resource.exists() && resource.getURL() != null) {
            return resource;
        }
    } catch (Exception var3) {
    }

    return null;
}
We found that this method is to find a web page file of index.html at the location of the passed in parameter
So we put an index.html file in the static resource folder, run the program again, and find that the home page we configured takes effect
4.3 icon configuration
The configuration is the same as that of the home page. You only need to place a favicon.ico in the static resource folder
4.4 Thymeleaf template engine
Thymeleaf is the template engine officially recommended by springboot. Thymeleaf is an advanced template engine with simple syntax and powerful functions.
4.4.1 introduction of thymeleaf
To import, you only need to import pom dependencies
<!--thymeleaf-->
<dependency>
    <groupId>org.springframework.boot</groupId>
    <artifactId>spring-boot-starter-thymeleaf</artifactId>
</dependency>
Thymeleaf official website: https://www.thymeleaf.org/
Thymeleaf's home page at Github: https://github.com/thymeleaf/thymeleaf
4.4.2 Thymeleaf analysis
Find the configuration class for Thymeleaf
public class ThymeleafProperties {
    private static final Charset DEFAULT_ENCODING;
    public static final String DEFAULT_PREFIX = "classpath:/templates/";
    public static final String DEFAULT_SUFFIX = ".html";
    private boolean checkTemplate = true;
    private boolean checkTemplateLocation = true;
    private String prefix = "classpath:/templates/";
    private String suffix = ".html";
    private String mode = "HTML";
    private Charset encoding;
    private boolean cache;
    private Integer templateResolverOrder;
    private String[] viewNames;
    private String[] excludedViewNames;
    private boolean enableSpringElCompiler;
    private boolean renderHiddenMarkersBeforeCheckboxes;
    private boolean enabled;
    private final ThymeleafProperties.Servlet servlet;
    private final ThymeleafProperties.Reactive reactive;
	...
}
You can see that prefix and suffix have been configured by default. We just need to put the template in the template folder
4.4.3 syntax
Common labels
We know that thymeleaf uses special tags to find the part belonging to thymeleaf and render the content of this part. Besides th:text shown above, there are many common tags, and thymeleaf mainly uses tags to identify and replace the content of the corresponding position. Thymeleaf tags have many, many functions, Here are some commonly used labels:
| label | effect | Example |
|---|---|---|
| th:id | Replace id | <input th:id="${user.id}"/> |
| th:text | Text replacement | <p text:="${user.name}">bigsai</p> |
| th:utext | Support html text replacement | <p utext:="${htmlcontent}">content</p> |
| th:object | Replace object | <div th:object="${user}"></div> |
| th:value | Replace value | <input th:value="${user.name}" > |
| th:each | iteration | <tr th:each="student:${user}" > |
| th:href | Replace hyperlink | < a th: href = "@{index. HTML}" > hyperlink |
| th:src | Replace resource | <script type="text/javascript" th:src="@{index.js}"></script> |
4.5 internationalization
4.5.1 basic use
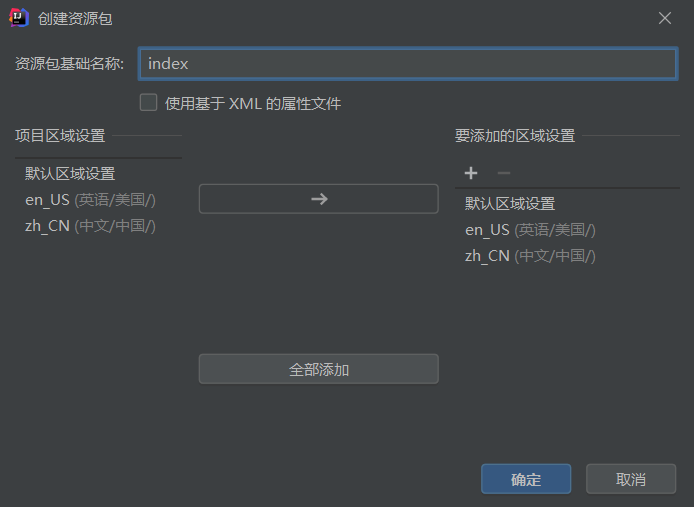
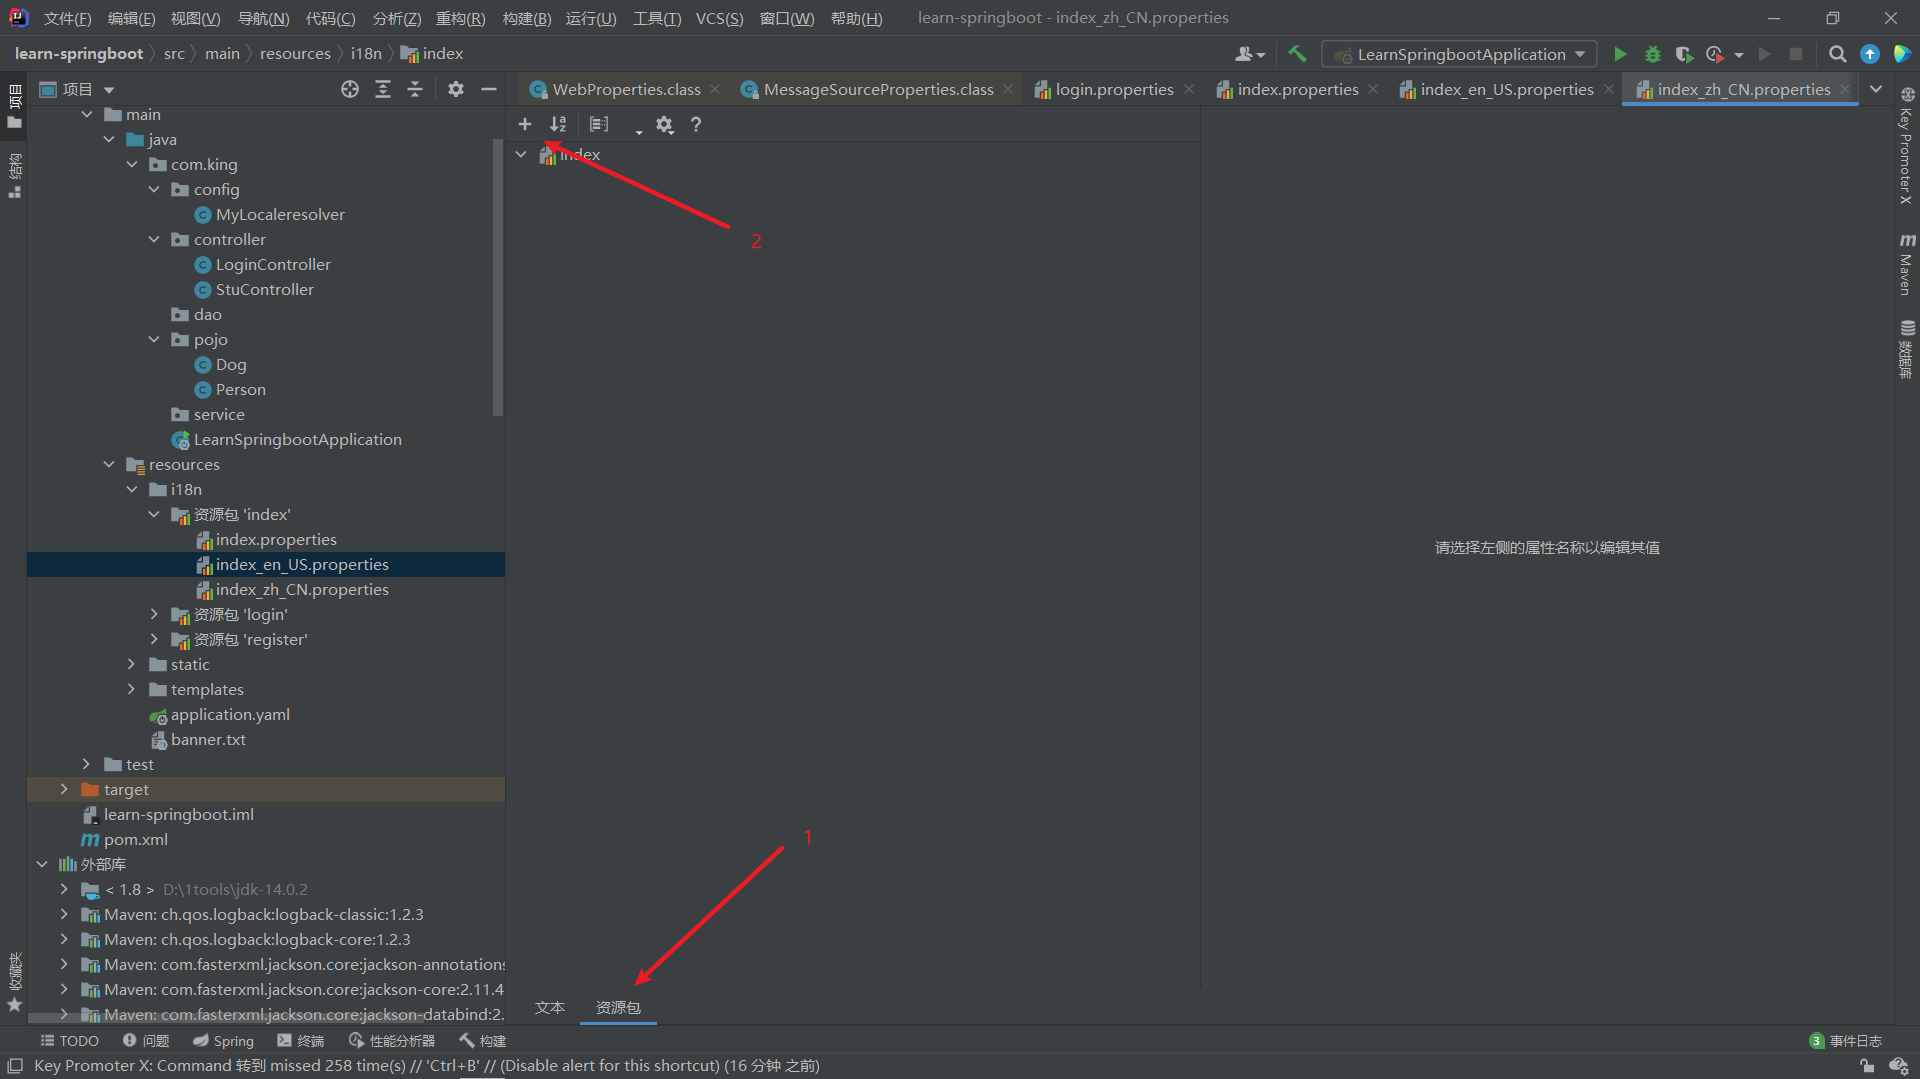
First, create an i18n(Internationalization) folder under the resource folder to store resource packages
Then create a new resource package, and add the language and region with the small plus sign of the unit price
Click the resource package in the lower left corner and add the key value pairs to be used in the template engine
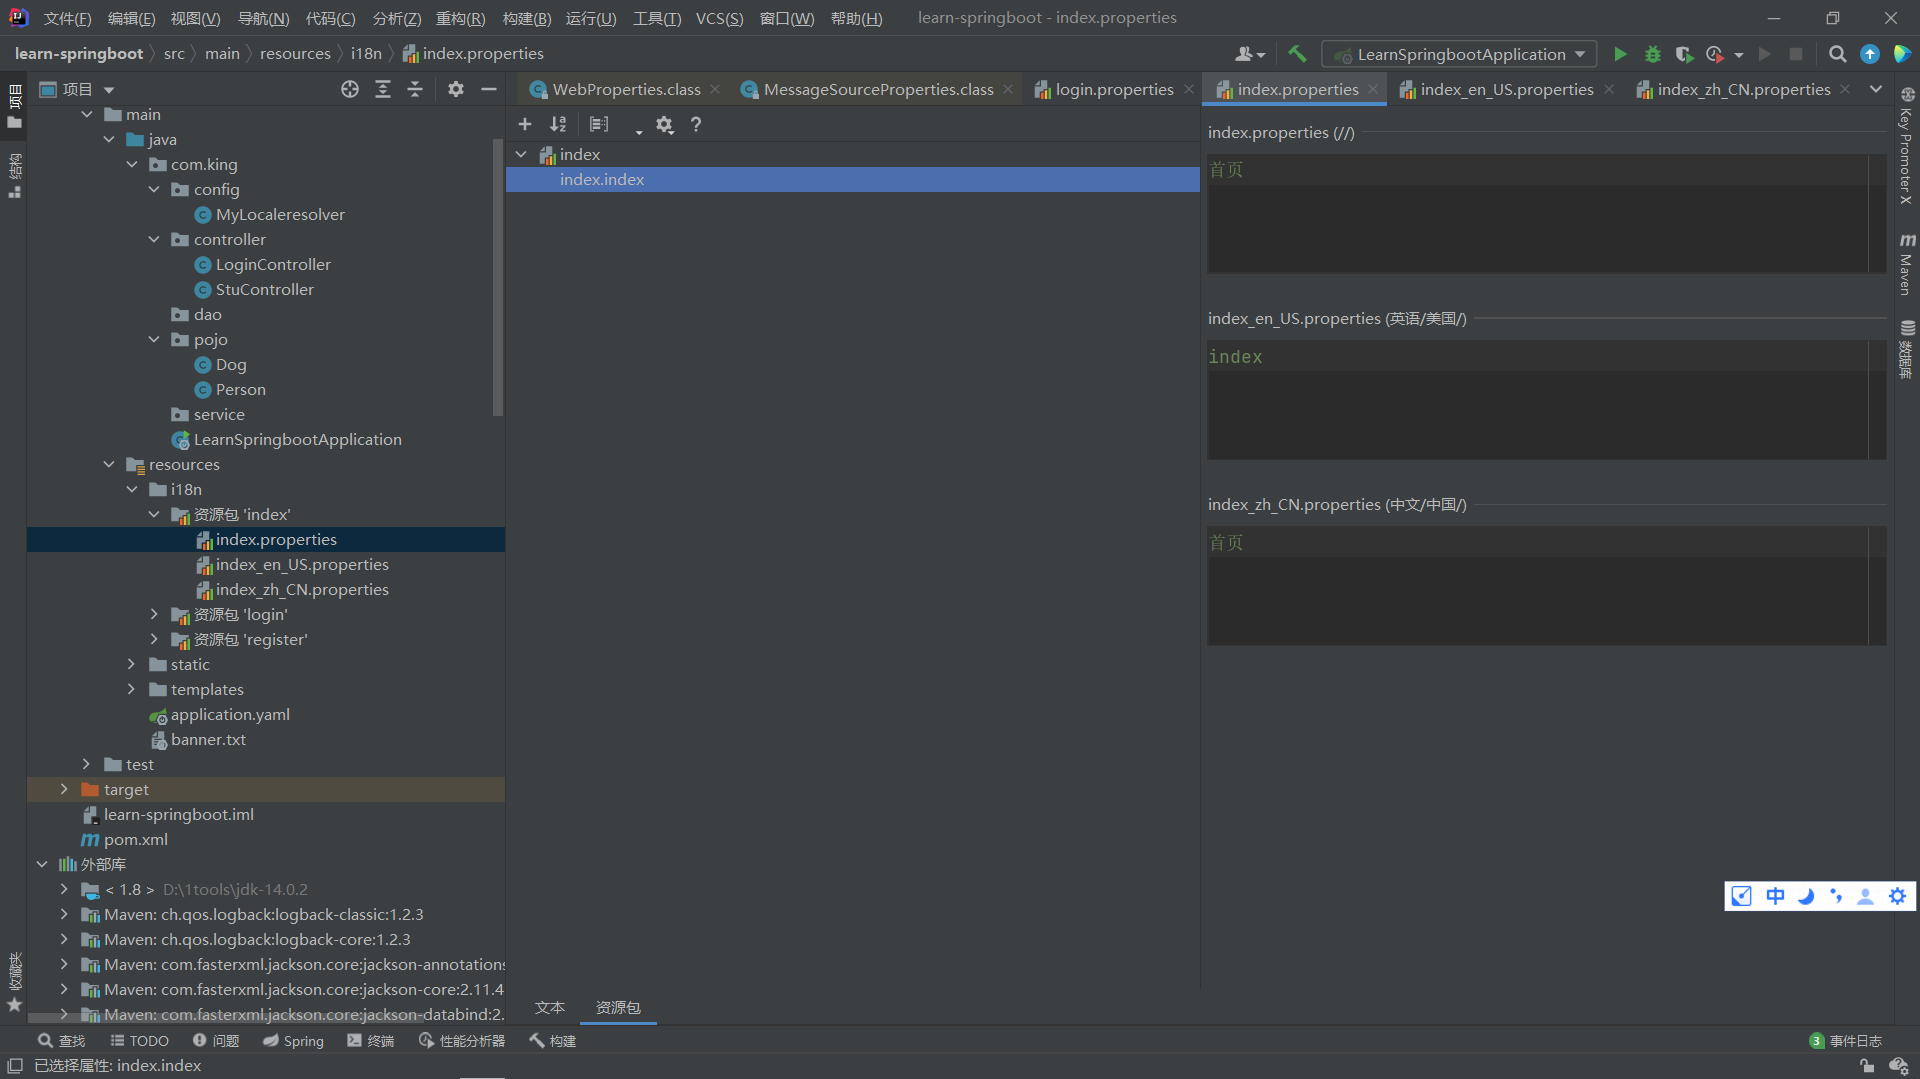
Then configure spring.messages.basename in application.yaml
spring:
  messages:
    basename: i18n.login
Then it can be #{} used in the template engine
<!DOCTYPE html>
<html lang="en" xmlns:th="http://www.thymeleaf.org" >
<head>
    <meta charset="UTF-8">
    <title>Title</title>
</head>
<body>
  <h1 th:text="#{index.index}"></h1>
  <form action="/login/handle">
      <p><label>user name<input type="text" name="username"></label></p>
      <p><label>password<input type="text" name="password"></label></p>
      <input type="submit" value="land">
  </form>
</body>
</html>
At this time, the back end will automatically change to the corresponding language according to the browser's language environment.
4.5.2 configuring localeresolver (message parser)
Search for locale (internationalization) under webmvcoautoconfiguration and you will find a @ Bean
@Bean
@ConditionalOnMissingBean(
    name = {"localeResolver"}
)
public LocaleResolver localeResolver() {
    if (this.webProperties.getLocaleResolver() == org.springframework.boot.autoconfigure.web.WebProperties.LocaleResolver.FIXED) {
        return new FixedLocaleResolver(this.webProperties.getLocale());
    } else if (this.mvcProperties.getLocaleResolver() == org.springframework.boot.autoconfigure.web.servlet.WebMvcProperties.LocaleResolver.FIXED) {
        return new FixedLocaleResolver(this.mvcProperties.getLocale());
    } else {
        AcceptHeaderLocaleResolver localeResolver = new AcceptHeaderLocaleResolver();
        Locale locale = this.webProperties.getLocale() != null ? this.webProperties.getLocale() : this.mvcProperties.getLocale();
        localeResolver.setDefaultLocale(locale);
        return localeResolver;
    }
}
Click LocaleResolver. We find that this is an interface with two methods: resolveLocale and setLocale.
We can see that the springboot will first see whether the user has configured the LocaleResolver. If not, the default LocaleResolver will be created. If we click into the default class, we will find that the AcceptHeaderLocaleResolver inherits the interface of LocaleResolver. Let's take a look at its implementation of the interface.
public Locale resolveLocale(HttpServletRequest request) {
    Locale defaultLocale = this.getDefaultLocale();
    if (defaultLocale != null && request.getHeader("Accept-Language") == null) {
        return defaultLocale;
    } else {
        Locale requestLocale = request.getLocale();
        List<Locale> supportedLocales = this.getSupportedLocales();
        if (!supportedLocales.isEmpty() && !supportedLocales.contains(requestLocale)) {
            Locale supportedLocale = this.findSupportedLocale(request, supportedLocales);
            if (supportedLocale != null) {
                return supportedLocale;
            } else {
                return defaultLocale != null ? defaultLocale : requestLocale;
            }
        } else {
            return requestLocale;
        }
    }
}

public void setLocale(HttpServletRequest request, @Nullable HttpServletResponse response, @Nullable Locale locale) {
    throw new UnsupportedOperationException("Cannot change HTTP accept header - use a different locale resolution strategy");
}
The resolveLocale method obtains the request and checks whether there is "accept language" in the request header. If not, the default Locale will be used. If there is, the header information will be parsed and finally a Locale object created by the obtained information will be returned.
Knowing the principle of springboot internationalization, we can also write a ResolveLocale to replace the ResolveLocale provided by springboot by default
4.6 custom jump addViewControllers
Inherit the addViewControllers method in a custom configuration class that inherits WebMvcConfigurer
@Configuration
public class MyWebMvcConfigurer implements WebMvcConfigurer {

    @Override
    public void addViewControllers(ViewControllerRegistry registry) {
        registry.addViewController("/").setViewName("login");
        registry.addViewController("/index.html").setViewName("login");
        registry.addViewController("/index").setViewName("login");
    }
}
In the browser, "/", "/ index" and "/ index.html" will all point to the login template
4.7 custom interceptors
First, implement a class that inherits the HandlerInterceptor class and rewrites its methods
public class MyInterceptor implements HandlerInterceptor {
    @Override
    public boolean preHandle(HttpServletRequest request, HttpServletResponse response, Object handler) throws Exception {
        if(request.getSession().getAttribute("loginUser") == null){
            request.getRequestDispatcher("/login").forward(request,response);
            return false;
        }
        return true;
    }
}
Then add interceptors in WebMVcConfigurer
@Configuration
public class MyWebMvcConfigurer implements WebMvcConfigurer {
	@Override
    public void addInterceptors(InterceptorRegistry registry) {
        registry.addInterceptor(new MyInterceptor())
                .addPathPatterns("/**")
                .excludePathPatterns("/login", "/login/handler");
    }

    ....
}
05 connect to database
5.1 integrating jdbc
5.1.1 basic operation
First, create a new project and check mysql and jdbc when the project is started. At this time, you will find that there are two more dependencies in pom
<dependency>
    <groupId>org.springframework.boot</groupId>
    <artifactId>spring-boot-starter-jdbc</artifactId>
</dependency>

<dependency>
    <groupId>mysql</groupId>
    <artifactId>mysql-connector-java</artifactId>
</dependency>
Then we configure the data source in the application.yaml configuration file
spring:
  datasource:
    username: root
    password: root
    url: jdbc:mysql://localhost:3306/learn_mybatis?serveTimezone=UTC&useSSL=false&useUnicode=true&characterEncoding=utf-8
    driver-class-name: com.mysql.cj.jdbc.Driver
At this point, jdbc has been configured. Let's output Datasource in the test class
@SpringBootTest
public class DataSourceTest {
    @Autowired
    DataSource dataSource;

    @Test
    public void test1() {
        System.out.println(dataSource);
        // Output: HikariDataSource (null)
    }
}
Springboot configures the default data source Hikari for us, which is the fastest data source at present
Then we obtain the connect object through the Datasource, and then obtain the statement object or preparedStatement object from the connect object to operate the database. At this time, it is no different from the traditional jdbc
@SpringBootTest
public class DataSourceTest {
    @Autowired
    DataSource dataSource;

    @Test
    public void test1() throws SQLException {
        String sql = "select * from user_tb";

        Connection connection = dataSource.getConnection();
        Statement statement = connection.createStatement();

        ResultSet resultSet = statement.executeQuery(sql);
        System.out.println(resultSet);

    }
}
5.1.2 jdbcTemplate
Springboot integrates various xxxxtempaltes for us to facilitate our operation
We get the JdbcTemplate directly from the container
@SpringBootTest
public class DataSourceTest {
    @Autowired
    JdbcTemplate jdbcTemplate;

    @Test
    public void test2(){
        String sql = "select * from user_tb";
        List<Map<String, Object>> users = jdbcTemplate.queryForList(sql);
        System.out.println(users);
    }

}
Next, it is completely consistent with the jdbc usage in spring
5.2 integrating druid
5.2.1 introduction and configuration items
A large part of Java programs need to operate the database. In order to improve the performance, they have to use the database connection pool when operating the database.
Druid is a database connection pool implementation on Alibaba's open source platform. It combines the advantages of C3P0, DBCP and other DB pools, and adds log monitoring.
Druid can well monitor DB pool connections and SQL execution. It is naturally a DB connection pool for monitoring.
Druid has deployed more than 600 applications in Alibaba, which has been severely tested by large-scale deployment in the production environment for more than a year.
For Spring Boot 2.0 and above, Hikari data source is used by default. It can be said that Hikari and Driud are the best data sources on the current Java Web. Let's focus on how Spring Boot integrates Druid data source and how to realize database monitoring.
Github address: https://github.com/alibaba/druid/
Github address: https://github.com/alibaba/druid/
The basic configuration parameters of com.alibaba.druid.pool.DruidDataSource are as follows:
| to configure | Default value | explain |
|---|---|---|
| name | The significance of configuring this attribute is that if there are multiple data sources, they can be distinguished by name during monitoring. If there is no configuration, a name will be generated in the format of "DataSource -" + System.identityHashCode(this) | |
| jdbcUrl | The url to connect to the database is different from database to database. For example: MySQL: JDBC: mysql://10.20.153.104:3306/druid2 oracle : jdbc:oracle:thin:@10.20.149.85:1521:ocnauto | |
| username | User name to connect to the database | |
| password | Password to connect to the database. If you don't want the password written directly in the configuration file, you can use configfilter. See here for details: https://github.com/alibaba/druid/wiki/%E4%BD%BF%E7%94%A8ConfigFilter | |
| driverClassName | Automatic identification according to url | This item can be configured or not. If druid is not configured, it will automatically identify the dbType according to the url, and then select the corresponding driverclassname (under recommended configuration) |
| initialSize | 0 | The number of physical connections established during initialization. Initialization occurs when the display calls the init method or the first getConnection |
| maxActive | 8 | Maximum number of connection pools |
| maxIdle | 8 | It is no longer used, and the configuration has no effect |
| minIdle | Minimum number of connection pools | |
| maxWait | Maximum wait time to get a connection, in milliseconds. After maxWait is configured, the fair lock is enabled by default, and the concurrency efficiency will be reduced. If necessary, you can use a non fair lock by configuring the useUnfairLock attribute to true. | |
| poolPreparedStatements | false | Whether to cache preparedStatement, that is, PSCache. PSCache greatly improves the performance of databases that support cursors, such as oracle. It is recommended to close under mysql. |
| maxOpenPreparedStatements | -1 | To enable PSCache, it must be configured to be greater than 0. When greater than 0, poolPreparedStatements is automatically triggered and modified to true. In Druid, there will be no problem that PSCache in Oracle occupies too much memory. You can configure this value to be larger, such as 100 |
| validationQuery | The sql used to check whether the connection is valid requires a query statement. If validationQuery is null, testonmirror, testOnReturn, and testwhiteidle will not work. | |
| testOnBorrow | true | When applying for a connection, execute validationQuery to check whether the connection is valid. This configuration will reduce performance. |
| testOnReturn | false | When returning the connection, execute validationQuery to check whether the connection is valid. This configuration will reduce the performance |
| testWhileIdle | false | It is recommended to configure to true, which will not affect performance and ensure security. Check when applying for a connection. If the idle time is greater than timebetween evictionrunsmillis, run validationQuery to check whether the connection is valid. |
| timeBetweenEvictionRunsMillis | It has two meanings: 1) the destroy thread will detect the connection interval; 2) the judgment basis of testwhiteidle. See the description of testwhiteidle property for details | |
| numTestsPerEvictionRun | No longer used, a DruidDataSource only supports one EvictionRun | |
| minEvictableIdleTimeMillis | ||
| connectionInitSqls | sql executed during physical connection initialization | |
| exceptionSorter | Automatic identification according to dbType | When the database throws some unrecoverable exceptions, the connection is discarded |
| filters | The attribute type is string. The extension plug-ins are configured by alias. The commonly used plug-ins are: filter for monitoring statistics: stat, filter for log: log4j, filter for defending sql injection: wall | |
| proxyFilters | The type is list < com. Alibaba. Druid. Filter. Filter >. If both filters and proxyFilters are configured, it is a combination relationship, not a replacement relationship |
5.2.2 basic use
- Import dependencies first
<dependency>
    <groupId>com.alibaba</groupId>
    <artifactId>druid-spring-boot-starter</artifactId>
    <version>1.2.1</version>
</dependency>
- Switch the data source and add a type to the original one in application.yaml
spring:
  datasource:
    username: root
    password: 123456
    url: jdbc:mysql://localhost:3306/springboot?serverTimezone=UTC&useUnicode=true&characterEncoding=utf-8
    driver-class-name: com.mysql.cj.jdbc.Driver
    type: com.alibaba.druid.pool.DruidDataSource # Custom data source
Common configuration:
spring:
	datasource:
		#Basic configuration of datasource
		username: root
        password: root
        url: jdbc:mysql://localhost:3306/learn_mybatis?serveTimezone=UTC&useSSL=false&useUnicode=true&characterEncoding=utf-8
        driver-class-name: com.mysql.cj.jdbc.Driver

        #SpringBoot does not inject these by default and needs to bind itself
        #druid data source proprietary configuration
        initialSize: 5
        minIdle: 5
        maxActive: 20
        maxWait: 60000
        timeBetweenEvictionRunsMillis: 60000
        minEvictableIdleTimeMillis: 300000
        validationQuery: SELECT 1 FROM DUAL
        testWhileIdle: true
        testOnBorrow: false
        testOnReturn: false
        poolPreparedStatements: true

        #Configure filters for monitoring statistics interception. stat: monitoring statistics, log4j: logging, wall: defending sql injection
        #If errors are allowed, java.lang.classnotfoundexception: org.apache.log4j.property
        #Then import log4j dependency
        filters: stat,wall,log4j
        maxPoolPreparedStatementPerConnectionSize: 20
        useGlobalDataSourceStat: true
        connectionoProperties: druid.stat.mergeSql=true;druid.stat.slowSqlMillis=500
- Then we import log4j
 <dependency>
     <groupId>log4j</groupId>
     <artifactId>log4j</artifactId>
     <version>1.2.17</version>
 </dependency>
- At this point, we need to register a data source ourselves. First, create the DruidConfig class
//DruidConfig.java

@Configuration
public class DruidConfig {

    /**
     * Add the custom Druid data source to the container and no longer let Spring Boot create it automatically
     * Bind the Druid data source properties in the global configuration file to com.alibaba.druid.pool.DruidDataSource to make them take effect
     * @ConfigurationProperties(prefix = "spring.datasource"): The function is to add the global configuration file
     * The attribute value prefixed with spring.datasource is injected into the parameter with the same name of com.alibaba.druid.pool.DruidDataSource
     */
    @Bean
    @ConfigurationProperties(prefix = "spring.datasource")
    DataSource druidDataSource(){
        return new DruidDataSource();
    }

}
- Let's test the class
@SpringBootTest
class SpringbootDataJdbcApplicationTests {

    //DI injection data source
    @Autowired
    DataSource dataSource;

    @Test
    public void contextLoads() throws SQLException {
        //Take a look at the default data source
        System.out.println(dataSource.getClass());
        //Get connection
        Connection connection = dataSource.getConnection();
        System.out.println(connection);

        DruidDataSource druidDataSource = (DruidDataSource) dataSource;
        System.out.println("druidDataSource Maximum connections to data source:" + druidDataSource.getMaxActive());
        System.out.println("druidDataSource Number of data source initialization connections:" + druidDataSource.getInitialSize());

        //Close connection
        connection.close();

        //Output:
        // class com.alibaba.druid.pool.DruidDataSource
        // com.mysql.cj.jdbc.ConnectionImpl@55951fcd
		// druidDataSource data source maximum connections: 8
		// druidDataSource data source initialization connections: 0
    }
}
5.2.3 configure data source monitoring
Druid data source has the function of monitoring and provides a web interface for users to view. Similarly, when installing a router, people also provide a default web page.
Therefore, the first step is to set Druid's background management page, such as login account, password, etc; Configure background management;
//Configure the Servlet of Druid monitoring management background;
//There is no web.xml file in the built-in Servlet container, so the Servlet registration method of Spring Boot is used
@Bean
public ServletRegistrationBean statViewServlet() {
    ServletRegistrationBean bean = new ServletRegistrationBean(new StatViewServlet(), "/druid/*");

    // These parameters can be found in com.alibaba.druid.support.http.StatViewServlet
    // Found in the parent class of com.alibaba.druid.support.http.ResourceServlet
    Map<String, String> initParams = new HashMap<>();
    initParams.put("loginUsername", "admin"); //Login account of background management interface
    initParams.put("loginPassword", "123456"); //Login password of background management interface

    //Who is allowed to access in the background
    //initParams.put("allow", "localhost"): indicates that only the local machine can access it
    //initParams.put("allow", ""): when it is empty or null, it means that all accesses are allowed
    initParams.put("allow", "");
    //deny: Druid, who is denied access in the background
    //initParams.put("kuangshen", "192.168.1.20"); Indicates that this ip access is prohibited

    //Set initialization parameters
    bean.setInitParameters(initParams);
    return bean;
}
After configuration, we can choose to access: http://localhost:8080/druid/login.html
In it, we can monitor all kinds of web and sql information
Configure Druid web monitoring filter
//Configure the filter of web monitoring for Druid monitoring
//WebStatFilter: used to configure management association monitoring statistics between Web and Druid data sources
@Bean
public FilterRegistrationBean webStatFilter() {
    FilterRegistrationBean bean = new FilterRegistrationBean();
    bean.setFilter(new WebStatFilter());

    //exclusions: sets which requests are filtered and excluded so that statistics are not performed
    Map<String, String> initParams = new HashMap<>();
    initParams.put("exclusions", "*.js,*.css,/druid/*,/jdbc/*");
    bean.setInitParameters(initParams);

    //"/ *" means to filter all requests
    bean.setUrlPatterns(Arrays.asList("/*"));
    return bean;
}
At ordinary times, it can be configured as required during work. It is mainly used for monitoring!
5.3 integrating mybatis
Official documents: http://mybatis.org/spring-boot-starter/mybatis-spring-boot-autoconfigure/
Maven warehouse address: https://mvnrepository.com/artifact/org.mybatis.spring.boot/mybatis-spring-boot-starter/2.1.1
- Dependencies required to import MyBatis
<dependency>
    <groupId>org.mybatis.spring.boot</groupId>
    <artifactId>mybatis-spring-boot-starter</artifactId>
    <version>2.1.1</version>
</dependency>
- Configure database connection information (unchanged)
spring:
  datasource:
    username: root
    password: 123456
    url: jdbc:mysql://localhost:3306/springboot?serverTimezone=UTC&useUnicode=true&characterEncoding=utf-8
    driver-class-name: com.mysql.cj.jdbc.Driver
    type: com.alibaba.druid.pool.DruidDataSource

    #Spring Boot does not inject these attribute values by default and needs to bind itself
    #druid data source proprietary configuration
    initialSize: 5
    minIdle: 5
    maxActive: 20
    maxWait: 60000
    timeBetweenEvictionRunsMillis: 60000
    minEvictableIdleTimeMillis: 300000
    validationQuery: SELECT 1 FROM DUAL
    testWhileIdle: true
    testOnBorrow: false
    testOnReturn: false
    poolPreparedStatements: true

    #Configure filters for monitoring statistics interception, stat: monitoring statistics, log4j: logging, wall: defending sql injection
    #If the error is allowed, java.lang.ClassNotFoundException: org.apache.log4j.Priority will be reported
    #Then import the log4j dependency. Maven address: https://mvnrepository.com/artifact/log4j/log4j
    filters: stat,wall,log4j
    maxPoolPreparedStatementPerConnectionSize: 20
    useGlobalDataSourceStat: true
    connectionProperties: druid.stat.mergeSql=true;druid.stat.slowSqlMillis=500
-
Test whether the database connection is successful!
-
Create pojo entity classes based on the database
@Data
@NoArgsConstructor
@AllArgsConstructor
public class Department {
    public String id;
    public String name;
}
- Create Mapper. Here, you can add @ Mapper annotation on each Mapper, or add all classes in @ MapperScan scan package on startup class
package com.king.mapper;

@Repository
@
public interface DepartmentMapper {

    Department queryDepartmentById(String id);

    List<Department> queryDepartments();
}
package com.king;

@MapperScan("com.king.mapper")
@SpringBootApplication
public class LearnSpringbootApplication {

    public static void main(String[] args) {
        SpringApplication.run(LearnSpringbootApplication.class, args);
    }

}
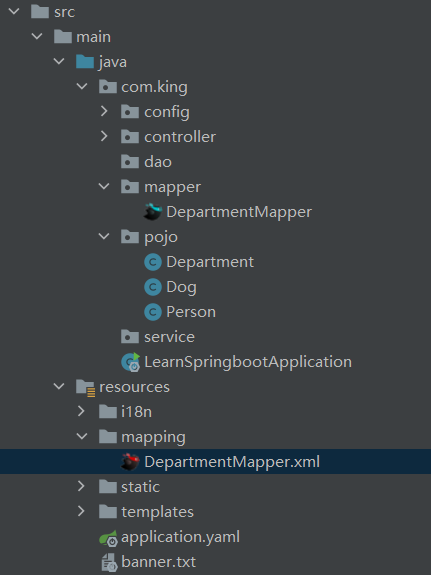
- Create a mapping folder in the resource folder and create the corresponding * * * Mapper.xml in it
<?xml version="1.0" encoding="UTF-8" ?>
<!DOCTYPE mapper
        PUBLIC "-//mybatis.org//DTD Mapper 3.0//EN"
        "http://mybatis.org/dtd/mybatis-3-mapper.dtd">
<mapper namespace="com.king.mapper.DepartmentMapper">

    <select id="queryDepartmentById" resultType="com.king.pojo.Department">
        select * from dept_tb where id = #{id};
    </select>

    <select id="queryDepartments" resultType="com.king.pojo.Department">
        select * from dept_tb;
    </select>

</mapper>
- Write application.yaml configuration
spring:
  datasource:
    username: root
    password: root
    url: jdbc:mysql://localhost:3306/learn_mybatis?serveTimezone=UTC&useSSL=false&useUnicode=true&characterEncoding=utf-8
    driver-class-name: com.mysql.cj.jdbc.Driver
    type: com.alibaba.druid.pool.DruidDataSource
    #SpringBoot does not inject these by default and needs to bind itself
    #druid data source proprietary configuration
    initialSize: 5
    minIdle: 5
    maxActive: 20
    maxWait: 60000
    timeBetweenEvictionRunsMillis: 60000
    minEvictableIdleTimeMillis: 300000
    validationQuery: SELECT 1 FROM DUAL
    testWhileIdle: true
    testOnBorrow: false
    testOnReturn: false
    poolPreparedStatements: true

    #Configure filters for monitoring statistics interception. stat: monitoring statistics, log4j: logging, wall: defending sql injection
    #If errors are allowed, java.lang.ClassNotFoundException: org.apache.Log4j.Property
    #Then import log4j dependency
    filters: stat,wall
    maxPoolPreparedStatementPerConnectionSize: 20
    useGlobalDataSourceStat: true
    connectionoProperties: druid.stat.mergeSql=true;druid.stat.slowSqlMillis=500

mybatis:
  mapper-locations: classpath:mapping/*.xml
  type-aliases-package: com.king.pojo
- test
@SpringBootTest
public class DeptTest {

    @Autowired
    DepartmentMapper departmentMapper;

    @Test
    public void test(){
        System.out.println(departmentMapper);
        System.out.println(departmentMapper.queryDepartments());
        System.out.println(departmentMapper.queryDepartmentById(1));

        //Output:
        //org.apache.ibatis.binding.MapperProxy@6aa6c17
        //[Department(id=1, name = Literature Department), Department(id=2, name = sports department)]
		//Department(id=1, name = Literature Department)
    }
}
springboot principle
Principle of automatic assembly
The core of springboot is the principle of automatic assembly. What is the principle of automatic assembly? The principle of automatic assembly is to read the xxxAutoConfiguration and configuration files provided by strat, and configure these classes after reading.