Prepare tool:
1.Four centos7 servers, one client
In this experiment, four servers are used, one server installs haproxy for scheduling, the other two servers build nginx to provide web services, and one client tests access.
·····················
| Host | system | IP | function |
| HAproxy | centos7 | 192.168.254.214 | HAproxy |
| nginx | centos7 | 192.168.254.226 | nginx |
| nginx | centos7 | 192.168.254.227 | nginx |
| Client | windows10 | 192.168.254.135 | Edg Browser |
| NFS | cetos7 | 192.168.254.228 | Shared Files |
2.One hand and one head


If that's all ready, let's get down to business.
First get the environment you need to do the experiment. Close the firewall and Elinux permissions
#Close Firewall

systemctl stop firewalld.service
systemctl disable firewalld.service

#Permanently close SElinux permissions

sed -i 's/SELINUX=.*/SELINUX=disabled/' /etc/sysconfig/selinux


#Restart the server after modifying the SElinux permissions for the configuration to take effect, and temporarily shut down SElinux if you suspect trouble using the following commands

setenforce 0
nginx server deployment
Install nginx and its dependent packages
#Installing nginx requires compiling the source code downloaded from the official website first, compiling depends on the gcc environment

yum install gcc-c++


#nginx's http module uses pcre to parse regular expressions, so you need to install the pcre library on linux

yum install -y pcre pcre-devel


#nginx uses zlib to gzip the contents of http packages, so you need to install the zlib library on Centos.

yum install -y zlib zlib-devel


#OpenSSL is a powerful Secure Sockets Layer cryptographic library that includes key cryptographic algorithms, commonly used key and certificate encapsulation management functions, and SSL protocols, and provides rich applications for testing or other purposes.
nginx Not only support http Agreement, also supported https(That is, ssl Transport on Protocol http),So you need to Centos install OpenSSL Library.

yum install -y openssl openssl-devel


#Download the Nginx installation package
cd /usr/local/

wget http://nginx.org/download/nginx-1.9.9.tar.gz
Unzip the Nginx installation package
tar -zxvf nginx-1.9.9.tar.gz
Switch to/usr/local/nginx-1.9.9/
#Compile and Install
./configure

make && make install
Switch to/usr/local/nginx/sbin to start the nginx service
./nginx
Another nginx server configuration is installed as above
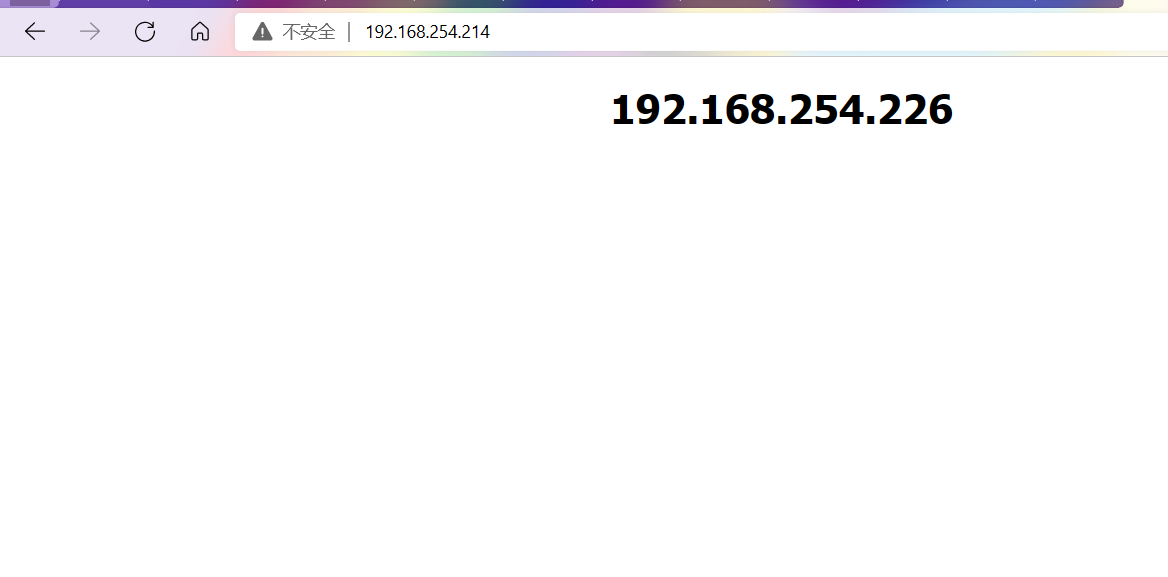
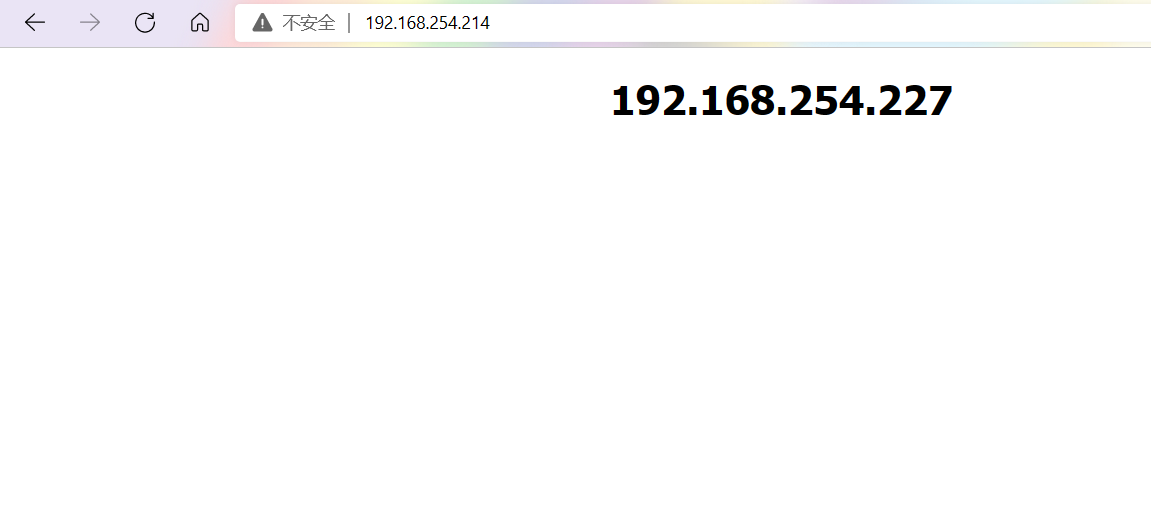
Verification
Authenticate with IP to Browser

nginx deployment complete
HAproxy Server Deployment
Switch to cd/root directory
Download installation package
cd /

wget https://src.fedoraproject.org/repo/pkgs/haproxy/haproxy-1.8.19.tar.gz/sha512/f62b0a18f19295986d26c5c60b6b1ad55850a175bed67a359282cc37a4c630a0c2be51d608226b4316f2e69c3008c20a1cb91ce10f86311219355973a050e65b/haproxy-1.8.19.tar.gz
decompression
tar -zxf haproxy-1.8.19.tar.gz
Compile Installation
 make TARGET=linux310 ARCH=x86_64

#Specify installation directory
 make install PREFIX=/usr/local/haproxy
Switch to/usr/local/haproxy/to create a Haproxy configuration file and write the following
vim haproxy.cfg

global
  #Journal
  log 127.0.0.1 local0 info
  #maximum connection
  maxconn 10240
  daemon

defaults
  #Apply global log configuration
  log global
  mode http
  #Timeout Configuration
  timeout connect 5000
  timeout client 5000
  timeout server 5000
  timeout check 2000

listen http_front #haproxy's customer page
  bind 192.168.254.214:8888         #Local IP Address
  mode http
  option httplog
  stats uri /haproxy
  stats auth admin:admin          #Control Panel Account Password admin Account:admin
  stats refresh 5s
  stats enable

listen webcluster
       bind 0.0.0.0:80
       option httpchk GET /index.html
       balance roundrobin  # Load Balance Mode Polling
       server inst1 192.168.2.226:80 check inter 2000 fall 3  #web Server IP
       server inst2 192.168.2.227:80 check inter 2000 fall 3
Start the Haproxy service
/haproxy-1.8.19/haproxy -f /usr/local/haproxy/haproxy.cfg
Check to see if the service started successfully
lsof -i:8888

Browser Validation
http://192.168.254.214:8888/haproxy
Account is admin password admin
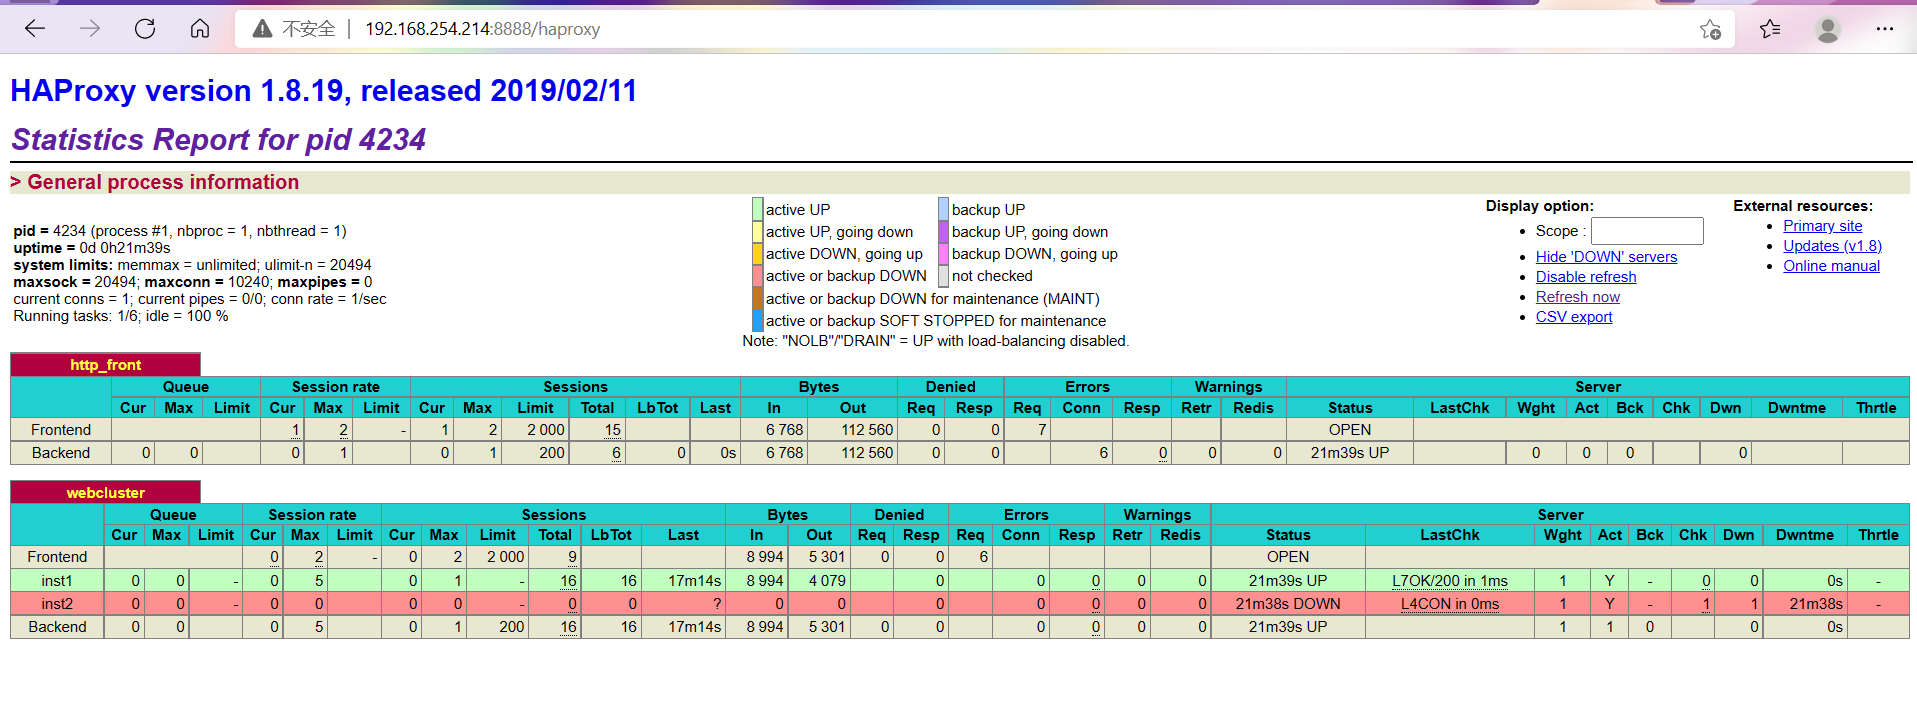
Verify that polling is valid and click Refresh to switch pages.
NFS Deployment
It is impossible to access pages differently in real-world environments. All pages are accessed consistently with NFS, but professional memory is the most used in reality.
Server
Install NFS on an NFS server
#Install NFS
yum -y install nfs-utils rpcbind


#Start Services
systemctl enable rpcbind
systemctl enable nfs-server
systemctl enable nfs-lock
systemctl enable nfs-idmap
systemctl start rpcbind
systemctl start nfs-server
systemctl start nfs-lock
systemctl start nfs-idmap
Create shared directory
cd ~

mkdir /html

cd /html

#Create your own web page file and write whatever you like
vim index.html


chmod -R 777 /html/
Insert the following in/etc/exports
vim /etc/exports

#Insert Content

/html   192.168.254.0/24(rw,sync,no_root_squash)


or

/html   192.168.254.*(rw,sync,no_root_squash)


ro read-only
rw Allow reading and writing
sync Synchronous Writing
no_root_squash When client to root When accessing an identity, assign root Permissions (that is, superuser reserved permissions)
Otherwise, root All user requests mapped to anonymous User same permissions (default)


#Make Configuration Effective
exportfs -a
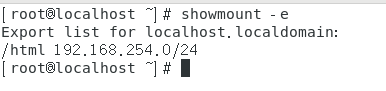
See if sharing was successful
showmount -e
Client
Two nginx servers as clients
Install the nfs client on the nginx server and do not need to start the nfs service on the client
yum install nfs-utils
Manually mount the shared directory to the default path of the nginx page file so that you do not have to modify the default path
mount 192.168.254.228:/html /usr/local/nginx/html/
Go to browser again to access validation