Exchange Group: 876618546 Exchange Group: 876618546
Catalog
1. Install docke and set up boot-up
2. Draw the green dragon panel
3. Log on to the Qinglong panel
4. Pull Timer Task Script Warehouse
5. Apply Settings Configuration
6. Setting up environment for xdd-plus
8.nvjdc SMS authentication login docking xdd-plus
I. Preparations
1.A computer (mobile phone can also find ssh link tool by itself)
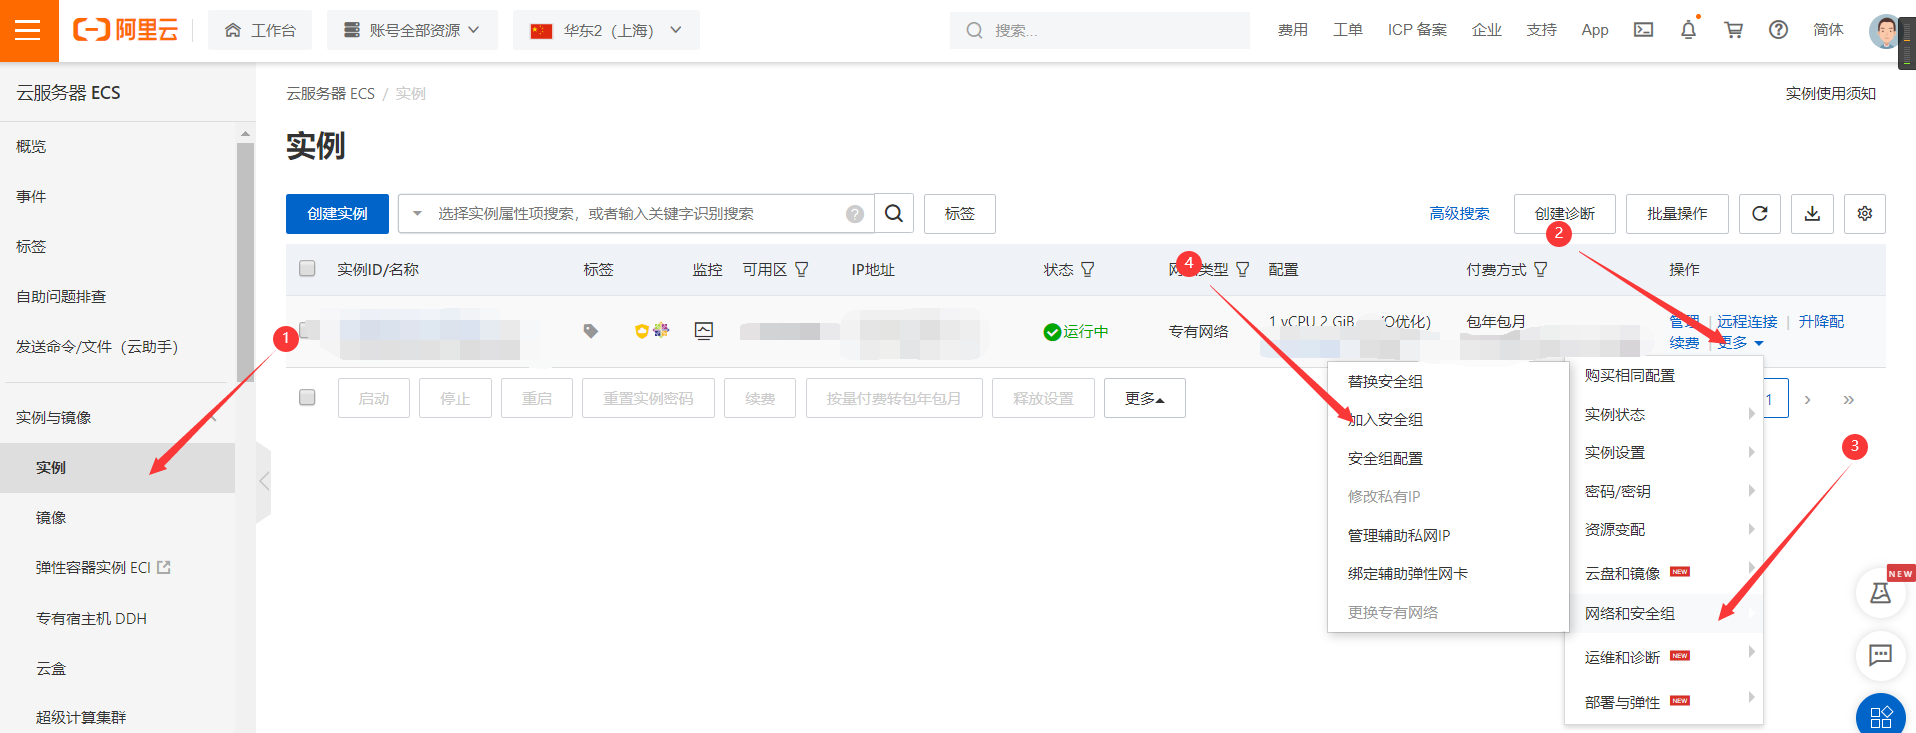
2. Purchase servers and open server ports, taking Ali cloud server as an example. Other servers own Baidu, there is not much description here.
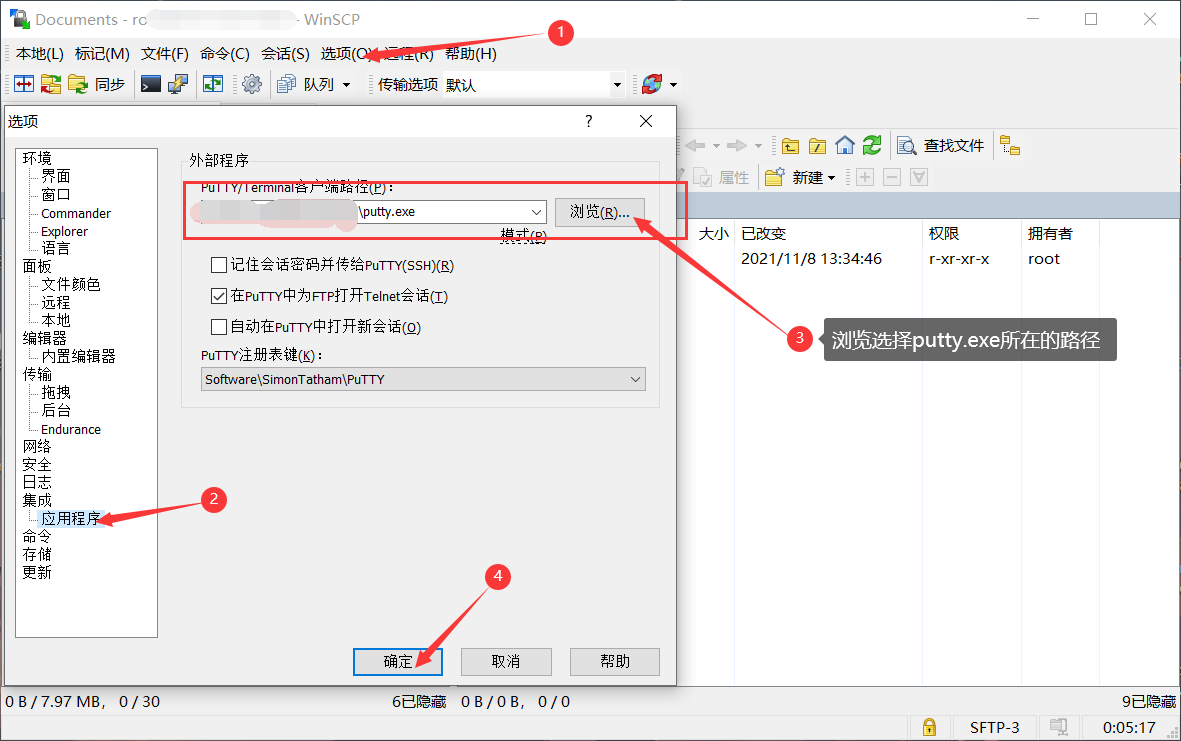
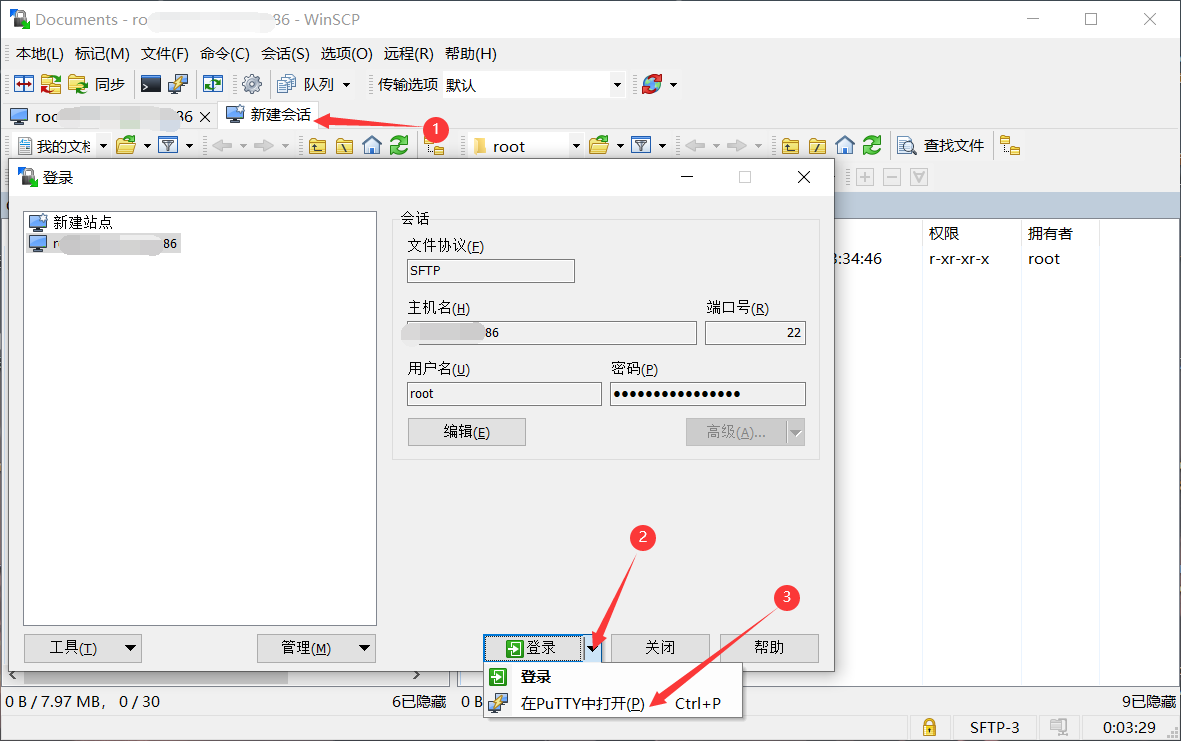
3. Prepare the ssh tool (for linking servers), which I use here winscp+putty with download link below
3.1 Link servers for later modification of configuration files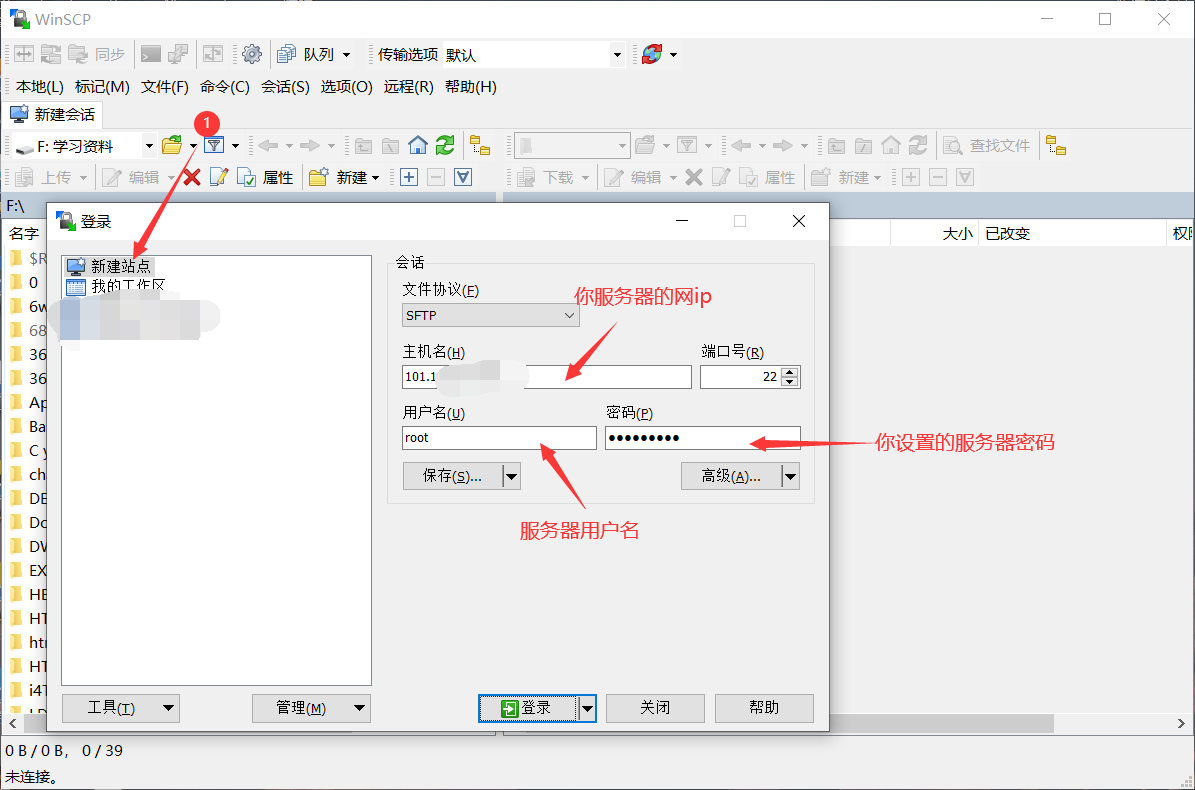
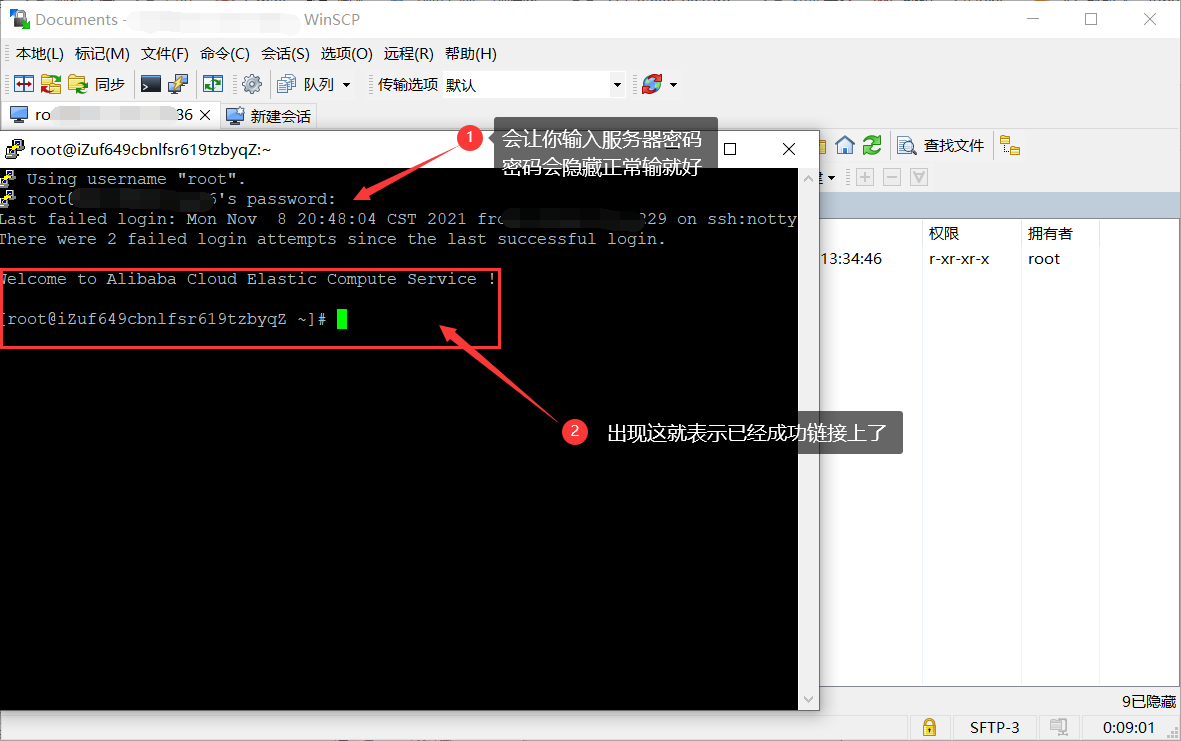
3.2 Command Line Link Control Server
2. Start building
1. Install docke and set up boot-up
sudo yum check-update
curl -sSL https://get.daocloud.io/docker | sh
sudo systemctl start docker
sudo systemctl status docker
sudo systemctl enable docker

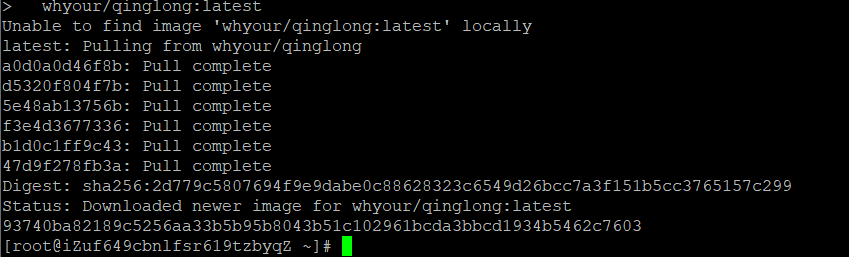
2. Draw the green dragon panel
docker run -dit \
  --name ql \
  --hostname ql \
  --restart always \
  -p 5700:5700 \
  -v $PWD/ql/config:/ql/config \
  -v $PWD/ql/log:/ql/log \
  -v $PWD/ql/db:/ql/db \
  -v $PWD/ql/scripts:/ql/scripts \
  -v $PWD/ql/jbot:/ql/jbot \
  whyour/qinglong:latest
Port numbers can be done on their own:
-p 5700:5700 Port number 5700
-p xxxx:5700 Port number is XXXX
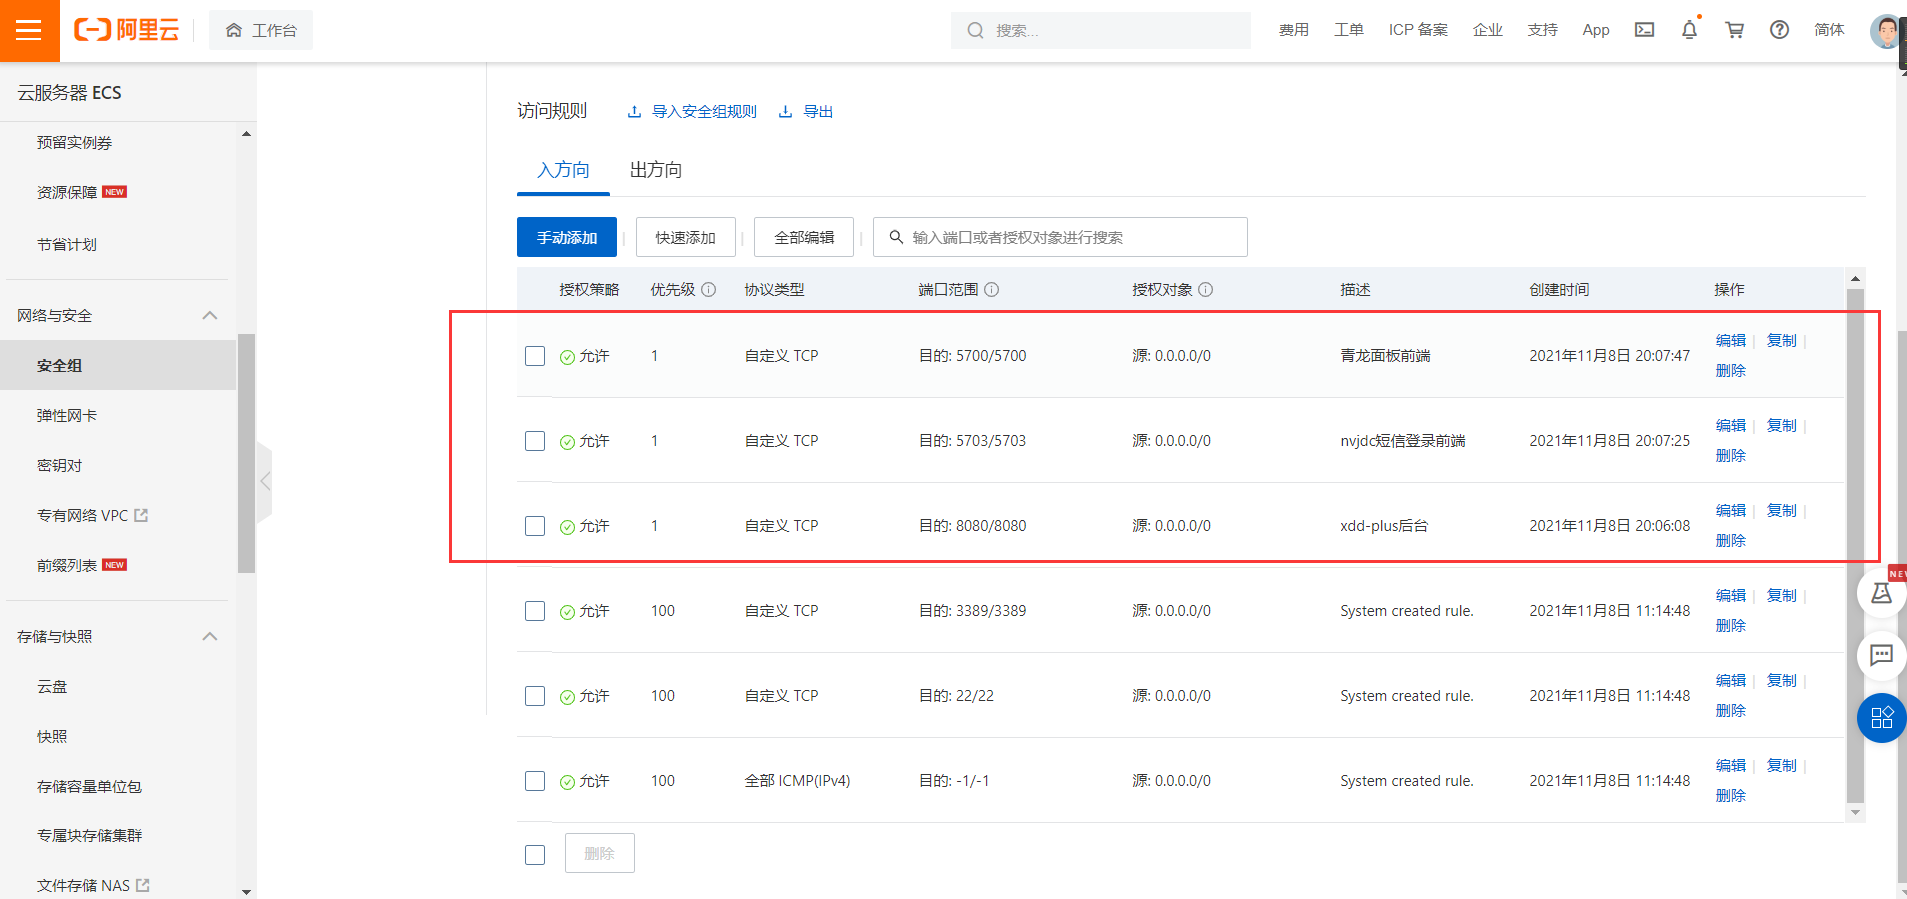
Note: Always change the port number to allow the port in the security group, otherwise it will not be accessible
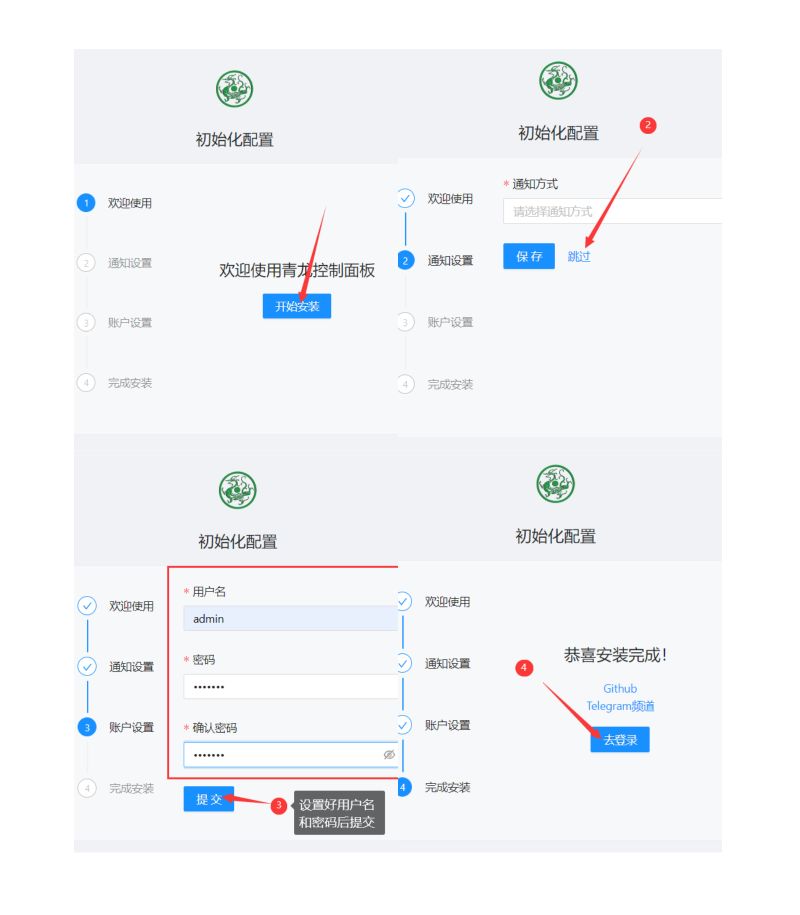
3. Log on to the Qinglong panel
Enter server ip:port number in browser Port number is the port number you set for the previous step
For example: 123.123.123.123:5700
Go to the landing page of the Qinglong panel and start the installation
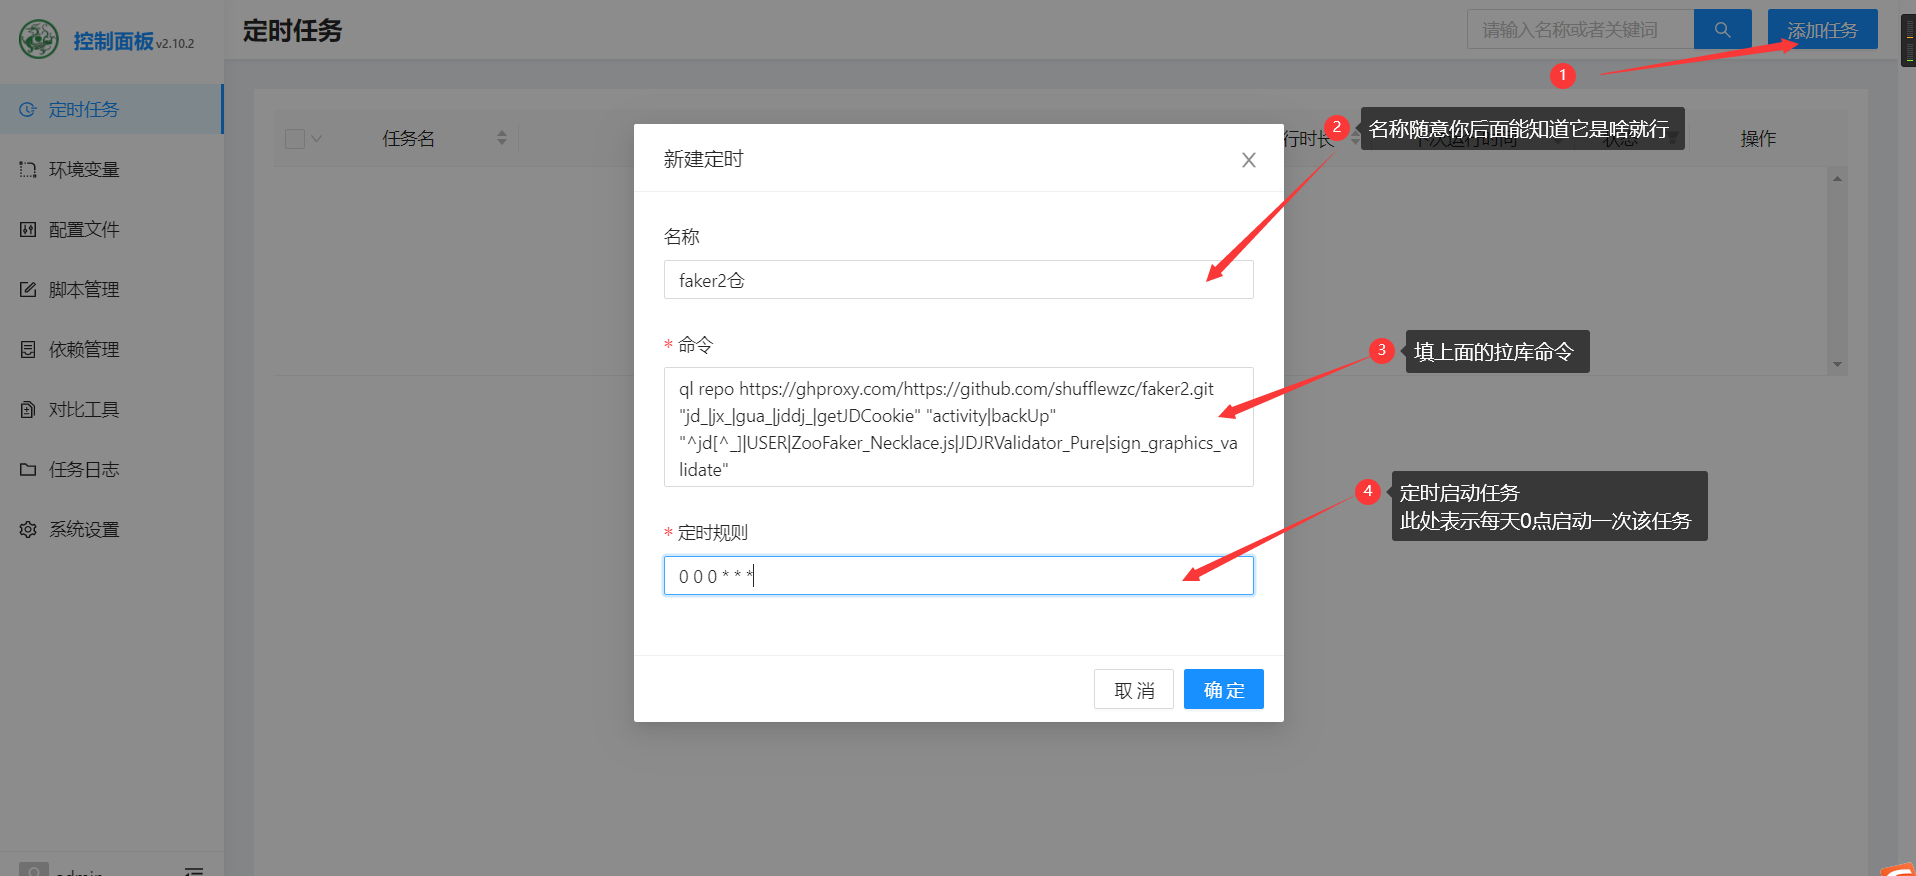
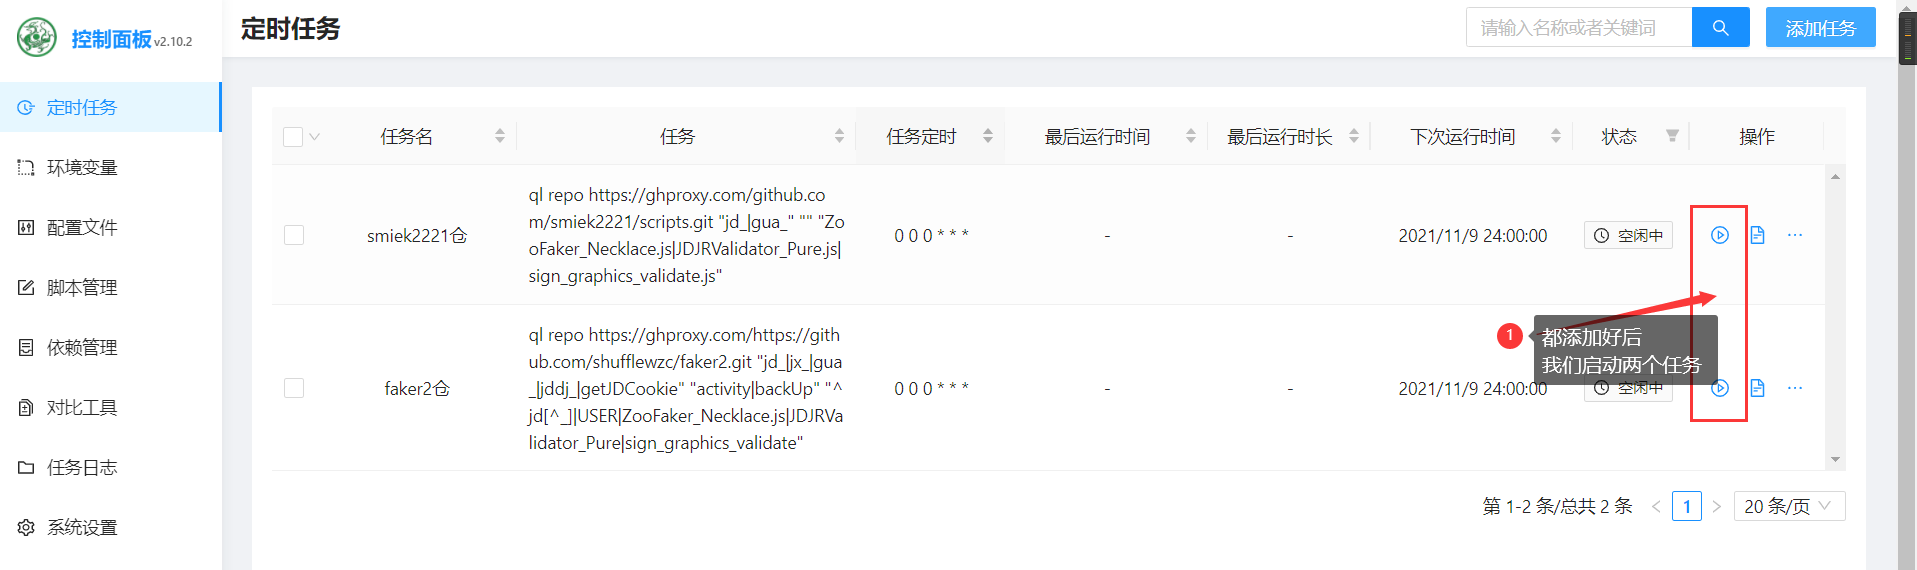
4. Pull Timer Task Script Warehouse
Two warehouses are recommended here:
faker2 repository:
ql repo https://ghproxy.com/https://github.com/shufflewzc/faker2.git "jd_|jx_|gua_|jddj_|getJDCookie" "activity|backUp" "^jd[^_]|USER|ZooFaker_Necklace.js|JDJRValidator_Pure|sign_graphics_validate"
Smiek 2221 warehouse:
ql repo https://ghproxy.com/github.com/smiek2221/scripts.git "jd_|gua_" "" "ZooFaker_Necklace.js|JDJRValidator_Pure.js|sign_graphics_validate.js"
Qinglong Panel Dependencies and some script Dependencies can not be lazy, wait a little slower
docker exec -it QL bash -c "npm install -g typescript"
docker exec -it QL bash -c "npm install axios date-fns"
docker exec -it QL bash -c "npm install crypto -g"
docker exec -it QL bash -c "npm install jsdom"
docker exec -it QL bash -c "npm install png-js"
docker exec -it QL bash -c "npm install -g npm"
docker exec -it QL bash -c "pnpm i png-js"
docker exec -it QL bash -c "pip3 install requests"
docker exec -it QL bash -c "apk add --no-cache build-base g++ cairo-dev pango-dev giflib-dev && cd scripts && npm install canvas --build-from-source"
docker exec -it QL bash -c "apk add python3 zlib-dev gcc jpeg-dev python3-dev musl-dev freetype-dev"
docker exec -it QL bash -c "cd /ql/scripts/ && apk add --no-cache build-base g++ cairo-dev pango-dev giflib-dev && npm i && npm i -S ts-node typescript @types/node date-fns axios png-js canvas --build-from-source"
5. Apply Settings Configuration
Prepare for next xdd-plus docking with Qinglong

6. Setting up environment for xdd-plus
6.1 Install gcc
yum -y install gcc
yum -y install gcc-c++
6.2 Download the go installation package, where we install to the usr/local directory
cd /usr/local && wget https://golang.google.cn/dl/go1.16.7.linux-amd64.tar.gz -O go1.16.7.linux-amd64.tar.gz
6.3 Unzip go installation package
tar -xvzf go1.16.7.linux-amd64.tar.gz
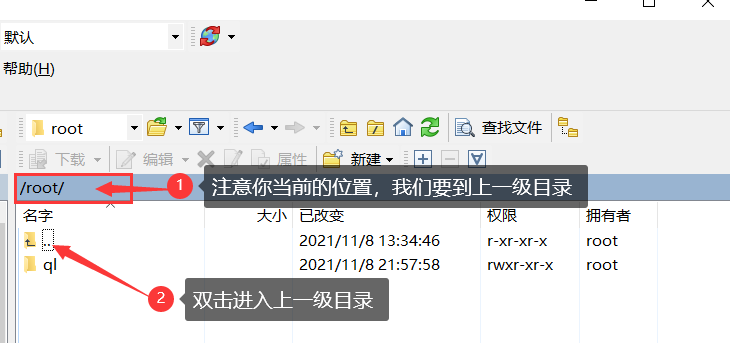
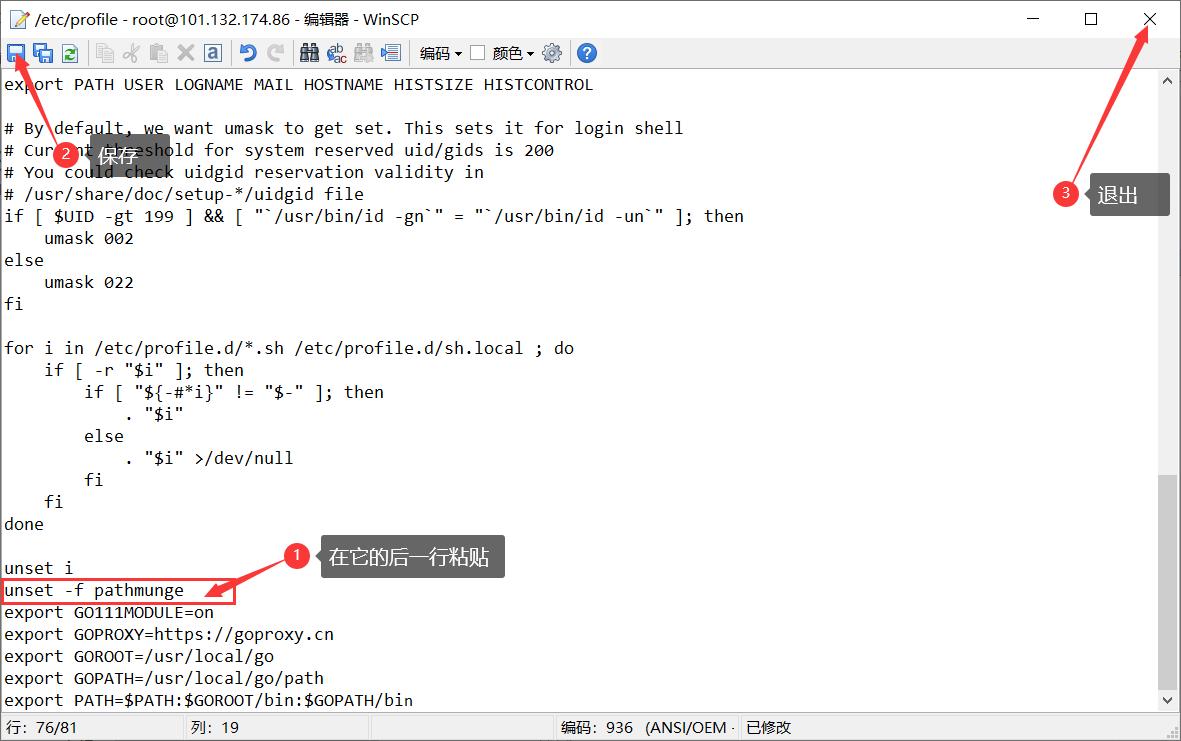
6.4 Manually set the environment variable path/etc/profile using the previously installed WinSCP software
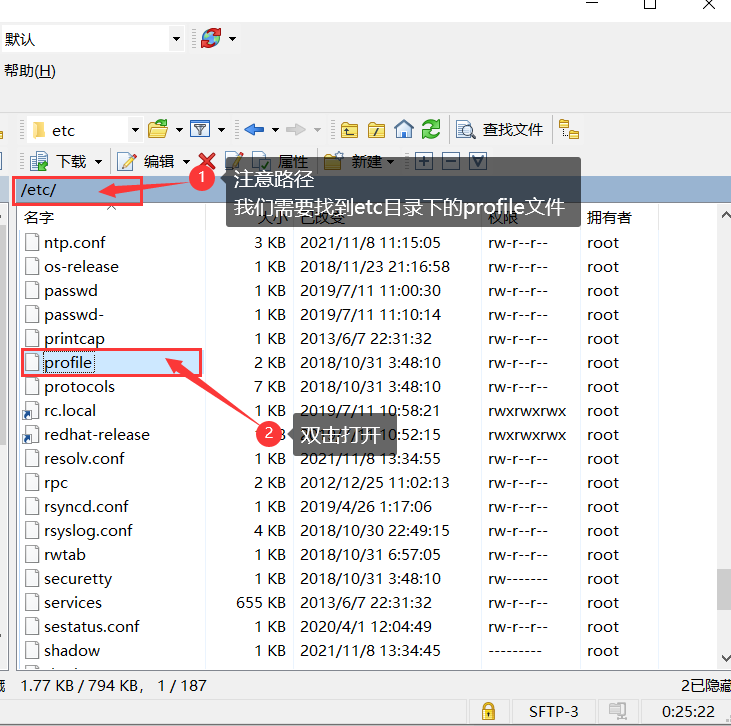
export GO111MODULE=on
export GOPROXY=https://goproxy.cn
export GOROOT=/usr/local/go
export GOPATH=/usr/local/go/path
export PATH=$PATH:$GOROOT/bin:$GOPATH/bin
Copy the code above to add to the end of the profile file
6.5 Execution source
source /etc/profile
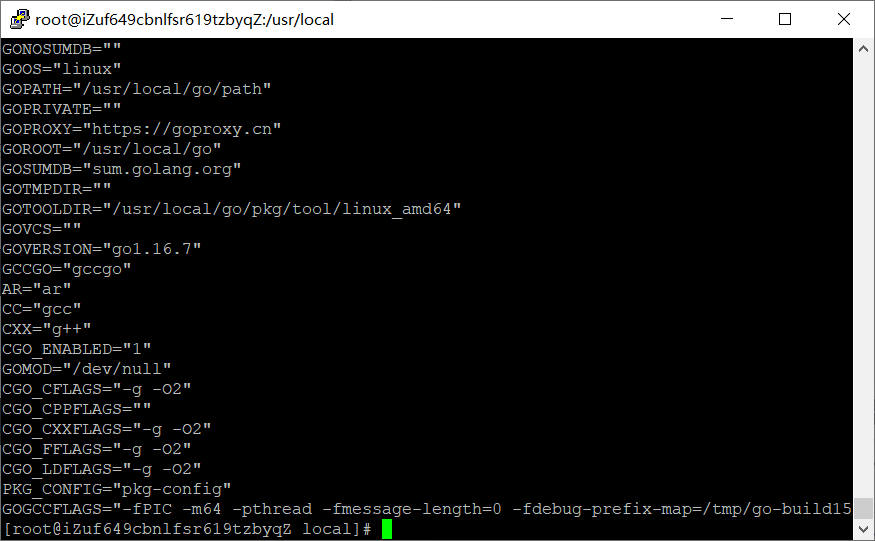
6.6 Check to see if the installation was successful
go env
The following diagram shows successful installation
6.7 Install git
wget http://dl.fedoraproject.org/pub/epel/epel-release-latest-7.noarch.rpm

rpm -ivh epel-release-latest-7.noarch.rpm

yum install -y git
7. Install xdd-plus
7.1 Pull xdd-plus Library
cd ~ && git clone https://ghproxy.com/https://github.com/764763903a/xdd-plus.git
7.2 Compile xdd
cd xdd-plus
go build
7.3 Give xdd maximum permissions
chmod 777 xdd
7.4 Run XDD (to make sure you are in the xdd-plus directory)
./xdd
Wait for program to run for half a minute Ctrl+c to exit
Manual modification of root/xdd-plus/conf/config.yaml file in 7.5 WinSCP
mode: parallel  #Mode balance (balanced mode), parallel (parallel mode)
containers:
  - address: http://123.123.123.123:5700 #Here is the address of your Qinglong panel
    username: Account of Qinglong Panel #Account for landing on Qinglong panel
    password: Password for Qinglong Panel #Password to log on to Qinglong panel
    cid: Client ID #Client ID just obtained in the Qinglong panel
    secret: Client Secret #Client Secret just acquired in the Qinglong panel
    weigth: 1 #The higher the weight in weight balance mode, the more ck the score will be, default 1
    mode: parallel #Mode balance (balanced mode), parallel (parallel mode)
    limit: 9999 #Limit the number of container CKS
AtTime: 8 #Wrong number filling between 1 and 12. Concern defaults to 1010 points, which is prone to peak timeouts.
IsHelp: true  #Fill in true or false false
IsOldV4: #Fill in whether true or false false false is new or old V4
Wskey: true # Fill in the blank Default Disable wsky conversion required fill in true
IsAddFriend: #Fill in true or false false
Lim: #Filling in 1-N means limit times
Tyt: #Fill in 1-N for the mutual help value needed for push, default is 8
Later: #Delay Prevent Black IP Set Default 60 Not Afraid of Black Change to 1 Unit is seconds
ApiToken: #nvjdc SMS access token parameter, set by oneself
theme: /root/xdd-plus/theme/admin.html  #Custom theme, support local, network paths
static: ./static #When static files are easy to customize QR code pages, introduce files such as css, js, etc.
master: #xdd-plus background password and delete all this text from the pound sign
database: /root/xdd-plus/.xdd.db
qywx_key: #Enterprise WeChat Push key
daily_push: #Timed Tasks
resident: #In balanced mode, all containers share a pin account, which is spliced with'&'. Not recommended.
user_agent:
telegram_bot_token:
telegram_user_id:
TGURL: #fill in TG Proxy Address Reference https://www.kejiwanjia.com/server/5221.html#3worker
qquid: Administrators QQ #QQ number to receive notification, administrator QQ number
qqgid: QQ Group Number #Monitored Groups
qbot_public_mode: true #qq robot group chat mode, default private chat mode
default_priority: #Default priority for new users
no_ghproxy: true #Update resources without proxy
daily_asset_push_cron: 0 21 * * * #Daily asset push times may not be filled in
repos:
  - git: https://github.com/shufflewzc/faker2.git
This is my profile for your reference only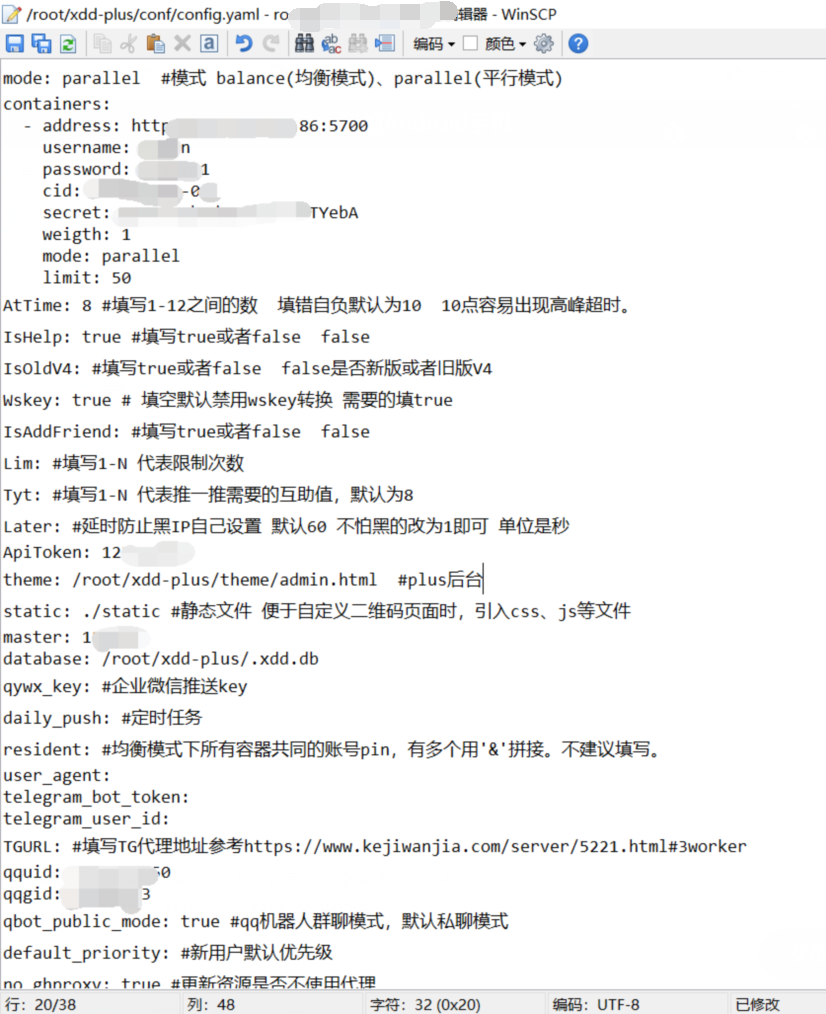
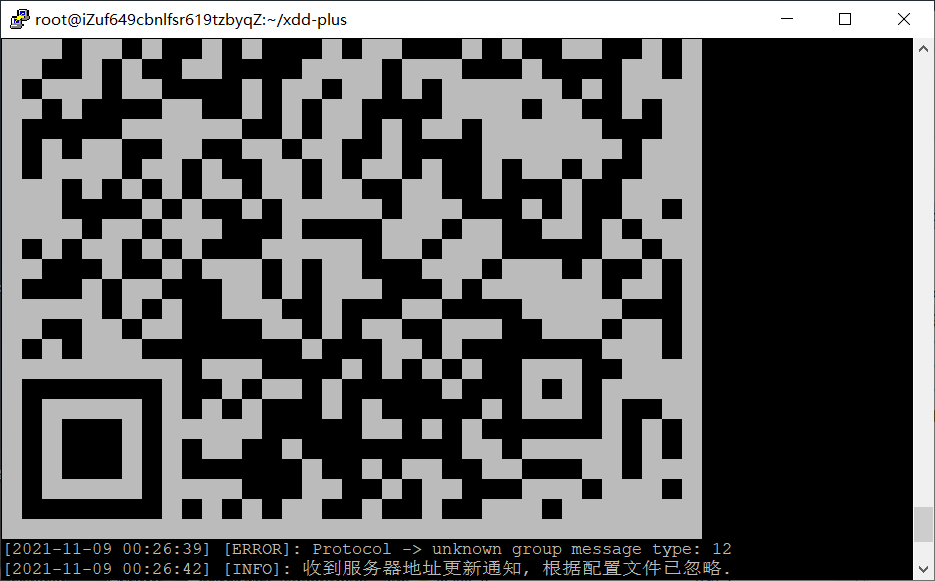
Ctrl+s Save File exits after modification and returns to the command line at last step 7.4
A two-dimensional code appears, and scanner binds your robot qq. After a while, send a message to your robot to test it.
7.6 Then Ctrl+c, to prevent the robot from being killed we hang up in the background
./xdd -d
This concludes our xdd-plus configuration
8.nvjdc SMS authentication login docking xdd-plus
8.1 cd first back to the root directory
cd ~
8.2 Install unzip first
yum install wget unzip -y
8.3 Then create a directory placement configuration and chromium
mkdir nolanjdc && cd nolanjdc
8.4 Pull configuration file for nvjdc docking xdd-plus
wget https://cdn.jsdelivr.net/gh/yanyuwangluo/tuku@main/Config.json
8.5 Create a chromium folder and enter
mkdir -p .local-chromium/Linux-884014 && cd .local-chromium/Linux-884014
8.6 Download chromium and remove the chromium compressed package
wget https://mirrors.huaweicloud.com/chromium-browser-snapshots/Linux_x64/884014/chrome-linux.zip && unzip chrome-linux.zip && rm -f chrome-linux.zip
8.7 Back to the directory you just created
cd ~/nolanjdc
8.8 Pull nvjdc Project Mirror
docker pull nolanhzy/nvjdc:0.8
8.9 Startup Project Container (5703 is the port number of your nvjdc)
docker run --name nolanjdc -p 5703:80 -d -v "$(pwd)"/Config.json:/app/Config/Config.json:ro \-v "$(pwd)"/.local-chromium:/app/.local-chromium \-it --privileged=true nolanhzy/nvjdc:0.8
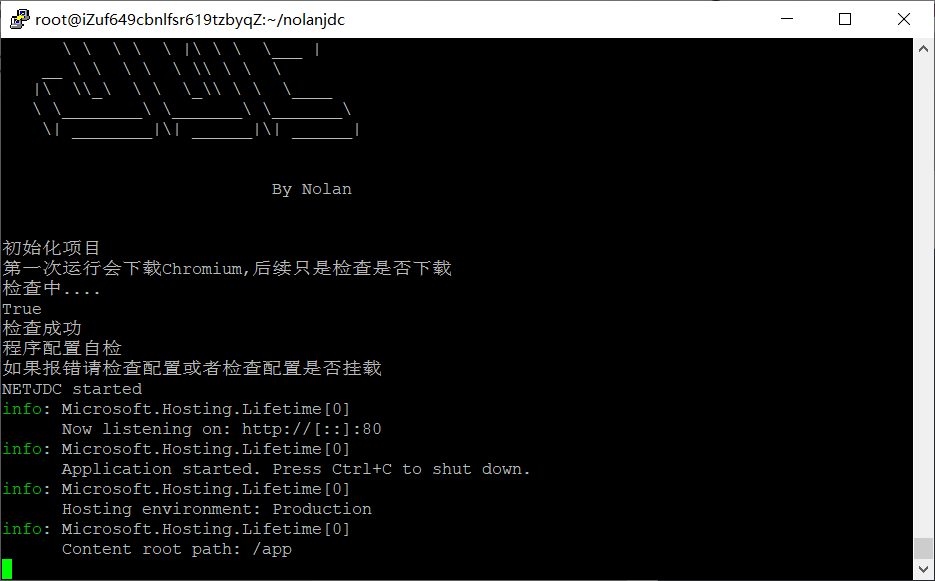
8.10 View Log
docker logs -f nolanjdc
NETJDC started succeeds and Ctrl+c exits the log
 8.11 Modify the configuration file for nvjdc docking xdd-plus
Configuration file path/root/nolanjdc/Config.json, as illustrated below
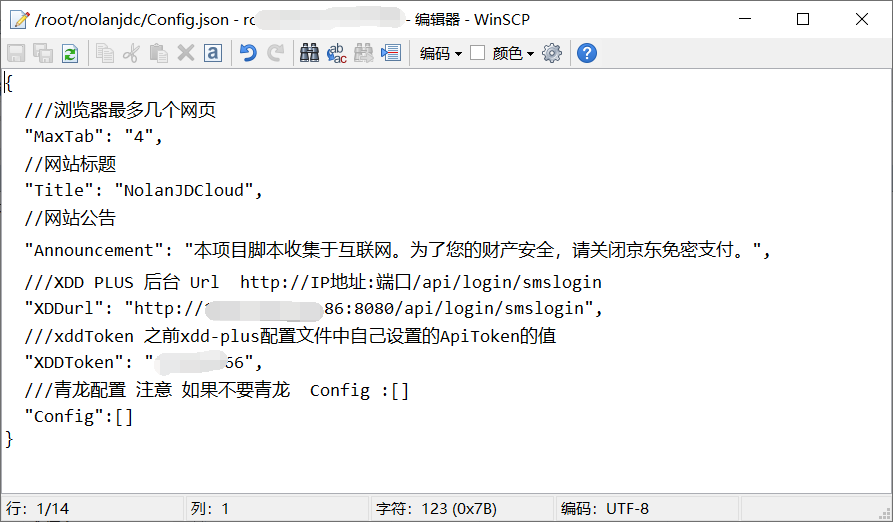
Save the restart container after editing (restart is required after modifying the configuration file)
docker restart nolanjdc
At this point it's all working
Technical Exchange Group: 876618546 Technical Exchange Group: 876618546
Technical Exchange Group: 876618546
Make a few additions later
(Neglectable) Announcement Office Announcement Office can add more functionality to communicate with groups through escape substitution after writing html+css.
Delete containers and mirrors (version number follows 0.8 changes to suit your needs)
docker rm -f nolanjdc && docker rmi -f nolanhzy/nvjdc:0.8
Update: Delete containers and mirrors before updating, then proceed with 8.7 to 8.10
Uninstall nvjdc
docker rm -f nolanjdc && docker rmi -f nolanhzy/nvjdc:0.8 && rm -rf /root/nolanjdc