This set of environment is really too complex. There are too many pits. After more than half a year, it finally succeeded today.
Graphics card driver
Direct installation system recommends graphics card driver, with the lowest error probability.
sudo ubuntu-drivers autoinstall
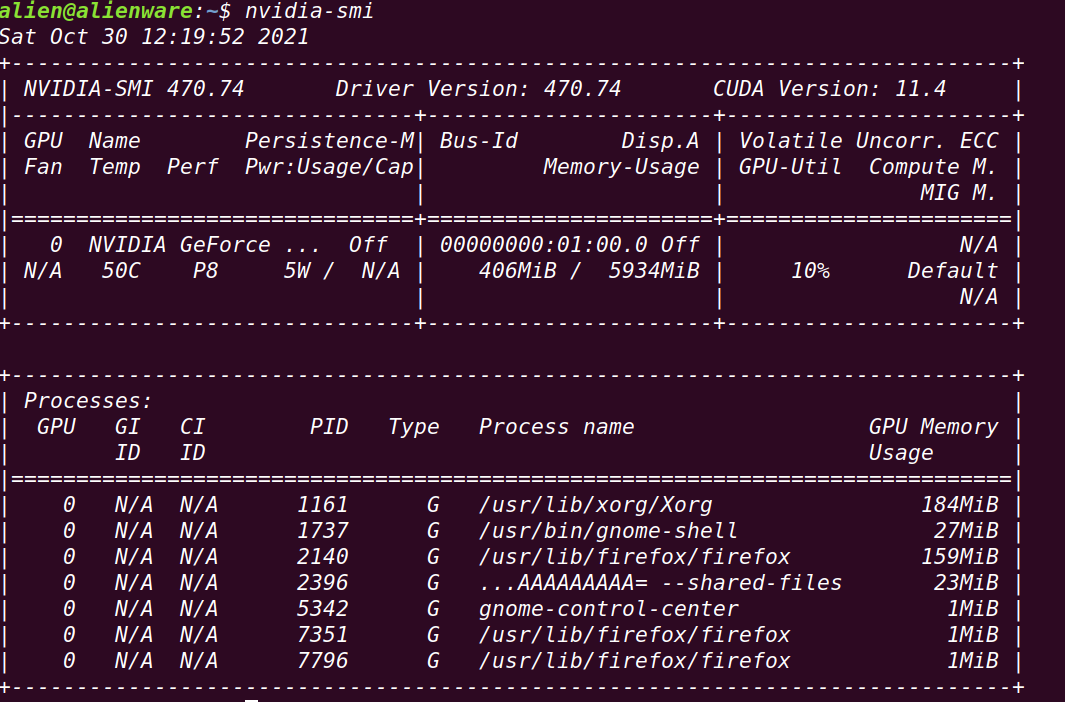
View installation status
nvidia-smi
The graphics card version and CUDA support will appear
CUDA
First of all, thank you for your original post:
https://blog.csdn.net/weixin_43491255/article/details/118549032
https://blog.csdn.net/a563562675/article/details/119458550
Disable nouveau first
sudo gedit /etc/modprobe.d/blacklist.conf
Add these two lines to save
blacklist nouveau
options nouveau modeset=0
Refresh
sudo update-initramfs -u
Restart the computer, be sure to restart. Then enter this command. If nothing is output, it is successful.
lsmod | grep nouveau
Install CUDA
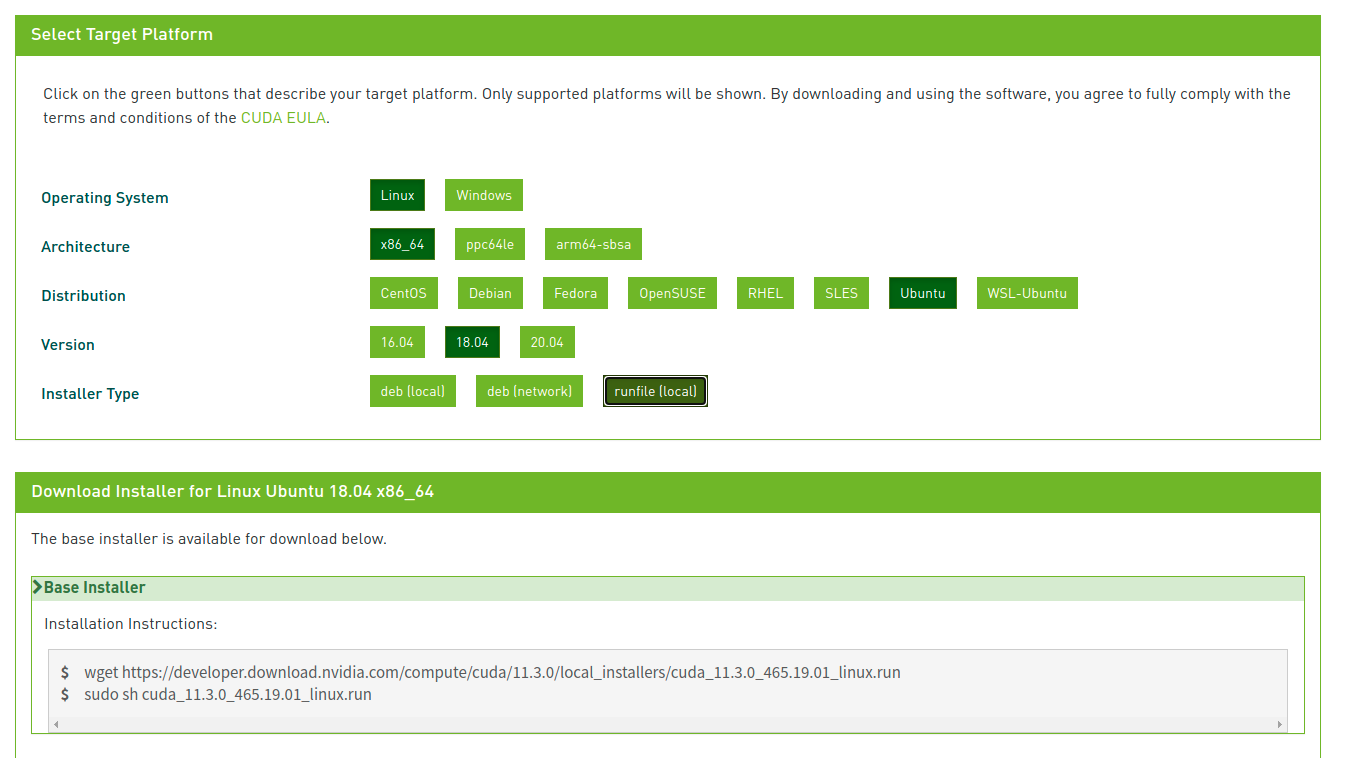
First, download the CUDA installation package (runfile format) you need here
Because you know the reason, it is recommended to open it with a kick, otherwise you can't get in.
https://developer.nvidia.com/cuda-toolkit-archive
Be sure to pay attention to the version!!!
I recommend CUDA 11.3.0 + cudnn 8.2.1 + Python 1.10
The combination of the three is very troublesome. I tested it successfully in person, and I can't guarantee other combinations.
 Because you know the reason, wget downloads very slowly. Here is a trick. Copy the link behind wget, paste it to the browser that can use kicks, and download it directly with the browser. I was about 3M/s, and the speed was pretty good. The file is large, 2.8G, Download patiently.
Enter this installation after the installation:
sudo sh cuda_11.3.0_465.19.01_linux.run
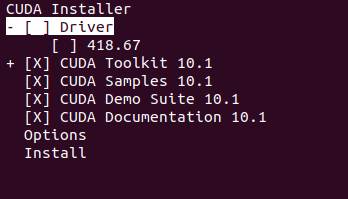
This will appear next. Press enter in the Driver, do not install the Driver (we have installed the Driver just now), and then select Install to install.
 After installation, open the environment variable
vim ~/.bashrc
Add these two lines to save. Note that this is 11.3. If you are in another version, you should change it to your own version
export PATH="/usr/local/cuda-11.3/bin:$PATH"
export LD_LIBRARY_PATH="/usr/lcoal/cuda-11.3/lib64:$LD_LIBRARY_PATH"
Refresh environment variables
source ~/.bashrc
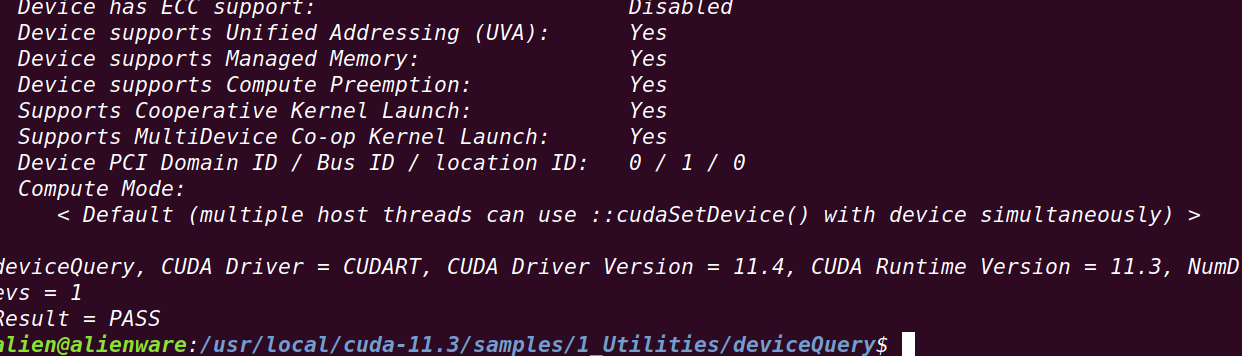
test
Terminal input
cd /usr/local/cuda-11.3/samples/1_Utilities/deviceQuery
sudo make
./deviceQuery
If so, it indicates success, and the available equipment information of CUDA is displayed.
CUDNN
install
Download three deb packages first. Be sure to use deb. The probability of error is small
https://developer.nvidia.com/rdp/cudnn-archive
Mine is 11.3. Select 8.2.1 for 11.x

Finally, install the three packages
sudo dpkg -i xxxxxxx.deb
test
Just now, a package is cudnn's own sample. Run the test
By the way, run this before testing to prevent errors later
sudo apt-get install libfreeimage3 libfreeimage-dev
Start running sample
cd /usr/src/cudnn_samples_v7
cp -r /usr/src/cudnn_samples_v7/ $HOME
cd $HOME/cudnn_samples_v7/mnistCUDNN
make clean && make
./mnistCUDNN
If Test passed appears, the installation is successful
Check out the cudnn version
find / -name cudnn_version.h 2>&1 | grep -v "Permission denied"
cat /usr/include/cudnn_version.h | grep CUDNN_MAJOR -A 2
Anaconda
Download the installation package from Tsinghua image source
https://mirrors.tuna.tsinghua.edu.cn/anaconda/archive/
After downloading, enter the command to install. Remember to select yes all the way
bash Anaconda3-2021.05-Linux-x86_64.sh
Open condarc to switch the source of conda
sudo gedit ~/.condarc
Replace the contents with this. The method of modifying defaults and the homepage of TUNA official website has been included.
channels:
  - defaults
show_channel_urls: true
default_channels:
  - https://mirrors.tuna.tsinghua.edu.cn/anaconda/pkgs/main
  - https://mirrors.tuna.tsinghua.edu.cn/anaconda/pkgs/r
  - https://mirrors.tuna.tsinghua.edu.cn/anaconda/pkgs/msys2
custom_channels:
  conda-forge: https://mirrors.tuna.tsinghua.edu.cn/anaconda/cloud
  msys2: https://mirrors.tuna.tsinghua.edu.cn/anaconda/cloud
  bioconda: https://mirrors.tuna.tsinghua.edu.cn/anaconda/cloud
  menpo: https://mirrors.tuna.tsinghua.edu.cn/anaconda/cloud
  pytorch: https://mirrors.tuna.tsinghua.edu.cn/anaconda/cloud
  simpleitk: https://mirrors.tuna.tsinghua.edu.cn/anaconda/cloud
report_errors: false
auto_activate_base: false
Finally, create a virtual environment to install pytorch
conda create -n alientorch((your own name)
Activate environment
activate alientorch
Install a wave of dependencies and test the source just now. If the speed is very fast, it will be great, and the pytoch will be very smooth in a while
conda install numpy mkl cffi
Pytorch
install
Enter the official website to view the installation commands corresponding to your version
https://pytorch.org/get-started/locally/
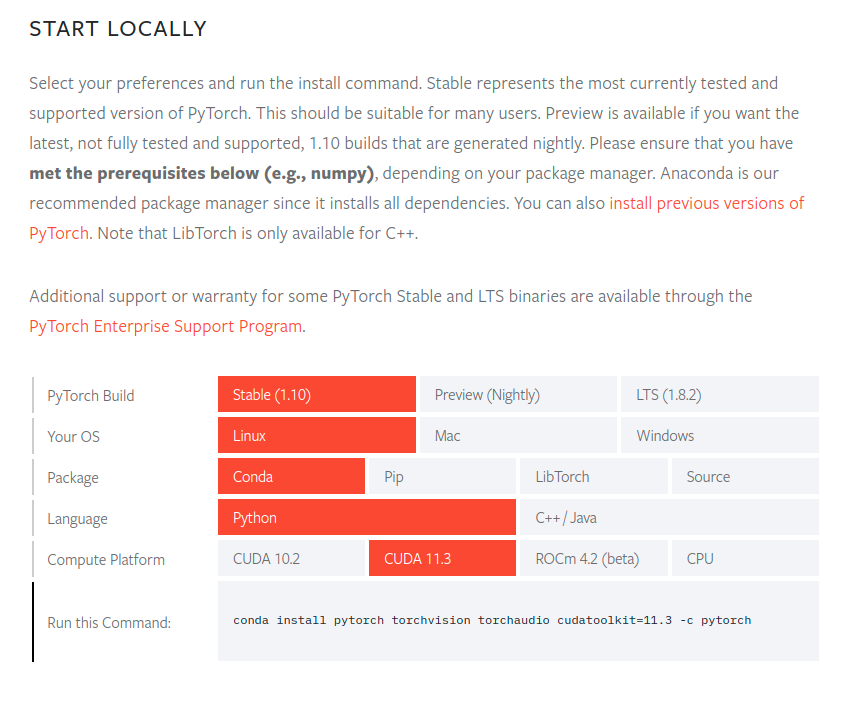 Enter the command to install pytorch in the virtual environment just now
conda install pytorch torchvision torchaudio cudatoolkit=11.3 -c pytorch
The installation file is very large. Just wait patiently. If the source switch is successful, the download here will be fast.
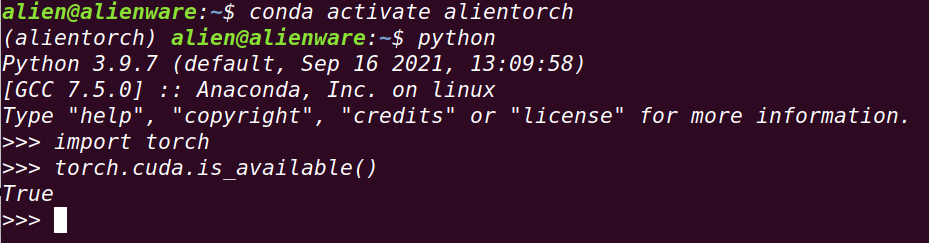
test
Enter the virtual environment, enter the command test, and you're done!
python
import torch
torch.cuda.is_available()