1. anaconda3 package download
1.1 windows Download
First download through windows, and then transfer to linux server through winscp and other software
Official website address: https://www.anaconda.com/products/individual
Tsinghua mirror address: https://mirrors.tuna.tsinghua.edu.cn/anaconda/archive/
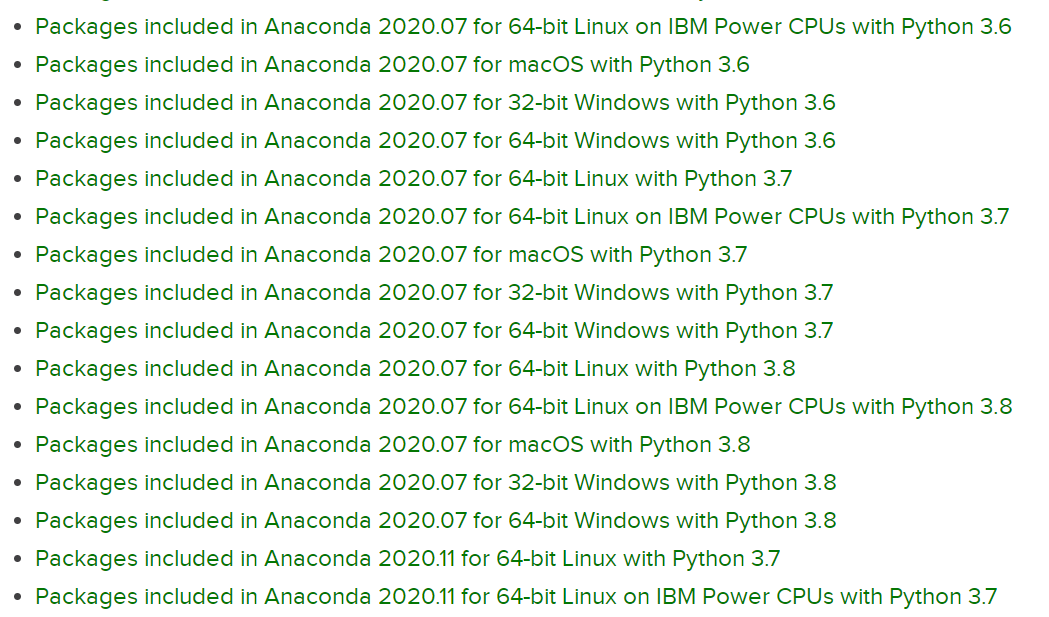
Anaconda corresponds to python version: https://docs.anaconda.com/anaconda/packages/oldpkglists/
1.2 linux download
wget https://repo.anaconda.com/archive/Anaconda3-2019.10-Linux-x86_64.sh
2. anaconda3 installation
Reference blog: https://blog.csdn.net/weixin_44159425/article/details/105749509
-
Enter the following code in the directory where the file is located (if the version is different and the file name is different, you can replace it by yourself)
bash Anaconda3-2020.02-Linux-x86_64.sh
-
After the following prompt appears, press ENTER to continue
Please, press ENTER to continue
>>>ENTER
-
Then ENTER the user agreement, press and hold ENTER until the following prompt appears, and ENTER yes
Please answer 'yes' or 'no':'
>>>yes
-
Then the following prompt appears. Enter the installation path to install automatically, for example: / opt/Anaconda3 (Anaconda3 folder cannot exist in / opt directory before installation)
Anaconda3 will now be installed into this location:
/root/anaconda3
  - Press ENTER to confirm the location
  - Press CTRL-C to abort the installation
  - Or specify a different location below
 >>>/opt/Anaconda3
Note: it is recommended to install in the home directory
-
After the installation, the following prompt appears, asking whether to initialize Anaconda3 in the. bashrc file in the home directory (in order to use the conda command and directly enter the base environment), enter yes
Do you wish the installer to initialize Anaconda3
by running conda init? [yes|no]
[no] >>> yes
-
Re execute the newly modified initialization file. bashrc (in the home directory)
source ~/.bashrc
-
Enter conda and the following contents will be displayed, and the installation will be successful
[test@localhost ~]$ conda
usage: conda [-h] [-V] command ...
conda is a tool for managing and deploying applications, environments and packages.
Options:
positional arguments:
-
The configuration conda command can be used globally (optional)
-
vi or vim command to edit ~ /. bashrc file
vim ~/.bashrc
-
Press i on the keyboard to enter the editing mode, and add the following contents at the end of the file
export PATH='anaconda Installation directory for/bin:$PATH'
-
esc exit editing mode: enter command mode, enter wq to save and exit
-
Let the modification take effect and execute the command: source ~/.bashrc
-
3. anaconda3 virtual environment management
Reference blog: https://blog.csdn.net/weixin_44159425/article/details/105749509
-
Create a python=3.7 virtual environment named py37
conda create -n py3.7 python=3.7
-
Delete the environment named py37
conda remove -n py3.7 --all
-
Activate environment py37
conda activate py37
-
Close the current environment
conda deactivate
-
Displays all installed environments
conda env list perhaps conda info --envs
-
Rename environment
conda create -n newenv --clone oldenv  # Clone old environment
conda remove -n oldenv --all  # Delete old environment
-
Automatic activation environment
conda config --set auto_activate_base false  # Turn off automatic activation
conda config --set auto_activate_base true  # Turn on automatic activation
4. tensorflow installation
- Tencerflow1.15 and tencerflow2 coexist
- Tensorflow 1.15 is installed in the virtual environment of Python 3.6
- Tensorflow 2 is installed in the virtual environment of Python 3.7
reference resources: https://zhuanlan.zhihu.com/p/109067934
Note: installing some packages with conda may be slow or fail. Adding a domestic image source can help solve the problem. Refer to part V image source management for details
3.1 tensorflow 1.15 installation (the same as tensorflow 2 installation)
-
Create a python=3.6 virtual environment named py36
conda create -n py3.6 python=3.6
-
Activate environment py36
conda activate py36
-
Search for available tensorflow GPU versions
anaconda search -t conda tensorflow-gpu
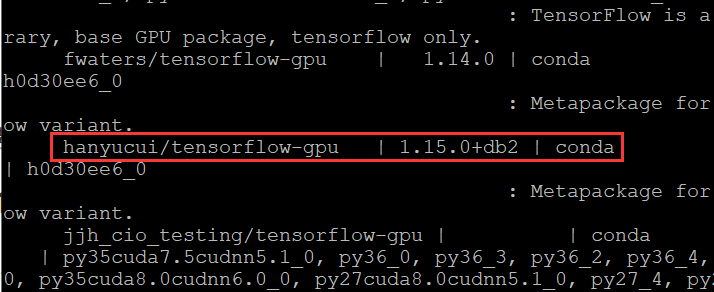
The feedback is shown in the figure below (part of it). Find the required tensorflow version:
-
Get the installation command of the corresponding version
anaconda show hanyucui/tensorflow-gpu
The feedback is as follows:
Using Anaconda API: https://api.anaconda.org Name: tensorflow-gpu Summary: Metapackage for selecting a TensorFlow variant. Access: public Package Types: conda Versions: + 1.15.0+db2 To install this package with conda run: conda install --channel https://conda.anaconda.org/hanyucui tensorflow-gpu -
Enter the command to install:
conda install --channel https://conda.anaconda.org/hanyucui tensorflow-gpu
It is best to confirm whether it is version 1.15:
conda install --channel https://conda.anaconda.org/hanyucui tensorflow-gpu=1.15
5. anaconda3 image source management
Reference blog: https://blog.csdn.net/weixin_44159425/article/details/105749509
https://blog.csdn.net/ebzxw/article/details/80702506
(winscp show hidden files: shortcut Ctrl+Arl+H)
-
Method 1: you can directly modify the. condarc file in the home directory, and then run conda clean -i to clear the index cache to ensure that the index provided by the mirror station is used
(. condarc configuration file is an optional runtime configuration file, which does not exist by default, but will be created in the user's home directory when the user runs the conda config command for the first time.)
If you use Tsinghua image source (recommended), replace the file content with the following:
# >>> conda mirrors >>>
channels:
  - defaults
show_channel_urls: true
channel_alias: https://mirrors.tuna.tsinghua.edu.cn/anaconda
default_channels:
  - https://mirrors.tuna.tsinghua.edu.cn/anaconda/pkgs/main
  - https://mirrors.tuna.tsinghua.edu.cn/anaconda/pkgs/free
  - https://mirrors.tuna.tsinghua.edu.cn/anaconda/pkgs/r
  - https://mirrors.tuna.tsinghua.edu.cn/anaconda/pkgs/pro
  - https://mirrors.tuna.tsinghua.edu.cn/anaconda/pkgs/msys2
custom_channels:
  conda-forge: https://mirrors.tuna.tsinghua.edu.cn/anaconda/cloud
  msys2: https://mirrors.tuna.tsinghua.edu.cn/anaconda/cloud
  bioconda: https://mirrors.tuna.tsinghua.edu.cn/anaconda/cloud
  menpo: https://mirrors.tuna.tsinghua.edu.cn/anaconda/cloud
  pytorch: https://mirrors.tuna.tsinghua.edu.cn/anaconda/cloud
  simpleitk: https://mirrors.tuna.tsinghua.edu.cn/anaconda/cloud
# <<< conda mirrors <<<
-
Method 2: command line management
-
View added mirror sources
conda config --show  # Displays the config information for all conda s
conda config --show channels  # Displays information about channels
-
Add cuust image source
conda config --add channels https://mirrors.ustc.edu.cn/anaconda/pkgs/free/
-
Set the channel address displayed during the search
conda config --set show_channel_urls ye
-
Delete the image source of China University of science and technology
conda config --remove channels https://mirrors.ustc.edu.cn/anaconda/pkgs/free/
-
Restore original mirror source
conda config --remove-key channels
-
6. anaconda3 unloading
Reference blog: https://blog.csdn.net/weixin_44159425/article/details/105749509
-
Delete the Anaconda 3 installation directory. Since the Anaconda installation files are contained in one directory, you can delete them directly
rm -rf Installation directory
-
Delete the following contents in the. bashrc file, namely the initialization contents of conda:
# >>> conda initialize >>> # !! Contents within this block are managed by 'conda init' !! __conda_setup="$('/home/test/anaconda3/bin/conda' 'shell.bash' 'hook' 2> /dev/null)" if [ $? -eq 0 ]; then eval "$__conda_setup" else if [ -f "/home/test/anaconda3/etc/profile.d/conda.sh" ]; then . "/home/test/anaconda3/etc/profile.d/conda.sh" else export PATH="/home/test/anaconda3/bin:$PATH" fi fi unset __conda_setup # <<< conda initialize <<< -
Re execute. bashrc
source ~/.bashrc
7. pycharm connects to the python environment in the remote linux server
- pycharm2020.3.5 + ubuntup1p6.04.07 + anaconda3 + python3.6
-
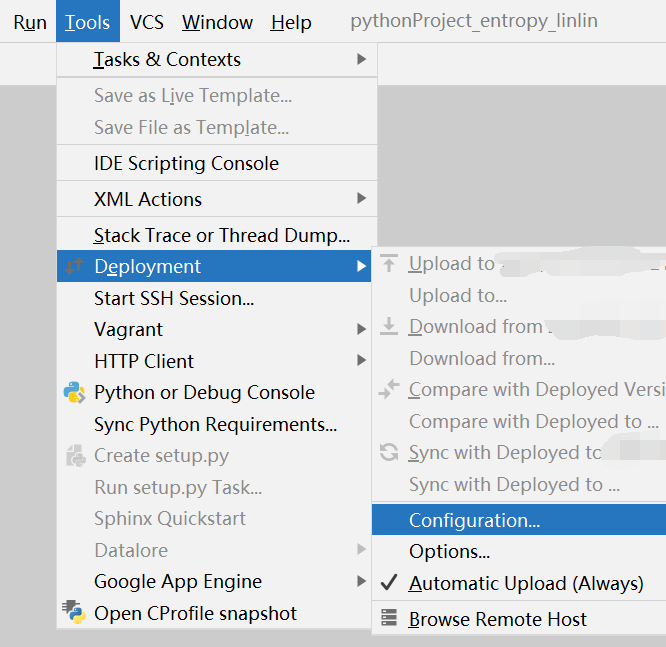
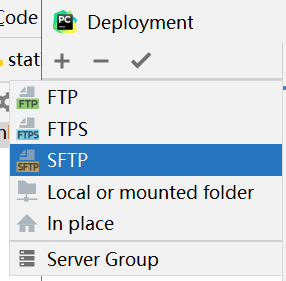
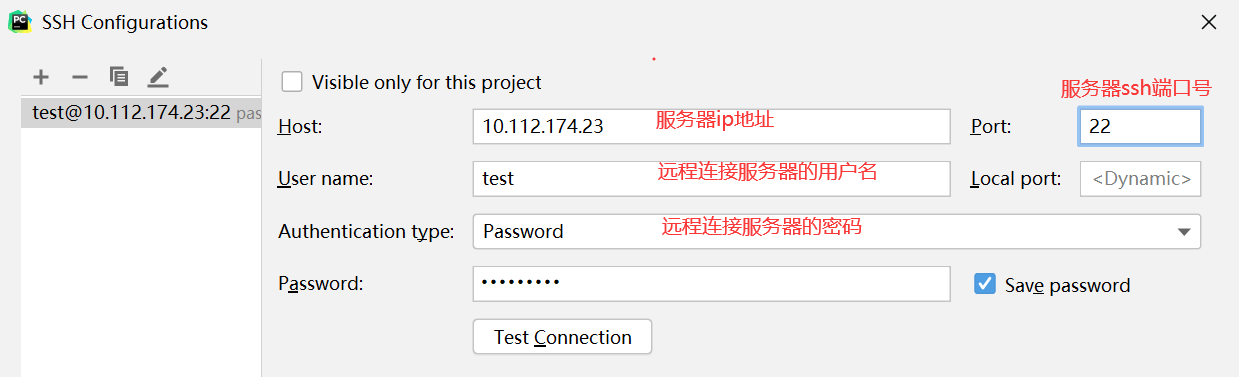
Configure remote server connection
- 1
1.2
1.3
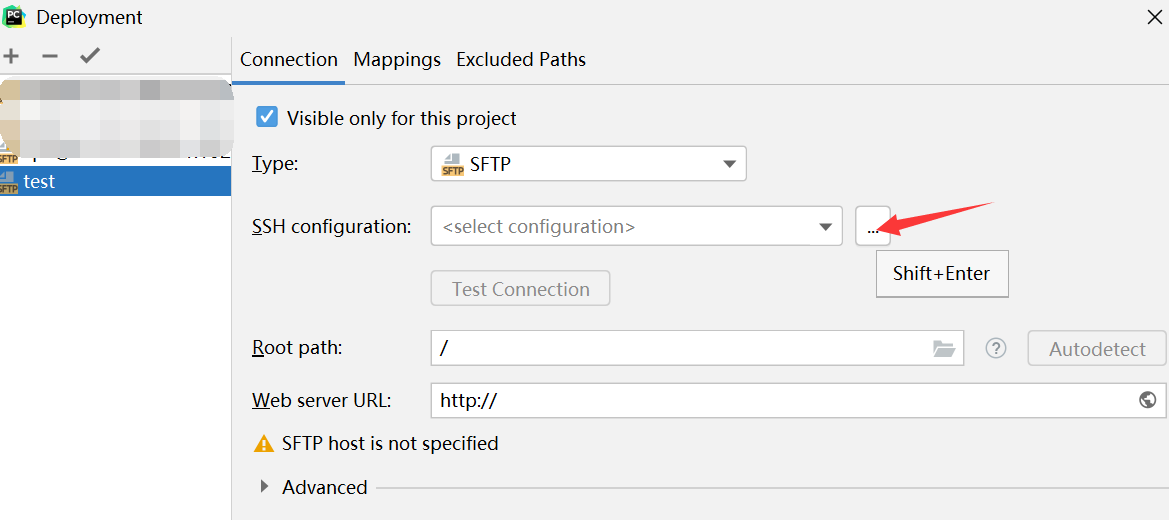
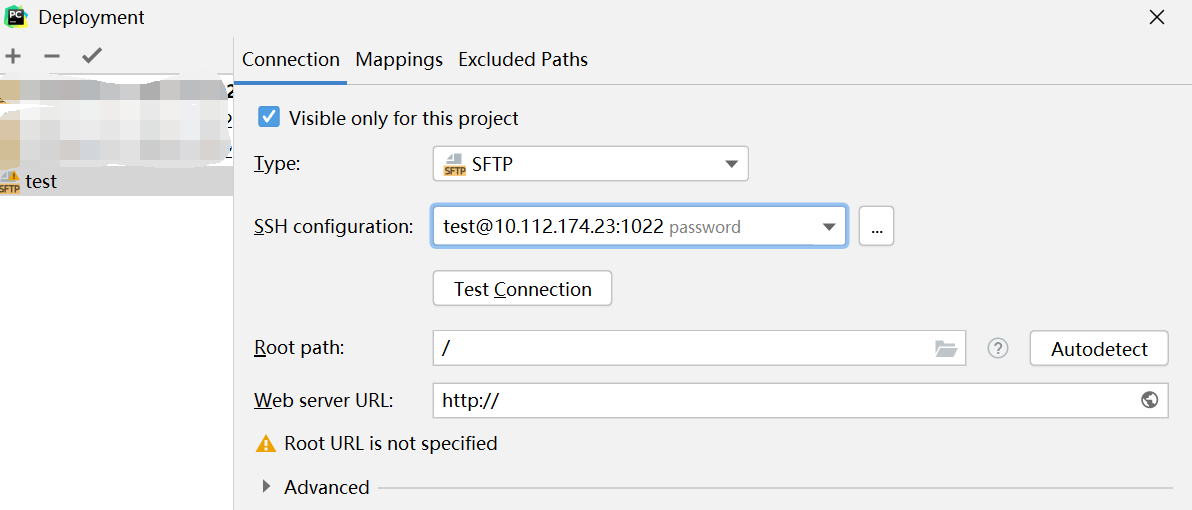
1.4 after configuration, click test conference to connect to the test server. After successful configuration, click apply and save to close the window
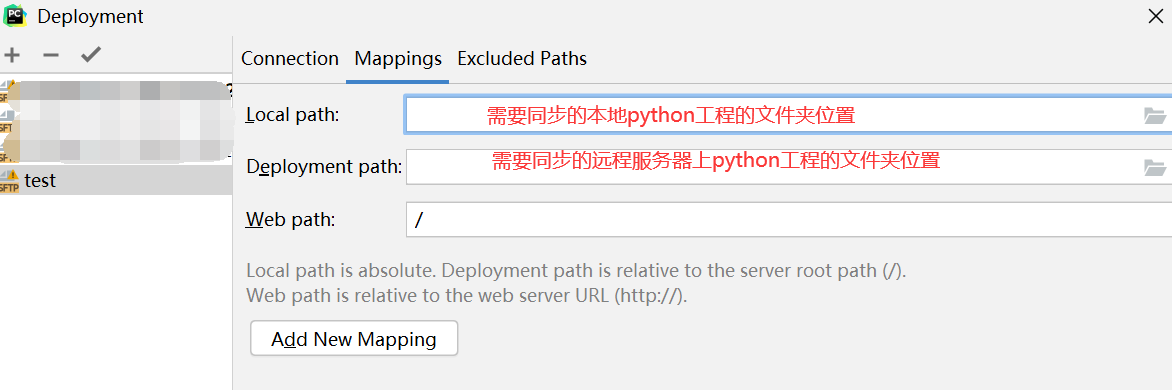
1.5 add the synchronous mapping relationship between the local project and the remote server project, complete the configuration, save and close the window
-
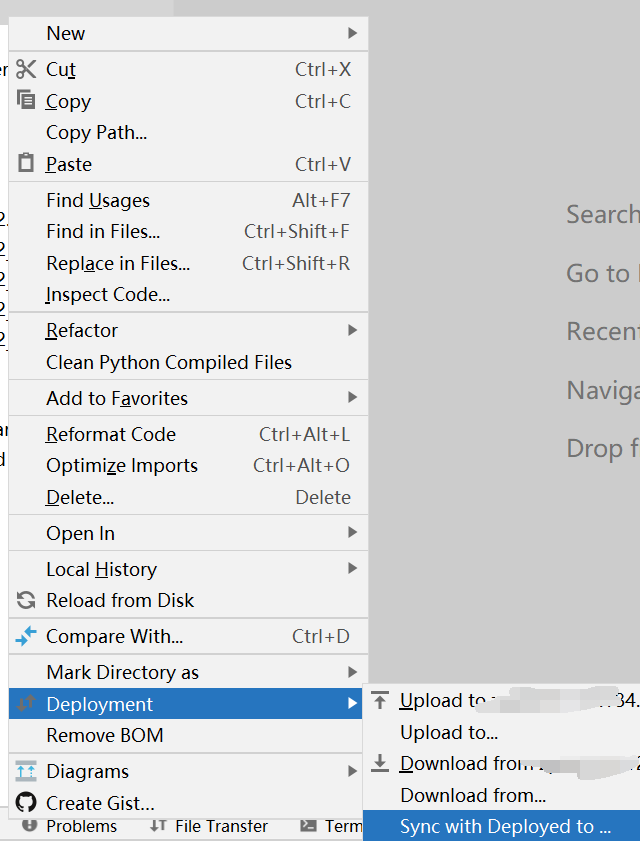
Turn on automatic synchronization
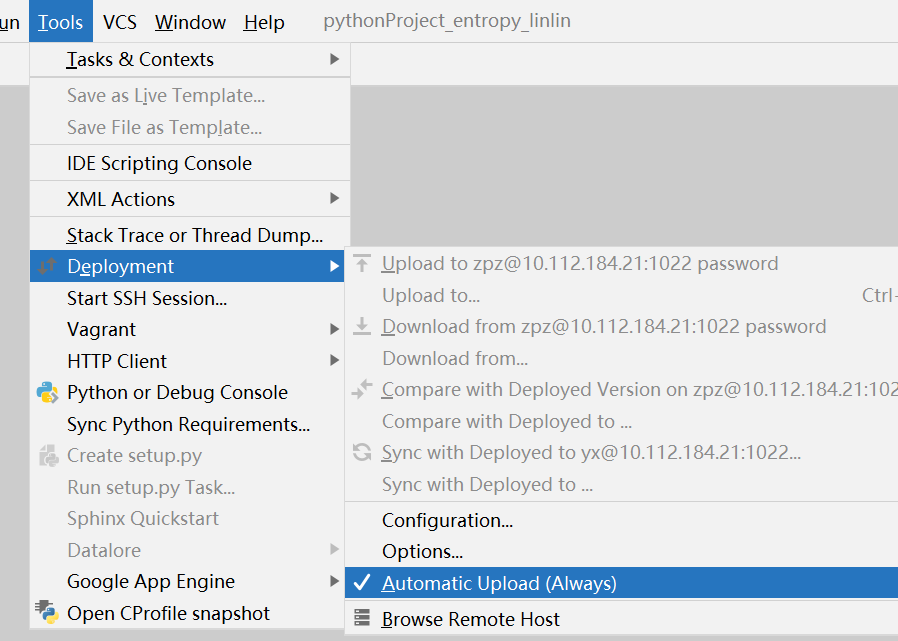
You can also right-click the file directory to synchronize separately:
-
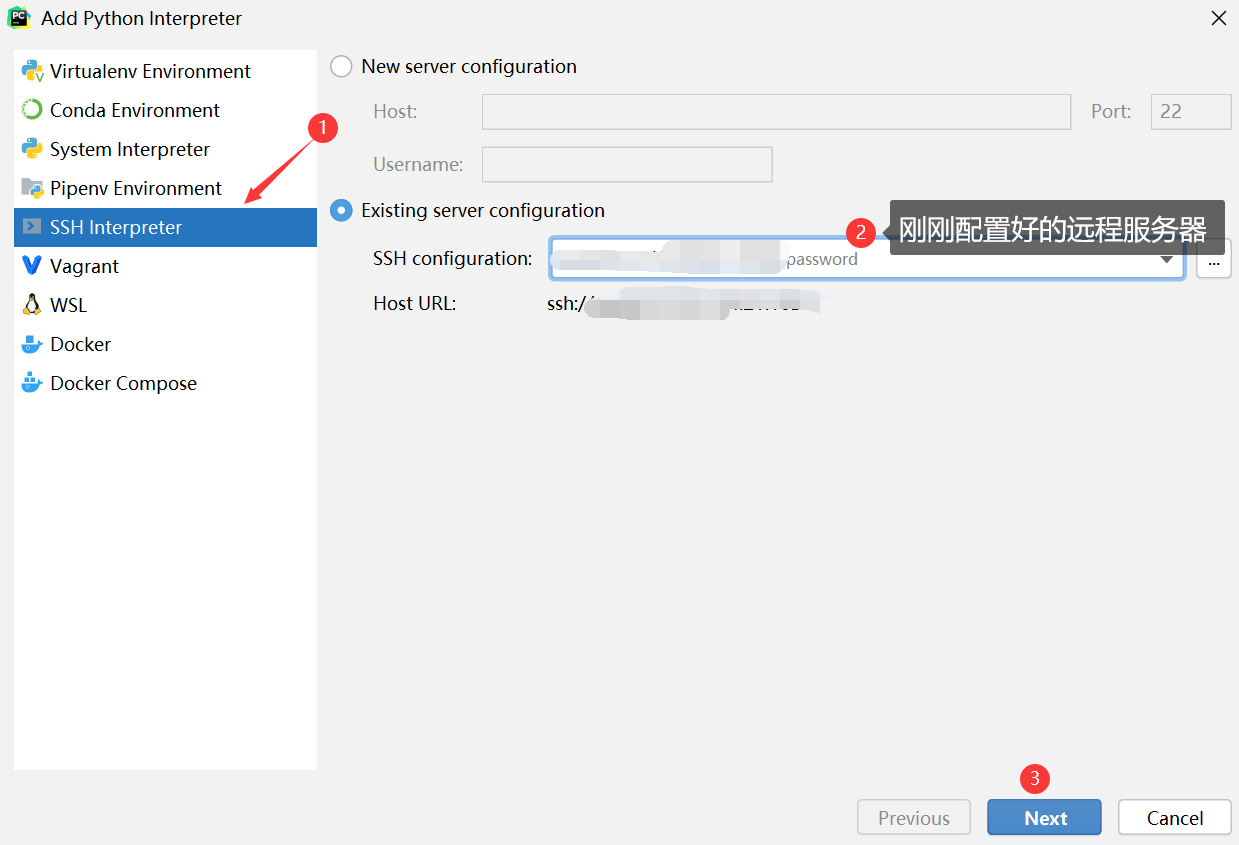
Configuring the remote python environment
3.1 file - > Settings - > python interpreter - > add add new python environment

3.2 as shown in the figure below:
3.3 fill in the python environment location in the remote server, so far all configuration is completed
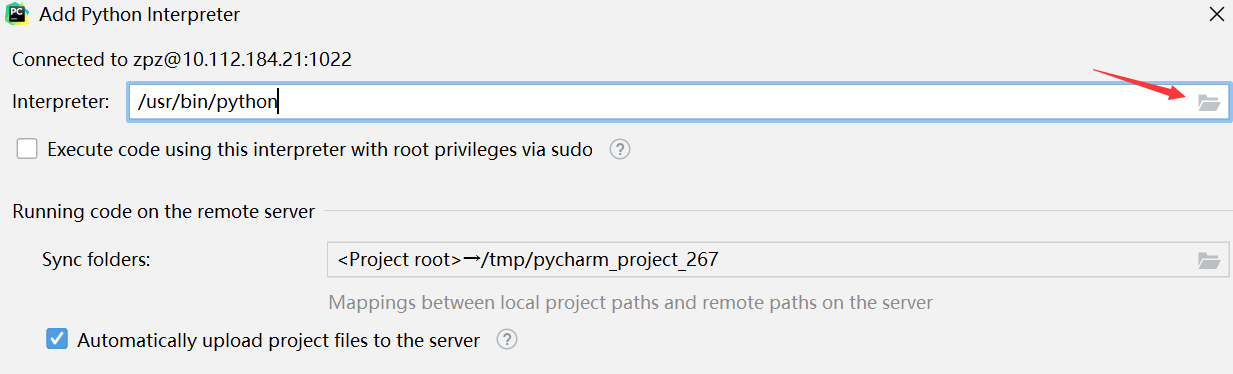
About python location on the server:
-
Windows: anaconda3 installation directory / envs / virtual environment name / python.exe
-
linux: anaconda3 installation directory / envs / virtual environment name / bin/python
You can locate the python location as follows:
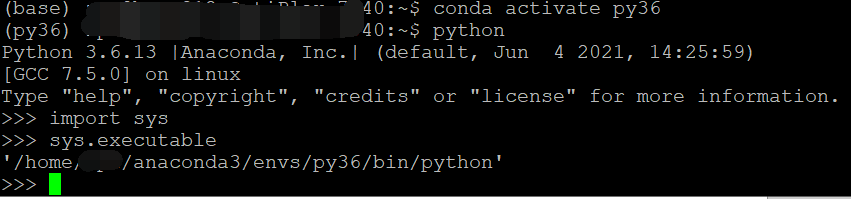
About python location on the server:
-
Windows: anaconda3 installation directory / envs / virtual environment name / python.exe
-
linux: anaconda3 installation directory / envs / virtual environment name / bin/python
You can locate the python location as follows:
-