objective
The traditional Web front and back communication is mainly carried out by HTTP. Usually, the foreground actively requests to the background for what it needs, and the background cannot directly send data to the front. Usually, if the background data changes frequently, the foreground mainly depends on polling or long connection. Both methods are not very elegant.
Now, there are two schemes to deal with this problem: WebSocket and server sent events (SSE). WebSocket can realize real-time two-way communication, which is very powerful in function, but it is a new technology compared with HTTP. Server sent events is a function extended over HTTP, a bit like the long connection mentioned above, but it is a native standard, more perfect in function and more convenient to use. This article will explain the contents related to server sent events.
Basic description
Server sent events is a function added to H5. It is an extended function on HTTP, so that the server can actively send data to the client. Use the EventSource interface on the client side to process server send events.
The core of server sent events is to add a MIME type: text / event stream. Look at the name to know that this is a stream. As long as it doesn't end, it can always transfer data.
In actual use, as long as the client actively initiates the access interface, it doesn't matter after the connection is established, and the server will actively push messages when needed.
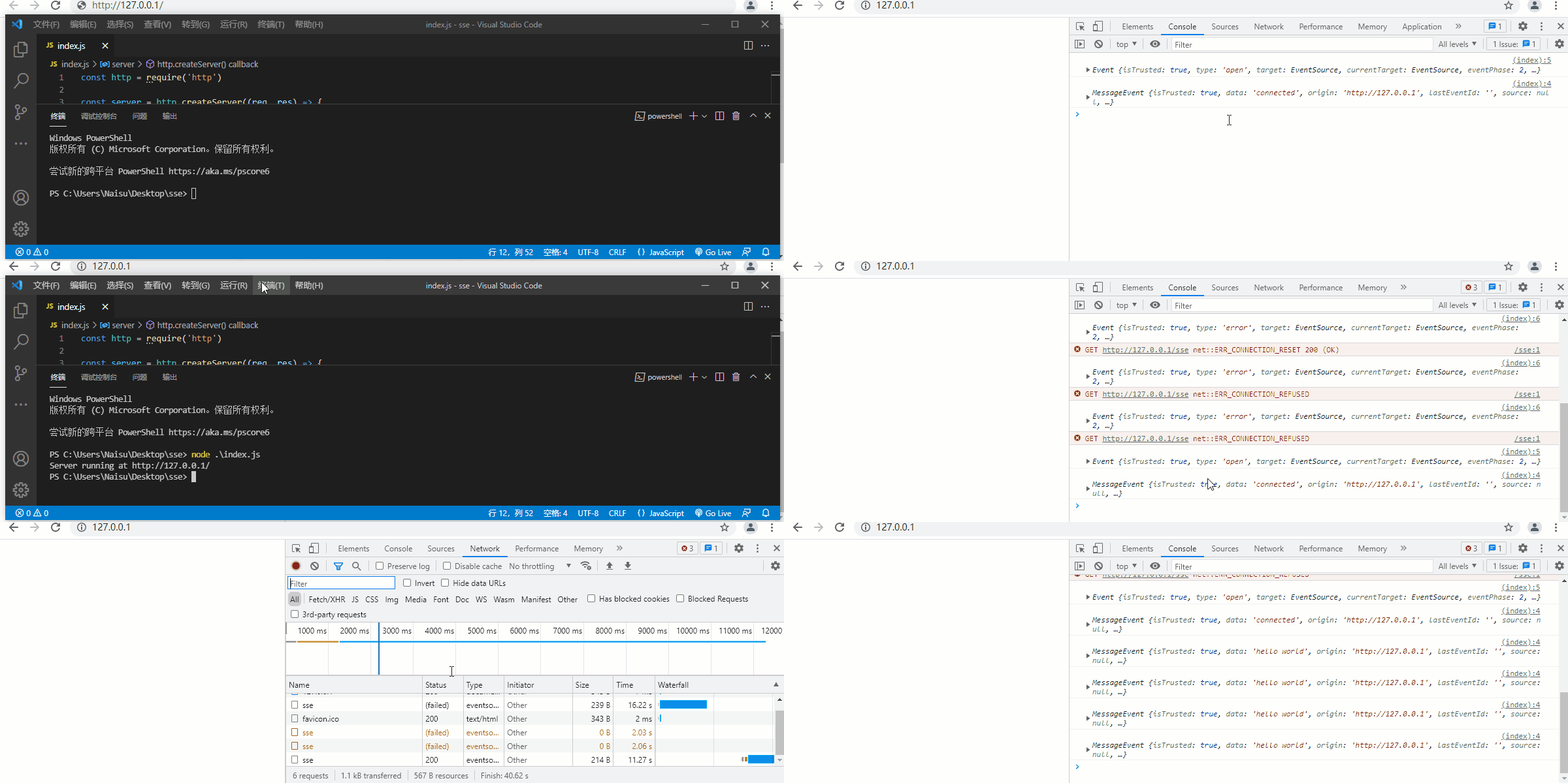
One advantage of the native function of server sent events is that the browser will automatically reconnect by default.
Basic use
Client use
The client uses the EventSource interface to process server sent events. The main methods of use are as follows:
    var es = new EventSource("/sse"); // Declare the EventSource object and connect the url

    es.onmessage = (e) => {} // Triggered when a server message is received

    es.onopen = (e) => {} // Triggered when the connection is established

    es.onerror = (e) => {} // Triggered when an error occurs

    // es.close(); //  Close EventSource connection

    // console.log(es.url);

    // console.log(es.readyState); //  Connection status: 0 - connecting; 1 - open; 2 - closed;
The basic use of the client is relatively simple. The demonstration needs to be combined with the following server.
For the front end, SSE can be used by directly using the EventSource interface of JS. For other languages as clients, there may be no ready-made methods available, but it is also very simple to use. Use the GET method to access the link and include the following attributes in the header file (only recommended, not required):
accept: text/event-stream
cache-control: no-store
connection: keep-alive
Then you can establish the connection, and then wait and process the data from the server.
Server implementation
Server sent events is a function extended from HTTP, so the server implementation only needs a little processing on the basis of HTTP server. The most important thing is to set the MIME type in the response header to text / event stream. The following is the simplest example:
const http = require('http')

const server = http.createServer((req, res) => {

     // Visit link / sse
    if (req.url == '/sse') {
        res.writeHead(200, {
            "Content-Type": "text/event-stream",
            "Cache-Control": "no-cache",
            "Connection": "keep-alive",
        });
        res.write("data: " + 'connected' + "\n\n");

        // The server sends messages to the client regularly
        interval = setInterval(function () {
            res.write("data: " + 'hello world' + "\n\n");
        }, 5000);

        // Req. On ('close ', () = > {}) / / triggered when the client disconnects

        return
    }

    // Any other links return to the web page
    res.statusCode = 200
    res.end(`
    <script>
        var es = new EventSource("/sse");
        es.onmessage = (e) => { console.log(e); }
        es.onopen = (e) => { console.log(e); }
        es.onerror = (e) => { console.log(e); }
    </script>
    `)
})

server.listen(80, '127.0.0.1', () => {
    console.log(`Server running at http://127.0.0.1/`)
})

In the above example, the server returns the 200 status code after receiving the connection request from EventSource, and adds text / event stream to the response header. After these contents are sent to the client, the connection is completed. Then, as long as the server sends a message to the client when necessary, the timer is used in the above example to simulate sending a message.
The data sent by the server in server send events must be UTF-8 encoded text with certain format requirements:
- The data must be sent section by section, and there must be a blank line between each end
For example, \ n\n in the above example, the latter newline character provides a blank line - There is a specific identification field before the data
For example, in the above example, sending a message uses data: data text
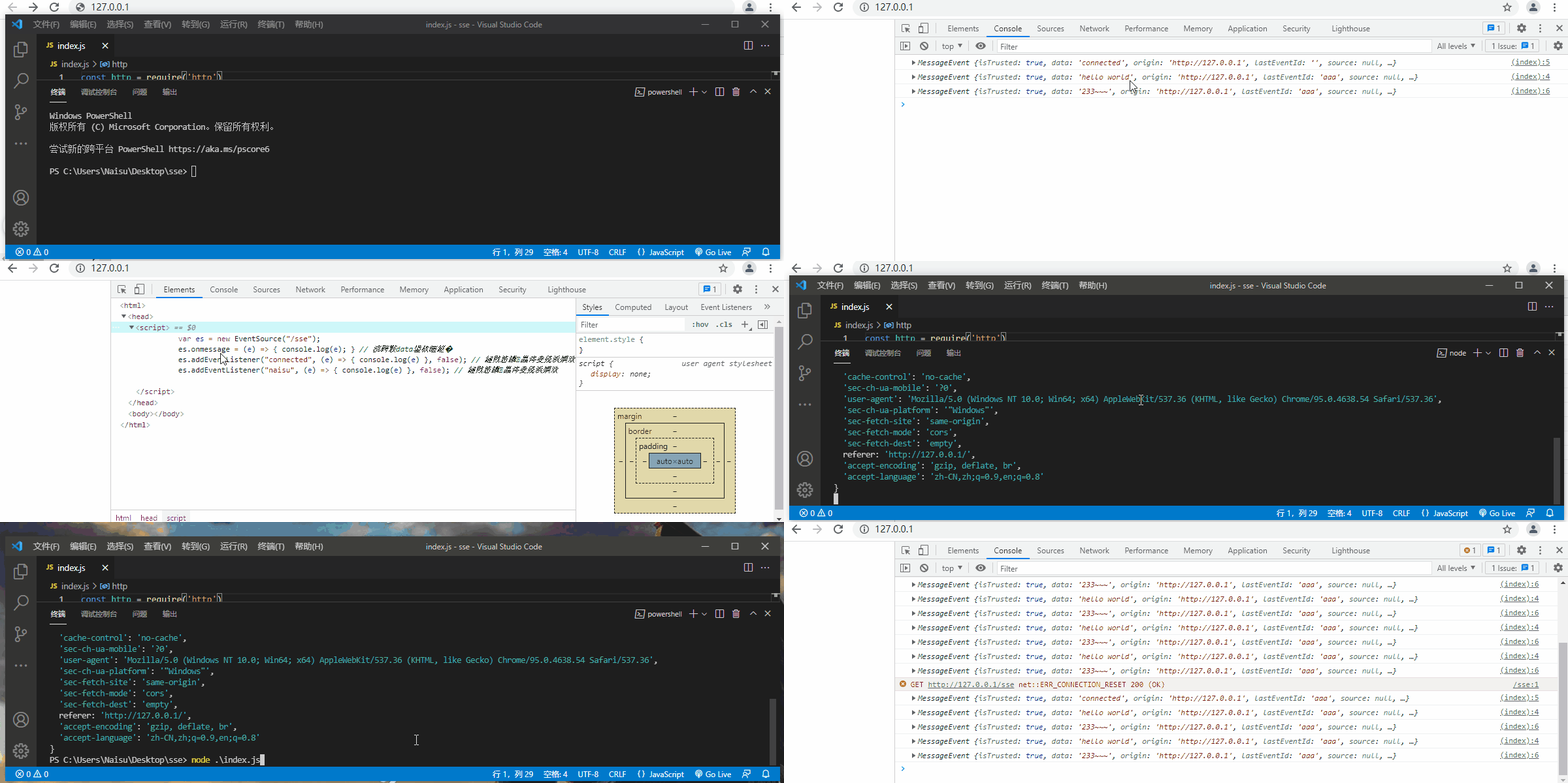
The optional values of the identification field mentioned above are as follows:
- data:
- event:
Define the event type. If this item is not set, sending data will trigger the message event, that is, the default onmessage method; - id:
The number used to identify the current piece of information. The client can obtain it through the lastEventId attribute. If the connection is disconnected, the client will fill in the latest id in the last event id field in the request header when establishing reconnection; - retry:
Specify the time interval for the browser to re initiate the connection; - :
For the information that will be ignored, the server in the network may close the connection that has not transmitted data for a long time (such as 15 seconds). You can use this method to send messages to maintain the connection;
Some of the above contents can be tested in the following ways:
const http = require('http')

const server = http.createServer((req, res) => {

     // Visit link / sse
    if (req.url == '/sse') {
    	console.log(req.headers);
        res.writeHead(200, {
            "Content-Type": "text/event-stream",
            "Cache-Control": "no-cache",
            "Connection": "keep-alive",
        });
        res.write("retry: 10000\n");
        res.write("event: connected\n");
        res.write("data: connected\n\n");


        // The server sends messages to the client regularly
        interval = setInterval(function () {
            res.write("data: " + "hello world" + "\n");
            res.write("id: " + "aaa" + "\n\n");

            res.write("event: " + "naisu" + "\n");
            res.write("data: " + "233~~~" + "\n\n");
        }, 5000);

        return
    }

    // Any other links return to the web page
    res.statusCode = 200
    res.end(`
    <script>
        var es = new EventSource("/sse");
        es.onmessage = (e) => { console.log(e); } // Fetch data using data
        es.addEventListener("connected", (e) => { console.log(e) }, false); // Listen for custom events
        es.addEventListener("naisu", (e) => { console.log(e) }, false); // Listen for custom events
    </script>
    `)
})

server.listen(80, '127.0.0.1', () => {
    console.log(`Server running at http://127.0.0.1/`)
})

matters needing attention
Although server sent events is simple, there are still some matters to pay attention to when using it:
- Browser connection limit
Most browsers have a limit on the number of connections to the same IP or domain name (for example, the upper limit of chrome is 6). For ordinary HTTP requests, it's no problem to connect and disconnect again, but server send events is a long connection, and you can't connect more than 6; - The data connection that has not been transmitted for a long time is closed
In the real environment, data transmission may pass through network nodes such as proxy server, which may close the connection that has not transmitted data for a long time; - Data is not transmitted in real time
In the real environment, data transmission may pass through proxy servers and other network nodes. These nodes may cache data and forward it after reaching a certain amount. Relevant caches can be closed to improve real-time performance;
summary
Generally speaking, the use of server sent events is quite simple. For more information, please refer to the following link:
https://html.spec.whatwg.org/multipage/server-sent-events.html
http://www.ruanyifeng.com/blog/2017/05/server-sent_events.html