preface
Celery is a Python task queue system used to handle work task assignments across threads or network nodes. It makes asynchronous task management easy.
Your application only needs to push messages to agents like RabbitMQ, and the Celery worker will pop them up and schedule tasks to execute.
Celery
Five roles of celery
- Task s are tasks, including asynchronous tasks and celery beats
- The Broker broker receives the message from the producer, that is, the Task, and stores the Task in the queue. The consumer of the Task is Worker. Celery itself does not provide queue services. Redis or RabbitMQ is recommended to implement queue services.
- Worker is the unit that executes tasks. It monitors the message queue in real time. If there is a task, it obtains the task and executes it.
- The Beat timing task scheduler sends tasks to the Broker according to the configuration timing.
- Backend is used to store the execution results of tasks.

Environmental preparation
1.django environment v2.1.2
2. Install celery version
pip install celery==3.1.26.post2
3. Install Django celery package
pip install django-celery==3.3.1
RabbitMQ environment
Broker (rabbit MQ) is responsible for creating a task queue, assigning tasks to the task queue according to some routing rules, and then delivering tasks from the task queue to worker s
First, use docker to build rabbitMQ environment, and rabbitMQ mirrors the warehouse address https://hub.docker.com/_/rabbitmq Find the version with mangement, which will bring the web background management interface
Download the 3.8.0-management image
docker pull rabbitmq:3.8.0-management
Start the container and set the account admin and password 123456
docker run -d --name rabbitmq3.8 -p 5672:5672 -p 15672:15672 --hostname myRabbit -e RABBITMQ_DEFAULT_USER=admin -e RABBITMQ_DEFAULT_PASS=123456 rabbitmq:3.8.0-management
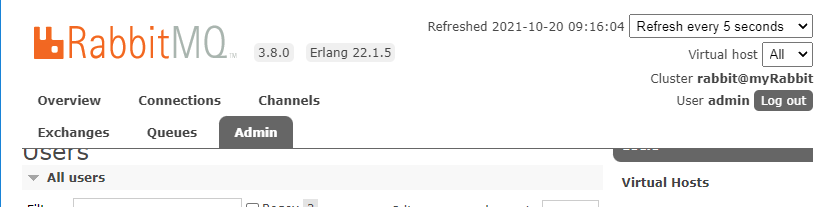
The host computer needs to open two ports: 5672 and 15672. 5672 is the port accessed by the back-end interface, and 15672 is the address of the front-end web management background page. Enter http://ip:15672 Access to web sites

Enter the previously set account admin and password 123456 to log in directly
Using Celery in Django
To use Celery in a Django project, you must first define an instance of the Celery Library (called an "application")
If you have a modern Django project layout, for example:
- proj/
  - manage.py
  - proj/
    - __init__.py
    - settings.py
    - urls.py
The recommended method is to create a new proj / proj / cell.py module to define the cell instance:
import os

from celery import Celery

# Set the default Django settings module for the 'celery' program.
os.environ.setdefault('DJANGO_SETTINGS_MODULE', 'proj.settings')

app = Celery('proj')

# Using a string here means the worker doesn't have to serialize
# the configuration object to child processes.
# - namespace='CELERY' means all celery-related configuration keys
#   should have a `CELERY_` prefix.
app.config_from_object('django.conf:settings', namespace='CELERY')

# Load task modules from all registered Django apps.
app.autodiscover_tasks()


@app.task(bind=True)
def debug_task(self):
    print(f'Request: {self.request!r}')
Where debug_task is a test task, which can be logged out
# @app.task(bind=True)
# def debug_task(self):
#     print('Request: {0!r}'.format(self.request))
Just change this sentence in the above paragraph, 'proj' is the app name of your own django project
app = Celery('proj')
Then you need to be in your proj/proj/__init__.py module. This ensures that the application is loaded at Django startup for @ shared_ The task decorator (mentioned later) will use it:
# This will make sure the app is always imported when
# Django starts so that shared_task will use this app.
from .celery import app as celery_app

__all__ = ('celery_app',)
The above paragraph is fixed and doesn't need to be changed
tasks
Create a new tasks.py under the app. If the name of the tasks.py file is required, django will automatically find the file under the app
@shared_task
def add(x, y):
    print("task----------1111111111111111111111")
    return x + y


@shared_task
def mul(x, y):
    return x * y
tasks.py can write task functions add and mul. The most direct way to make them effective is to add app.task or shared_task this decorator
Add setting configuration
setting.py add configuration
- The broker parameter indicates the URL used to connect to the broker. Rabbitmq uses a protocol called 'amqp'. If rabbitmq runs under the default setting, celery does not need other information, as long as amqp: / /.
- The backend parameter is optional. If you want to query task status or task execution results, it is required. The backend in the cell is used to store task results. rpc means sending the result back as an AMQP message.
#   RabbitMQ configuring BROKER_URL and backend
BROKER_URL = 'amqp://admin:123456@192.168.1.11:5672//'
CELERY_RESULT_BACKEND = 'rpc://'

CELERY_TASK_SERIALIZER = 'json'
CELERY_RESULT_SERIALIZER = 'json'
CELERY_ACCEPT_CONTENT=['json']
CELERY_TIMEZONE = 'Asia/Shanghai'
CELERY_ENABLE_UTC = True
Create view
views.py create views
from .tasks import add, mul

def task_demo(request):
    res = add.delay(10, 20)
    print(res.task_id)  # Return task_id
    return JsonResponse({"code": 0, "res": res.task_id})
Start worker
The celery application has been installed in pip. Celery is an independent application that can start the worker
celery -A MyDjango worker -l info
Where MyDjango is your own django project name
Run log
 -------------- celery@DESKTOP-HJ487C8 v3.1.26.post2 (Cipater)
---- **** -----
--- * ***  * -- Windows-10-10.0.17134-SP0
-- * - **** ---
- ** ---------- [config]
- ** ---------- .> app:         yoyo:0x1ea1a96e9b0
- ** ---------- .> transport:   amqp://admin:**@192.168.1.11:5672//
- ** ---------- .> results:     rpc://
- *** --- * --- .> concurrency: 4 (prefork)
-- ******* ----
--- ***** ----- [queues]
 -------------- .> celery           exchange=celery(direct) key=celery


[tasks]
  . yoyo.tasks.add
  . yoyo.tasks.mul

[2021-10-18 22:45:03,155: INFO/MainProcess] Connected to amqp://admin:**@192.168.1.11:5672//
[2021-10-18 22:45:03,347: INFO/MainProcess] mingle: searching for neighbors
[2021-10-18 22:45:04,897: INFO/MainProcess] mingle: all alone
[2021-10-18 22:45:05,406: WARNING/MainProcess] e:\python36\lib\site-packages\celery\fixups\django.py:265:
UserWarning: Using settings.DEBUG leads to a memory leak, never use this setting in production environments!
  warnings.warn('Using settings.DEBUG leads to a memory leak, never '
[2021-10-18 22:45:05,407: WARNING/MainProcess] celery@DESKTOP-HJ487C8 ready.
When running, when we see "Connected to amqp", it indicates that the connection has been successful!
shell interactive environment
Debugging and running tasks in django shell interactive environment
D:\202107django\MyDjango>python manage.py shell
Python 3.6.6 (v3.6.6:4cf1f54eb7, Jun 27 2018, 03:37:03) [MSC v.1900 64 bit (AMD64)] on win32
Type "help", "copyright", "credits" or "license" for more information.
(InteractiveConsole)
>>> from yoyo.tasks import add,mul
>>> from celery.result import AsyncResult
>>>
>>> res = add.delay(11, 12)
>>> res
<AsyncResult: c5ff83a4-4840-4b36-8869-5ce6081904f1>
>>> res.status
'SUCCESS'
>>>
>>> res.backend
<celery.backends.redis.RedisBackend object at 0x0000015E011C3128>
>>>
>>> res.task_id
'c5ff83a4-4840-4b36-8869-5ce6081904f1'
>>>
>>>
>>> get_task = AsyncResult(id=res.task_id)
>>> get_task
<AsyncResult: c5ff83a4-4840-4b36-8869-5ce6081904f1>
>>> get_task.result
23
>>>
res.status is to view the task status
res.task_id is the id of the acquisition task
Result.result get task results
Query the execution result asyncresult (id = res.task_id) of the task according to the ID of the task. Get the result