1, Title: design an APP.
1. Design an APP.
(1) There are two interfaces in the APP.
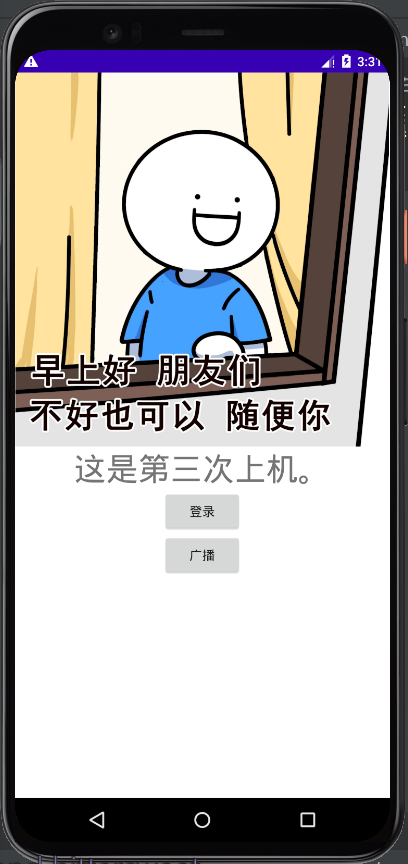
(2) There are two buttons "login" and "broadcast" on the main activity. Click the "login" button to open a new activity. Click the "broadcast" button to send a broadcast message.
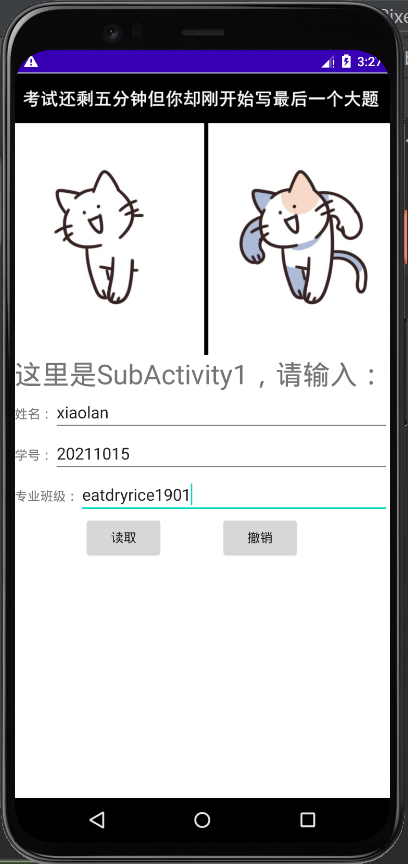
(3) On the new activity interface, you can enter student name, student number, professional class and other information. In addition, there are two buttons "confirm" and "Cancel". After clicking the "confirm" button, the student name and student number can be transferred back to the main interface, and the transmitted information will be displayed on the main interface. After clicking the "Cancel" button, return to the main interface without bringing back any data information.
2. Add an option menu in the main activity. The click logic of the menu is consistent with that of the button (jump to the new activity).
2, Interface display

3, Main page details
The code implementation of this time is somewhat complex, but fortunately, there are still many online cases. I just can't turn my head. Then I did it for a week, but I found that I was mentally retarded at that time.
The content of this APP can be mainly divided into three parts: page Jump, Intent data transmission and broadcasting.
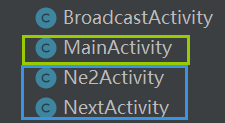
As shown in the figure above, we want to create four Java files, including main page MainActivity, sub page 1NextActivity, sub page 2Ne2Activity and broadcast receiving BroadcastActivity. Here, only the main page MainActivity, sub page 1NextActivity and sub page 2Ne2Activity are used for page display. The broadcast receiving BroadcastActivity is used to obtain the data of sub page 2 and then display the pop-up window.
In the main page, we first set two static global variables as the return flag of the sub page to the main page.
    private static final int SUBACTIVITY1 = 1;
    private static final int SUBACTIVITY2 = 2;
Then establish a listener with two keys, control the "login" button and the "broadcast" button respectively, and write the code to pass the value and the code to return to the main page in the listener. Here, we use to upload the value, and startActivityForResult() returns to the main page with data.
//Suppose there is a MainActivity and NextActivity. Now, after the MainActivity starts NextActivity, we want NextActivity to transfer values to MainActivity (this value transfer process is called uploading values to)
Intent intent = new Intent(MainActivity.this, NextActivity.class);//First, send the data request code in MainActivity
startActivityForResult(intent, SUBACTIVITY1);//The second value is the request code Key
In addition, we have to write relevant codes in the code of the main page to make the data of the sub page return to the main page successfully. There are two methods. One is to use the callback function onActivityResult(), and the other is to obtain data directly under the onCreate() function. However, Intent is used in both of them. Its main function is to solve the communication between various components in Android.
Method 1: implement onActivityResult()
 /**
     * requestCode Corresponds to the requestCode in startActivityForResult
     * resultCode And Intent are returned by SubActivity through its setResult() method
     **/
    @Override
    protected void onActivityResult(int requestCode, int resultCode, Intent data) {
        super.onActivityResult(requestCode, resultCode, data);

        switch(requestCode){
            case SUBACTIVITY1:
                if (resultCode == RESULT_OK){
                    Uri uriData = data.getData();
                    textView.setText(uriData.toString());
                break;
            case SUBACTIVITY2:
                break;
        }
    }
Code meaning: when the page receives the request code SUBACTIVITY1, if the result code in the sub page is equal to RESULT_OK, at this time, we use Uri to define a uriData, assign the data in the sub page to uriData, then use setText to display the data on the main page, and use toString() to convert the data into String type; If the request code is SUBACTIVITY2, it is considered RESULT_CANCELED, no data will be brought back and returned to the main page.
The onActivityResult() function here inherits the onActivityResult parent class and requires three parameters: request code, result code and data data.
We are told the meaning of these three parameters both in the book and on the Internet. Here I quote the text of a blog. See the properties and usage of Android onActivityResult() at the end of the article for the link:
The meanings of these three parameters are as follows:
requestCode: the request code used to start the child Activity
resultCode: the result code set by the child Activity, which indicates the operation result. Can be any integer value, but usually resultCode ==
RESULT_OK or resultCode==RESULT_CANCELED
Data: the Intent used to package the returned data, which can include the URI used to represent the selected content. Child activities can also add some additional messages when returning data Intent.
Method 2: onCreate() implementation
public class MainActivity extends Activity {
@Override
    public void onCreate(Bundle savedInstanceState) {
        super.onCreate(savedInstanceState);
        Intent intent = getIntent();
        String name = intent.getStringExtra("editText");
        String num = intent.getStringExtra("editText2");
        String proclass = intent.getStringExtra("editText3");
        textView.setText(String.valueOf(name));
        textView2.setText(String.valueOf(num));
        textView3.setText(String.valueOf(proclass));
    }
}
In method 2, we directly use getIntent() to obtain the data, and return the obtained data to the Intent defined by us, and then use getStringExtra to obtain the data of other Java files under the consent project. The content in the quotation marks here is the key name of the data we want to obtain.
The following String.valueOf() means to convert the content in name (num, proclass) into a String class.
Personally, compared with the first toString() method, String.valueOf() is like an indirect addressing process.
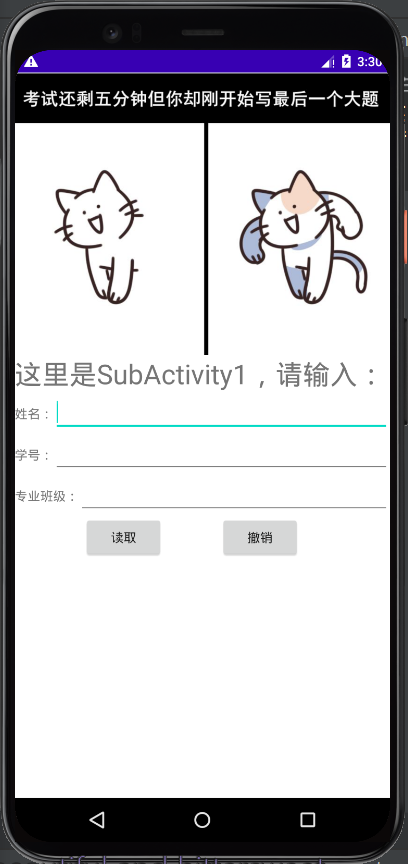
4, Detailed explanation of sub page 1
As can be seen from the title, we need to input the student's name, student number and professional class from sub page 1, which means that the EditText control is used, and the Button button is used to read and cancel.
As for the Java file of sub page 1, the button normally needs a listener to listen. Because the read button is responsible for transmitting the data we entered back to the main page, we need to add the Intent() method to the read button listener, and then put the data into intent.
Here we need to use putExtra(name,value) to put the data in.
putExtra here is equivalent to a function that can send data to other Java files. If there is only put, it means that we can only get the data stored in the current Java file. Name is the key name, which is equivalent to a "secret code". When we enter this key name in other Java files, we can "match the secret code" with the content here. Value is the key value, which is used to store the data we enter. When we match the secret code from other Java files, we can transfer the data in the key value.
The partial Java code of sub page 1 is as follows (Note: the code here corresponds to method 2 explained in detail on the main page above):
 btnSign.setOnClickListener(new View.OnClickListener(){
            public void onClick(View view){
                String uriString = editText.getText().toString();
                String uriString2 = editText2.getText().toString();
                String uriString3 = editText3.getText().toString();
                Intent intent = new Intent();
                intent.putExtra("editText",uriString);
                intent.putExtra("editText2",uriString2);
				intent.putExtra("editText3",uriString3);
				intent.setClass(SubActivity1.this,MainActivity.class);
                startActivity(intent);
            }
        });
How to write the code corresponding to the main page method 1?
The code is as follows. In the following code, we define a Uri type to store our data and use the parse method to access our local resources. The resource name here is defined as uriString.
btnSign.setOnClickListener(new View.OnClickListener(){
        public void onClick(View view){
                String uriString = editText.getText().toString()+"   "+editText2.getText().toString()+"   "+editText3.getText().toString();
                //The parse method returns a Uri type through which you can access a network or local resource
                Uri data = Uri.parse(uriString);
                Intent result = new Intent(null, data);
                setResult(RESULT_OK, result);//The first parameter is the system KEY to judge whether the value transfer is successful
                finish();
            }
        });
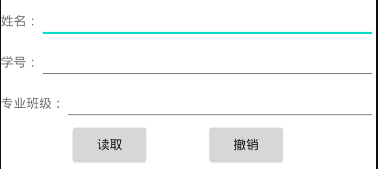
What is the difference between the two methods to the final output display?
As shown below:
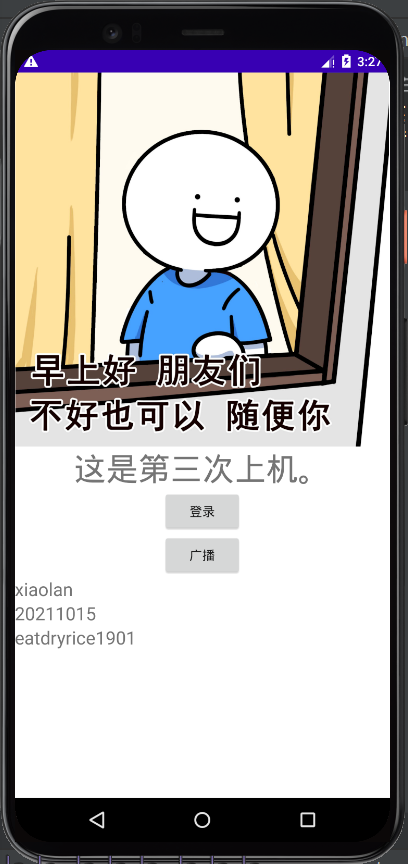
①

↑ ↑ ↑ ↑ this is the page display of transmitting data by putExtra method.
②

↑ ↑ ↑ this is the page display of transmitting data by parse method.
It can be seen that we can use ① to return our three data respectively; ② uses the following line of code to connect our three data and store them in one data. In this way, the output is actually one data, but we can separate them with spaces, so that when we look, it becomes three data (that is, we look like three data, but in the code, it is only one data).
String uriString = editText.getText().toString()+" "+editText2.getText().toString()+" "+editText3.getText().toString();
When we don't want to return any data to the home page, we click the undo button.
The undo button does not bring back any data, so we write result in the listener_ Just cancel the result code, and the returned value is null.
        btnRe.setOnClickListener(new View.OnClickListener(){
            public void onClick(View view){
                setResult(RESULT_CANCELED, null);
                finish();
            }
        });
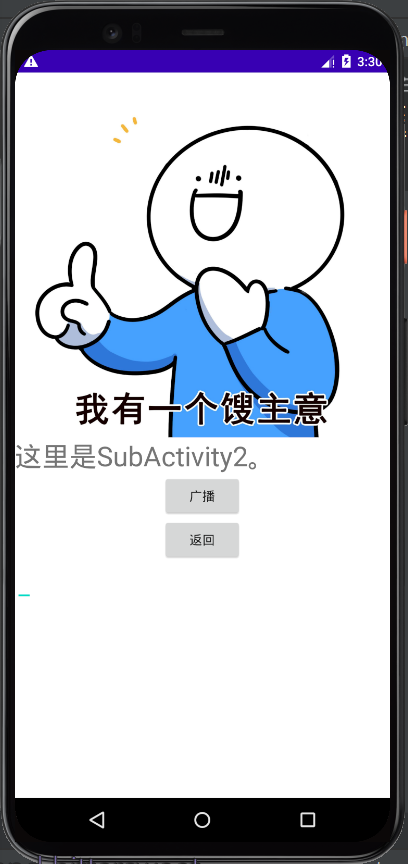
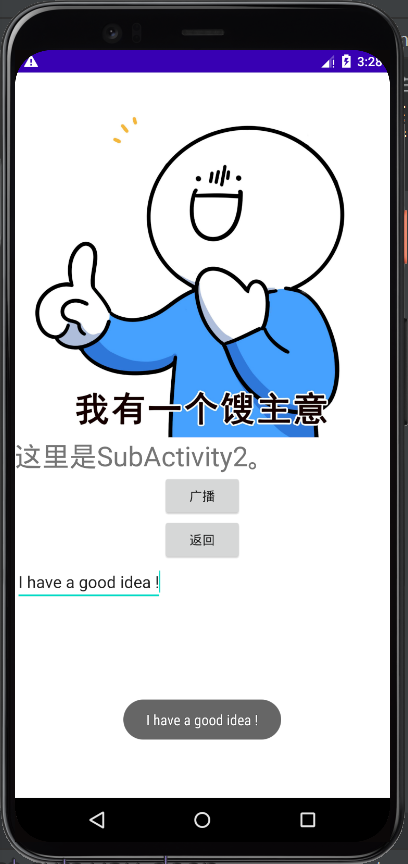
5, Detailed explanation of sub page 2
Sub page 2 uses broadcast to send data. Here, we need to create two Java files, one for sending broadcast and the other for receiving broadcast.
We generally use Intent to send broadcast messages. The content of broadcast messages can be data information closely related to the application or Android system information. When the application registers BroadcastReceiver, it can receive the specified broadcast messages.
There is a passage in my textbook:
Sending broadcast messages using Intent is very simple. Just create an Intent and call sendBroadcast() function to broadcast the information carried by Intent. However, it should be noted that when constructing Intent, a globally unique string must be defined to identify the action to be performed, usually using the name of the application package. If you want to pass additional data in Intent, you can use the putExtra() method of Intent.
As described in the textbook, we need to define a globally unique string in the key listener to identify the action to be performed, and use putExtra to send data.
The code is as follows:
btnbro.setOnClickListener(new View.OnClickListener(){
            public void onClick(View view){
                Intent intent = new Intent("com.mwt.mwtclass3rd");
                intent.putExtra("showmess",ent2.getText().toString());
                sendBroadcast(intent);
            }
        });
When receiving broadcast messages, we need to inherit the BroadcastReceiver class and overload the onReceive() method.
In this APP, the returned broadcast is displayed in a floating window.
Broadcast received code:
public class BroActivity extends BroadcastReceiver {
    @Override
    public void onReceive(Context context, Intent intent)
    {
        //TODO Auto-generated method stub
        String msg=intent.getStringExtra("showmess");
        Toast.makeText(context,msg,Toast.LENGTH_LONG).show();
    }
}
Is the broadcast over? Otherwise, we have to register a BroadcastReceiver in the AndroidMani.xml file, otherwise we will not receive the message we want to send.
The broadcast registration here uses < intent Filter > to register static broadcast and dynamic broadcast. If you are interested, you can find the use case of dynamic broadcast.
However, if static broadcasting is used, we must run on systems below Android 8.0, because since Android 8.0, Google has cancelled most of the static broadcasting functions in order to improve users' system performance.
        <receiver
            android:name=".BroActivity"
            android:exported="true">
            <intent-filter>
                <action android:name="com.mwt.mwtclass3rd"/>
            </intent-filter>
        </receiver>
At the same time, we also write < uses SDK Android: maxsdkversion = "14" / > in the manifest control under the file. Here, uses SDK is used to set the compatibility of APP with Android system, and 14 here can ensure that our APP can be 100% compatible with all Android systems.
6, Java code
Main page Java code 1
package com.mwt.testmaxing;
import androidx.appcompat.app.AppCompatActivity;
import android.app.Activity;
import android.content.Intent;
import android.net.Uri;
import android.os.Bundle;
import android.view.View;
import android.widget.Button;
import android.widget.EditText;
import android.widget.TextView;
import java.net.DatagramPacket;

public class MainActivity extends Activity {
    private static final int SUBACTIVITY1 = 1;
    private static final int SUBACTIVITY2 = 2;

    TextView textView,textView2,textView3;

    @Override
    public void onCreate(Bundle savedInstanceState) {
        super.onCreate(savedInstanceState);
        setContentView(R.layout.activity_main);
        textView = (TextView)findViewById(R.id.label1);
        textView2 = (TextView) findViewById(R.id.label2);
        textView3 = (TextView) findViewById(R.id.label3);
        final Button btn1 = (Button)findViewById(R.id.btn1);
        final Button btn2 = (Button)findViewById(R.id.btn2);

        btn1.setOnClickListener(new View.OnClickListener(){
            public void onClick(View view){
                //Suppose there is a MainActivity and NextActivity. Now, after the MainActivity starts NextActivity, we want NextActivity to transfer values to MainActivity (this value transfer process is called uploading values to)
                //First, send the data request code in MainActivity
                Intent intent = new Intent(MainActivity.this, NextActivity.class);
                startActivityForResult(intent, SUBACTIVITY1https://blog.csdn.net/kiro_1023?spm=1001.2101.3001.5343);// The second value is the request code Key
            }
        });

        btn2.setOnClickListener(new View.OnClickListener(){
            public void onClick(View view){
                Intent intent = new Intent(MainActivity.this, Ne2Activity.class);
                startActivityForResult(intent, SUBACTIVITY2);
            }
        });

    }
    /**
     * requestCode Corresponds to the requestCode in startActivityForResult
     * resultCode And Intent are returned by SubActivity through its setResult() method
     **/
    @Override
    protected void onActivityResult(int requestCode, int resultCode, Intent data) {
        super.onActivityResult(requestCode, resultCode, data);

        switch(requestCode){
            case SUBACTIVITY1:
                if (resultCode == RESULT_OK){
                    Uri uriData = data.getData();
                    textView.setText(uriData.toString(https://blog.csdn.net/kiro_1023?spm=1001.2101.3001.5343));
                }
                break;
            case SUBACTIVITY2:
                break;
        }
    }
}
Sub page Java code 1
package com.mwt.testmaxing;
import androidx.appcompat.app.AppCompatActivity;
import android.app.Activity;
import android.content.Intent;
import android.net.Uri;
import android.os.Bundle;
import android.view.View;
import android.widget.Button;
import android.widget.EditText;

public class NextActivity extends Activity {
    @Override
    public void onCreate(Bundle savedInstanceState) {
        super.onCreate(savedInstanceState);
        setContentView(R.layout.activity_next);https://blog.csdn.net/kiro_1023?spm=1001.2101.3001.5343
        final EditText editText = (EditText)findViewById(R.id.entry1);
        final EditText editText2 = (EditText)findViewById(R.id.entry2);
        final EditText editText3 = (EditText)findViewById(R.id.entry3);
        Button btnSign = (Button)findViewById(R.id.get);
        Button btnRe = (Button)findViewById(R.id.cancel);

        btnSign.setOnClickListener(new View.OnClickListener(){
            public void onClick(View view){
                String uriString = editText.getText().toString()+"   "+editText2.getText().toString()+"   "+editText3.getText().https://blog.csdn.net/kiro_1023?spm=1001.2101.3001.5343toString();
                //The parse method returns a Uri type through which you can access a network or local resource
                Uri data = Uri.parse(uriString);
                Intent result = new Intent(null, data);https://blog.csdn.net/kiro_1023?spm=1001.2101.3001.5343
                setResult(RESULT_OK, result);//The first parameter is the system KEY to judge whether the value transfer is successful
                finish();
            }
        });
        btnRe.setOnClickListener(new View.OnClickListener(){
            public void onClick(View view){
                setResult(RESULT_CANCELED, null);
                finish();
            }
        });
    }
}
Main page Java code 2
package com.mwt.mwtclass3rd;
import android.app.Activity;
import android.content.Intent;
import android.os.Bundle;
import android.view.View;
import android.widget.Button;
import android.widget.TextView;


public class MainActivity extends Activity {
    private static final int SUBACTIVITY1 = 1;
    private static final int SUBACTIVITY2 = 2;

    TextView textView,textView2,textView3;

    @Override
    public void onCreate(Bundle savedInstanceState) {
        super.onCreate(savedInstanceState);
        setContentView(R.layout.activity_main);
        textView = (TextView)findViewById(R.id.label1);
        textView2 = (TextView) findViewById(R.id.label2);
        textView3= (TextView) findViewById(R.id.label3);

        final Button btn1 = (Button)findViewById(R.id.btn1);
        final Button btn2 = (Button)findViewById(R.id.btn2);

        Intent intent = getIntent();
        String name = intent.getStringExtra("editText");
        String num = intent.getStringExtra("editText2");
        String proclass = intent.getStringExtra("editText3");
        textView.setText(String.valueOf(name));
        textView2.setText(String.valueOf(num));
        textView3.setText(String.valueOf(proclass));

        btn1.setOnClickListener(new View.OnClickListener(){
            public void onClick(View view){
                //Upload value to
                Intent intent = new Intent(MainActivity.this, SubActivity1.class);https://blog.csdn.net/kiro_1023?spm=1001.2101.3001.5343
                //Page Jump
                startActivityForResult(intent, SUBACTIVITY1);
            }
        });

        btn2.setOnClickListener(new View.OnClickListener(){
            public void onClick(View view){
                Intent intent = new Intent(MainActivity.this, SubActivity2.https://blog.csdn.net/kiro_1023?spm=1001.2101.3001.5343class);

                startActivityForResult(intent, SUBACTIVITY2);
            }
        });
	}
    }
Sub page 1Java code 2
package com.mwt.mwtclass3rd;
import androidx.appcompat.app.AppCompatActivity;
import android.app.Activity;
import android.content.Intent;
import android.net.Uri;
import android.os.Bundle;
import android.view.View;
import android.widget.Button;
import android.widget.EditText;

public class SubActivity1 extends Activity {
    @Override
    public void onCreate(Bundle savedInstanceState) {
        super.onCreate(savedInstanceState);
        setContentView(R.layout.activity_sub1);
        final EditText editText = (EditText)findViewById(R.id.entry1);
        final EditText editText2 = (EditText)findViewById(R.id.entry2);
        final EditText editText3 = (EditText)findViewById(R.id.entry3);
        Button btnSign = (Button)findViewById(R.id.get);
        Button btnRe = (Button)findViewById(R.id.cancel);
        btnSign.setOnClickListener(new View.OnClickListener(){
            public void onClick(View view){
                String uriString = editText.getText().toString();
                String uriString2 = editText2.getText().toString();
                String uriString3 = editText3.getText().toString();
                Intent intent = new Intent();
                intent.putExtra("editText",uriString);
                intent.putExtra("editText2",uriString2);
                intent.putExtra("editText3",uriString3);
                intent.setClass(SubActivity1.this,MainActivityhttps://blog.csdn.net/kiro_1023?spm=1001.2101.3001.5343.class);
                startActivity(intent);
            }
        });

        btnRe.setOnClickListener(new View.OnClickListener(){
            public void onClick(View view){
                setResult(RESULT_CANCELED, null);
                finish();
            }
        });
    }
}
Sub page 2 code
package com.mwt.mwtclass3rd;
import android.app.Activity;
import android.content.Intent;
import android.os.Bundle;
import android.view.View;
import android.widget.Button;
import android.widget.EditText;
public class SubActivity2 extends Activity {
    @Override
    public void onCreate(Bundle savedInstanceState) {
        super.onCreate(savedInstanceState);
        setContentView(R.layout.activity_sub2);
        Button btnbro = (Button)findViewById(R.id.btn_Bro);
        EditText ent2 = (EditText) findViewById(R.id.writemes);
        Button btnReturn = (Button)findViewById(R.id.btn_return);

        btnbro.setOnClickListener(new View.OnClickListener(){
            public void onClick(View view){
                Intent intent = new Intent("com.mwt.mwtclass3rd");
                intent.putExtra("showmess",ent2.getText().toString()https://blog.csdn.net/kiro_1023?spm=1001.2101.3001.5343);
                sendBroadcast(intent);
            }
        });
        btnReturn.setOnClickListener(new View.OnClickListener(){
            public void onClick(View view){
                setResult(RESULT_CANCELED, null);
                finish();
            }
        });
    }
}
Broadcast receiving page Java code
package com.mwt.mwtclass3rd;
import android.content.BroadcastReceiver;
import android.content.Context;
import android.content.Intent;
import android.widget.Toast;

public class BroActivity extends BroadcastReceiver {
    @Override
    public void onReceive(Context context, Intent intent)
    {
        //TODO Auto-generated method stub
        String msg=intent.https://blog.csdn.net/kiro_1023?spm=1001.2101.3001.5343getStringExtra("showmess");
        Toast.makeText(context,msg,Toast.LENGTH_LONG).show();
    }
}
7, Demonstration
8, Daily account
The difficulty of this computer class did come up. At that time, it had been stuck in the data return function of sub page 1. The teacher gave the code in the book, that is, using the request code, result code and data to return the data we entered. Most of the Internet directly overloaded onCreate() to getIntent() our data. Personally, I think the latter is easier to use.
At that time, I was first stuck by the BroadcastReceiver and couldn't receive the broadcast. After checking the relevant materials, I found out that Google has cancelled most of the static broadcast functions since Android 8.0 in order to improve the user's system performance, and what I said in the class is to use the static broadcast to send the broadcast. In order to save time, Instead of learning how to use dynamic broadcasting, I directly set the initial Android 11.0 system in the simulator to Android 5.0 System. Then it is a long way to find a solution to why sub page 1 cannot return multiple data to the main page.
Later, I finally solved this problem: at first, I directly copied the code told by the teacher in class, using the onActivityResult method, but on the Internet, I directly used the getIntent method. Originally, I wanted to put the online method directly into onActivityResult, but I couldn't. after asking the teacher, the teacher asked me to use putExtra method and getExtra, However, after using it, the main page can only return "null" regardless of the input data. After being null for one day, I went to ask the teacher again. The teacher said that my code was correct. In principle, it should not only return "null". However, I was asked to put three data into one data. I also tried, but the returned data will be connected, which is not very good-looking. I told the students in my class about it, and the students demonstrated it to me - he added a + "" + "between the connected data, so the output is really better, but I still feel strange.
Last night, I was bored and continued to look at the online method. I just deleted the copied teacher's code and wrote it again
It's very sad, because I've been like a retarded for eight days.
reference resources
android studio transfers information from one page to another and displays it
Four components of Android - broadcastreceiver (principle)
New features in Android 8.0 - cancel most static registration broadcasts
Android 8.0 behavior change
Android BroadcastReceiver: receive broadcast
Configure Android Studio
Properties and usage of Android onActivityResult()
SharedPreferences for Android data storage
android development Intent tips
[Android development] detailed explanation and example of intent.putExtra() method parameters