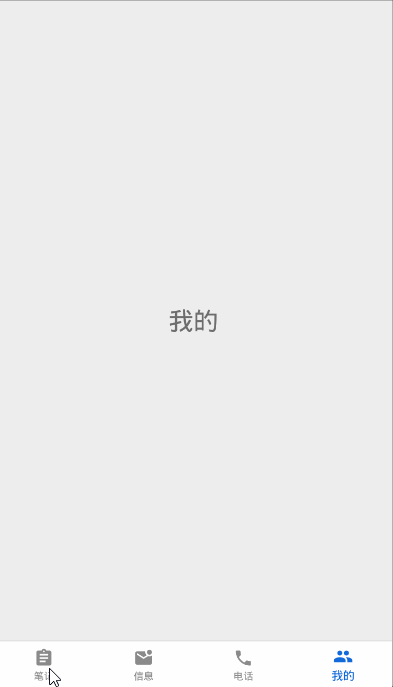
The renderings are as follows:
Implementation steps:
Don't forget to add the required dependencies before working
implementation 'androidx.navigation:navigation-fragment:2.2.2'
implementation 'androidx.navigation:navigation-ui:2.2.2'
1, First, make preparations and create four fragments, corresponding layout files and menu files
1. Four fragments. I'll take out one for your reference
FirstFragment class
public class FirstFragment extends Fragment {

    private FirstViewModel mViewModel;

    public static FirstFragment newInstance() {
        return new FirstFragment();
    }

    @Override
    public View onCreateView(@NonNull LayoutInflater inflater, @Nullable ViewGroup container,
                             @Nullable Bundle savedInstanceState) {
        return inflater.inflate(R.layout.first_fragment, container, false);
    }

    @Override
    public void onActivityCreated(@Nullable Bundle savedInstanceState) {
        super.onActivityCreated(savedInstanceState);
        mViewModel = new ViewModelProvider(this).get(FirstViewModel.class);
        // TODO: Use the ViewModel
    }

}
Corresponding first_fragment.xml layout file
<?xml version="1.0" encoding="utf-8"?>
<LinearLayout xmlns:android="http://schemas.android.com/apk/res/android"
    xmlns:tools="http://schemas.android.com/tools"
    android:layout_width="match_parent"
    android:layout_height="match_parent"
    android:gravity="center"
    tools:context=".fragment.FirstFragment">

    <TextView
        android:layout_width="wrap_content"
        android:layout_height="wrap_content"
        android:text="note"
        android:textSize="30sp" />

</LinearLayout>
2. The next step is to create my in the menu folder_ bottom_ navigation.xml:
Here is the icon and corresponding text placed at the bottom of the navigation.
Special note: the icon color here can be arbitrary and unlimited, because the specific icon colors before and after selection can be set in the BottomNavigationView tab.
I use vector graphics here. The advantage is that there is no sawtooth. Icons can be better displayed on any size screen.
<?xml version="1.0" encoding="utf-8"?>
<menu xmlns:android="http://schemas.android.com/apk/res/android">
    <item
        android:id="@+id/firstFragment"
        android:icon="@drawable/first_normal"
        android:title="note" />
    <item
        android:id="@+id/secondFragment"
        android:icon="@drawable/second_normal"
        android:title="information" />
    <item
        android:id="@+id/thirdFragment"
        android:icon="@drawable/third_normal"
        android:title="Telephone" />
    <item
        android:id="@+id/fourthFragment"
        android:icon="@drawable/fourth_normal"
        android:title="my" />
</menu>
2, Next, in the res directory, create a resource whose type is Navigation and whose name can be customized. Here, it is set to my_bottom_navigation.xml
<?xml version="1.0" encoding="utf-8"?>
<navigation xmlns:android="http://schemas.android.com/apk/res/android"
    xmlns:app="http://schemas.android.com/apk/res-auto"
    xmlns:tools="http://schemas.android.com/tools"
    android:id="@+id/my_bottom_navigation"
    app:startDestination="@id/firstFragment">

    <fragment
        android:id="@+id/firstFragment"
        android:name="com.example.exampletest.fragment.FirstFragment"
        android:label="first_fragment"
        tools:layout="@layout/first_fragment" />
    <fragment
        android:id="@+id/secondFragment"
        android:name="com.example.exampletest.fragment.SecondFragment"
        android:label="second_fragment"
        tools:layout="@layout/second_fragment" />
    <fragment
        android:id="@+id/thirdFragment"
        android:name="com.example.exampletest.fragment.ThirdFragment"
        android:label="third_fragment"
        tools:layout="@layout/third_fragment" />
    <fragment
        android:id="@+id/fourthFragment"
        android:name="com.example.exampletest.fragment.FourthFragment"
        android:label="fourth_fragment"
        tools:layout="@layout/fourth_fragment" />
</navigation>
Explain here:
- app:startDestination="@id/firstFragment" attribute: by default, the first fragment is the page after entering.
- The label attribute indicates that the label is the font in the title bar. Because I set the theme here as no ActionBar, this effect naturally does not exist
- The id of each fragment tag here must be the same as my in the menu folder_ bottom_ The id in the item tag in the navigation.xml file corresponds one-to-one
3, Create BottomNavigationViewActivity and corresponding activity_bottom_navigation_view.xml, soften the four fragments together, and realize the function of clicking the corresponding icon to switch to the corresponding interface.
1. Activity first_ bottom_ navigation_ The implementation of view.xml is a very important step
<?xml version="1.0" encoding="utf-8"?>
<androidx.constraintlayout.widget.ConstraintLayout xmlns:android="http://schemas.android.com/apk/res/android"
    xmlns:app="http://schemas.android.com/apk/res-auto"
    xmlns:tools="http://schemas.android.com/tools"
    android:layout_width="match_parent"
    android:layout_height="match_parent"
    android:orientation="vertical"
    tools:context=".BottomNavigationViewActivity">

    <com.google.android.material.bottomnavigation.BottomNavigationView
        android:id="@+id/bottomNavigationView"
        android:layout_width="match_parent"
        android:layout_height="wrap_content"
        android:background="@color/white"
        app:itemIconTint="@color/text_color"
        app:itemTextColor="@color/text_color"
        app:labelVisibilityMode="labeled"
        app:layout_constraintBottom_toBottomOf="parent"
        app:layout_constraintEnd_toEndOf="parent"
        app:layout_constraintStart_toStartOf="parent"
        app:menu="@menu/my_bottom_navigation" />

    <fragment
        android:id="@+id/fragment8"
        android:name="androidx.navigation.fragment.NavHostFragment"
        android:layout_width="match_parent"
        android:layout_height="0dp"
        app:defaultNavHost="true"
        app:layout_constraintBottom_toTopOf="@+id/bottomNavigationView"
        app:layout_constraintEnd_toEndOf="parent"
        app:layout_constraintHorizontal_bias="0.0"
        app:layout_constraintStart_toStartOf="parent"
        app:layout_constraintTop_toTopOf="parent"
        app:navGraph="@navigation/my_bottom_navigation" />
</androidx.constraintlayout.widget.ConstraintLayout>
Analyze the more important attributes:
1. Under fragment label:
- app:layout_constraintBottom_toTopOf="@+id/bottomNavigationView" function: the lower edge of the fragment is aligned with the upper edge of the bottom navigation, in other words, the fragment is on the upper edge of the bottom navigation
- app:defaultNavHost = "true" indicates that the default navigation host is used and the back button of the Activity is automatically overwritten
- app:navGraph="@navigation/my_bottom_navigation" points to my in your navigation folder_ bottom_ Navigation file
2. Under the bottomnavigationview tab
- App: itemicon = "@ color / text_color" indicates the color of the icon in the selected and unchecked states
- app:itemTextColor="@color/text_color" indicates the color of the text in the selected and unselected States, so the two attributes can use the same resource file
- app:labelVisibilityMode = "labeled" when there are four or five navigation icons at the bottom, you can only set five at most. You need to set this property to display the icon mark. In other words, it is to display the text under the icon. If this property is not set, the text under the icon cannot be displayed when it is not selected
2. The code under the file BottomNavigationViewActivity is very simple
public class BottomNavigationViewActivity extends AppCompatActivity {

    @Override
    protected void onCreate(Bundle savedInstanceState) {
        super.onCreate(savedInstanceState);
        setContentView(R.layout.activity_bottom_navigation_view);
        //Instantiate BottomNavigationView
        BottomNavigationView bottomNavigationView = findViewById(R.id.bottomNavigationView);
        //Get NavController instance
        //NavController: responsible for operating the jump and exit of fragments under the Navigation framework, animating and monitoring the current Fragment information
        //This R.id.fragment8 is the ID of the fragment control in the Activity layout
        NavController controller = Navigation.findNavController(this, R.id.fragment8);
        //Called when the menu is selected. When the destination changes, the selected item in the BottomNavigationView will be automatically updated
        NavigationUI.setupWithNavController(bottomNavigationView, controller);
    }
}
In this way, the bottom navigationview is used to complete a basic bottom navigation function. On this template, you can add the functions you need. Of course, you can correct any mistakes in the comment area, so as not to mislead people~