Step 1 download the required
Download bert source code and model
First, we download the source code and official model of bert and go to the official website:
https://github.com/google-research/bert
Download the official website source code:
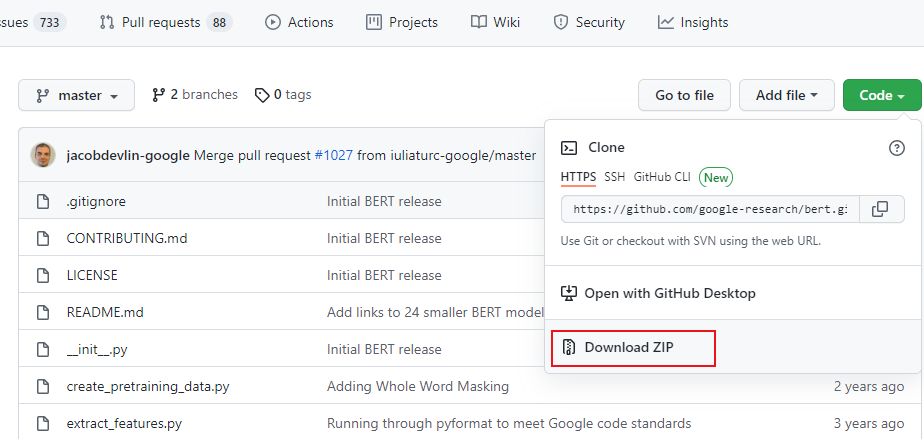
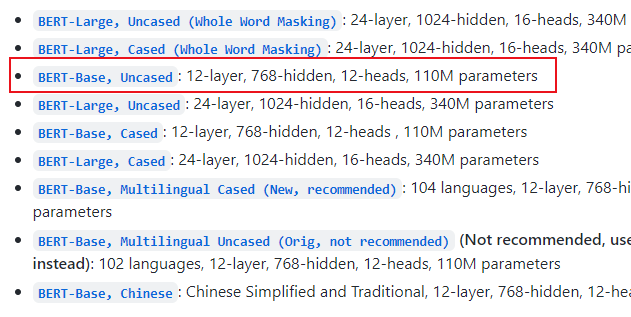
Download the official model:
Look for it and turn it down. There must be such a position below.
Download GLUE dataset
To run the bert model, you need to use the specified GLUE dataset. The dataset download address is:
https://gluebenchmark.com/tasks
GLUE is a general term, in which there are many independent data sets. For example, if you only use MRPC for testing, you can only download MRPC data sets. If you can't download them, you can use the ones I downloaded:
Link: https://pan.baidu.com/s/1rhy138f0wPNgTZwjO0CV4g
Extraction code: dkf6
Step 2 run environment configuration
After the above steps, you have obtained all the data of bert. Now you only need to configure your local environment.
Create virtual environment
Here, create a new virtual environment using conda:
conda create -n bert python=3.7
The operation of bert needs the support of tensorflow. To install tensorflow in this environment, it should be noted that the following specified version must be installed, otherwise an error will be reported in the later operation.
conda activate bert // Enter the newly created virtual environment
conda install tensorflow==1.14 // Install tensorflow version 1.14
Create project
Use pycharm to create a new project for running tests.
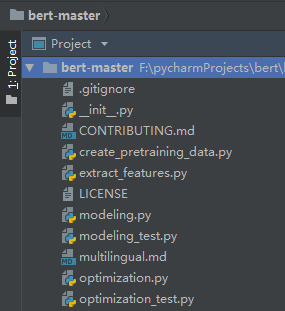
Then put the bert source code, glue dataset and official website model into the project. Look at my directory structure:
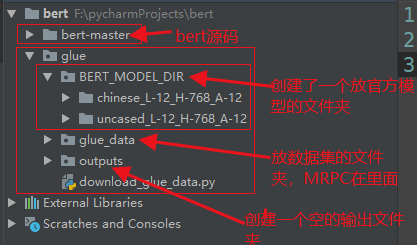
If you downloaded the glue dataset yourself, it may be a little different from my directory structure. Please ignore the redundant files.
Another important point is to configure the python environment of the project into the newly created environment named bert.
Then there is a detail that you can choose to open:
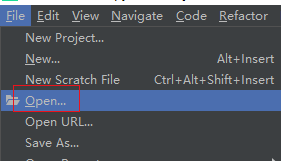
We i need to open the source folder of bert in pycharm, and then run the test, because some py files in the source folder of bert are referenced to each other, so when we choose to open it, the reference will not report an error.
It looks like this after opening:
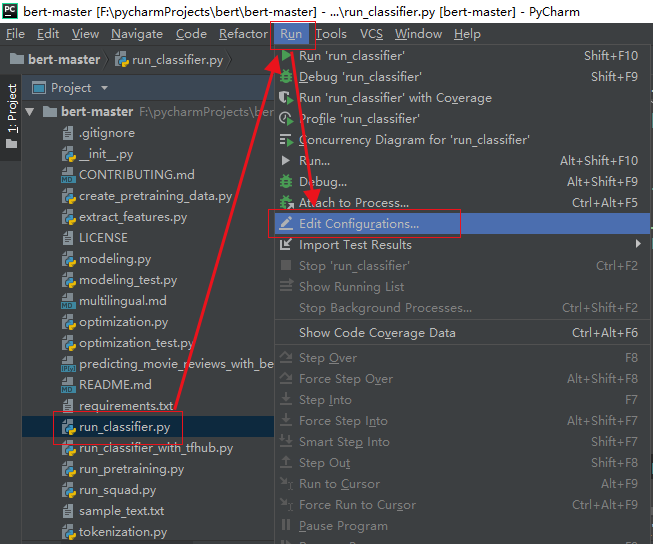
Configure operating parameters
The last step before running is to configure the running parameters, that is, to specify batch_size, data set location, etc. select the file in the following figure (because we use this file to run later):
Set the operation parameters. After these parameters are set, we only need to run the file directly, and there is no need to manually transfer parameters on the command line.
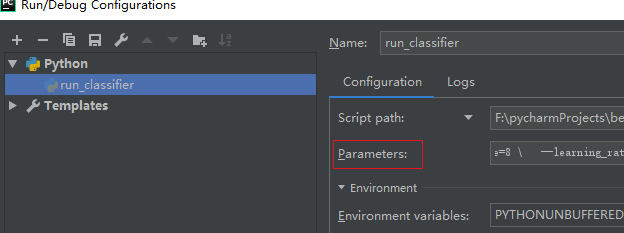
Enter in the input box behind the red box in the figure above (copy and throw it in, regardless of format):
--task_name=MRPC \
--do_train=true \
--do_eval=true \
--data_dir=../glue/glue_data/MRPC \
--vocab_file=../glue/BERT_MODEL_DIR/uncased_L-12_H-768_A-12/vocab.txt \
--bert_config_file=../glue/BERT_MODEL_DIR/uncased_L-12_H-768_A-12/bert_config.json \
--init_checkpoint=../glue/BERT_MODEL_DIR/uncased_L-12_H-768_A-12/bert_model.ckpt \
--max_seq_length=128 \
--train_batch_size=8 \
--learning_rate=2e-5 \
--num_train_epochs=1.0 \
--output_dir=../glue/outputs
Copy it above and add a comment below to explain it briefly.
--task_name=MRPC \   			//Dataset to use
--do_train=true \
--do_eval=true \
--data_dir=../glue/glue_data/MRPC \    // Dataset location
--vocab_file=../glue/BERT_MODEL_DIR/uncased_L-12_H-768_A-12/vocab.txt \    // Model dictionary file
--bert_config_file=../glue/BERT_MODEL_DIR/uncased_L-12_H-768_A-12/bert_config.json \
--init_checkpoint=../glue/BERT_MODEL_DIR/uncased_L-12_H-768_A-12/bert_model.ckpt \
--max_seq_length=128 \     // It depends on the configuration of your computer. Try not to be too large
--train_batch_size=8 \    // It depends on the configuration of your computer. Try not to be too large
--learning_rate=2e-5 \
--num_train_epochs=1.0 \
--output_dir=../glue/outputs    // Trained model output path
The only thing to note is that don't get the path wrong. The path here is consistent with the engineering structure diagram above.
Finally, you can try running run_ Try the classifier.py file!!!