catalogue
1, Generating static library and dynamic library files with gcc
2, Compilation of gcc and EFF files
3, Learning opencv image library programming
4, Summary
1, Generating static library and dynamic library files with gcc
Static library and dynamic library
-
Static library
When the program is compiled, it will be connected to the object code, and the static library will no longer be needed when the program runs -
Dynamic library
It is not connected to the object code when the program is compiled, but is loaded when the program is running, so the program needs dynamic inventory when it is running.
1. gcc generates static and dynamic libraries
(1) Create directory
mkdir test1
cd test1
(2) Edit program code -
hello.h
 1. #infdef HELLO_H
 2. #define HELLO_H
 3. void hello(const char *name);
 4. #endif//HELLO_H
- hello.c
#include<stdio.h>
void hello(const char *name)
{
printf("Hello%s!\n",name);
}
- main.c
#include"stdio.h"
int main()
{
hello("everyone");
return 0;
}
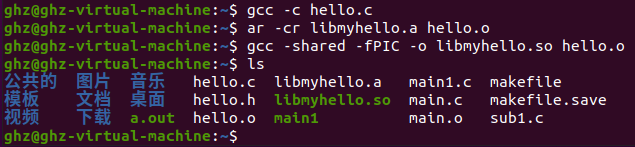
(3)gcc compiling. o files
gcc -c hello.c

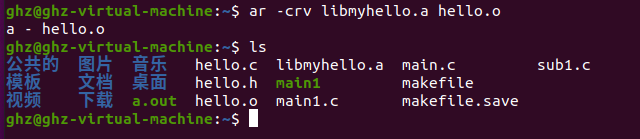
(4) Creating static libraries with. o files
Create tool: ar
Naming rules: prefix lib with. a extension
ar -crv libmyhello.a hello.o
(5) Using static libraries
- Method 1
gcc -o hello main.c -L. -lmyhello

- Method 2
gcc main.c libmyhello.a -o hello

- Method 3
gcc -c main.c
gcc -o hello main.o libmyhello.a

(6) Creating dynamic library files from. o files
The naming convention is similar to the static library, with the prefix lib, but the file extension. so
gcc -shared -fPIC -o libmyhello.so hello.o

(7) Using dynamic libraries in programs
gcc -o hello main.c -L. -lmyhello

An error is displayed here because the file libmyhello.so cannot be found. The solution is as follows:
mv libmyhello.so/usr/lib
Type. / hello and you can see that the program runs successfully
(8) Which file does the gcc command use when testing static and dynamic libraries with the same name
- First, delete all files except. c and. h, and restore the editing program state

- Create static and dynamic library files
- Run the gcc command, use the function library myhello to generate the target file Hello, and run the program hello

It can be found that when the static library and the dynamic library have the same name, the gcc command will give priority to the dynamic library. By default, disconnect the dynamic libraries in / usr/lib and / lib directories, and copy the file libmyhello.so to the directory / usr/lib
2. Adapt job 1, use ar tool to generate. a static library file from x2x and x2y target files, and link them
(1) Edit three subprograms sub1.c, sub2.c and main1.c
- x2x function program sub1.c
#include<stdio.h>
float x2x(int a,int b)
{
        return a*b;}
- x2y function program sub2.c
#include<stdio.h>
float x2y(int a,int b)
{
        return a+b;}
- Main function program main.c
#include<stdio.h>
int main()
{
        float x2x(int a,int b);
        float x2y(int a,int b);
        int x1,x2;
        x1=4;
        x2=5;
        printf("%f %f\n",x2x(x1,x2),x2y(x1,x2));
        return 0;}
(2) Compile three. c files into. o target files with gcc
gcc -c sub1.c
gcc -c sub2.c
gcc -c main1.c
(3) Generate 1. a static library file from x2x and x2y target files

(4) Using gcc to link the main function object file with the static library file
2. Generate. so dynamic library files from x2x and x2y files
(1) Generate target file
(2) Generate shared library. so file
(3) Create executable program

The corresponding. so file cannot be found. Copy the corresponding. so file to the corresponding path


After executing. / main1 again, the program runs successfully
2, Compilation of gcc and EFF files
1. gcc compilation
(1) Sample program test.c
#include<stdio.h>
int main(void)
{
 printf("Hello World!\n");
        return 0;}
(2) One step compilation instruction
gcc test.c -o test
(3) Essentially, the four stages of compilation
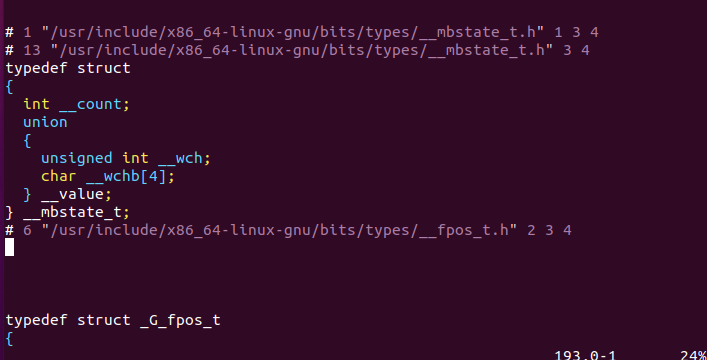
- Pretreatment
gcc -E test.c -o test.i (or gcc -E test.c)
Preprocessing code
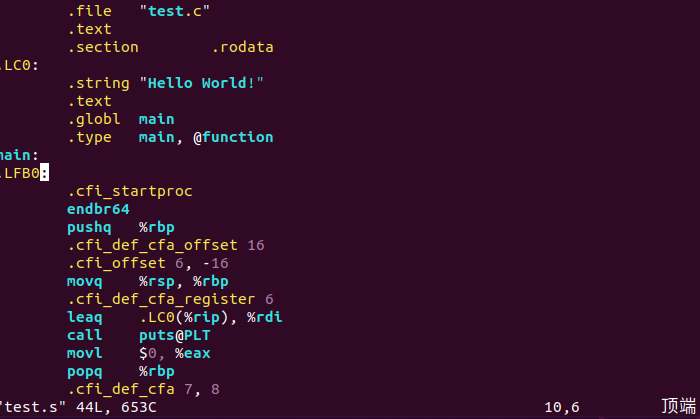
- Compile to assembly code
gcc -S test.i -o test.s
Assembly code
- assembly
gcc -c test.s -o test.o
- connect
gcc test.o -o test
Dynamic link executable size

Static link executable size

(3) Execution procedure
2. Analysis of ELF files
(1) Segment of ELF file
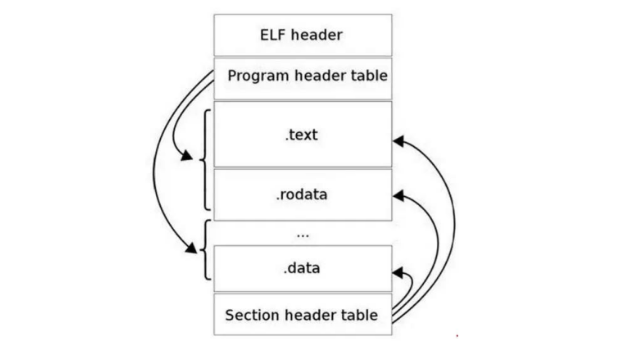
The ELF file format is shown in the following figure. Between ELF Header and Section Header Table are sections. A typical ELF file contains the following paragraphs:
text: instruction code of compiled program
rodata: ro stands for read only, that is, read-only data.
data: initialized C program global variables and static local variables,
bss: uninitialized C program global variables and static local variables.
Debug: debug symbol table. The debugger uses this section of information to help debug.
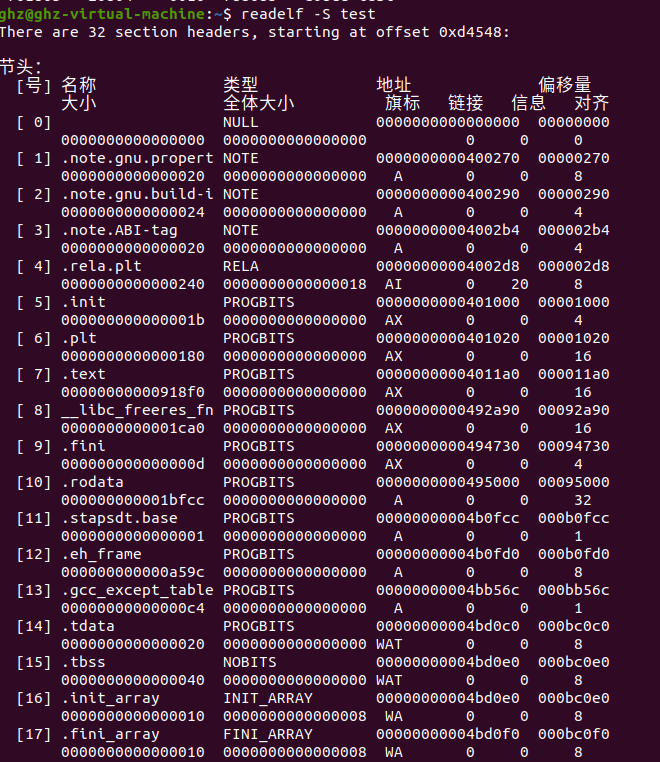
Use readelf -S to view the information of the section as follows:
readelf -S
2. Disassembly ELF
Since elf files cannot be opened as ordinary text files, if you want to directly view the instructions and data contained in an ELF file, you need to use the disassembly method.
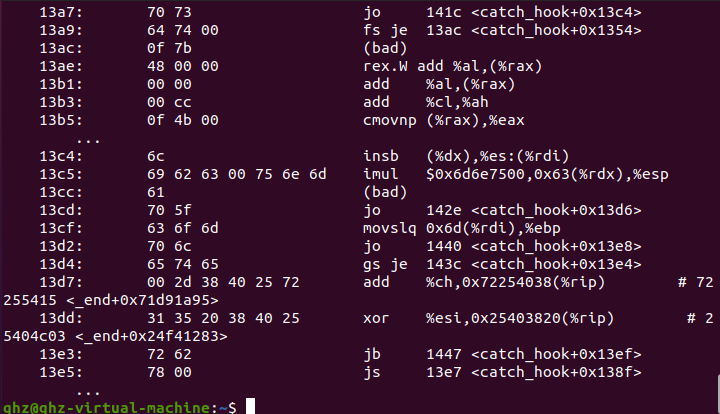
- Disassembly of objdump -D
objdump -D test
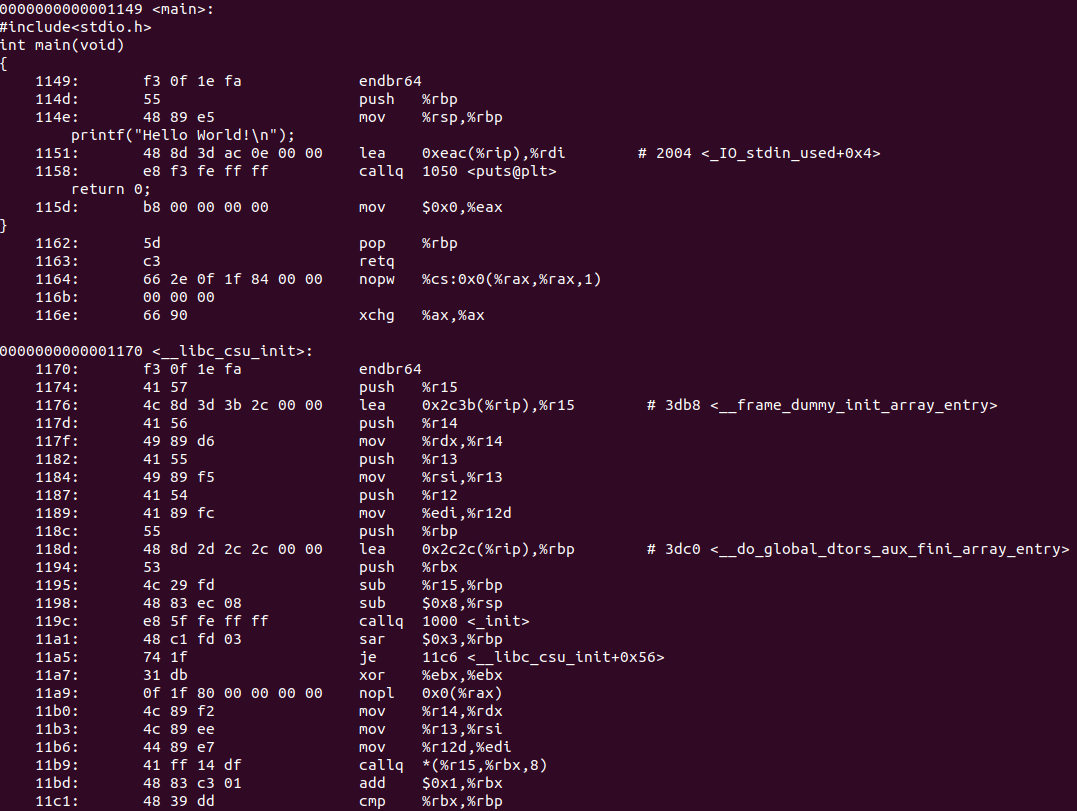
- objdump -S disassembles and displays its c language source code
gcc -o test -g test.c
objdump -S test
3, Learning opencv image library programming
Install link opencv installation
1. Picture conversion
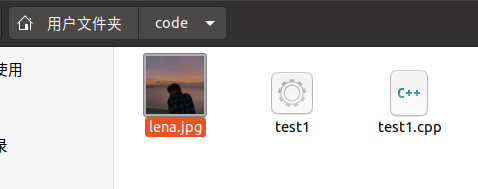
- Create a code folder and enter the code folder (here, I use touch code to create a folder and enter the folder to display that code is not a directory, I changed it to mkdir code)
mkdir code
cd code

- Create test1.cpp file
gedit test1.cpp

glue code
#include <opencv2/highgui.hpp>
#include <opencv2/opencv.hpp>
using namespace cv;
using namespace std;
int main(int argc, char** argv)
{
CvPoint center;
double scale = -3;
IplImage* image = cvLoadImage("lena.jpg");
argc == 2? cvLoadImage(argv[1]) : 0;
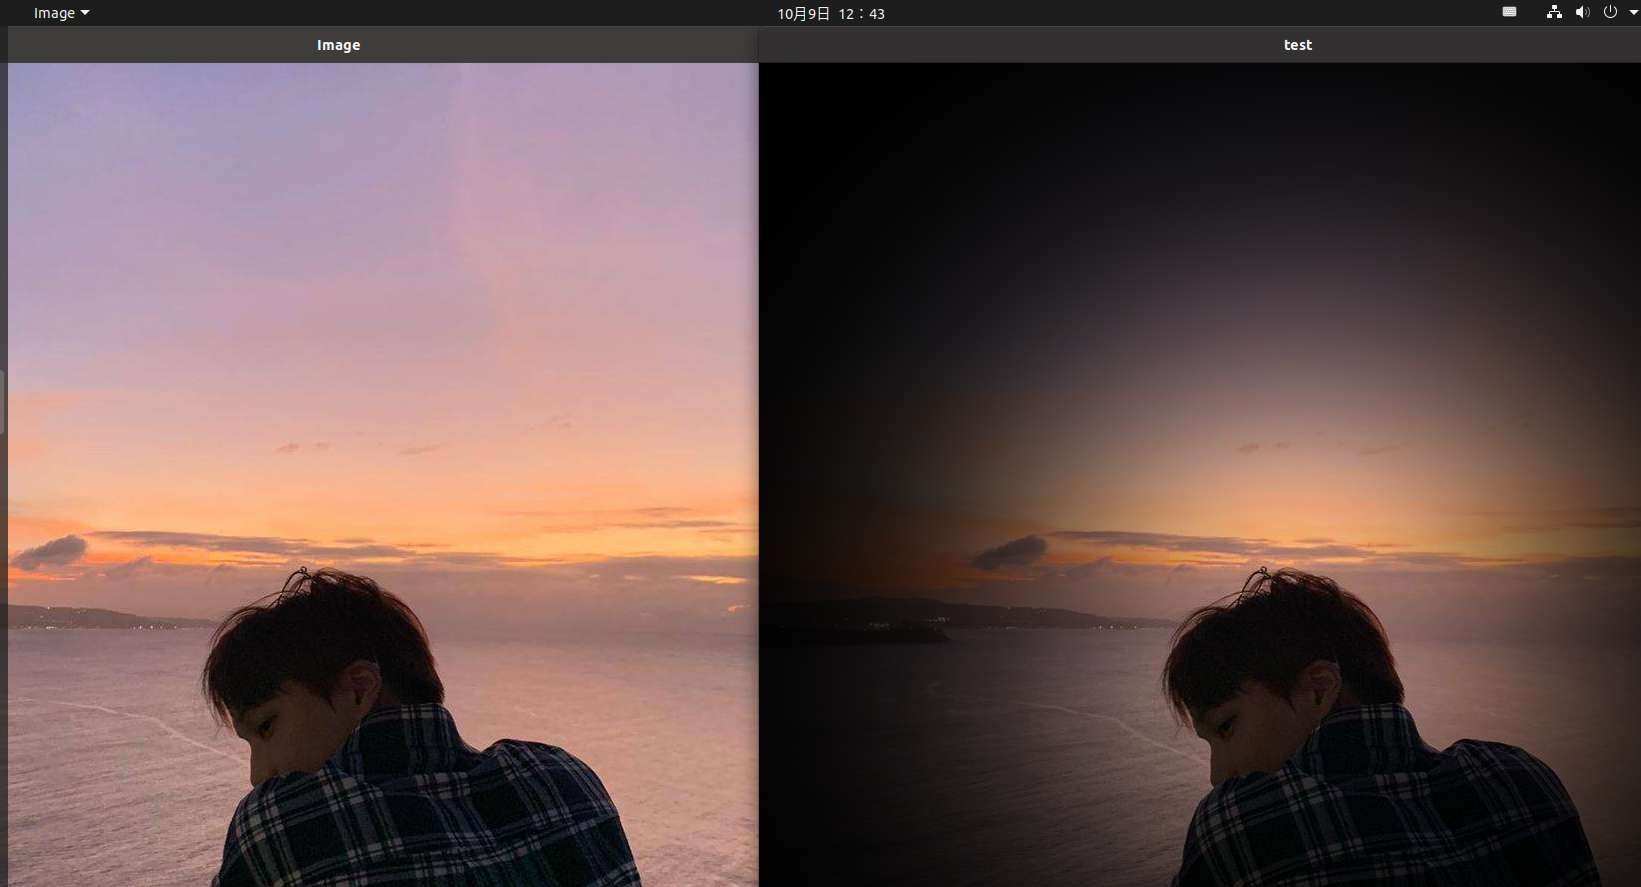
cvShowImage("Image", image);
if (!image) return -1; center = cvPoint(image->width / 2, image->height / 2);
for (int i = 0;i<image->height;i++)
for (int j = 0;j<image->width;j++) {
double dx = (double)(j - center.x) / center.x;
double dy = (double)(i - center.y) / center.y;
double weight = exp((dx*dx + dy*dy)*scale);
uchar* ptr = &CV_IMAGE_ELEM(image, uchar, i, j * 3);
ptr[0] = cvRound(ptr[0] * weight);
ptr[1] = cvRound(ptr[1] * weight);
ptr[2] = cvRound(ptr[2] * weight);
}
Mat src;Mat dst;
src = cvarrToMat(image);
cv::imwrite("test.png", src);
cvNamedWindow("test",1); imshow("test", src);
cvWaitKey();
return 0;
}
Exit after saving and execute the following command
g++ test1.cpp -o test1 pkg-config --cflags --libs opencv
- Prepare JPG pictures in the code folder, named lena.jpg here
Execute command
./test1
From the results, we can see that lena.jpg becomes test.png
2. Video
(1) Play video
- Get camera permissions for virtual machine
Shortcut key win+R. Enter services.msc and click OK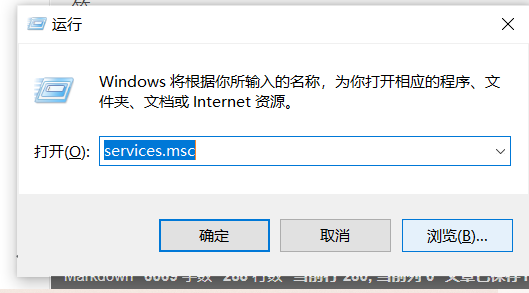
Locate the VMmare USB Aribitration S... Service and ensure that it shows that it is starting
Click "virtual machine" and "Settings"
Select "USB controller", set "USB compatibility" to "USB3.1", and click OK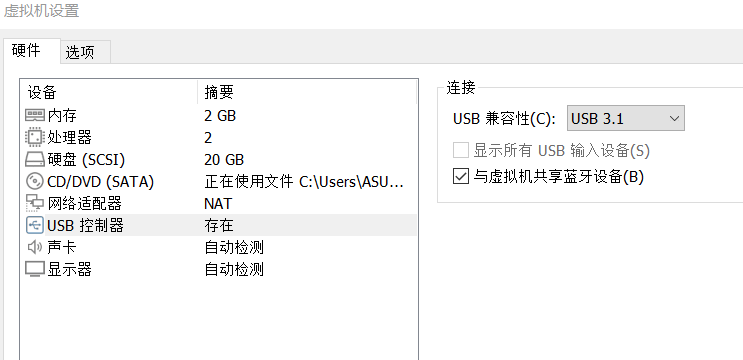
The original blogger set USB3.0. I only displayed 3.1 here, so I chose 3.1
Then click "virtual machine", select IMC Networks USB2.0 VGA UVC WebCam option of "removable device", select connection, and click "OK" in the pop-up window
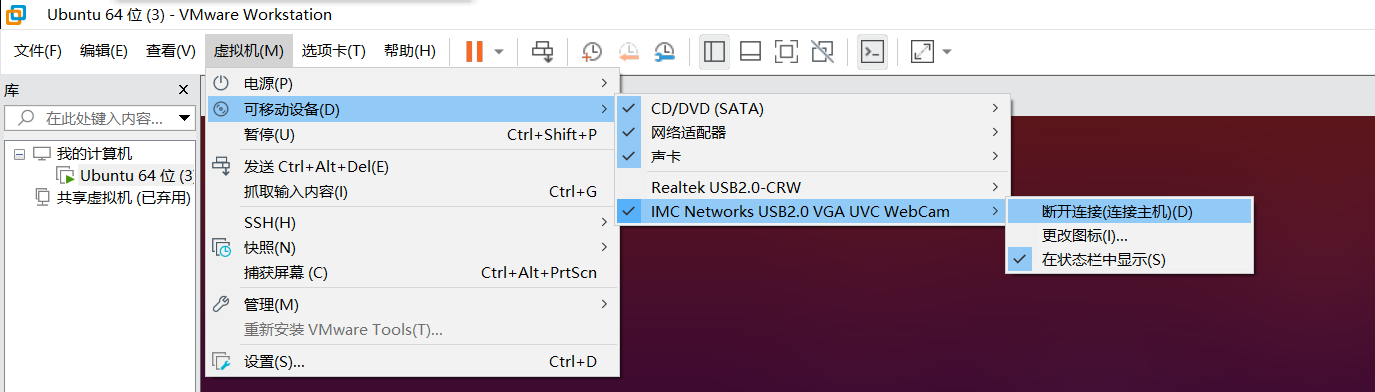
The successful connection is displayed, as shown in the lower right corner of the interface

- Create test2.cpp file
gedit test2.cpp
#include <opencv2/opencv.hpp>
using namespace cv;
int main()
{
//Read video from camera
VideoCapture capture("scene.mp4");
//Cycle through each frame
while(1){
Mat frame;//Define a Mat variable to store the image of each frame
capture >> frame;//Read current frame
if(frame.empty())//Play finished, exit
break;
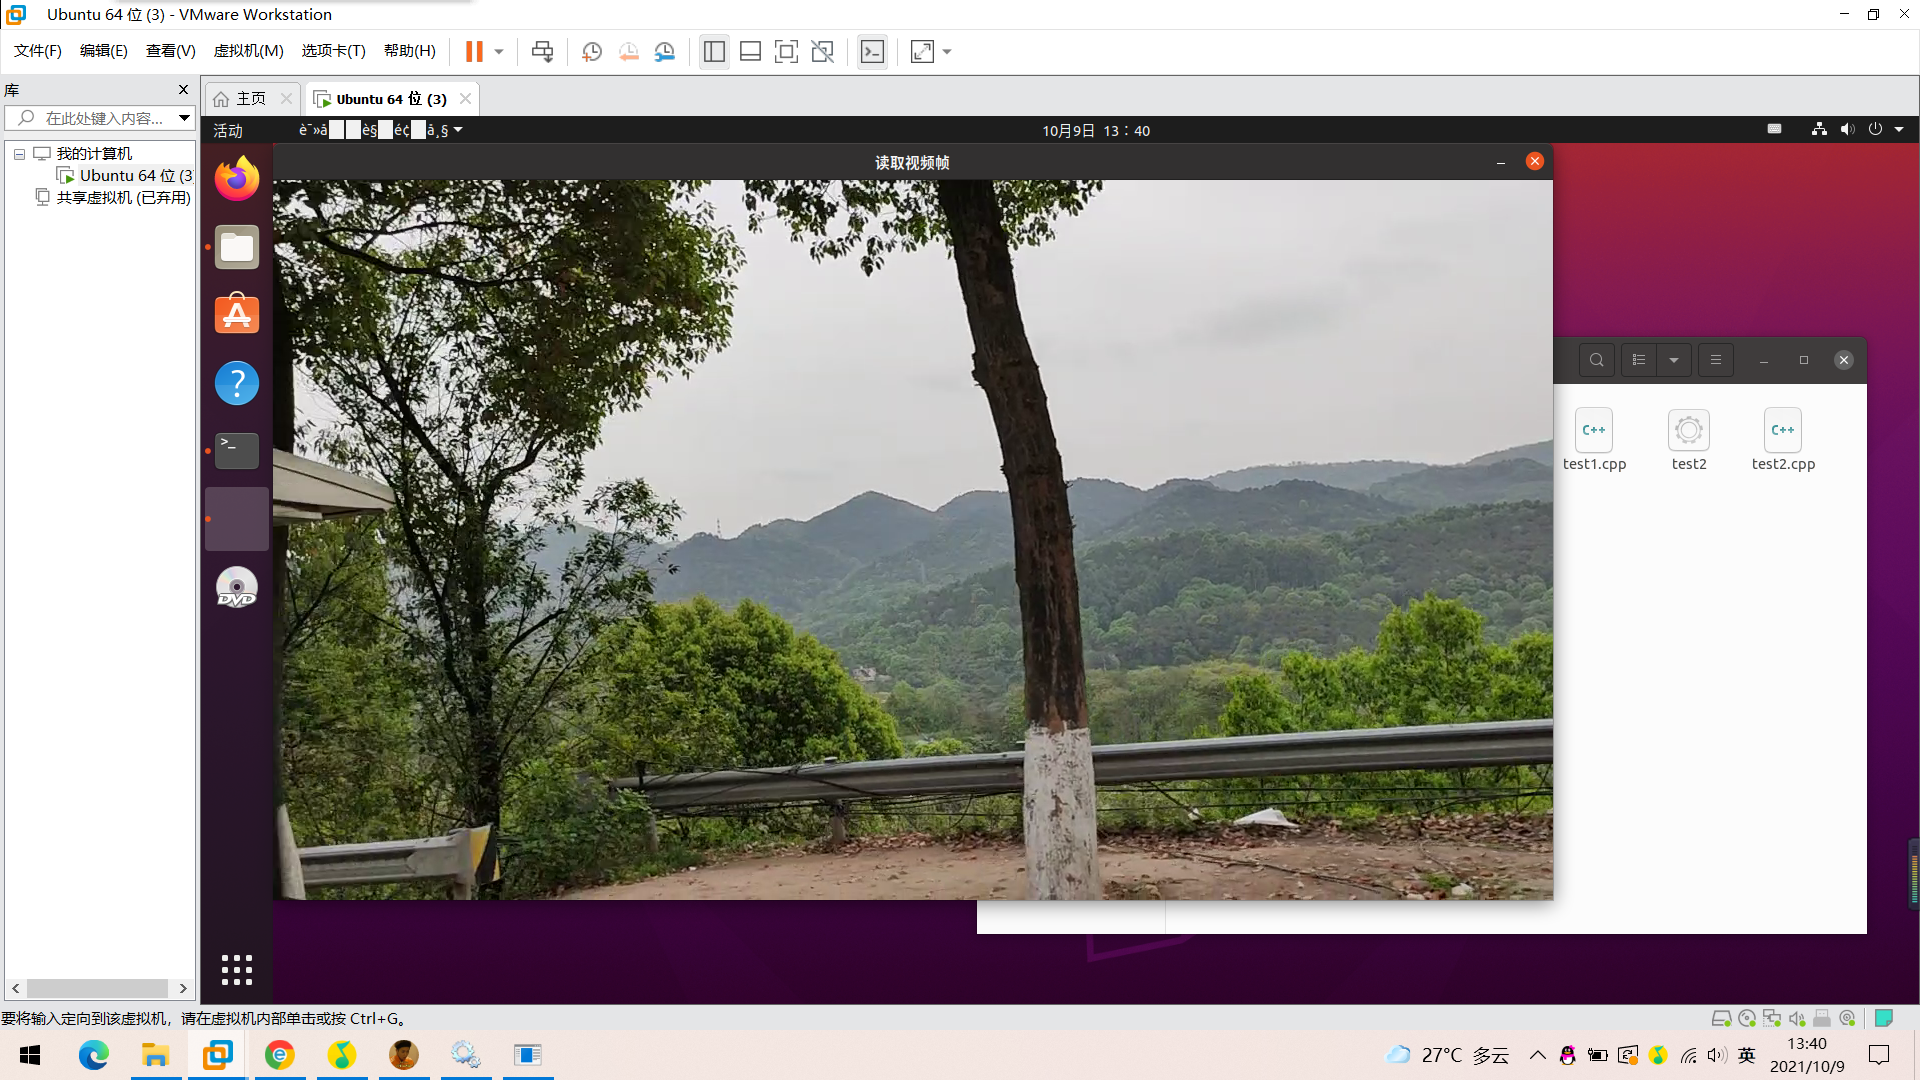
imshow("Read video frame",frame);//Displays the current frame
waitKey(30);//Cover up 30ms
}
system("pause");
return 0;
}
Prepare a video scene.mp4

- Compile the test2.cpp file
g++ test2.cpp -o test2 pkg-config --cflags --libs opencv
Output results
./test2
(2) Record video
- Create a test3.cpp file
gedit test3.cpp
/*********************************************************************
Turn on the computer camera, control the video recording with a blank space, and ESC exits and saves the video RecordVideo.avi
*********************************************************************/
#include<iostream>
#include <opencv2/opencv.hpp>
#include<opencv2/core/core.hpp>
#include<opencv2/highgui/highgui.hpp>
using namespace cv;
using namespace std;
int main()
{
//Turn on the computer camera
VideoCapture cap(0);
if (!cap.isOpened())
{
cout << "error" << endl;
waitKey(0);
return 0;
}
//Get the resolution of cap
int w = static_cast<int>(cap.get(CV_CAP_PROP_FRAME_WIDTH));
int h = static_cast<int>(cap.get(CV_CAP_PROP_FRAME_HEIGHT));
Size videoSize(w, h);
VideoWriter writer("RecordVideo.avi", CV_FOURCC('M', 'J', 'P', 'G'), 25, videoSize);
Mat frame;
int key;//Record keyboard keys
char startOrStop = 1;//0 starts recording video; 1 ends recording video
char flag = 0;//Recording flag 0 - not recording; 1 - recording
while (1)
{
cap >> frame;
key = waitKey(100);
if (key == 32)//Press the space to start recording and pause recording to switch back and forth
{
startOrStop = 1 - startOrStop;
if (startOrStop == 0)
{
flag = 1;
}
}
if (key == 27)//Press ESC to exit the whole program and save the video file to disk
{
break;
}
if (startOrStop == 0 && flag==1)
{
writer << frame;
cout << "recording" << endl;
}
else if (startOrStop == 1)
{
flag = 0;
cout << "end recording" << endl;
}
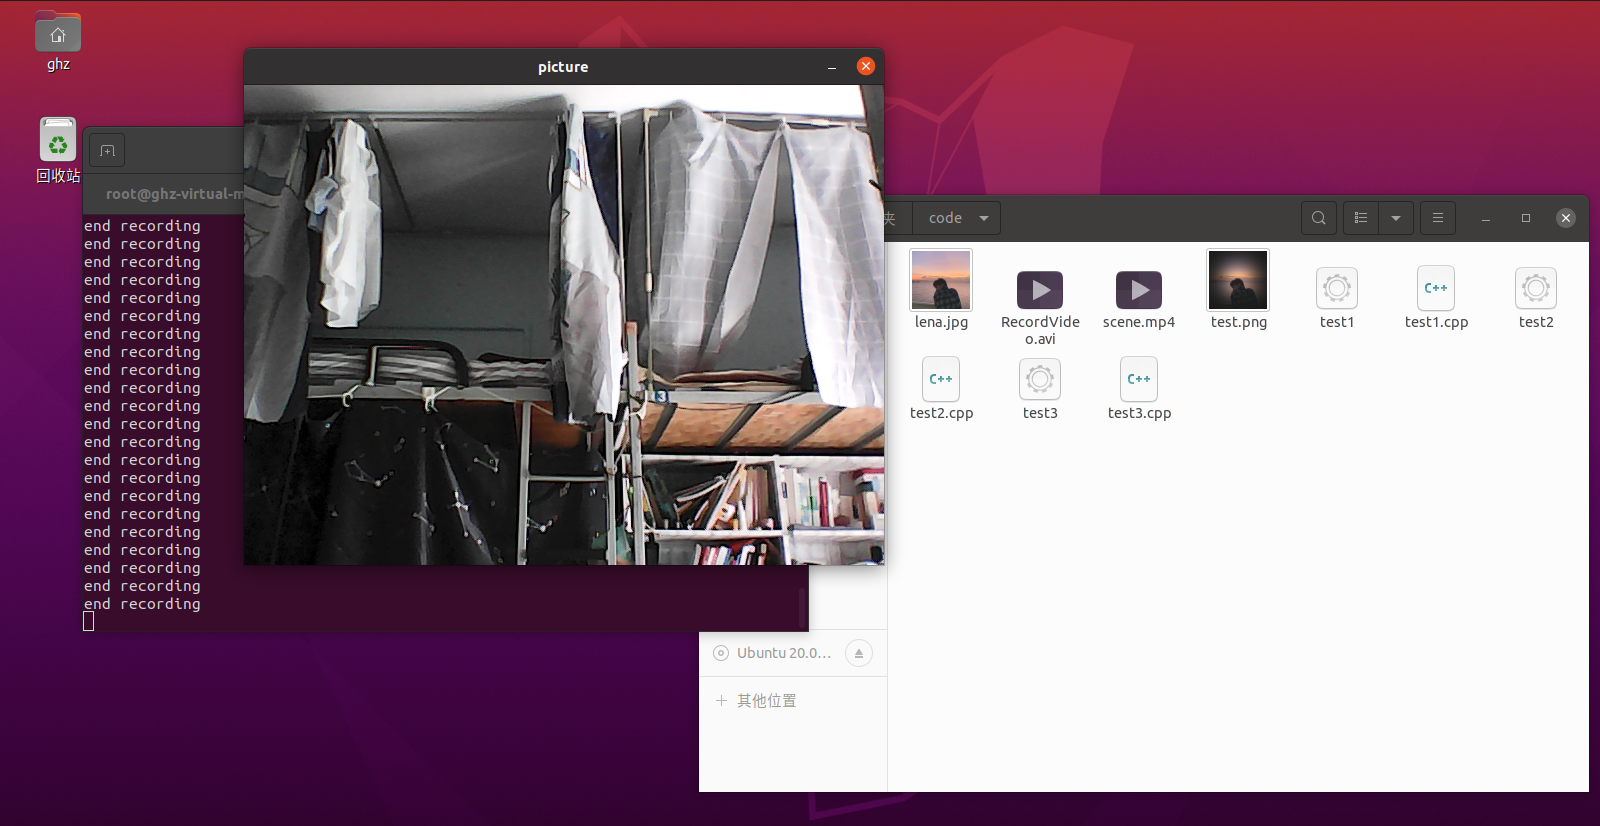
imshow("picture", frame);
}
cap.release();
writer.release();
destroyAllWindows();
return 0;
}
Exit after saving
- Compile the test3.cpp file
g++ test3.cpp -o test3 pkg-config --cflags --libs opencv
Output results
./test3
You can see that a Record Video.avi file is generated, the video starts recording and frames are generated continuously.
3,
(1) If it is required to open a video file on the hard disk to play, how to modify the code in line 7 of example code 1?
A: after selecting the video file you want to open, change the content in the bracket of capture(0) in line 7 of code 1 to the name of the video file you want to play
(2) In the while loop in line 9 of example code 1, what data structure is Mat? Why do you have to add a waitKey delay code and delete it?
A: the Mat data structure in the while loop is actually a dot matrix, which corresponds to each point on the image. The set of points forms a frame of image. The parameter unit in waitKey(30) is MS, that is, the interval between each frame is 30 ms, and its function is to constantly refresh the image. This statement cannot be deleted, otherwise an error will be executed and the video cannot be played or recorded.
(3) Example code 1 the code will run all the time in the while loop. If you try to close the image display window with the mouse, you will find that it can't be closed all the time. You need to use the keyboard Ctrl+C to forcibly interrupt the program, which is very unfriendly. How to improve?
A: the improvement method is to add a judgment statement to close.