1, Foreword
First, declare that the configuration process can allow you to configure your RabbitMQ.
Secondly, I'm pure white. If you have any questions in the article, please point them out in the comment area. Thank you very much.
2, Configure ErLang
If ErLang is not well equipped, you can't engage in RabbitMQ. Even if you install the correct version correctly, it will still show that your ErLang version is not suitable for RabbitMQ. See the solution below.
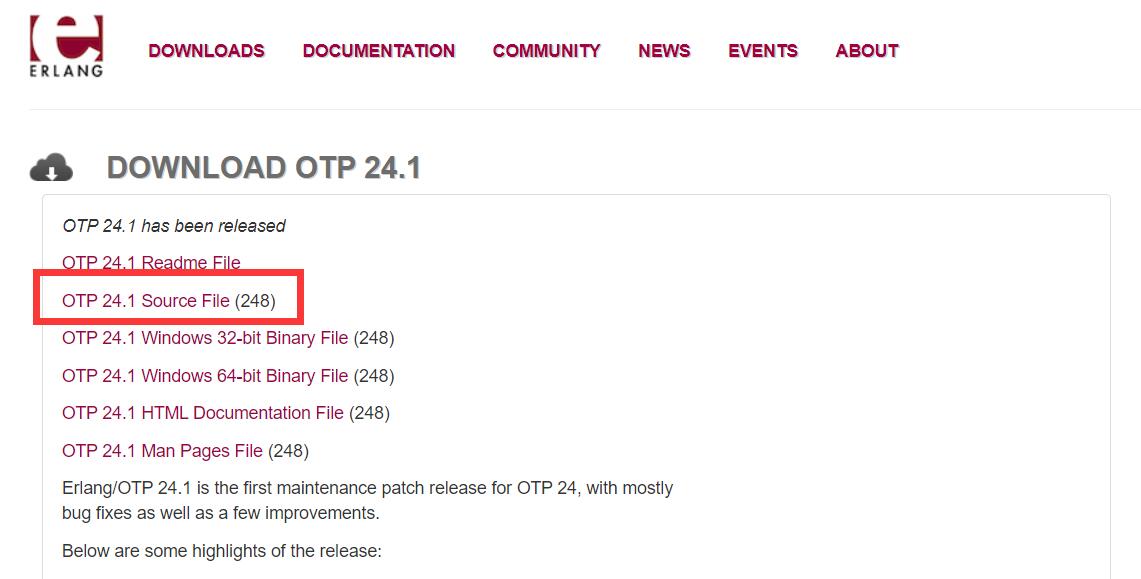
1. Download ErLang
Official website address: https://www.erlang.org/downloads
Download this:
2. Installing ErLang
① The source package of ErLang downloaded above is otp_src_xx.x.tar.gz, upload it to your Linux server, usually under the / usr/local folder.
② Jump to the directory where you store the ErLang source package: cd /usr/local
③ Decompression: tar -zxvf otp_src_24.1.tar.gz
④ Create the installation directory of ErLang: manually create or mkdir /usr/local/erlang
⑤ Enter the Erlang decompression directory CD / usr / local / OTP_ src_ twenty-four point one
⑥ Configure Erlang installation information:. / configure -- prefix = / usr / local / Erlang -- without javac
⑦ Compile and install: Make & & make install
⑧ Configure environment variables:
Open the / etc/profile file iv /etc/profile and fill in the following configuration at the end of the profile file:
export ERL_HOME=/usr/local/erlang
export PATH=$ERL_HOME/bin:$PATH
⑨ Start environment variable configuration file source /etc/profile
⑩ Check the Erlang version to see if the installation is successful. erl -version
This section refers to the boss blog: Blog
3. Configure ErLang (or update yum warehouse)
But this is not over, because even if you install rabbitmq like this, you still can't install rabbitmq, because it reads erlang from the yum warehouse by default. By default, the version in the yum warehouse is lower.
You can see the latest modification here: https://codechina.csdn.net/mirrors/rabbitmq/erlang-rpm?utm_source=csdn_github_accelerator
I'm Erlang 24.1, rabbit MQ 3.9.1
Namely:
① Enter configuration file
vi /etc/yum.repos.d/rabbitmq_erlang.repo
② Add the following configuration:
Because you didn't get this configuration file before, it will be created automatically. After you open it, it is empty, and then press i to enter the input mode,
Copy and paste the configuration:
[rabbitmq-rabbitmq-erlang]
name=rabbitmq-rabbitmq-erlang
baseurl=https://dl.cloudsmith.io/public/rabbitmq/rabbitmq-erlang/rpm/el/8/$basearch
repo_gpgcheck=1
enabled=1
gpgkey=https://dl.cloudsmith.io/public/rabbitmq/rabbitmq-erlang/gpg.E495BB49CC4BBE5B.key
gpgcheck=1
sslverify=1
sslcacert=/etc/pki/tls/certs/ca-bundle.crt
metadata_expire=300
pkg_gpgcheck=1
autorefresh=1
type=rpm-md

[rabbitmq-rabbitmq-erlang-noarch]
name=rabbitmq-rabbitmq-erlang-noarch
baseurl=https://dl.cloudsmith.io/public/rabbitmq/rabbitmq-erlang/rpm/el/8/noarch
repo_gpgcheck=1
enabled=1
gpgkey=https://dl.cloudsmith.io/public/rabbitmq/rabbitmq-erlang/gpg.E495BB49CC4BBE5B.key
       https://github.com/rabbitmq/signing-keys/releases/download/2.0/rabbitmq-release-signing-key.asc
gpgcheck=1
sslverify=1
sslcacert=/etc/pki/tls/certs/ca-bundle.crt
metadata_expire=300
pkg_gpgcheck=1
autorefresh=1
type=rpm-md

[rabbitmq-rabbitmq-erlang-source]
name=rabbitmq-rabbitmq-erlang-source
baseurl=https://dl.cloudsmith.io/public/rabbitmq/rabbitmq-erlang/rpm/el/8/SRPMS
repo_gpgcheck=1
enabled=1
gpgkey=https://dl.cloudsmith.io/public/rabbitmq/rabbitmq-erlang/gpg.E495BB49CC4BBE5B.key
       https://github.com/rabbitmq/signing-keys/releases/download/2.0/rabbitmq-release-signing-key.asc
gpgcheck=1
sslverify=1
sslcacert=/etc/pki/tls/certs/ca-bundle.crt
metadata_expire=300
pkg_gpgcheck=1
autorefresh=1
type=rpm-md
Then ESC+:wq push out and save
③ Update warehouse and install ErLang(?)
yum update -y
yum install -y erlang
This completes ErLang's configuration.
Here, I don't know if the ErLang operation I installed through the installation package is useless. I hope some big guys can solve their doubts.
2, Installing RabbitMQ
1. Download
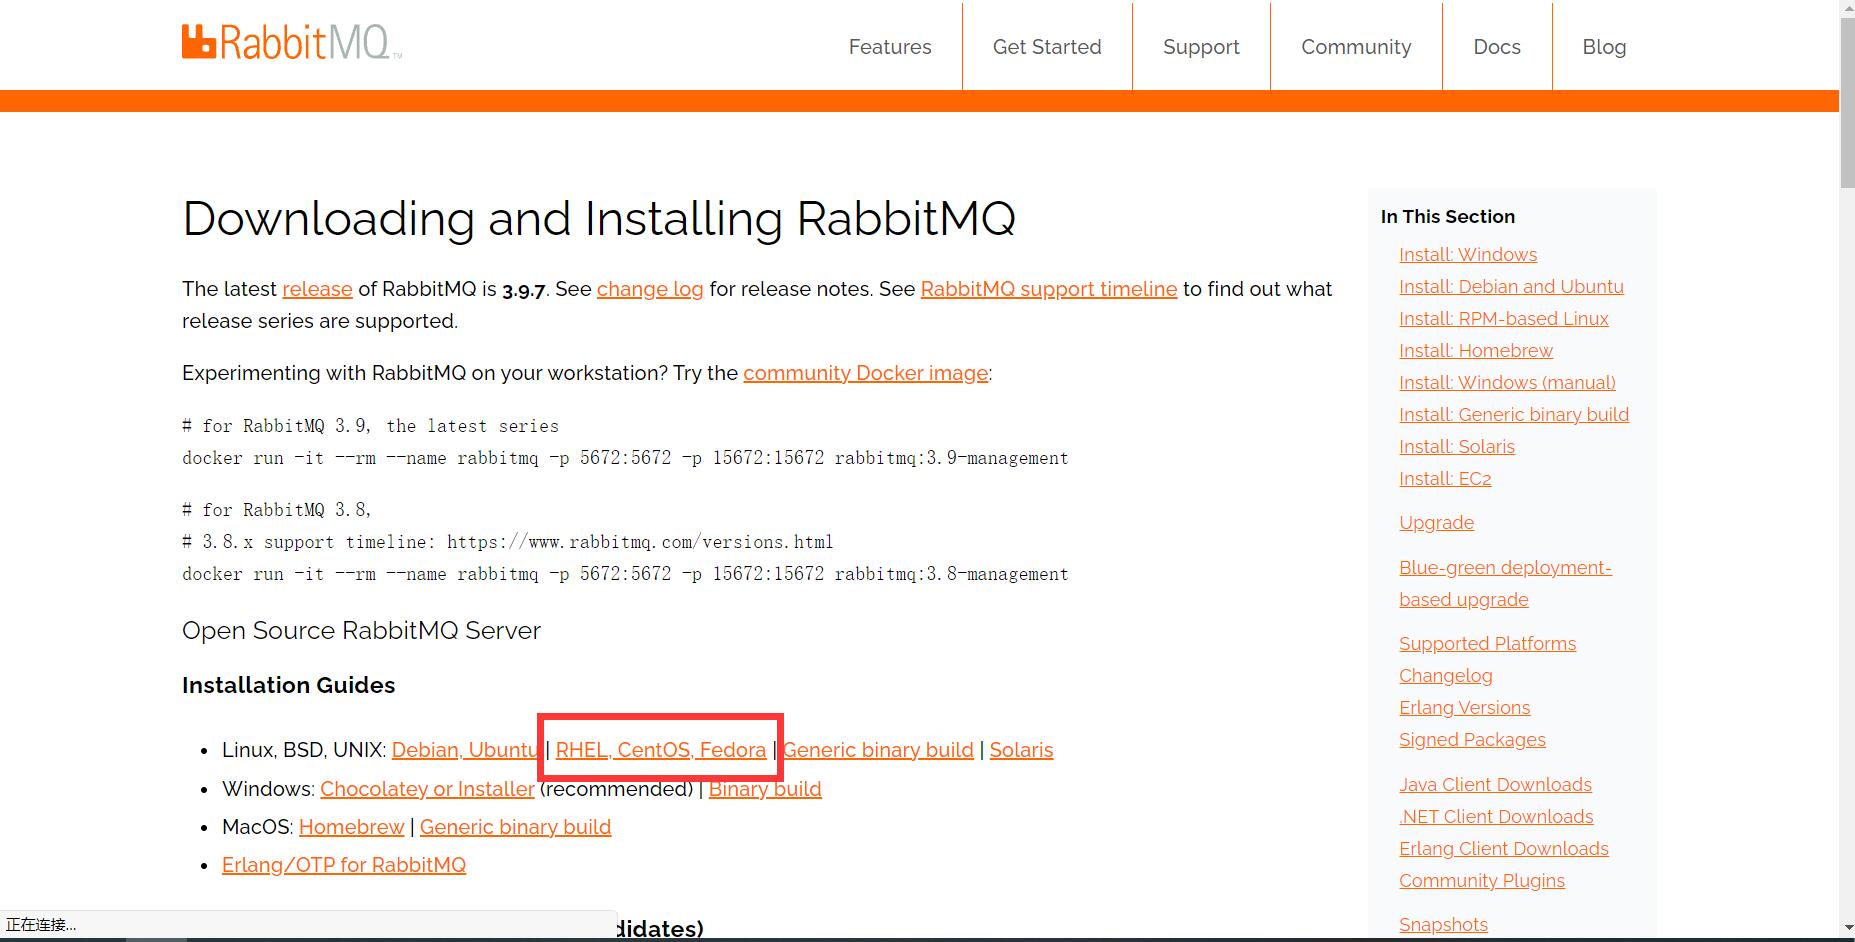
① First go to the official website: https://www.rabbitmq.com/download.html
② Click:
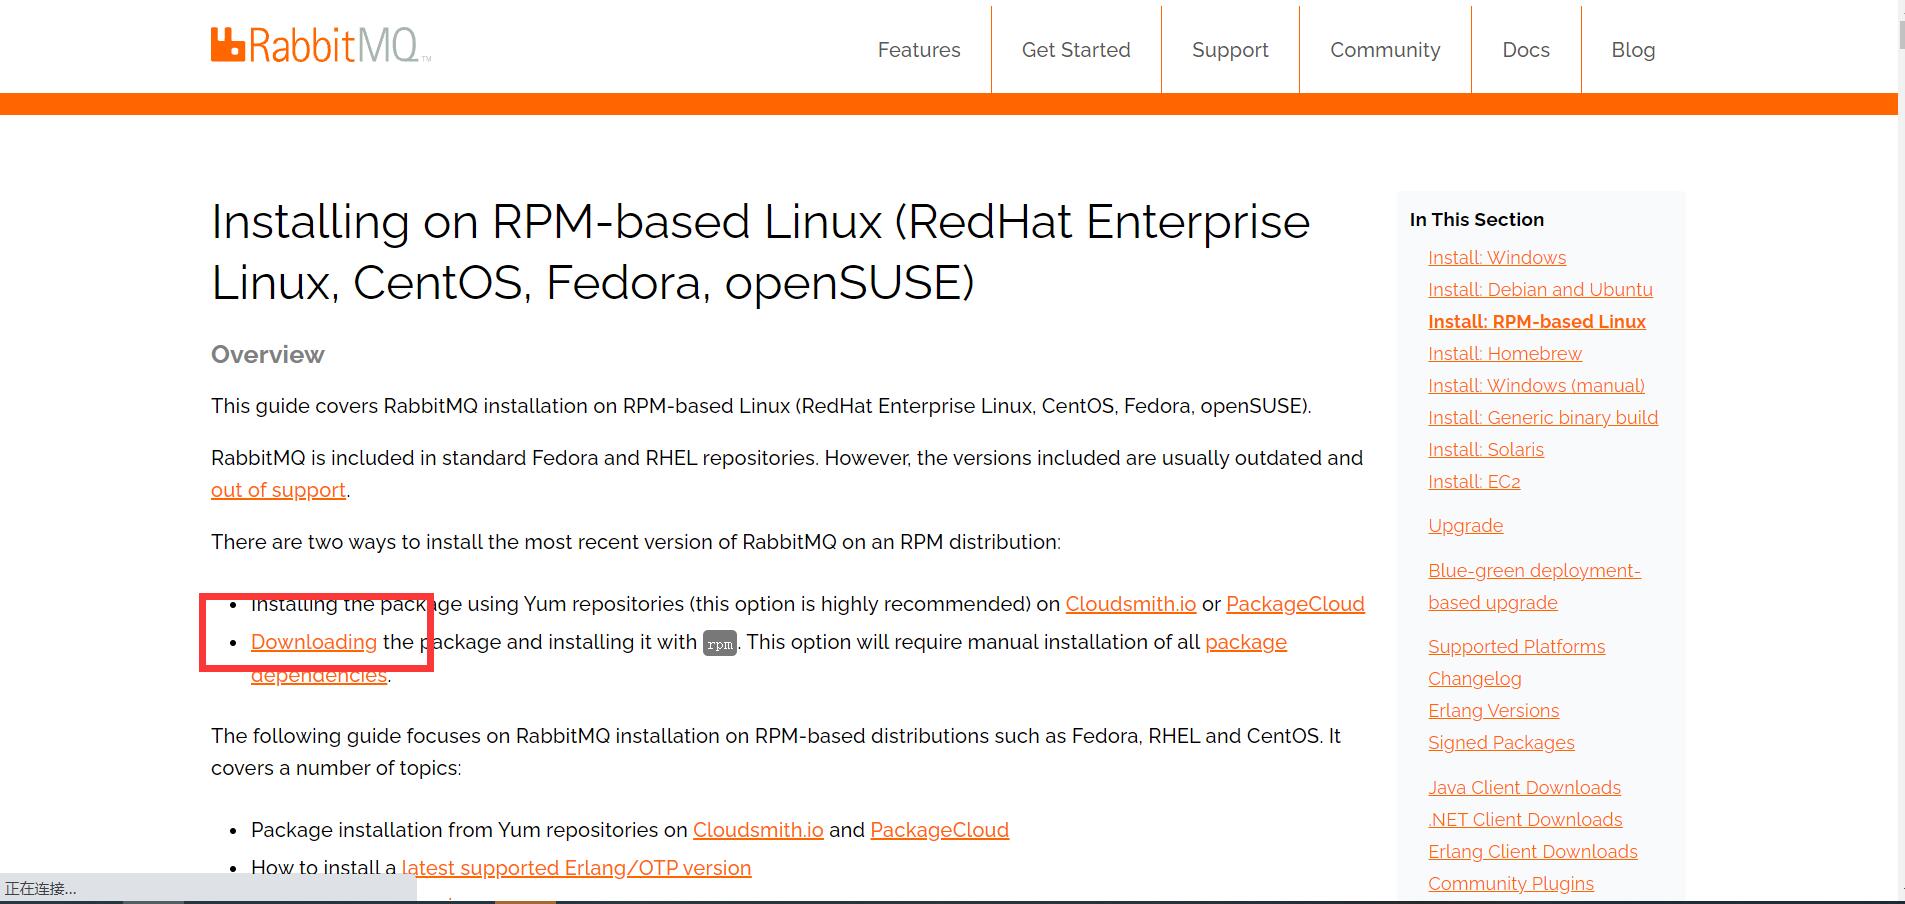
③ Click:
④ Click:
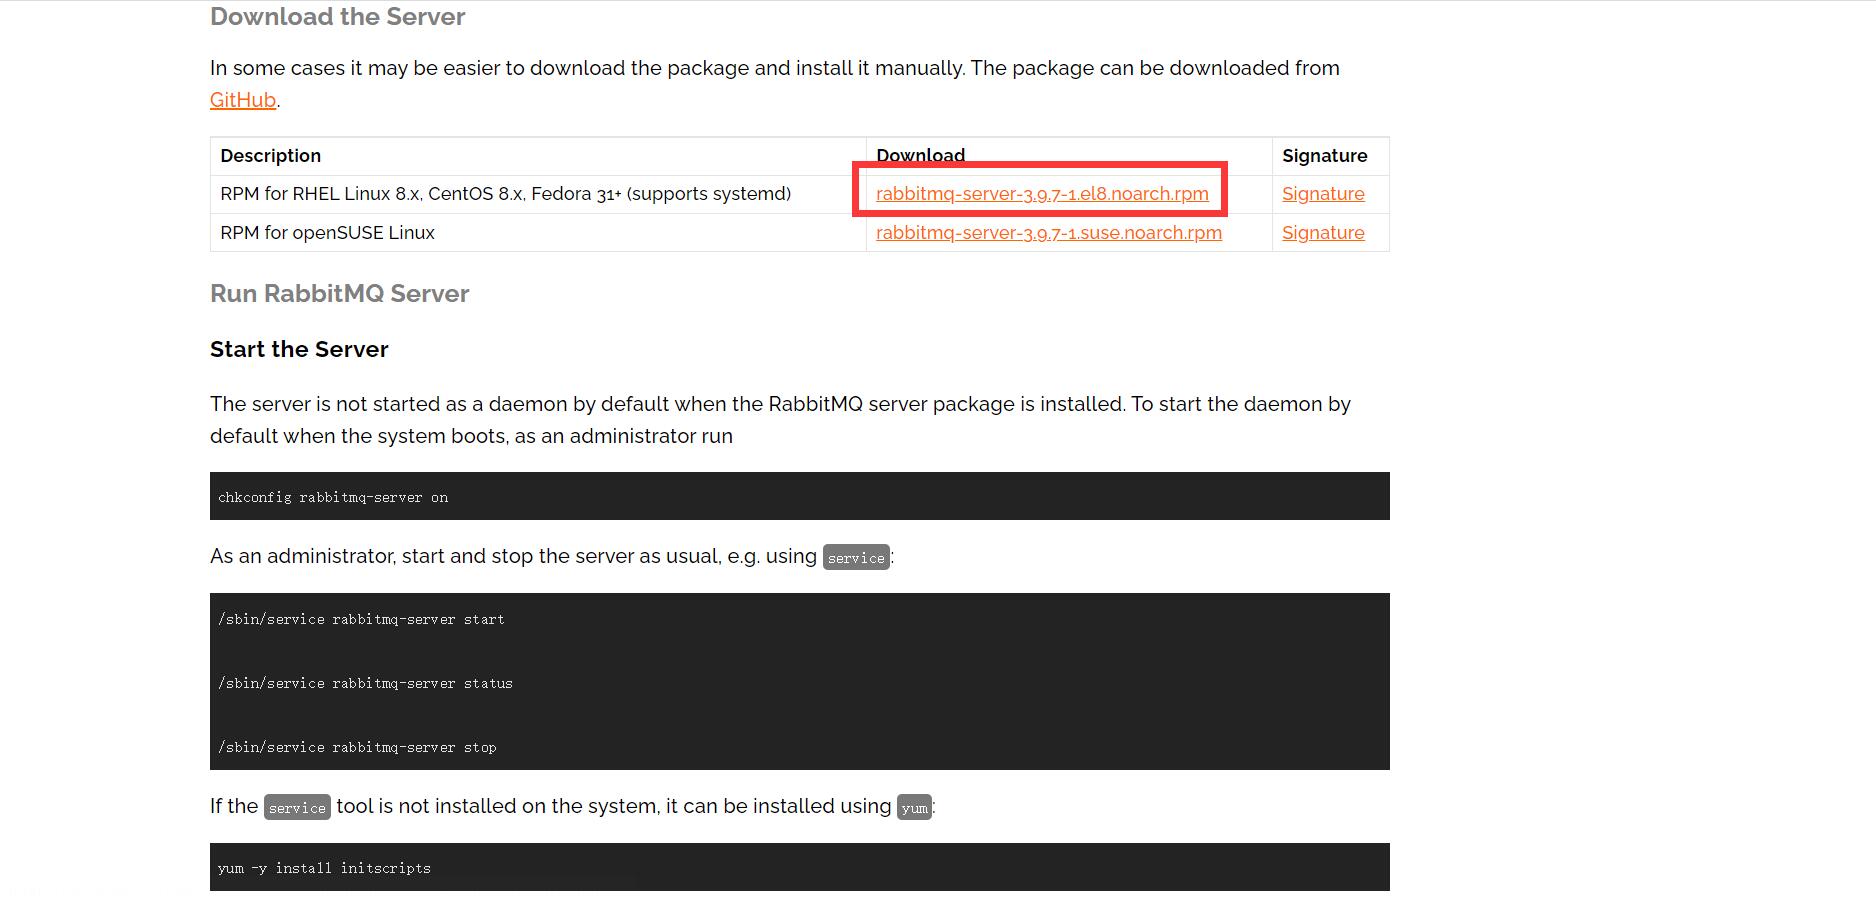
⑤ After downloading, upload it to your server. Generally, it is placed in / usr/local/software directory by default
Because I learned from Shang Silicon Valley, I can follow his process
⑥ Jump to the directory cd /usr/local/software. Of course, you need to create your own software folder
⑦ Install dependent on yum install socat -y
⑧ Install RabbitMQrpm -ivh rabbitmq-server-3.9.7-1.el8.noarch.rpm
⑨ Add startup startup RabbitMQ service chkconfig RabbitMQ server on
Start service / SBIN / service rabbitmq server start
View service status / SBIN / service rabbitmq server status
⑩ No, let's start from the beginning